Network storage, increasingly used
To be able to access our files over the internet and from anywhere we can take into account the use of different services and devices. We can use both the public and private cloud. It allows us to store information and be able to access it no matter where we are.
In recent years this is something that has increased considerably. The rise of teleworking, the improved internet connections, have services with greater capacity in the cloud … Everything has helped network storage to be more and more present and we have more options available.
One option that we have available and that is very interesting is to have a NAS server. Basically it is a hard disk connected to the network and that allows us to access the content from any place and device. There we can create backup copies, free up space from other computers, gain accessibility …
Steps for Windows to detect the NAS server
The problem comes when our operating system, Windows in this case, does not detect NAS server. We have it connected, we know it works because we have tried it before or on another computer, but we could not get it to work properly on this device. This is something that can happen on certain occasions and we can solve it without too many complications, unless there is a physical failure or a problem with the system.
Enable network discovery
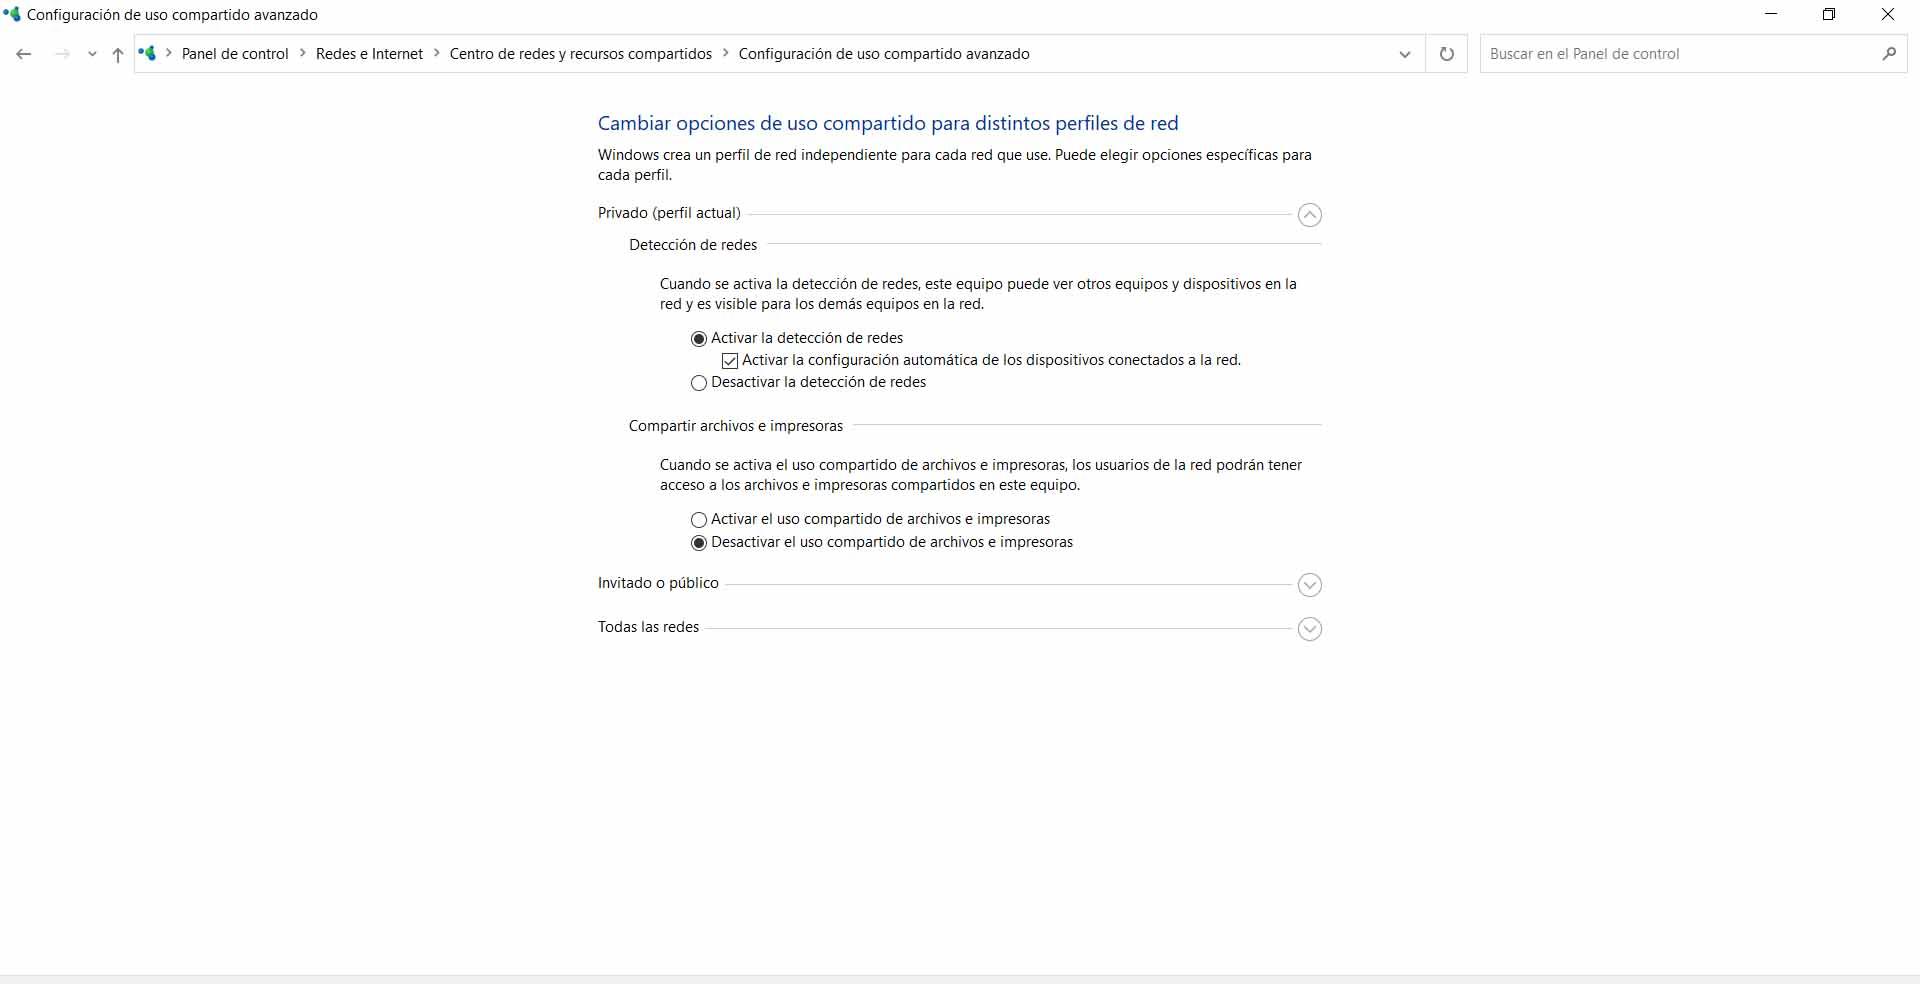
One of the reasons why we can have problems detecting a NAS server or any similar device is that we do not have enabled network discovery in Windows. This is a simple process that we can carry out and that serves so that a computer connected to the same network can be visible.
To activate network detection in Windows we have to go to Start, type Control Panel and access, go to Networks and Internet and click on Change advanced sharing settings. There we will find the Network Detection section, which we must make sure is activated. If it is not, we must activate it and give it to save changes.
Update NAS server firmware
Something very important is to bear in mind that we must have the latest firmware version from the NAS server. It is undoubtedly one of the most common reasons for it not working properly. This can be due to a conflict with the operating system after a Windows update, for example.
It is essential to have the latest version of the firmware for it to be detected correctly. To do this we will have to access the control panel of the device and find if there is a more recent version that we can add. This will also be essential to achieve the best possible performance, as well as to correct possible security breaches that can be exploited by hackers.
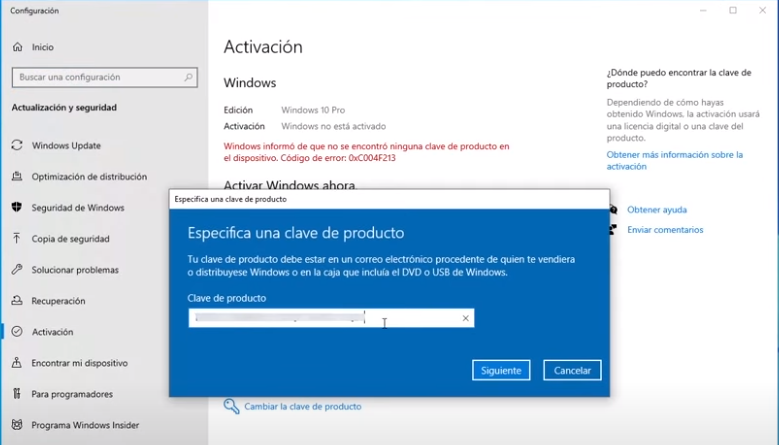
Verify that Windows is up to date
Also important Windows is up to date correctly and not just the device. There could be conflicts at the software level and affecting the recognition of the NAS server. For example, if we have the NAS updated but we use an old version of Windows that does not have any necessary component.
Therefore, we must always make sure that we are using the latest version of the Microsoft operating system. To do this, just go to Start, enter Settings, go to Update and security and verify which version we are using and, if there is a higher version, install it.
Enable NetBIOS over TCP / IP
One more configuration that we can take into account in Windows if the system does not detect the NAS server that we have installed is enable NetBIOS over TCP / IP if it is not. It is a quick process and can be very useful in these cases.
What we are going to do is go to Start, enter Settings, go to Network and Internet, click on Change adapter options and, once inside, we select the network card that interests us. You have to click with the right mouse button and go to Properties.
Now we have to mark Internet Protocol version 4 (TCP / IPv4) and, once again, to Properties. Later we click on Advanced options and a new window will open, which is the one that interests us to solve this error.
In this new window we have to click on the tab WINS and we mark the option Enable NetBIOS through TCP / IP, which we can see below.
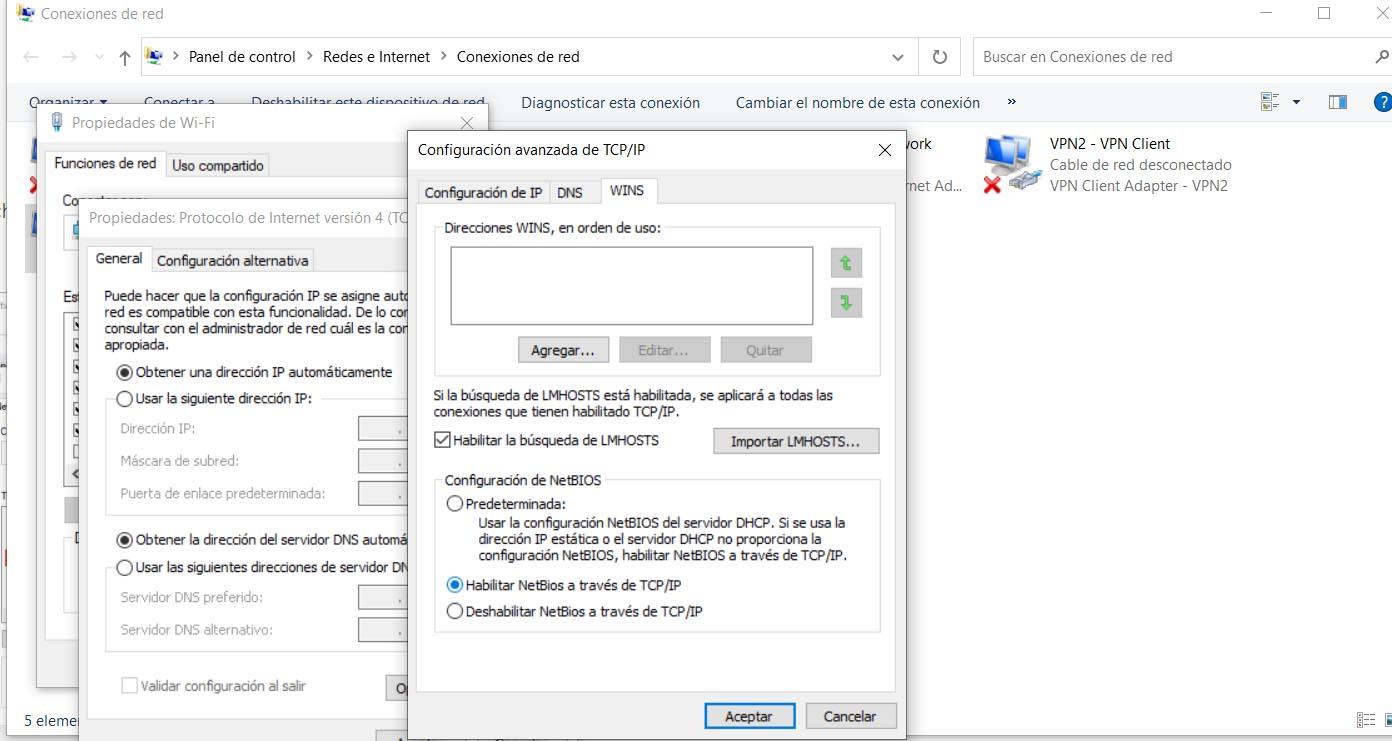
Keep in mind that this process will have to be carried out on each of the network cards that we use to connect to the NAS. That is, if for example we have an Ethernet network card and another Wi-Fi, we would have to do it in both cases.
Reinstall SMBv1
Another option that we have in case the problem appears that our computer does not recognize the NAS server, reinstall SMBv1. However, keep in mind that Windows does not recommend this. This is so since it has had different security problems that have been exploited by hackers.
Reinstall SMBv1 on Windows It is very simple. You simply have to carry out a series of steps that we are going to show. Once done we can see if the Microsoft operating system recognizes or not the NAS server that we have on our network.
The first thing we are going to do is go to Start, look for Control Panel and access Programs. Once here you have to click on the option Activate or deactivate Windows features. We will see a series of characteristics of the operating system and we have to look for the one that says SMB 1.0 file sharing protocol support.
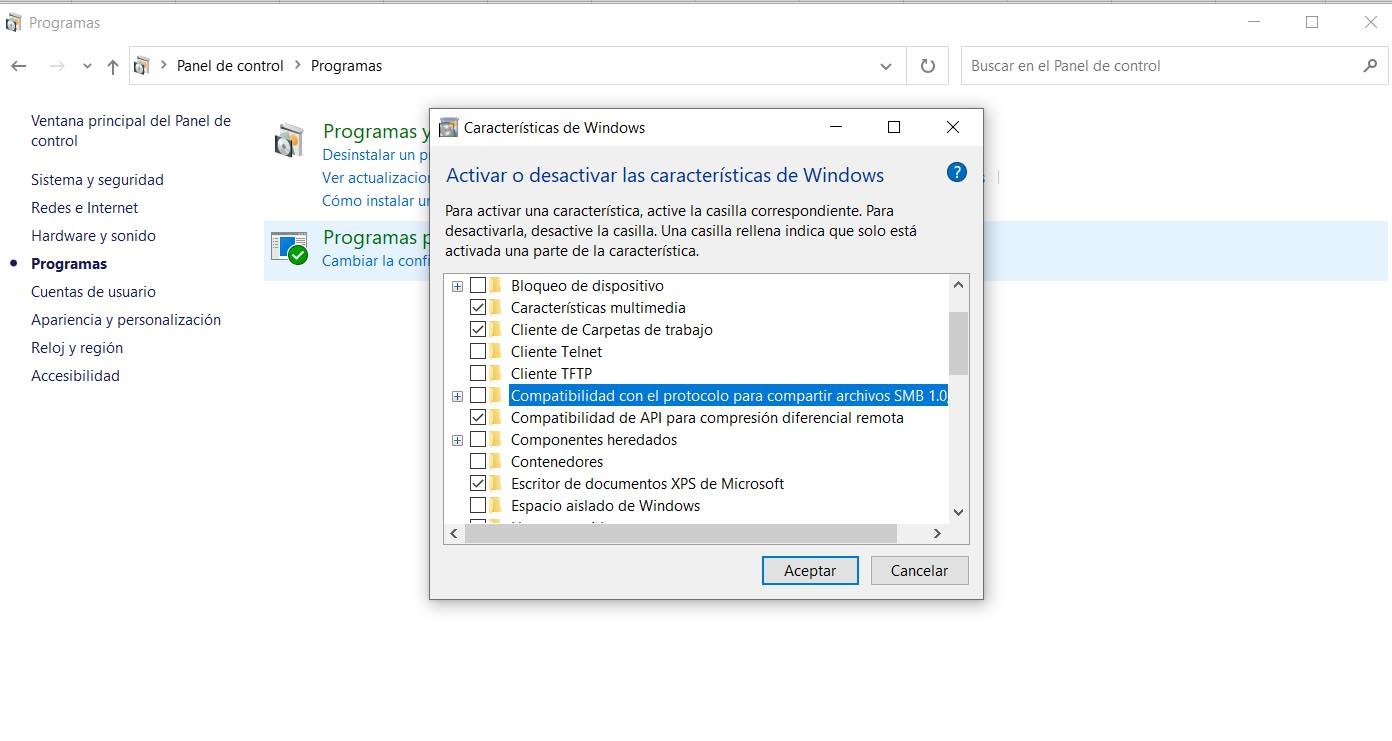
We have to check the box and we accept. Once this is done, you have to restart the computer and we can check if it has really had an effect or not on our problem.
In short, if Windows does not detect the NAS we can follow these steps that we have mentioned. They are very simple and in a short time we will be able to solve this error that could appear in certain circumstances on our computer.