And is that the taskbar can become an important element, so that a correct customization of it can help to be more productive, obtaining a greater organization of our workspace. To do this, it will be possible to change its location to any side or at the top of the screen, as well as make it larger to obtain more space to include shortcuts to applications. Likewise the Start Menu, it has some customization options and it is also possible to change its size.
Move and resize the taskbar
As we have mentioned, it is possible to change the size of the taskbar to make it even taller, thereby achieving greater space to anchor shortcuts, as long as we are using it vertically. This is something that we can do to our liking in order to obtain a visual appearance and a work desk that is as optimized as possible.
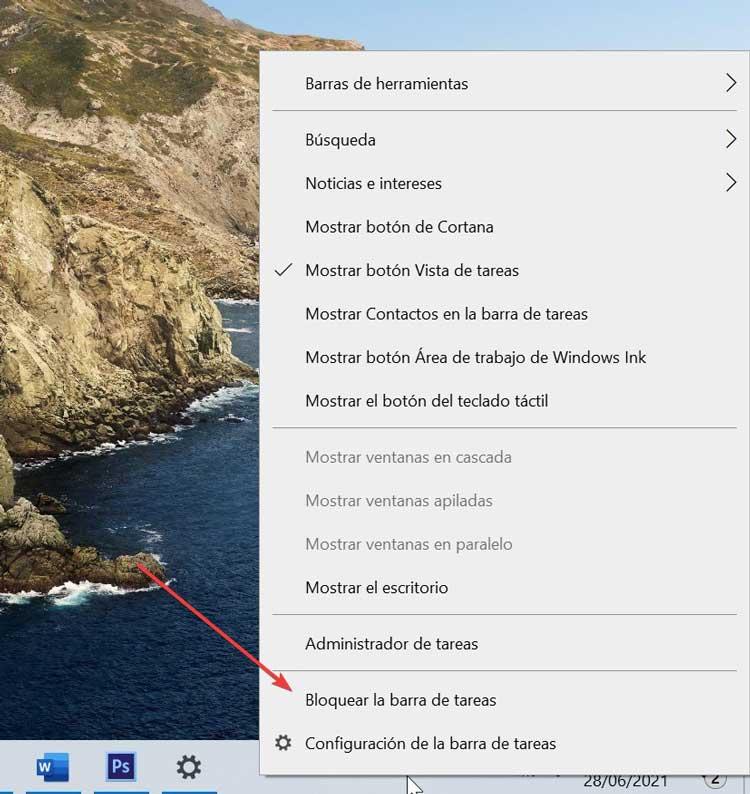
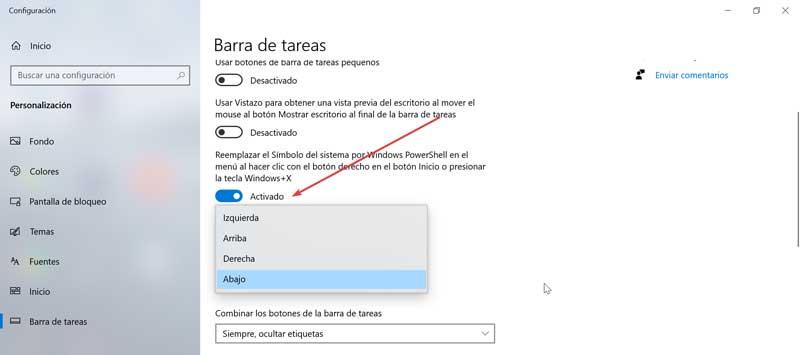
In order to change the size of the taskbar, the first thing we must do is unlock it. To do this, we will click with the right button on a space on the bar and a contextual menu will appear where we must look at the option “Lock the taskbar”. If this option is checked, it means that it does not allow modifications, so you will have to click on it to be unlocked. Once the bar is unlocked, it will be possible to change its size or move it to place it on the left, right or upper edge of the screen.
Change position
As we have mentioned, it is possible to move the taskbar to any edge of the screen. In order to perform this action, there are two ways to do it. The first one consists of keeping the left button pressed in a hole in the bar and dragging it to the desired place, either the left, right or upper edge of the screen and the bar will automatically change its position.
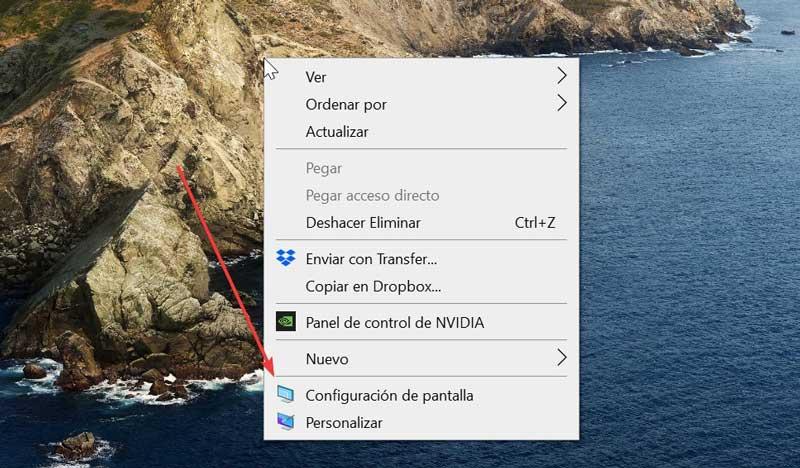
Likewise, we have another option which is by accessing its «Settings» menu. To do this, we right-click on an empty place on the bar. This will bring up a menu where we must select the “Taskbar Configuration” option.
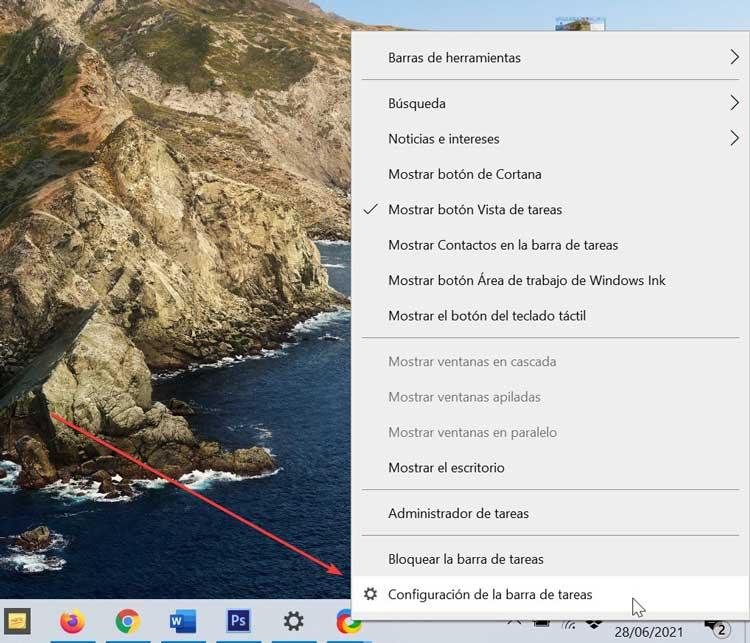
Once here, we must look at the section that says “Location of the taskbar on the screen.” We will verify that by default it is located “Down”, although if we click on it, a small sliding menu opens that will allow us to choose the desired place to position the bar, either “Up”, “Left”, “Right” or keep it “Down.”
Change height
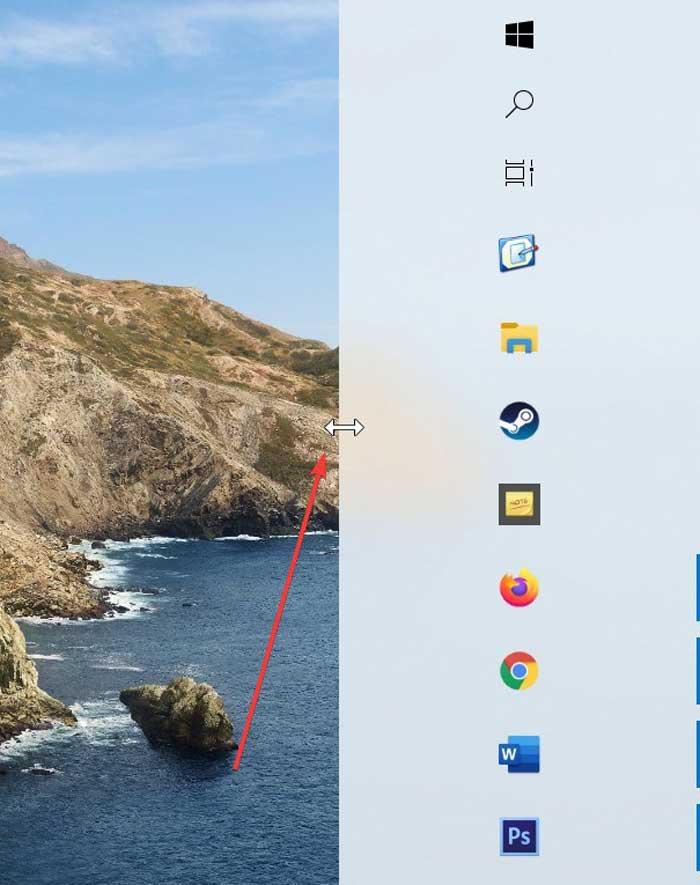
Once we have decided where we want the taskbar to be located, the next step will be to decide to change its height. This is something we can do as long as the bar is in horizontal position, that is, at the bottom or top of the screen. To do this, we must place the mouse cursor on the edge of the bar, which will make the pointer become a resize cursor. Thus, a short vertical line appears, with an arrowhead at each end, which makes us indicate that we can stretch or shrink it.
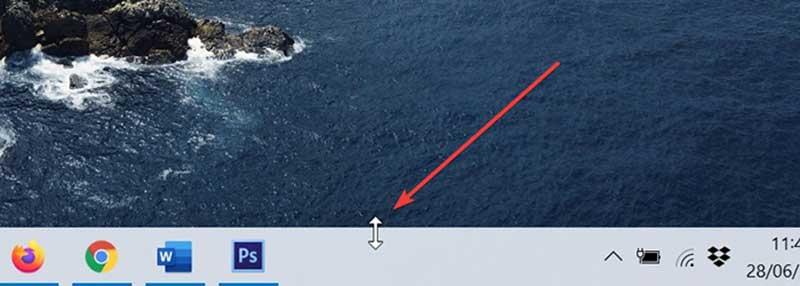
Once we see the resize cursor, we left click and we drag the mouse up or down to change the height of the bar. Once we have found the desired height, we release the mouse button and the taskbar will remain at that new size. If we want to avoid that by mistake or accident the size can be changed, we can always right-click on the bar and select “Lock the taskbar”.
Change width
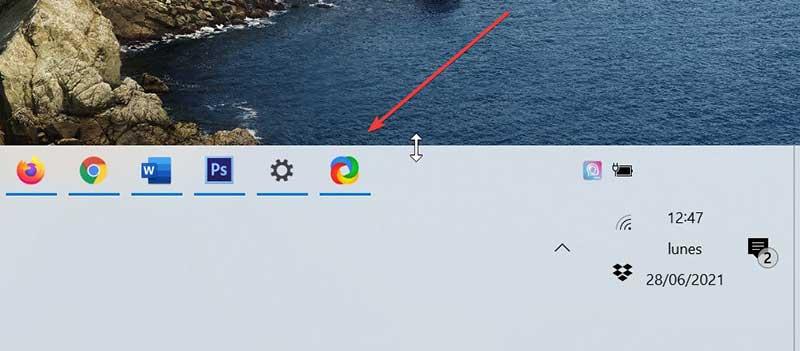
Like the height, it will also be possible to change the width of the taskbar. To do this, it will be necessary for the bar to be located in a vertical position, that is, on the left or right side of the screen and be unlocked. To place the bar in a vertical position, simply follow the steps mentioned above, either by dragging it or from its configuration section
Once the bar is in a vertical position, we place the mouse cursor on the edge of the taskbar. This way the cursor will turn into a resize cursor, a short horizontal line appears with an arrowhead at each end.
Once we see the resize cursor, we click and drag the mouse to the left or right to be able to change the size of the bar to our liking. Once we find the desired width, we can choose to lock the bar again to prevent its size from being changed by accident. To do this, right-click on a hole in the bar and select “Lock the taskbar.”
Adjust the size of the bar icons
Once we have the taskbar located in the desired place and we have resized its size to our liking, we can choose to also adjust the size of the icons that appear in it. And is that the size of these icons can be tiny for some users and too large for others.
In the event that we want smaller buttons, we must right-click on a space on the bar and select “Taskbar Configuration”. This will bring up a new screen. Here we must activate the button corresponding to «Use small taskbar buttons».
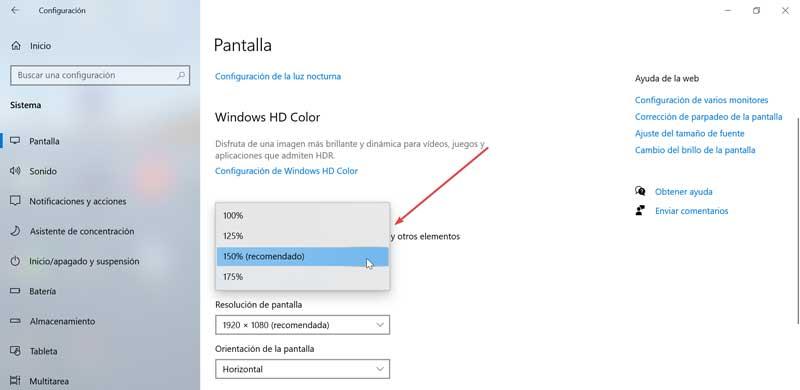
There is also the possibility of expand icons through one settings. For this, it must be taken into account that the settings will affect both the icons on the bar and any element that we see on our screen (desktop, browsers, applications, etc).
If we want to do it, we must right-click on any empty space on the desktop and in the context menu we select “Screen Settings.” Within the “Scale and distribution” section, we find the option to “Change the size of text, applications and other elements.” Here, we choose the size scale that interests us the most and the changes will be applied automatically.
Resize the Start menu
As with the taskbar, the Start menu can also be customized in size, stretching or shrinking it to our liking. For this we have two ways to do it. One, stretching and shrinking the menu by its edges and another by using the keyboard. We will review both ways below
Change the size using the mouse
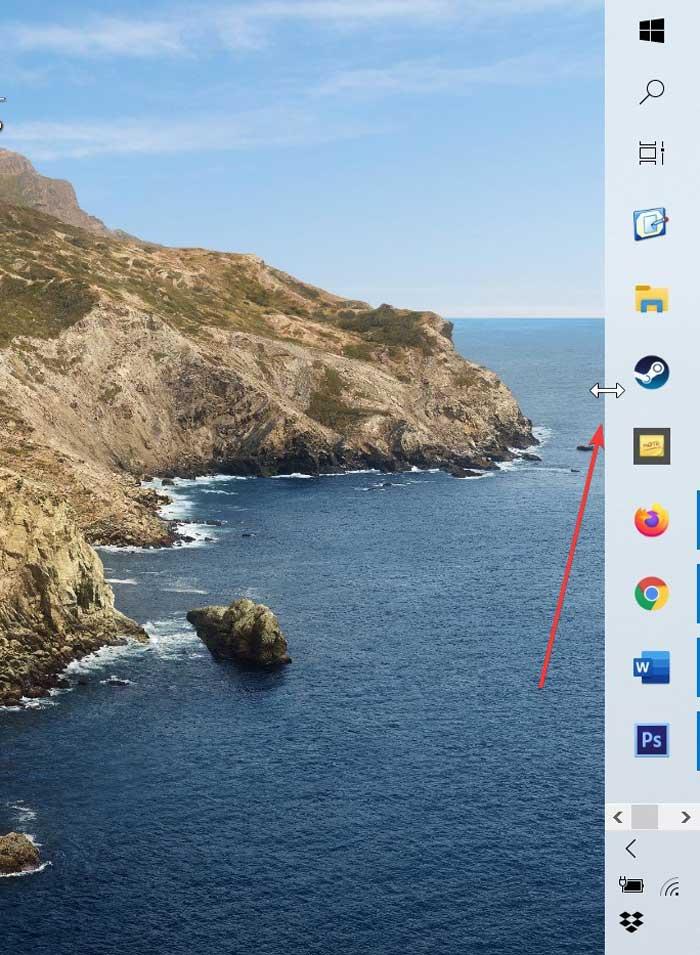
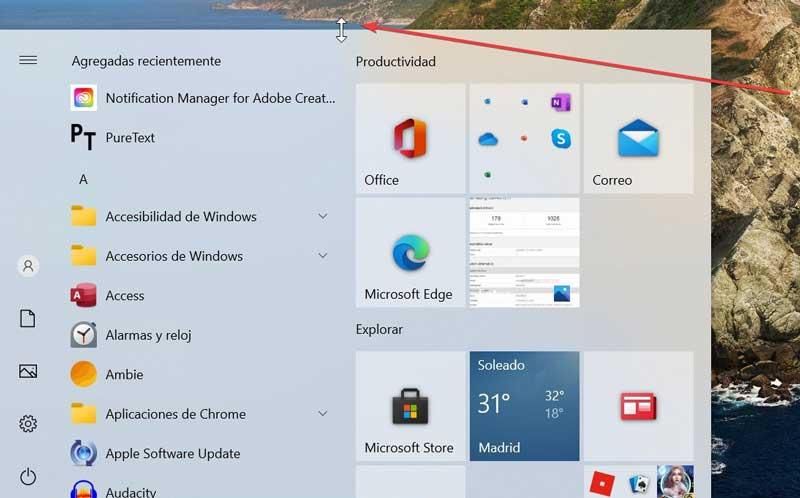
As with the toolbar, we can change the size of the Start menu, stretching or shrinking it with the help of our mouse. To do this, we must first click on the Start button or press the Windows key to open it. Once open, we must place the mouse cursor over its edge. In this way, the mouse will turn into a resize cursor, allowing you to see a short line with an arrowhead at each end cursor.
If we want to change the height, we must place the cursor on the upper edge of the Start menu. Subsequently, holding down the left mouse button, we drag up or down to adjust it to our liking. In this way the Start menu will change as we move the mouse. When it is at the desired height, we release the mouse button and the Start menu will remain at the chosen height.
If we want to change the width of the menu we can do it in the same way. First we grab its right edge with the resize cursor and drag to the right or left to make it bigger or smaller. The moment you resize horizontally, the Start menu will adjust the size of your tiles.
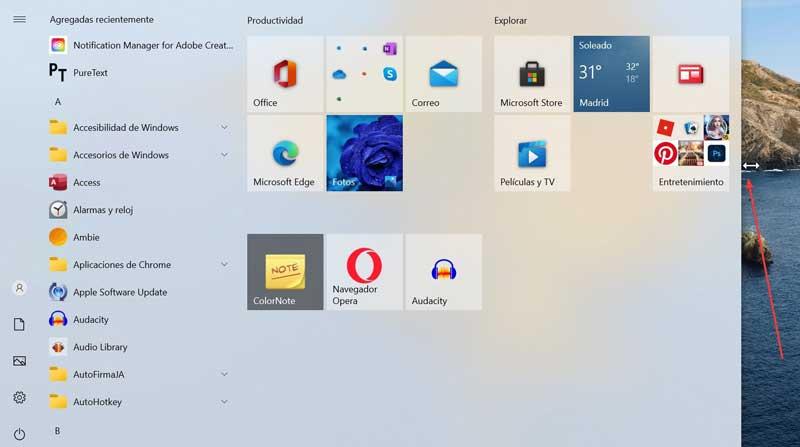
Likewise, it is also possible to change the size of the Start menu in diagonal, so that the width and length are changed at the same time. For this we will click on the upper right corner of the menu and drag it with the mouse inwards or outwards diagonally.

Change the size with the help of the cursors
Another quite comfortable way that will allow us to change the size of the Start menu is by using the cursor keys. with them we can make it wider, narrower, high or low according to the keyboard shortcuts. To be able to change the size we just have to press the Ctrl key And while we hold her down, we must go resizing through the cursors.
In this way, we must first press the Start button or the Windows key so that the menu on the screen appears. Later, with the Ctrl key pressed, we click on the up, down, left or right arrows of the cursors. If we want to make the Start menu higher, we press Ctrl and cursor up. If we prefer to make it lower, Ctrl and down arrow cursor. We will also do the same with the right and left cursors, to make the menu wider or narrower.