Data we need to configure the FRITZ!Box
In order to configure the operator Masmóvil, Yoigo or Pepephone we need the following information:
- GPON password to authenticate correctly in the operator’s OLT.
- SIP username (if we want to have or if we can have a fixed telephone, for example, Pepephone does not have a fixed telephone if you do not acquire it additionally).
- SIP Password.
If the Masmovil or Pepephone connection is with direct coverage, or through Orange, they will surely have fitted you with a Sagecom brand router with an integrated ONT. However, if you have indirect coverage through Movistar, the most normal thing is that you have a Nokia ONT and then a Sagemcom router that acts as a neutral router. If you have the router with integrated ONT, getting this information can be somewhat complicated, however, there are step-by-step tutorials on the Internet that will help you get this information.
In the case of having the Nokia ONT, as we do with Pepephone, this process is much simpler because it is enough to access its configuration via the web to extract the GPON key. If you have VoIP you will have to extract the SIP information from the router, since it is the one that has the VoIP information.
Once we have obtained these parameters, we can configure our FRITZ!Box router by following the steps below.
Configure the Internet connection (Masmóvil and Pepephone)
To set up the Internet connection, whether with Masmóvil, Yoigo or Pepephone, the process is exactly the same for all of them.
The first thing we have to do is select the “Internet Provider” and choose “Other” to put the name. Next, we need to make the following configuration:
- Internet access via: Fiber (optical fiber).
- Access data:
- Is access data required?: No
- Is an ONT Installation ID needed? Yes, you enter here the password of the ONT that you have taken from the router.
We display the connection configuration options, and configure:
- Up and down channel: 600Mbps, or the speed you have contracted. It is important to put the real speed so that the QoS works correctly.
- VLAN configuration: we mark the option “Use VLAN for Internet access”, and put “VLAN identifier” in 20.
In the “IP Configuration” section we can put the DHCP host name that we want, in principle there would be no problem putting the default one that is “fritz.box”.
Once this configuration is done, click on “Apply” and the router will check if the Internet access works well, after a minute we can see that everything works perfectly. If we get into “Internet / Internet Monitor» we can see the public IP or the IP behind CG-NAT, of course, we will also see the corresponding DNS servers that we have obtained via WAN.
If we go to the “Information about the connection” menu we can see that we have perfectly authenticated with the Masmóvil OLT, we can also see the download and upload speed, as well as the type of connection, manufacturer and version of the OLT if it is that provides it.
At this time we will already have the Internet connection configured, if you also want to have all the IP telephony in this router, you will have to make the following configuration:
Configure VoIP (Masmóvil only)
To configure VoIP on this router, we must go to the «Telephony / Own numbers«, in this menu we click on the «Connection configuration» tab. In this section we put the country and the country prefix 0034 that we all know, we must also make the following settings:
- Limit the number of outgoing international calls: is optional, we recommend checking it.
- telephony connection:
- Fax transmission also with T.38: optional, we can uncheck it.
- Keep port forwarding of an Internet router active for telephony: active and configure it in 5 minutes.
- Connection setup for DSL/WAN:
- Use for telephony over IP a separate PVC connection: we mark.
- Do you want access data? Nope
- Obtain an automatic IP address via DHCP.
In the following screenshots you can see our configuration:
Now we go to the “Own numbers” menu and click on “New phone number”, unless we have previously configured it and it does not work. Here we must enter the following information:
- Telephone number for the connection: +34949111111 (we have to put our real telephone number, we have given an example, the number must also be with the prefix of the province).
- Internal telephone number in the FRITZ!Box: 949111111
Now at the bottom we must put the information extracted from the original Masmóvil router, but the information will look like this:
- Username: e34949111111 (e34 plus phone number)
- Authentication Name: e34949111111 (e34 plus phone number)
- Password: the password that you have extracted from the router.
- Recorder: ims.masmovil.com
- proxy server: imsemad2.yoigo.com or you can choose imsebcn2.yoigo.com
The rest of the configuration options are the default ones, below you have our configuration in the FRITZ!Box 5590:
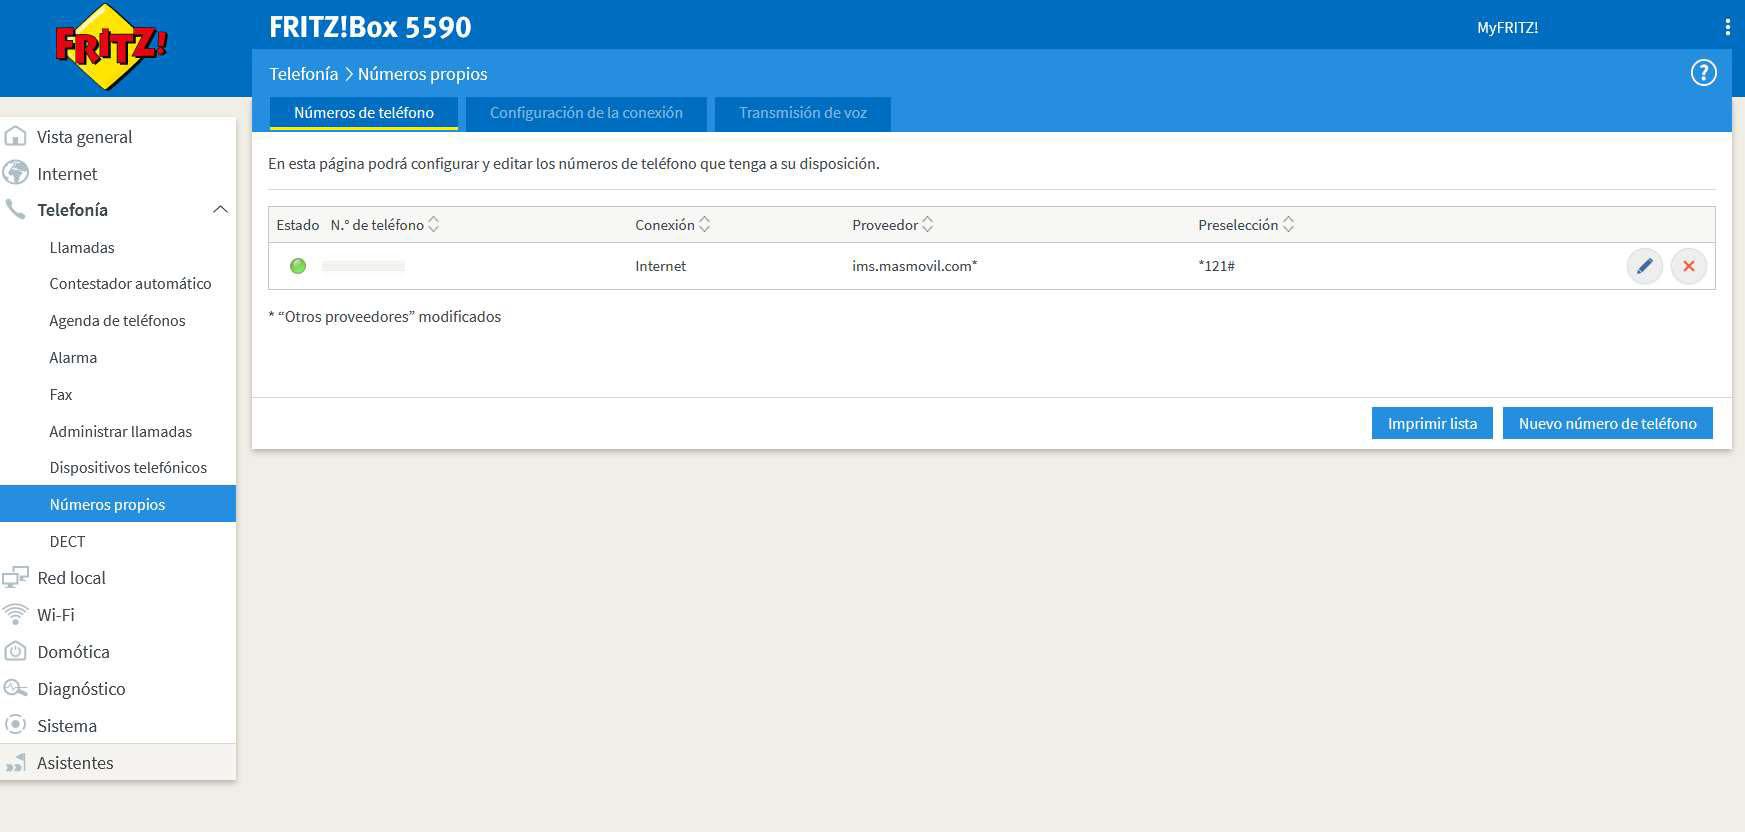
Once we have applied the changes, and after waiting a couple of minutes, we will be able to see our telephone connection in green and working perfectly.
In the main menu we also have that the telephony is fully operational and working.

As you can see, configuring Internet and telephony on this FRITZ!Box 5590 Fiber and 5530 Fiber router is quite simple, without a doubt the most complicated thing is extracting the GPON and VoIP passwords. Depending on the router that you have been provided, or the external ONT, the information extraction process is different, we recommend you read tutorials on the ADSLZone forum where we have information about it.