Then we will try to apply simple solutions such as changing the printer’s Ethernet cable or restarting the computer. However, in most cases it will not solve the problem and we will have to find other solutions.
The failure in most cases has occurred after the installation of a security patch. In this case, this update protects us from a spoofing vulnerability in the Windows print queue. A registry key has also been added that administrators can use to increase the level of RPC authentication that comes from English. Remote Procedure Call and what translated means remote procedure call. This security update mitigates a number of security issues related to print queues. Thus, from now on the default installation privilege requirement is updated so that an administrator must install the drivers.
What to do to fix this error?
To solve this error we can do it in different ways, the first one is by editing the Windows registry file, we could also try to uninstall Windows updates and prevent them from being installed again. Finally, we have the possibility of configuring a fixed IP on our computer to avoid losing communication with the printer.
Edit the Windows registry
Let’s first try to solve the problem without having to uninstall any updates. To do this, we will follow these steps:
- We are going to Start Menu Windows.
- We type regedit and we press enter.
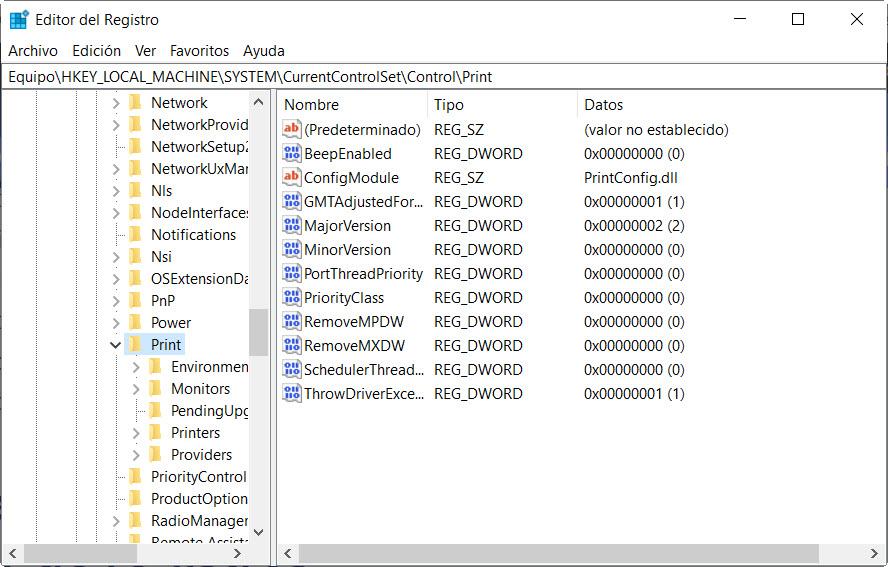
So we have to follow the following route:
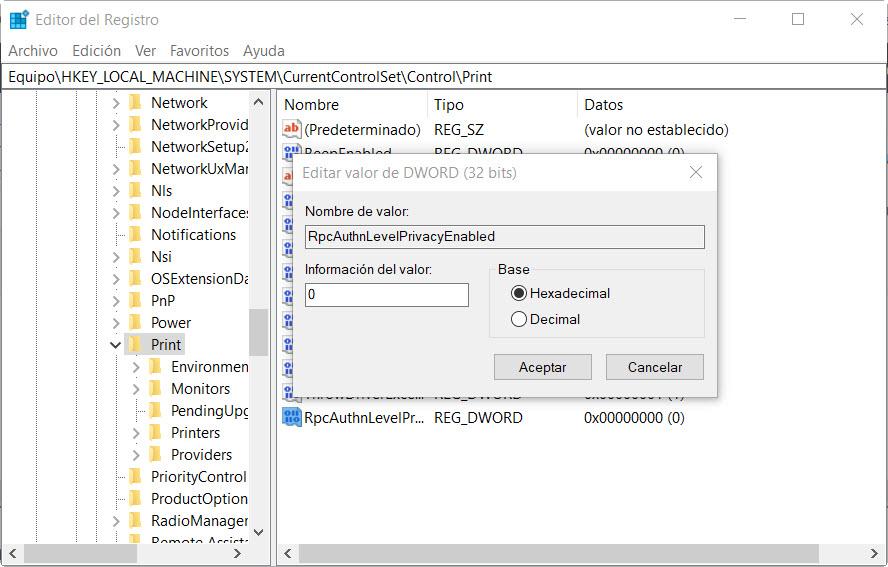
HKEY_LOCAL_MACHINESSystemCurrentControlSetControlPrint
Next, we will see a screen like this:
The next step we would have to take is to create a new value DWORD-32 bit called RpcAuthnLevelPrivacyEnabled. We would do this by clicking with the right mouse button in the right window.
Next, to solve the error we double click on that key that we have just created, we put the value zero and we give it to okay.
Once we have done this procedure, we will not be protected against this vulnerability but at least we will be able to use our printers again.
Uninstall Windows updates
One of the ways we can use to resolve error 0x0000011b is by uninstalling a series of updates. These are the ones we should uninstall the KB5005030, KB5005613 or KB5005565. If we want to uninstall an update in Windows 10:
- We press the keys Windows + R.
- We wrote Control Panel and we press enter.
- We are going to Programs.
- There we select View installed updates.
Then we will see a screen like this where we will have to look for the updates that we have mentioned before.
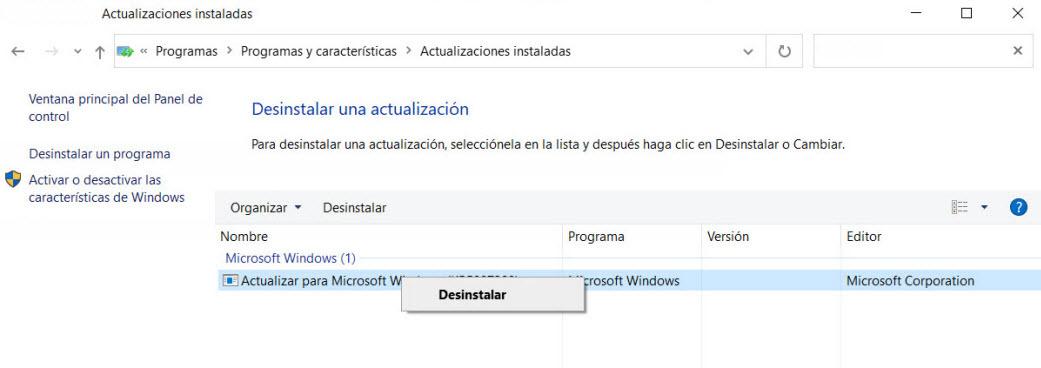
Once located, click on it with the right mouse button and click on Uninstall. Also another option we have is to go to Windows start menu, to write PowerShell and we should run it as administrator.
Next, we will see how a blue window opens and we write the following command:
Get-hotfix
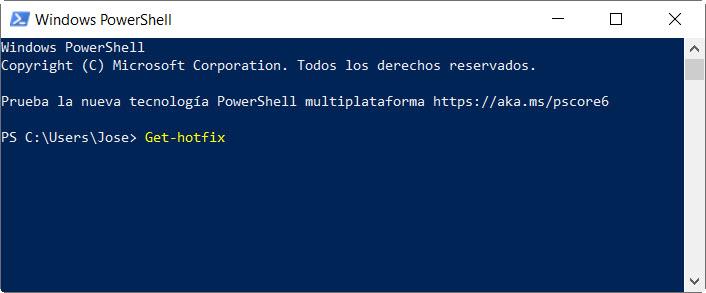
Thanks to its use, we will be able to see the updates that have been installed on our Windows computer and that will appear in the form of a list. The next step is to locate one of the ones I mentioned above to proceed with its uninstallation using the following command. If we want to uninstall an update to resolve error 0x0000011b we must enter the following command in the Windows PowerShell window:
wusa /uninstall /KB:ZZZZZ
Here what you have to do is replace the Z by the corresponding name of the update. In my case with Windows 10 the update would be KB5005565. Thus, the specific command that we should apply would be the following:
wusa /uninstall /KB:5005565
After executing the command, it will ask us for permission to delete that update. Once done, we must restart our computer for the changes to take effect. This should solve the error 0x0000011b.
Prevent updates from being reinstalled
We have already seen how uninstalling certain updates fixes the problem. However, if the registry key edition has not been enough when we run the automatic updates again, the problem may return. For that reason we are going to find a way to make that update never be installed again. We are going to do it with a Microsoft tool that you can download from here.
Once downloaded we execute it and click on the option Following. Then we will see a screen like this:
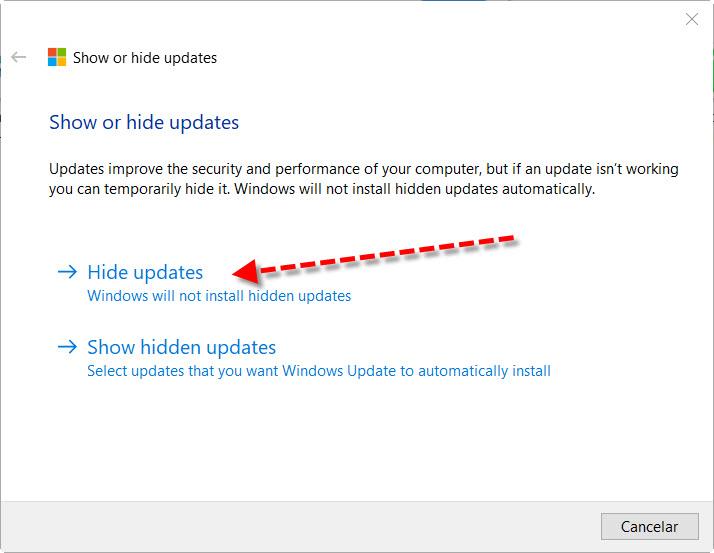
In Hide updates you choose the update that you want not to be installed again. On the other hand, if you change your mind or it is necessary Show hidden updates you can reverse the process.
Put a private fixed IP to the printer
Also another thing that can help to solve the error 0x0000011b can be to establish a static IP in your LAN to the printer.
So to try to solve the problem in this way we are going to follow these steps:
- Let’s go to Windows start menu.
- We type Setting and then we press enter.
- There we choose the option Devices by clicking on it.
- Then we go to the option Printers and Scanners.
Next, what we are going to do is see a screen like this:
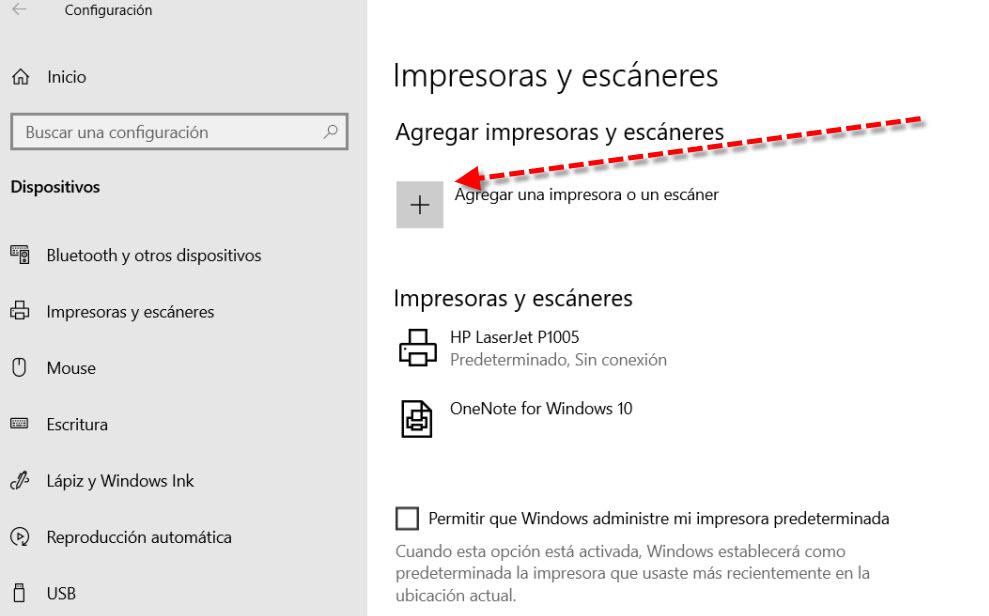
Then we will click on the sign + pointing to the red arrow to add a printer. At that time we will see the following configuration screen:
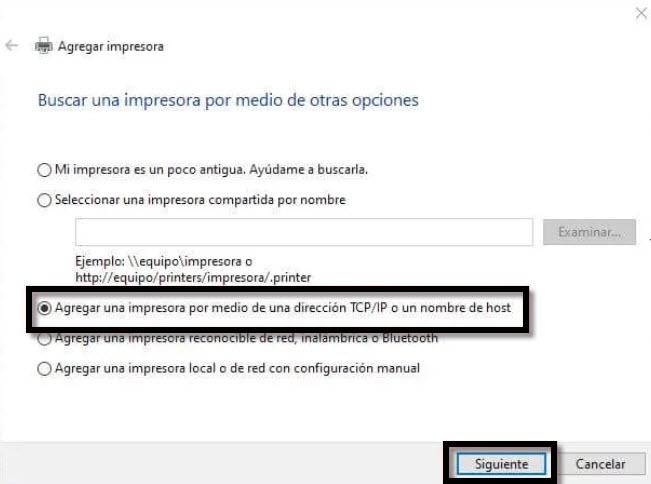
Here what we would have to do is Add a printer using a TCP / IP address. Then what you have to do is follow the instructions by putting a private IP within the same range of the router. For example, if the router’s IP is 192.168.1.1, another one that is within the 192.168.1.X range and that is not being used by another device.