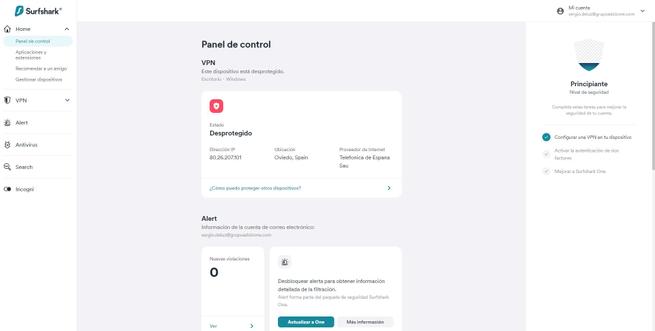
The first thing we must do is acquire a VPN service or have a server configured in another location, in order to establish the VPN tunnel without any problem. In our case, for this use case we have used Surfshark VPN, one of the most recommended, safe and cheap services that we can find today. After registering, purchasing the monthly or annual subscription, and logging into the official website, we have to go to the “Home / Control Panel” menu where we will see the current status of the Internet connection.
To be able to see and download the configuration files that later have to be imported into the router, we go to the «VPN / Manual Configuration«. In this section we have to choose which connection protocol we are going to use, in our case we are going to use WireGuard, one of the safest and fastest protocols that we can choose today.

Within «Wireguard» we have to click on «I don’t have a key pair» to proceed to generate these public and private keys, since later they will be totally necessary for the connection of the router to the service. Once we have generated the keys, click on «Choose a location» to proceed to choose the VPN server that we want.
In our case, we have selected a server in Spain, specifically in the city of Madrid. Here what we have to do is click on “Download” the WireGuard configuration file, it will automatically download a configuration file that we can import directly into the ASUS router, we do not have to make any modifications.


Now we proceed to go to the “VPN Fusion” section to proceed with the import of this configuration file that we just downloaded.
Configure the router as a client with Fusion VPN
The configuration that we must make is in the menu «Advanced Settings / VPN / VPN Fusion«. When we are in this menu, we can see that the Internet connection is the default connection, and all the wired and wireless clients will go to the Internet through this connection that we have configured, which is the native one. On the right side we can see that this configuration is applied to all devices, the IP address of the public Internet WAN will appear, and we will also have the type of connection.
In the event that we only want certain devices to go to the Internet through this connection, we will have to click on the “Edit” button and choose the ones we want, but we can do this later, when we have imported the VPN profile in the asus router.

If we click on the button «add profile«, all we have to do is give the VPN client a name, choose the type of VPN and then click on «Upload Config». It will automatically fill in all the boxes with the information from the downloaded configuration file. An important aspect is that we must always activate the NATso that all wired or WiFi clients go out to the VPN but with a single private IP address in the tunnel, bypassing all the traffic so that we do not have to create a VPN client for each device in our home.


At the bottom, we can choose which devices we want to go to the Internet through this VPN tunnel, if we do not choose anything, automatically all wired and WiF clients will go to the Internet through this tunnel that we just created. If we want to edit this behavior before activating the client, we must click on the “Edit” button and choose the device or devices that we want. When we have clicked on “Apply and Enable” all the changes will be applied and we will have it ready.
When we have added the profile, we can turn the VPN service on and off whenever we want. If we have not selected the devices to use in this VPN tunnel, by default they will all be, it is something that you must take into account, but do not worry because it can be changed at any time.
If you want to modify the clients (local network devices) that connect to the Internet via VPN, then you must perform the following steps:
- Turn off the client’s VPN, the one named Surfshark VPN.
- Click on «Edit» devices, and choose the device that we want. We click on accept.
- Once finished, click on “Apply all settings”.
- We turn on the VPN service again, it will take a few seconds to establish the connection again.
And by now we will have edited the clients that they support. A very important aspect is that to make any changes to the VPN client, we must necessarily stop the service, even if it is only the devices.
If we look at the IP address of our computer, which we have configured with Fusion VPN, we will see that it does not correspond to the main public IP of the router and the network, but rather the IP address of the VPN server to which we have connected with the Surfshark VPN service.
We currently consider that Fusion VPN is a really important feature, because it will allow us to establish VPN tunnels and apply it to the devices that we want, such as Smart TVs, computers or any other device, in order to bypass regional blocks, browse securely and privately over the Internet etc. A very important aspect is that we must “remove” devices such as consoles or gaming computers, because if we make them go to the Internet through the VPN, we will have a higher latency in the connection, and we will probably not have the best possible user experience. .
As you have seen, the configuration of this important feature is quite simple, the only thing we have to take into account is to correctly import the configuration file downloaded from the VPN service.