The first thing we must do is get into the Nuclias Cloud platform. In the main menu we have to choose in which site we are going to install this DBG-2000, and also in which network, if we have different networks registered and configured. Once we are in the correct network, we have to go to the configuration menu of «Configure / Gateway / Profiles«, from here we will configure a profile for when we add the DBG-2000.
In the profiles section we must click on «Create Profile«, we will give it a profile name, we will add a model (the DBG-2000), and we will also give it the corresponding privileges, we have chosen privileges at the site level and finally the site «NetworksZone» as you can see. When we click on “Create profile” a profile will be created with the default parameters.
Now we have to add the DBG-2000 that we have and later associate it with this profile. For this we go to the section «Settings / Add device«. In this menu we put the “Device UID” that we have on the DBG-2000 sticker, we give the device a name, and we proceed to select the “RedesZone” site and we also assign the profile that we have created in the previous step. If we had not created the profile for the gateway, we would not be able to add it to the Nuclias Cloud.
Once added, we wait a couple of minutes and we can see that in this profile we have already added a device, and we can see that we have the device connected, with the name we have given it, the model of the equipment, the public IP address, the site and whether the profile has been successfully synced.

At this moment we should already have configured the DBG-2000 with the default options, now we must go to the different menus to edit the profile that it has configured, and have access to the rest of the options.
Internet and LAN settings
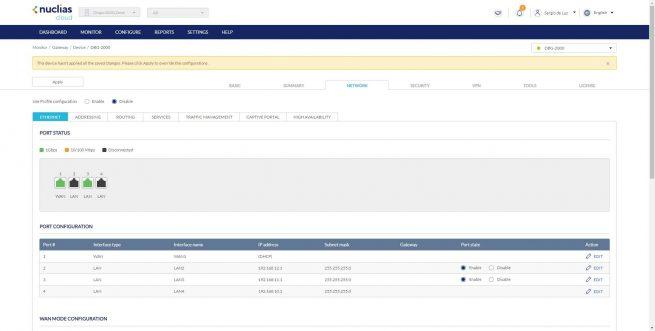
If we want to configure the Internet WAN, we can do it from «Monitor / Gateway / Device / DBG-2000» or do it from the «configure» if we want to edit the profile. In this menu, if we want to add or remove configured WANs, we will have to click on “Use profile configuration” in “Disable”, to disable the profile and overwrite the configuration made by us.
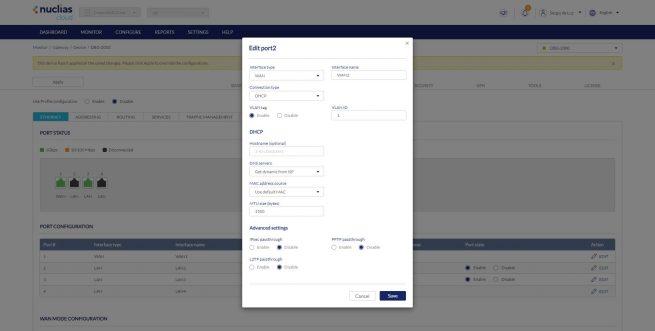
In this menu we can edit the Internet WAN with the operator data, we can configure DHCP, static IP, PPPoE, configure VLAN IDthe way to obtain the public IP, if we want to use a specific MAC and other common options in any home and professional router.
If we want to configure the LAN network, we must go to the «Configure / Gateway / Profiles» and click on the «Network» button to take us directly to the local network menu where we can edit the LAN. In this menu we can configure the LAN2 and LAN3 ports as LAN or as DMZ. The LAN4 port is mandatory to always be configured as LAN, it is not possible to change it.
Within the port configuration, we can give it the name we want, the IP address, the DHCP server configuration and even the DNS to configure. Also if we allow pinging from the LAN to other destinations.
In case you want configure VLANs on the LAN, this must be done in the “Addressing” menu. In this menu we define the name of the VLAN, we put the VLAN ID, as well as if we want there to be inter VLAN communication or not, in addition, we can assign this VLAN to one or more physical interfaces of the LAN, but these will always be there. VLAN as tagged on ports, because the only VLAN that goes as untagged is VLAN1, which is the one that we can configure in the previous menu. Here we can also configure the DHCP server, and even if we want to enable the proxy DNS and the captive portal for the different wired or wireless clients.
In the “menu”IP management» is where we can configure the static DHCP, we can register different devices with their corresponding IP/MAC address, the host name and through which physical interface it will connect. In addition, we can make an IP-MAC binding to avoid ARP Spoofing attacks, and we can even make this IP reserved in the DHCP server.
As you can see, we have a large number of configuration options for the LAN, and all this must be done from the Cloud, to later apply the changes.
Set up a second Internet WAN
In the event that you want to configure a second Internet WAN, the process is somewhat peculiar, because it is not done from “Configure” and you edit the profile. You must go to «Monitor / Gateway / Device / DBG-2000“, disable the profile edit the physical interface you want and overwrite the profile settings. To do this you go to the main menu and where it says “Use Profile configuration” click on “Disable”, now you can edit the different ports and also configure them as WAN.
We have different WAN configuration modes:
- Define a primary WAN.
- Define a WAN rollover, so that if WAN1 does not work, the second is activated automatically.
- Load balancing between several Internet WANs.
Depending on our needs, we can choose one option or another.
Traffic Shaping Configuration
In the “Network / Traffic Management” menu is where we can configure the traffic shaping, to perform a prioritization of the network traffic that travels through the router. We can configure both packet priority and limit the download and upload bandwidth. In the following menu you can see all the available options:
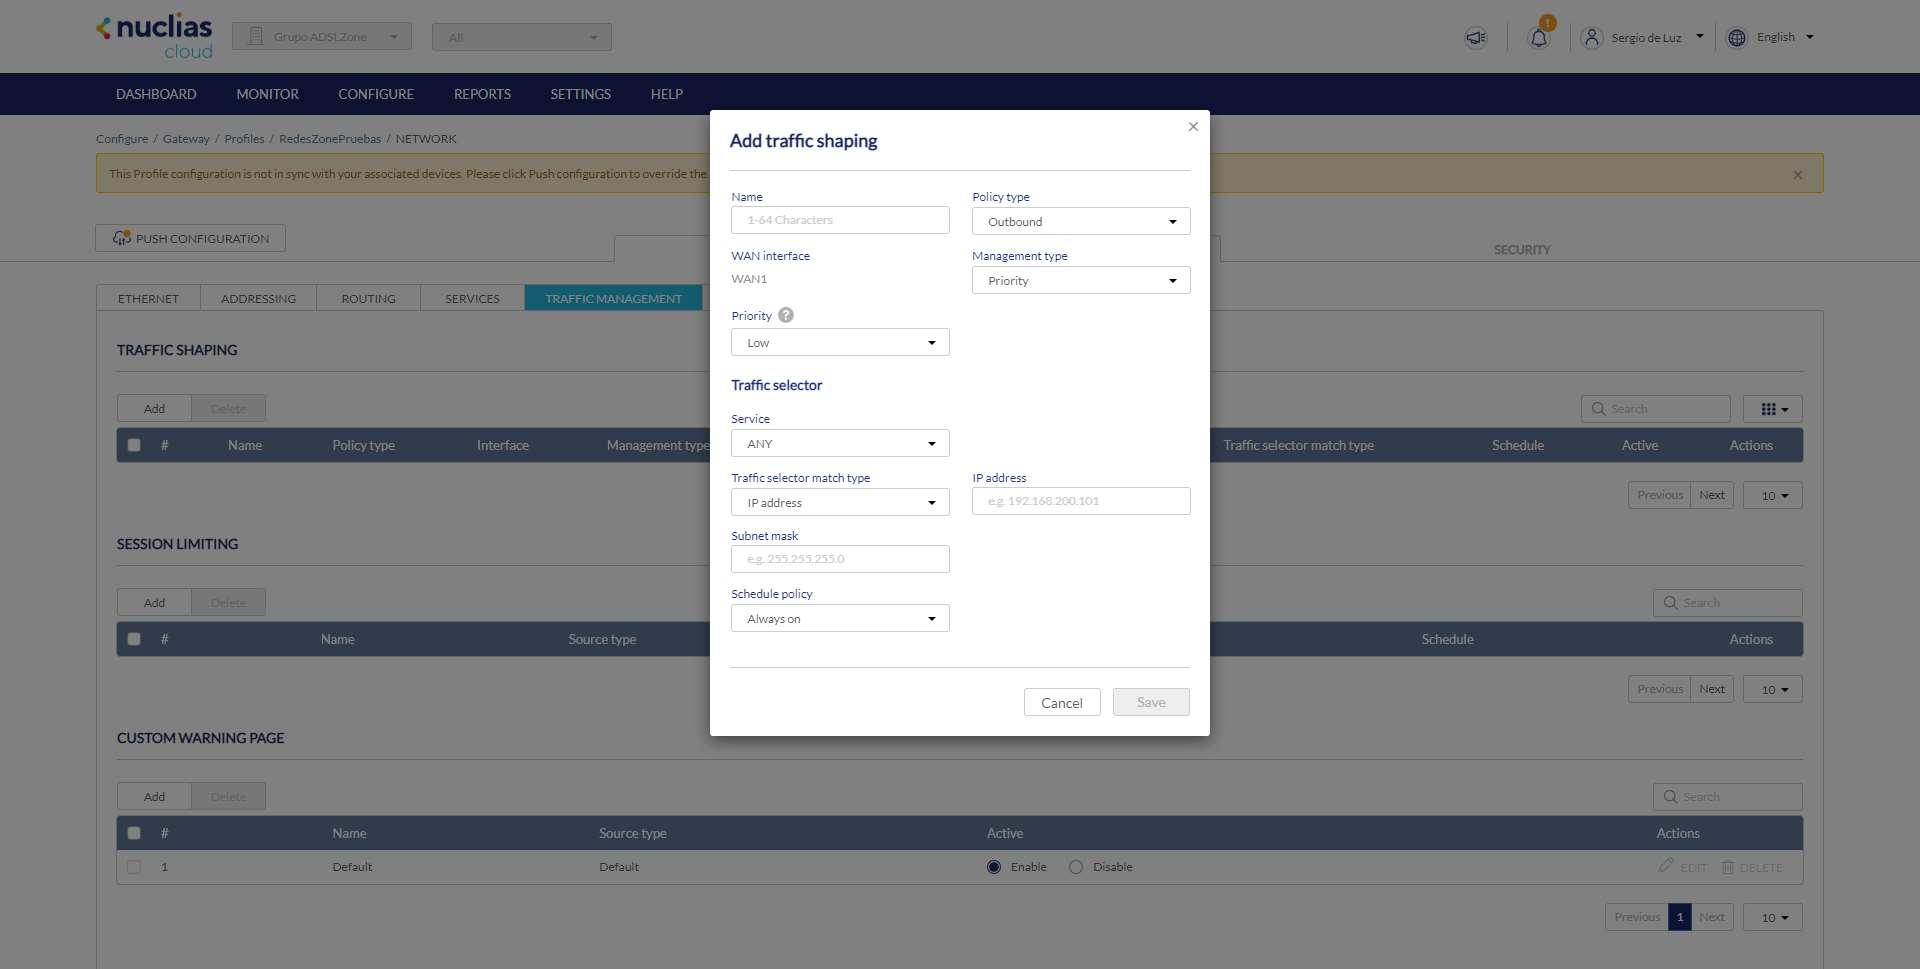
This option will also allow us to choose if we want to limit certain network protocols, so we have great versatility.
Firewall and IPS configuration
In the “menu”Safety» We can configure the firewall in detail, we have the possibility of registering different rules to allow or deny network traffic. In these menus we can choose any IP address, several IP addresses, a range of addresses and we can even define an “any” for any source and/or destination address. Of course, we can allow or deny all the traffic that we want, and even schedule the application of this rule based on a time schedule.
The IDS/IPS of the DBG-2000 is not very advanced because it does not allow us to edit the signatures or even see them, we can simply activate the different options available to us. In these menus we can also activate different technologies to protect ourselves from external attacks.
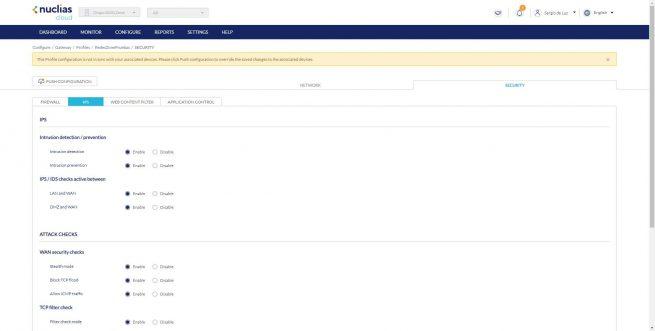

Nuclias Cloud will be in charge of downloading the new signatures for the team’s IDS/IPS on a daily basis, without us having to worry about anything, because everything is done automatically and these signatures are maintained by the D-Link team, so we guarantee its proper functioning and that they are not going to block anything.
So far we have come with this tutorial to configure the DBG-2000 from scratch, soon we will explain in more detail how to configure other very important options of this very interesting device that is managed through Nuclias Cloud.