Why rename the network card
The network adapter is going to have a generic name. One of the main reasons to change the one that comes standard is troubleshoot there is at the software level. For example if we have installed an update to the operating system and there has been a problem recognizing the networks and connected devices.
It may also be that we simply want to have a more control about the Wi-Fi network adapters that we have in a computer. It is usual that we have both the one that is integrated into the motherboard as well as another that we connect by USB to have better coverage or that the speed is higher. We can put names that better identify what each one is.
This process can be taken into account to change the name of an adapter Ethernet or also Wi-Fi. By default it is normal for it to appear as Ethernet or Wi-Fi. If we have, for example, two wireless adapters we would find that the second one is named as Wi-Fi 2. This is what could mislead us and thus, by putting the name we want, we can avoid it. We can put, for example, “Wi-Fi USB” to know which one we connect like this.
In addition, although it is not something usual, it could happen that our team has been infected by some malware that can point directly to the network card. The normal thing is that a hacker, if for example a virus sneaks us through a program that we install or a file that we download by mail, have it configured to block a network adapter according to the generic names, which would be “Ethernet” or “Wi-Fi”. If we have been victims of a virus like this, it might be necessary to change the name of the adapter to have a normal connection.
Steps to change the name of the Ethernet or Wi-Fi adapter
Windows 10 has several options for renaming the network adapter. We will not have to install anything and we simply have to follow a series of steps and use the operating system’s own configuration. We can change it from the Setting and also through Symbol of the system.
Windows Settings
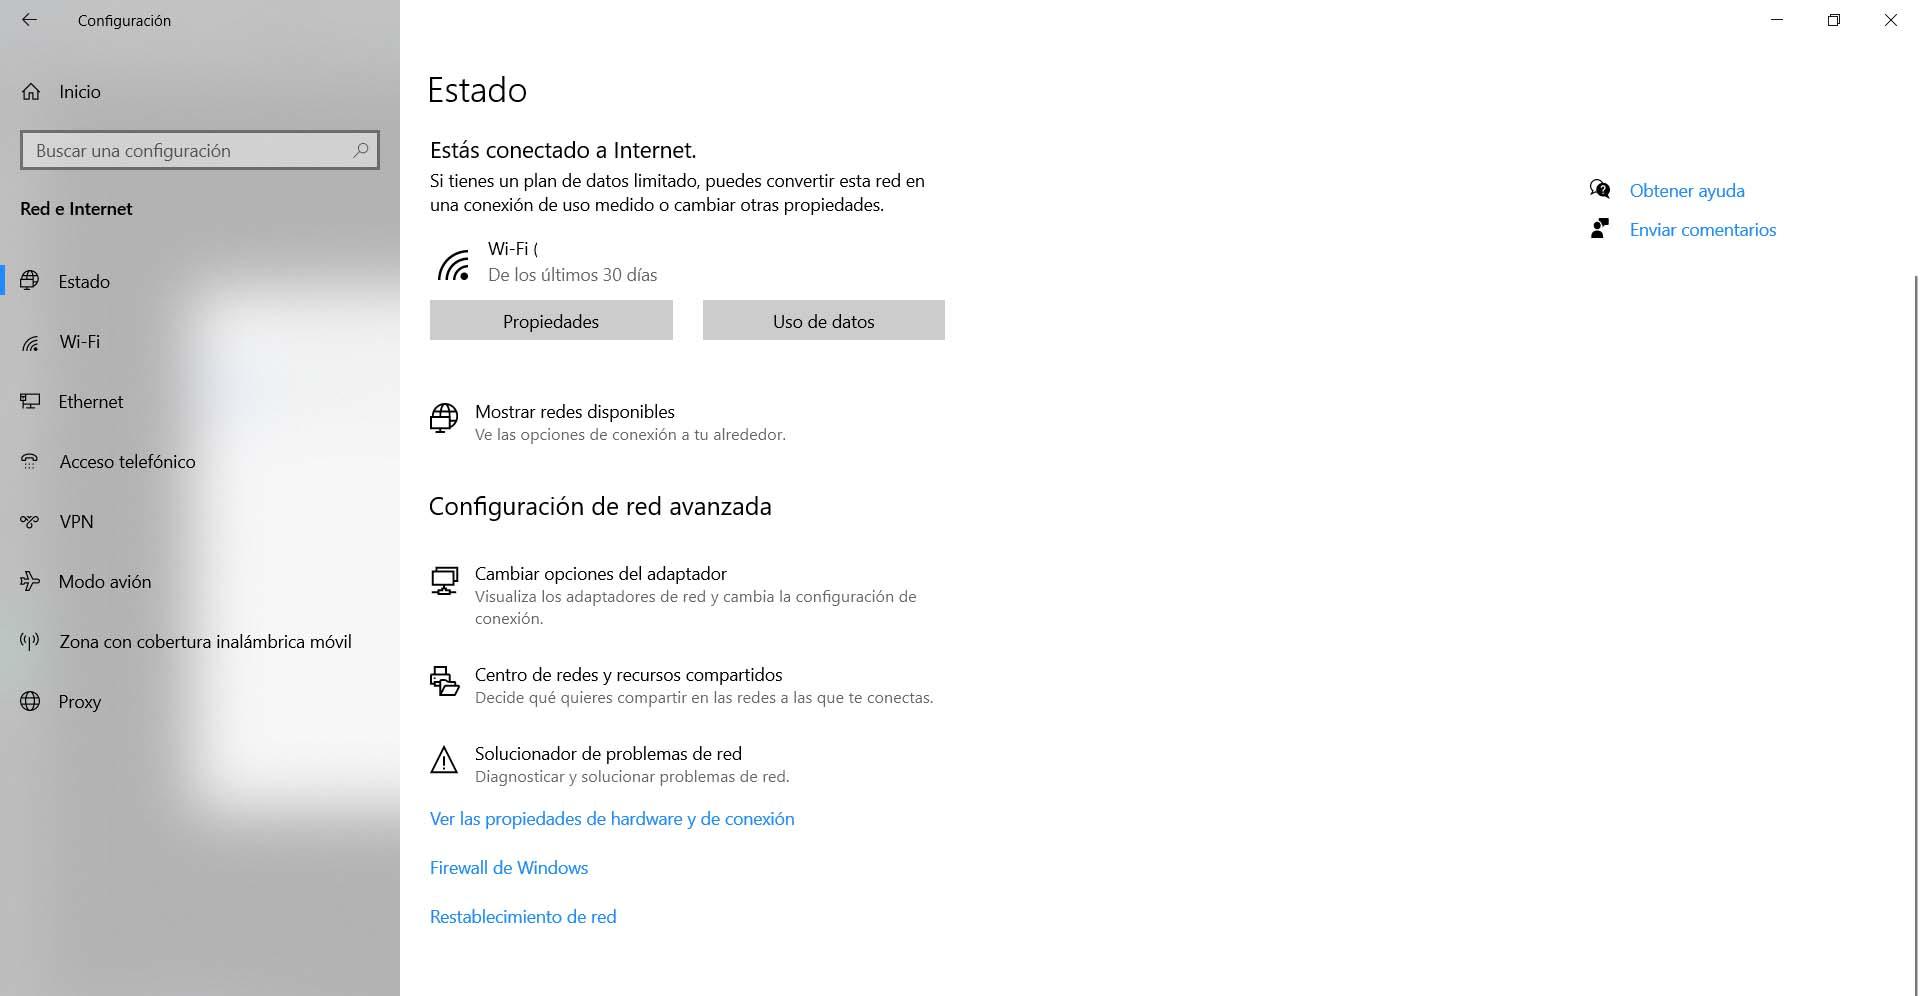
First of all, we are going to see the steps to change the name of the Wi-Fi or Ethernet adapter from Windows Settings. For this we have to go to Start and open Setting. We can also simply right-click on the Start button and select it.
Once we are inside we must access the Network and Internet and click on Change adapter options. We will see this feature in the central part, within Advanced network settings.
The next window will show us all the network adapters, both physical and virtual, that we have in Windows. There we will simply have to select the one that interests us, which normally is an Ethernet or Wi-Fi adapter to which we want to put another name. We click with the right mouse button and click on Rename. We give you the one that interests us and we accept.

From that moment Windows will identify the network adapter with the name that we have given it. It will serve for us to identify it better, but also to correct possible problems in case the system does not recognize it well or there is a conflict. It is something that we can revert at any time and return to the old name or give it a new one.
Windows command
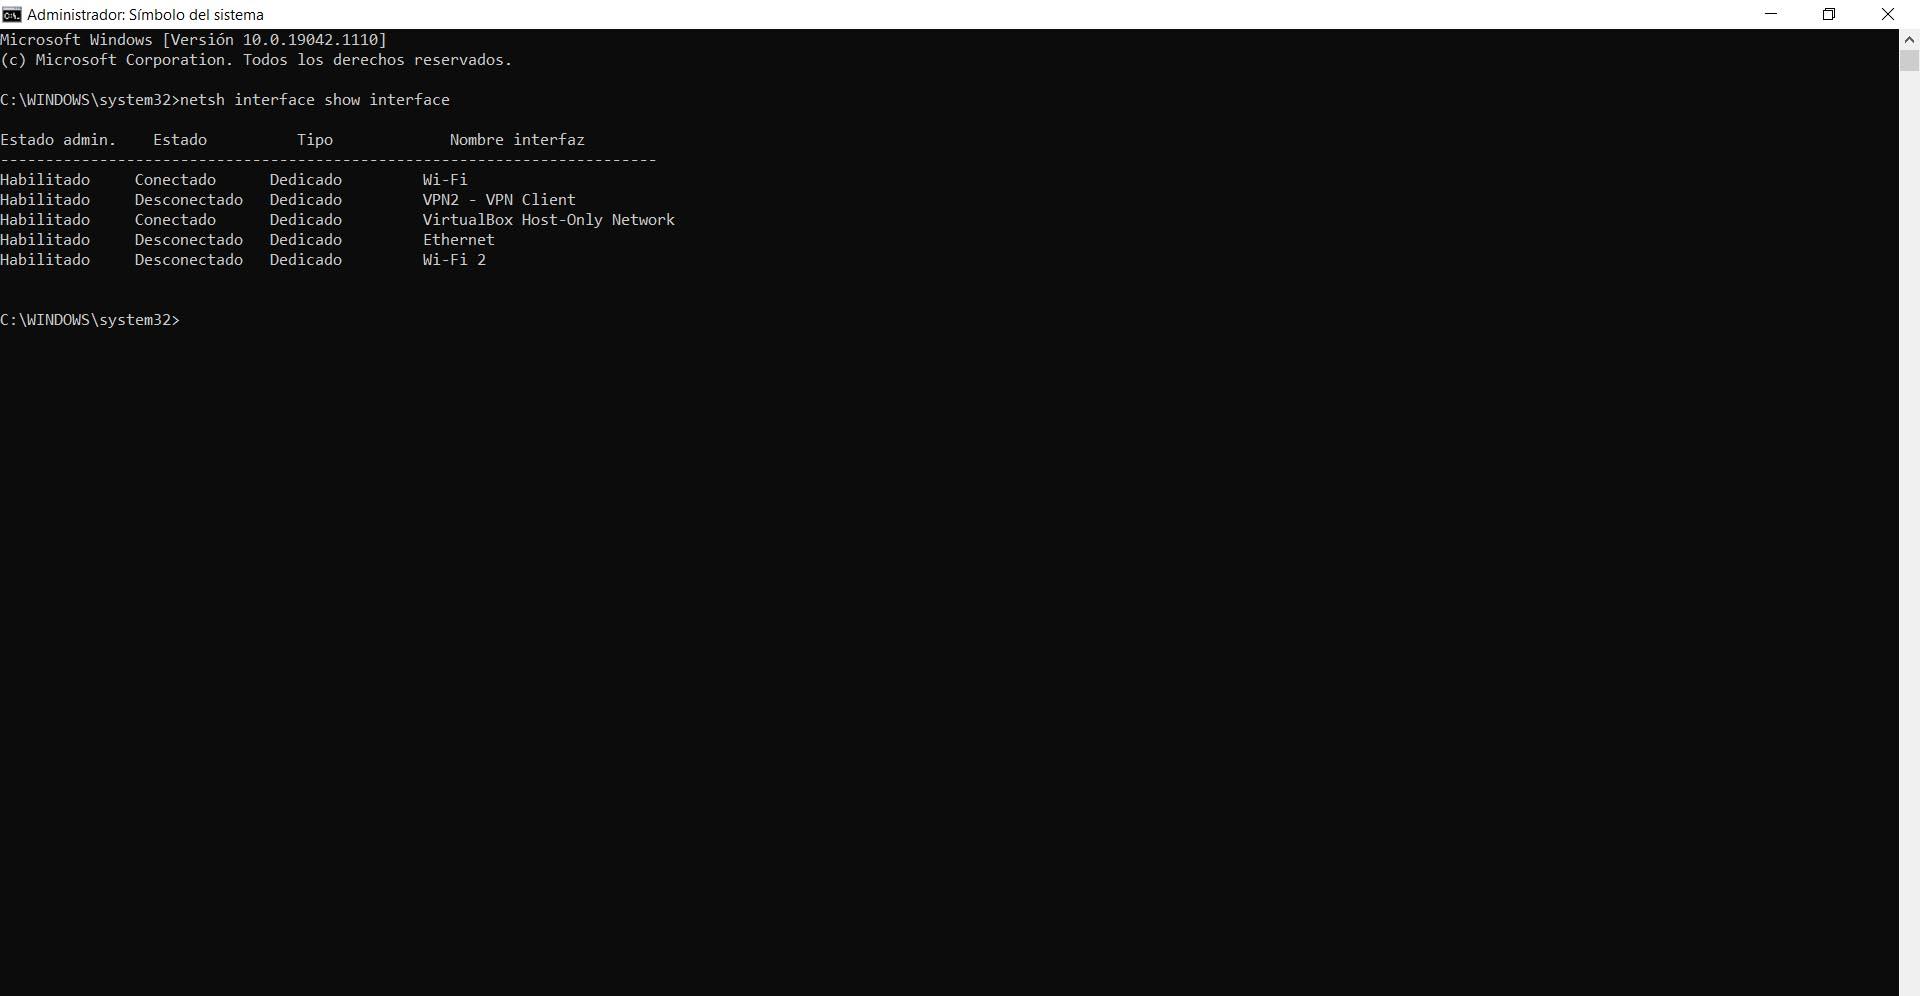
Another option we have to rename the network adapter in Windows is to use the command line or Command Prompt. What we are going to do in this case is open the Command Prompt or PowerShell. We can do it in Start, by typing Command Prompt and opening it with administrator permissions, but also with the Windows + R key combination and run the cmd command.
When we are in the command line we have to execute netsh interface show interface. What it is going to do is show us all the network cards that we have in the computer and we will see the name of each one of them.
This step is not essential, since we can also go to Settings and see the exact name of the network there, but it is convenient to carry out the next point.
To change the name of the network adapter we must execute the command netsh interface set interface name = ”current name” newname = ”new name”. We can do this both in the Command Prompt and in PowerShell.
We replace the “current name” with the name of the adapter that we want to change. For example in our case we can change “Wi-Fi 2”. In “new name” we simply put the one that interests us. We are going to name RedesZone, so the command to execute would be: netsh interface set interface name = ”Wi-Fi 2” newname = ”RedesZone”. We can give it any alphanumeric name.

Keep in mind that we must keep the quotes in the name, both in the old and in the new. Once we execute it, nothing else will appear on the command line, but we can go to Windows Settings and see how it has effectively been changed to the desired name.
In both cases, if we want go back to the previous name you just have to follow the same steps again. We would only have to modify the name from Configuration or execute the command taking into account that this time we have to change the value of “current name” and “newname” for what it really is.
In short, following these steps that we have shown we can change the name of the network adapter in Windows. We can do this whether we use the Ethernet adapter or if we are using a Wi-Fi adapter. The process is the same and you do not have to make any changes, beyond choosing the one that corresponds.