If you think to buy one home ip camera, or if you have already bought one but have not yet installed it, you may encounter some problems when linking it to the WiFi wireless network. Most home cameras are wireless to greatly facilitate their configuration, however, this also has its negative parts, and that is that if the WiFi router has certain settings enabled, we will surely have problems linking it. Today at RedesZone we are going to teach you how to configure any IP camera in three simple steps.
Configure the WiFi network of the router well
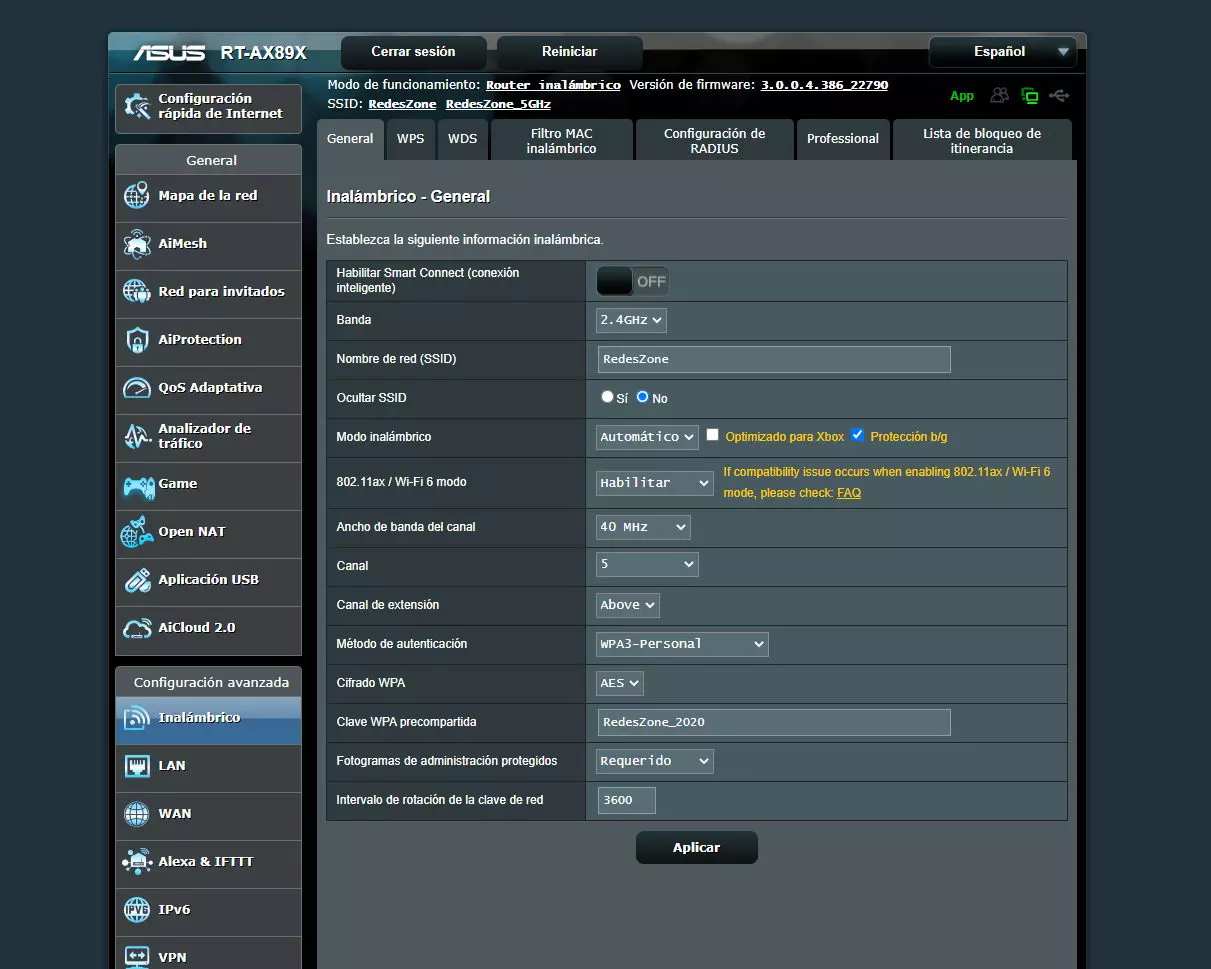
For several years now, Wi-Fi 5 or Wi-Fi 6 Wi-Fi 5 or Wi-Fi 6 dual-band routers have issued two single SSIDs (WiFi Network Name), this is often called “SmartConnect«. This makes it easier for users to connect to home WiFi networks, because they will not see two different networks. The router will handle the band steering functionthis means that it will place wireless clients in the 2.4GHz or 5GHz band depending on different data:
- Signal received by the wireless client. If you are too far away or have poor signal, it will connect to 2.4GHz. As it gets closer and has a stronger signal, it will connect to the 5GHz network.
- Number of clients connected in the two frequency bands.
- WiFi client support to connect to 2.4GHz or 5GHz band.
- Max client sync, so slow clients connect at 2.4GHz and don’t hurt fast ones that will connect at 5GHz.
This functionality, when enabled, it can cause problems for IP cameras because these normally only support the 2.4GHz band. To avoid possible problems when connecting the camera, it is highly recommended to perform the following steps:
- disable the function SmartConnect.
- Set a different SSID for the 2.4GHz and 5GHz band.
Once this is done, it is advisable to check that the changes have been applied correctly and we can connect to both bands separately.
Enable location services and Bluetooth
If you use an Android smartphone, it is completely necessary enable location services (GPS) to locate the IP camera and be able to configure it with the official app of said brand. If we don’t enable location services, it will probably give you an error in the camera setup wizard. In some cases, the application itself will already notify us that it is necessary to enable this functionality on our smartphone, if we do not already have it previously enabled.

There are IP camera models that have Bluetooth to configure them easily and quickly, you may have bought an IP camera that has Bluetooth without you knowing it. For this reason, our recommendation is that you also enable Bluetooth before starting the IP camera setup process, otherwise you may have problems adding it to the wireless network.
Download the app and follow the installation wizard
Once you have prepared the WiFi router with the configuration that we have indicated, we have enabled location services (GPS) and also Bluetooth, it is time to download the official application of the camera, install it on our smartphone, and start with the installation wizard. In all the cameras that exist today, the manufacturers need a registration through an email account, after registering in the service, we can add one or several cameras through the step-by-step installation wizard.

Generally, these installation assistants will tell us how we can connect the camera to electricity, and they will guide us step by step, without the need for any prior knowledge. However, there are some wizards that will tell us what we have explained before, especially the WiFi router and the Smart Connect functionality.
We hope that by doing these three simple steps, you can install any domestic IP camera without problems.