apt install filezilla
If you are interested in installing several packages simultaneously, you can put the different programs all in a row, without commas or anything, just a space between each program to install, it would look like this:
sudo apt install filezilla chromium programa3 programa3
As you have seen, installing programs for which we know their package name is really easy, the complicated thing comes if we have to search for a package in question, because we must indicate the exact name of the program.
Search for packages (programs)
Although there are several basic and easy ways to locate packages in the repositories of this Linux-based distribution, it is best to use the “apt-cache” tool. This tool runs through the console, it does not have any type of graphical user interface, however, it allows us to locate the different packages very quickly based on the keywords that we put.
In order to use this command, we simply have to open the terminal, and put the following command:
sudo apt-cache search PalabraClave
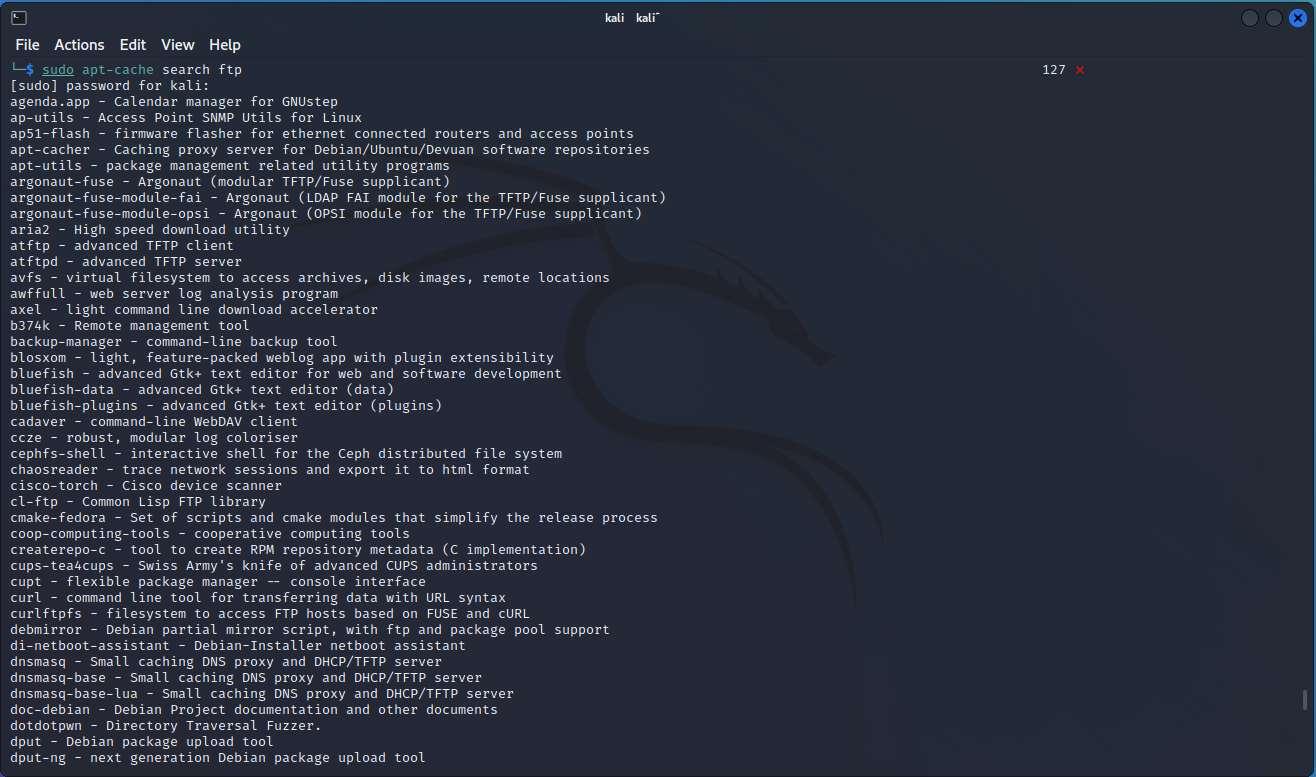
For example, if we want to search for all the packages that contain the word “ftp”, that is, the popular file transfer protocol, then we will put the following order:
sudo apt-cache search ftp
The result of this command makes us see a complete list of all the packages that have the word “ftp” in their name, also including the description of the package itself. In this way, we can easily and quickly search for all the packages related to FTP, and later decide which ones we want to install, in this list we see both the name of the package and the brief description:
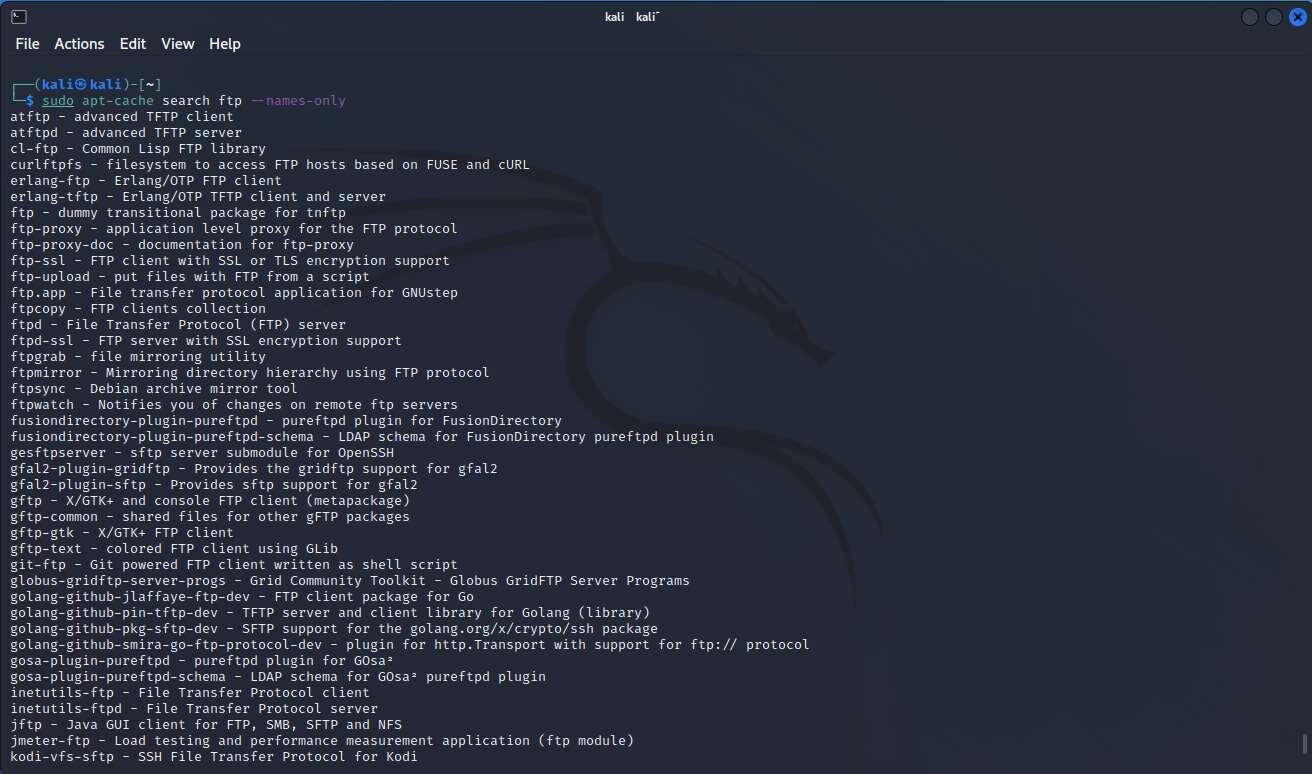
The number of results returned by the search is really large, and depending on the term to search for, it will be greater or less. In the event that we want to filter the results and show only those that contain said word in the name of the package, without taking into account the description that has been incorporated in the packages, we will simply have to add the parameter “–names-only” at the end altogether. In the previous example, the command would be as follows:
sudo apt-cache search ftp --names-only
In the following screenshot you can see that some packages have disappeared with respect to the previous result, such as “ap-utils” among many others.
Once we have located the package, we will simply have to execute the installation command to proceed with it:
sudo apt install NombrePrograma
Once we know how to search for the programs that we can install in Kali Linux, we are going to teach you how to install new repositories in case we do not have the program that we are looking for.
Install and configure new repository
Kali Linux allows us to install new repositories and also configure existing ones. To see the current repositories in Kali Linux, we simply have to view the sources.list file located in /etc/apt. We can execute the following command to see it:
sudo cat /etc/apt/sources.list
In the following screenshot you can see the content of the file when we perform a clean installation of the operating system:
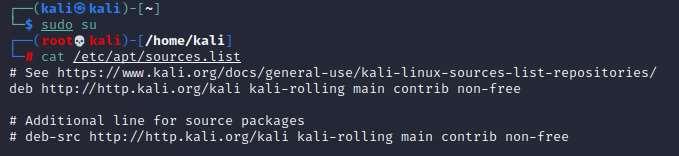
Right now we are using only the official Kali Linux repository, which contains all the programs that are designed and tested in this security-oriented distro. In addition, you can see that we have activated the main, contrib and also the non-free. This means that we have all the supported repositories:
- Main: are the open source programs officially supported by Kali Linux. All the packages included here are the most important ones.
- Contrib: These are packages that contain open source software, but have no dependencies on main. Possibly they are packaged for non-free.
- Non-free: Contains software that is not open source.
The reason for adding a new repository or more repositories is to have at our disposal the possibility of installing the software via apt install, without having to download the package manually and then install it with the popular dpkg that we have in the distributions. of Linux. When incorporating a new repository, if the package to be installed has dependencies, they will also be installed completely automatically without us having to do it manually.
In the event that we want to add a new repository, we have two ways to do it.
The first way to do this is by using the “echo” command and incorporating it into the aforementioned /etc/apt/sources.list file, to do this we can run the following command:
echo "deb http://http.kali.org/kali kali-last-snapshot main contrib non-free" | sudo tee /etc/apt/sources.list

Another way to add a new repository is to add it to the /etc/apt/sources.list file manually, in this case we will have to open the file with a text editor such as vi, vim or nano, and add it at the end of everything the following “deb http://http.kali.org/kali kali-last-snapshot main contrib non-free”.
The /etc/apt/sources.list file would look like this:

As you have seen, “kali-last-snapshot” has been added, although if the repository is not Kali, then it will be added just below it and we will have two or more entries for the OS repositories.