What we are going to try to do is to turn our smartphone into a router to have an Internet connection. We are going to explain what cables we need, how to connect them and what steps we have to take in Windows.
Reasons why it may be interesting to connect a mobile phone and a PC by cable
Although it is more convenient to create a Wi-Fi access point on the smartphone, there are times when it is not the most appropriate or safe. One of the reasons may be because Desktop PCs usually do not have a Wi-Fi card with which to connect to the Internet. This class of equipment is generally connected by Ethernet network cable. As the smartphones only have a USB port and the PC also, this is going to be the way in which both can connect.
Another reason why you prefer to connect by cable to your PC or laptop may be for security reasons. For example, if you are in a public area with many people around you. Someone might see your Wi-Fi key when you enter it or try to hack into your portable Wi-Fi network. In case of having a robust key for our wireless connection, the threat would be minimized.
Another reason is for higher connection speed. Wi-Fi networks are evolving, perhaps our PC or laptop does not have a 5GHz Wi-Fi card that supports the 5GHz band, with which, it is possible that we may lose connection speed. This is constantly evolving, and although our team is currently prepared, it will have to deal with this problem. The reason is that the networks in the 6 GHz band and the successive ones will come. Perhaps at the present time you are not interested, but in the future, depending on the task you are doing, it may be worth connecting your mobile and PC via USB cable.
Necessary elements and placement
In this case, in order to connect to the Internet, we will need three things:
- A desktop or laptop PC with an available USB port. Currently minimum version 2.0 but if it is a later version, the better. Also, the more powerful and modern it is, the better connection speeds we can obtain. In this case, we are going to use one with Windows 10 operating system.
- The corresponding USB cable depending on the PC and smartphone.
- A smartphone with Android and IOS.
The first step we have to do is locate an available USB port on our laptop or PC. In the latter, they can be located both on the front and on the back of it. This is an example of a USB type A port on a laptop located on the side:
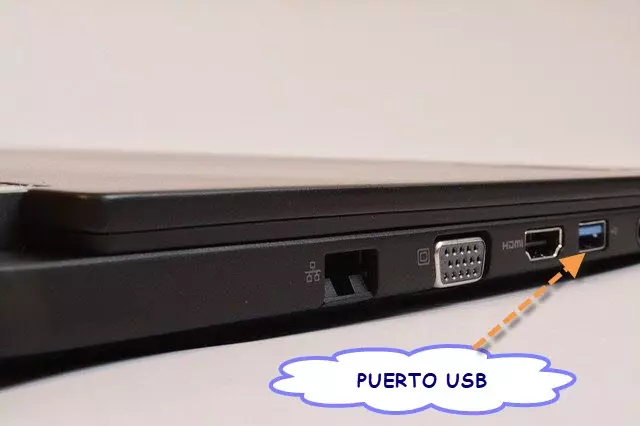
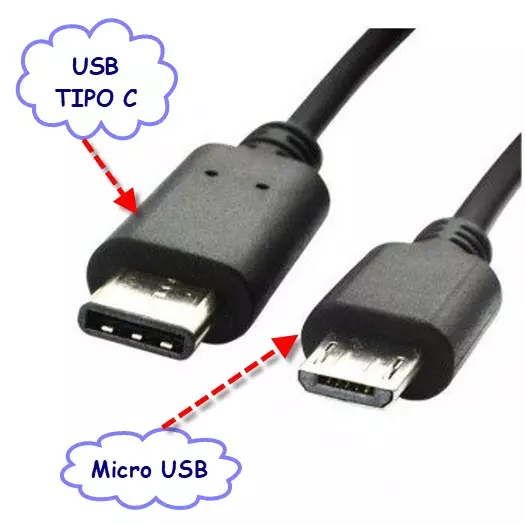
On a PC it also has the same shape, they are the USB type that we have used for more years. Currently, some computers are seeing how they are being replaced by the smaller USB type C. The other item we need is the USB cable. Older or lower-end Android smartphones use a micro USB connector and the most modern are USB Type-C.
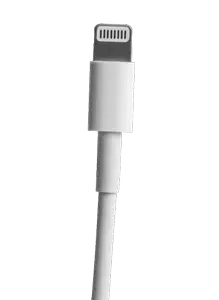
In contrast, smartphones with IOS have a Lightning connector.
The installation process to connect mobile and PC by cable is very simple.
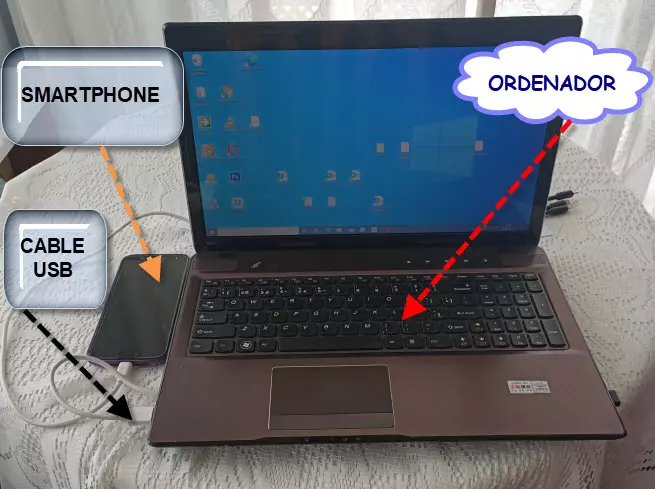
After finding a free USB port on the computer that we are going to use, we insert the USB cable at the corresponding end. Next, we insert the corresponding connector into the smartphone, in this case it is USB type C.
Setting up an Android smartphone
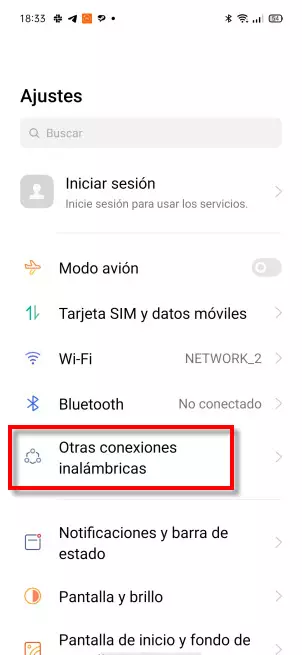
Once we have the mobile and PC correctly connected via USB cable, it is the turn to configure our Android smartphone. The first thing we are going to do is activate mobile data in case of being turned off. Then within Settings, we have to look for a section that usually calls:
- Network and Internet.
- Connect and share.
- Other wireless connections.
This would be an example of one of the aforementioned:
Sometimes an intermediate screen usually comes after that is called «Wi-Fi zone / share connection“Or”Portable access point«. In the case of the smartphone that I used, it came directly:
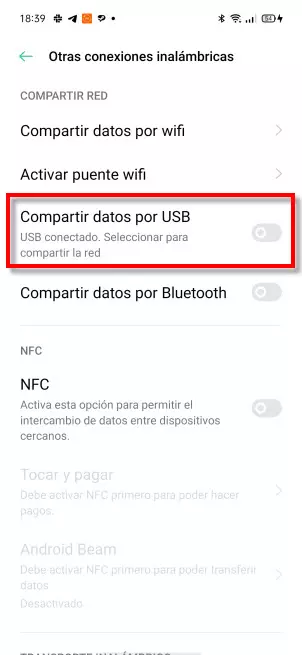
Here what you have to do is activate «Share data via USB«. Other names that it also receives are «Share connection via USB“Or”Share via USB«. If you can’t find it, you can try using the Settings search engine represented by the magnifying glass icon. They have to be names very similar to the ones I have given.
Setting up an iOS smartphone
Here it is recommended to have the latest version of iTunes on your PC. Then, we connect the mobile and PC by USB cable. Now we are going to Settings and click on the section Personal Access Point. The next step is to select Allow others to connect. Then it will connect to your computer via WiFi, Bluetooth or USB depending on how you have the smartphone connected. In this case it will be via USB when the cable is connected.
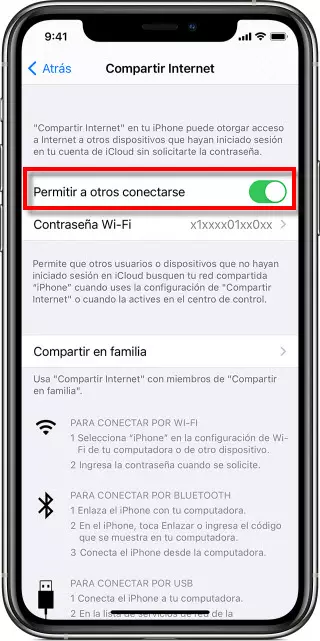
Finally, when I ask you: Trust this computer?; we will click on Trust.
Configuring Windows to be able to use the mobile phone and PC by cable
The Windows part is the same, regardless of whether our smartphone has an Android or IOS operating system. In this case we have used a PC with Windows 10. What will happen after configuring the smartphone is that Windows will automatically detect a new network. Then a screen like this will appear:
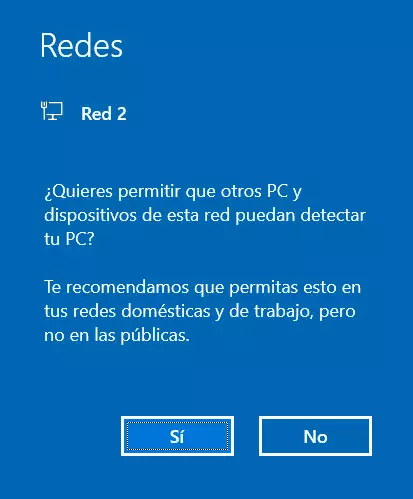
Here we have to choose if we want a public or private network. If you click on “yes”, your PC or laptop will be visible to the rest of the computers connected to the network.
Right now, we would already have a mobile phone and cable PC as well as an internet connection. The problem is that the vast majority of mobile rates when you consume all the mobile data will slow you down. They will do it in such a way that Internet browsing will become very slow. Therefore, what we have to do is limit that network so that data consumption does not skyrocket and we are left without any. To do this, we will follow these steps:
- Start Menu.
- Windows Settings.
- Network and Internet.
- On the left we click on Ethernet.
Then a screen like the following will appear:
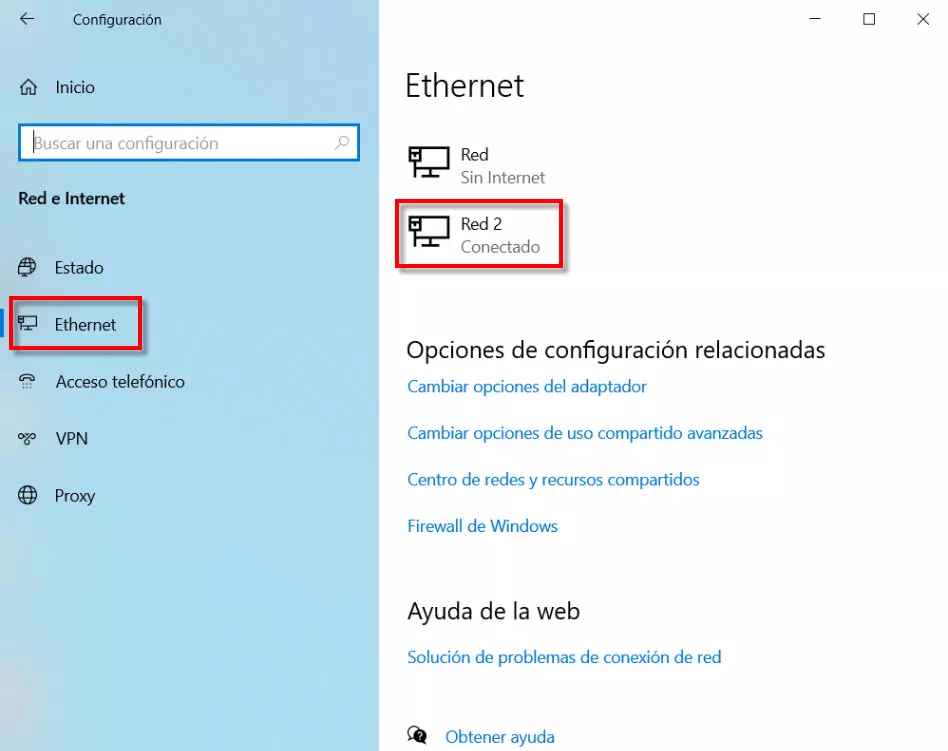
Click on Network 2, which, if you look at it, was the one that was created by connecting the mobile and PC via USB cable. Once inside, a screen will appear like it is:
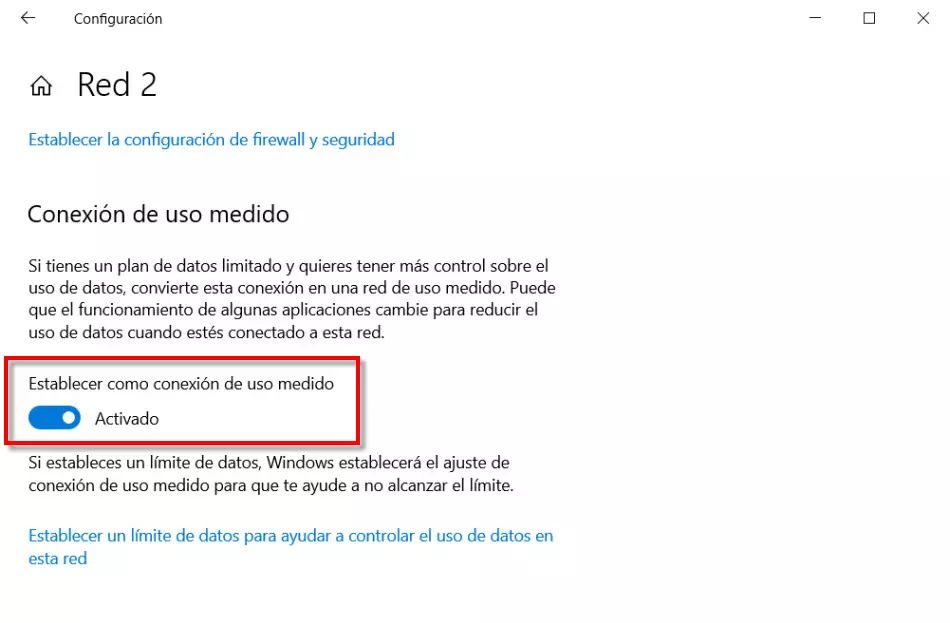
Finally, what we have to do is activate Set as metered connection and set the data limit that we want.