What is SpiderFoot and what does it offer us
SpiderFoot we can define it as a recognition tool that automatically queries more than 100 OSINT public data sources. Its purpose is to collect information about IP addresses, domain names, emails, names, and more. Its way of working is simple, we specify an objective, we choose the modules that we are going to use and then SpiderFoot will collect the data and see how they are related to each other.
We also have SpiderFoot HX which builds on the base of the open source version module to offer enhanced functionality. This version is paid and intended for professionals who want to automate OSINT, threat intelligence, asset discovery, or for security assessments. Among its main characteristics we have:
- No need installation as it is hosted and managed in the cloud. Simply by registering we will be ready to use it.
- Investigation individually using a single module or performing the multiple target scan quickly.
- OSINT monitoring in which we can run scans automatically daily, weekly, monthly or schedule them to our liking.
- Email notifications and Slack when changes occur or analysis ends.
- Integration with TOR that provides us that no scanned entity knows that we are the ones who performed the scan.
- The two-factor authentication (2FA) means that the security of our platform and OSINT investigations are secure.
- Custom scan profiles.
As for this tool, it has a free version and other paid versions. This is an approximate example of what we can with each version:
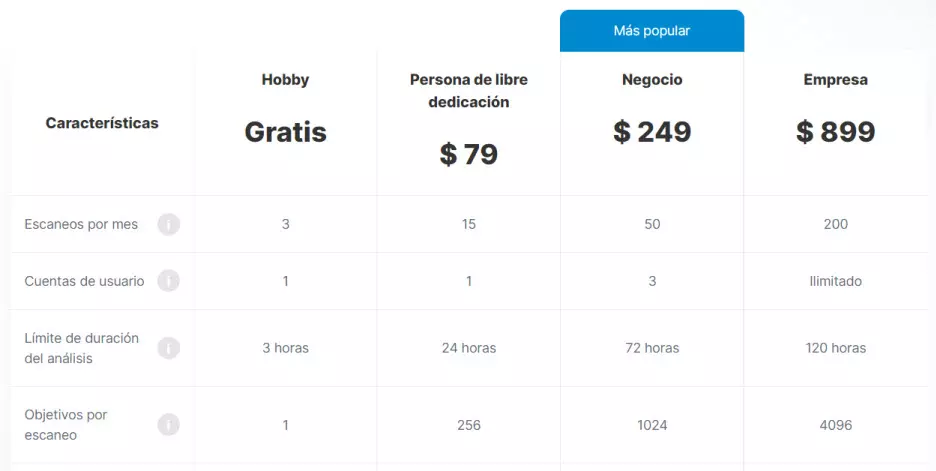
Here the one we are going to use is the free version to know everything about a user. In this case, it allows us 3 scans per month, the analysis duration limit is 1 hour and we have 1 target per scan.
Know everything about a user with SpiderFoot
The first thing we have to do is go to the website of the developer of the tool by clicking on this link. Then we will see a screen like this:
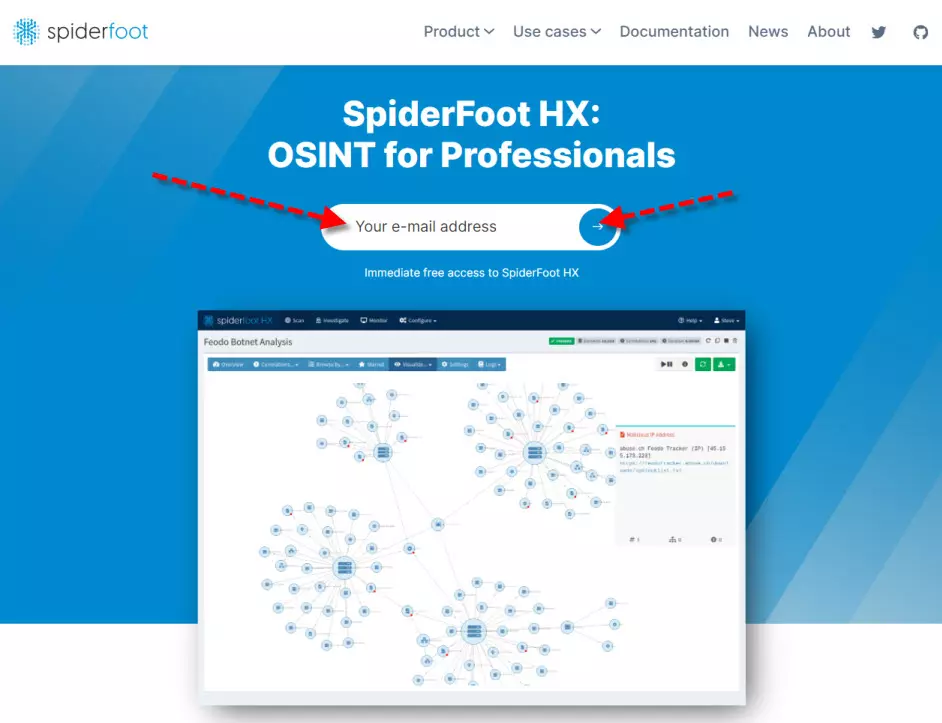
As we have already mentioned before, it is not necessary for us to perform any installation because it runs from the cloud. All we have to do is register by entering an e-mail and click on the blue button to start the process. Next, we go to our email account and copy the 6-digit code. If you don’t see anything, check your Spam folder. Here we enter the code, select any of the options in the fields and complete the registration by clicking on the button Proceed to create account.

Next, a screen will appear to finish creating the account.
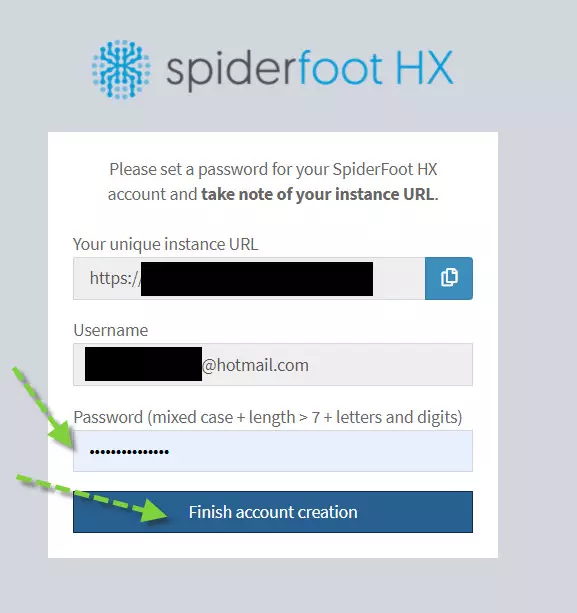
All you have to do is copy your unique URL, set a password and click on the button Finish account creation.
First steps with the tool
The first screen that we will see within SpiderFoot HX is the following:
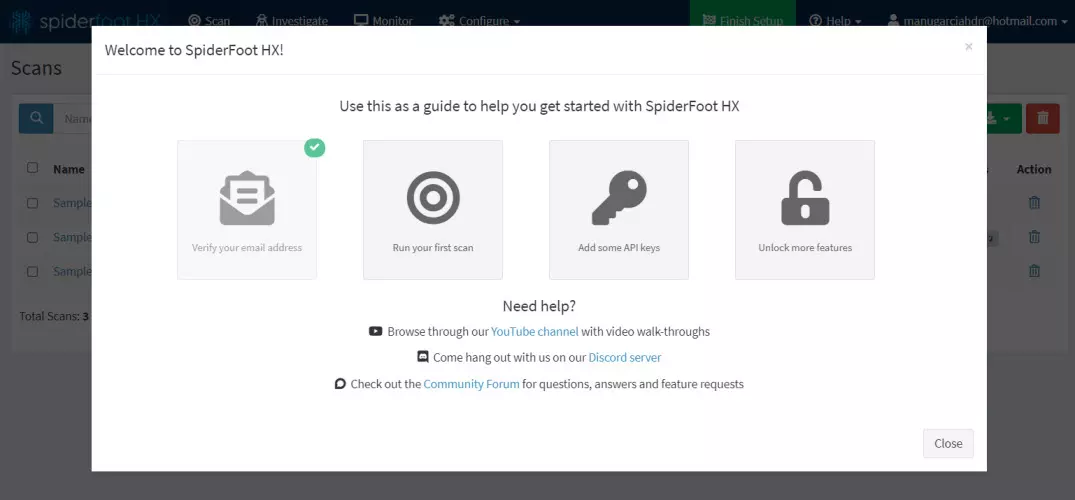
If we click on the button Run your first scan we could start our first scan. In this case we will click on Close and we are going to know a few things before.
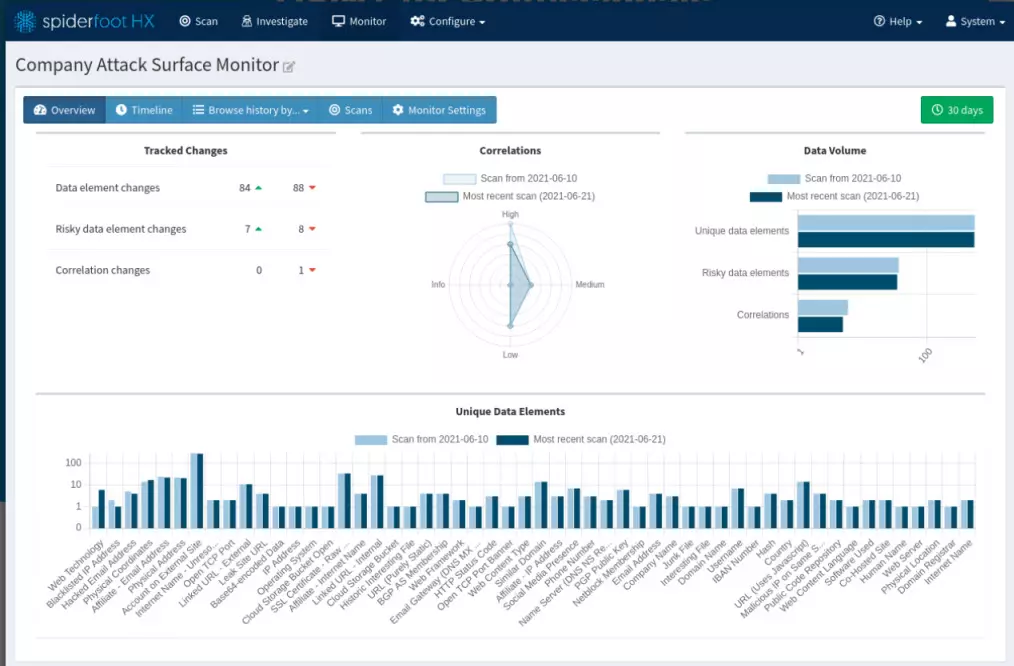
In the registration we were given a unique URL, if we use it and we are logged in, it will send us directly to the main screen. Otherwise, it will send us to a page where we must enter username and password. This would be the main screen of the tool:
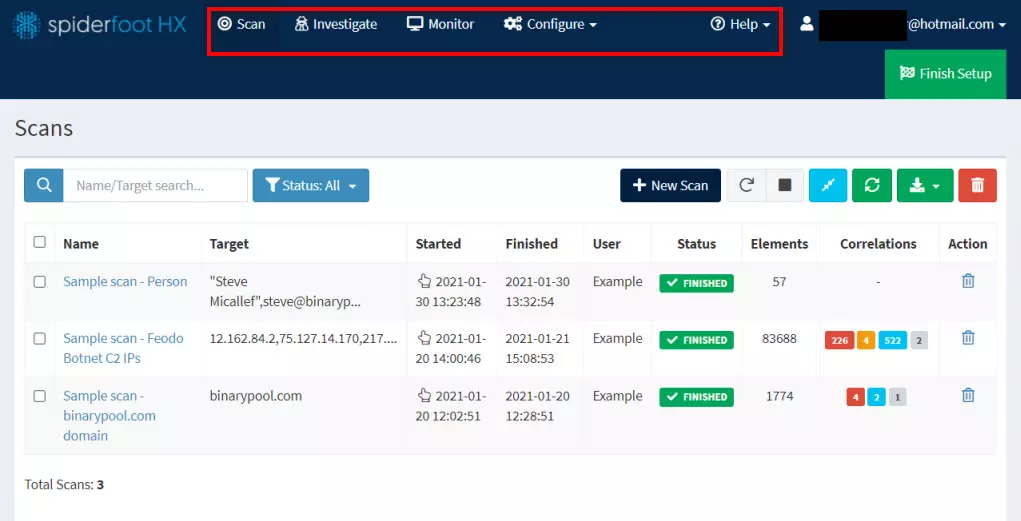
Above marked with a red box we have the main SpiderFoot menu:
- Scan: it is used to make a scan of what we ask for using a series of modules and options. This is the one that we are going to discuss further.
- Investigate: in this section we can specify an objective of our investigations and a graph is created that reflects it. It is also a payment function.
- Monitor: to automatically monitor when new data is found. Its underlying purpose is to be notified when a new OSINT is identified. This is a payment function.
- Configure: in this section we will be able to configure general options, modules, rule mapping and API key management. We also have a section called subscription in case we want to go to a paid version.
- Help: a complete help in video mode is coming. The first explains how to run a scan.
Find out everything about a user with SpiderFoot
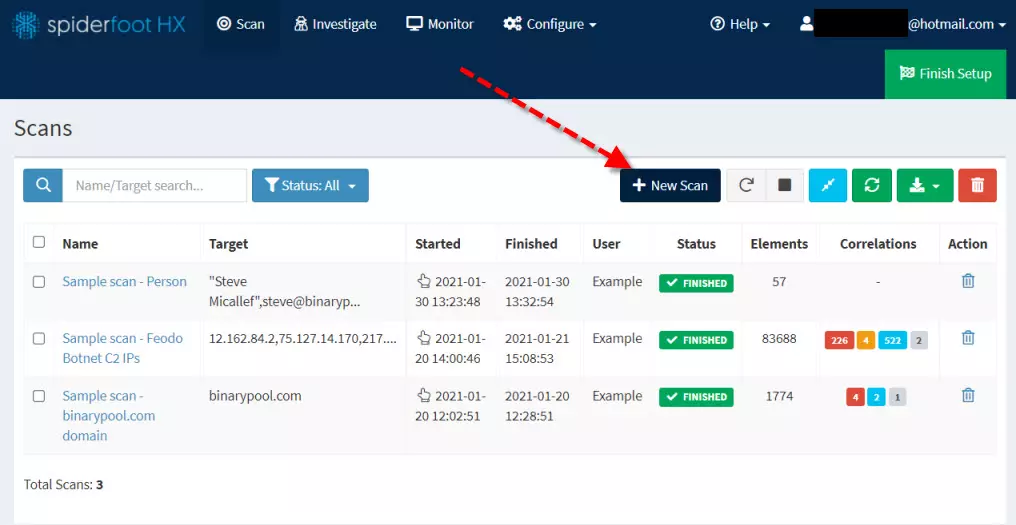
Now we are going to see the section in depth Scan and their way of working:
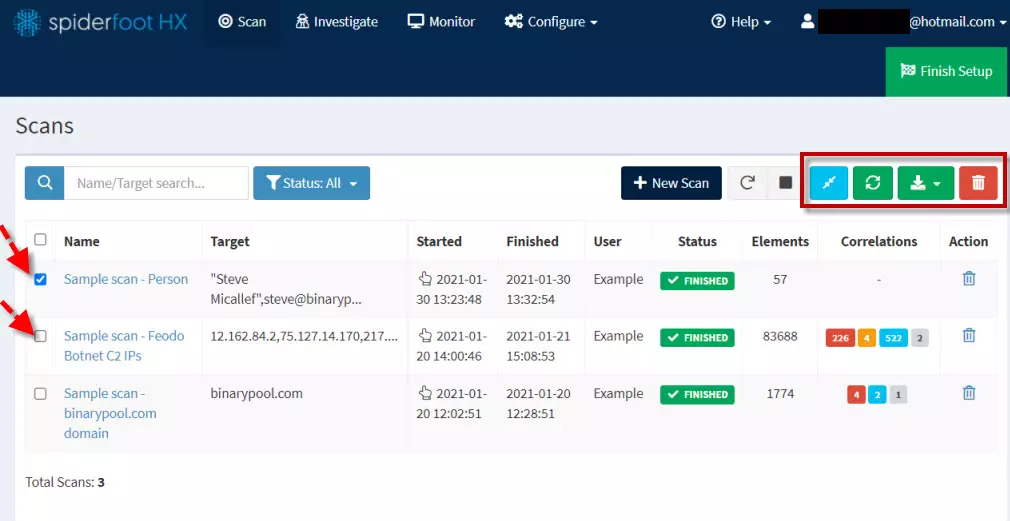
Here are all the scans that have been carried out in this case 3. If we want to do something with any of them we must activate the corresponding box. In the red box you have a series of buttons that will be very useful:
- Button with red trash icon: Used to delete a scan.
- Green icon with down arrow– Used to export the data in CSV, GEXF, and JSON format.
- The green icon with two circular arrows: used to refresh.
- Blue button with two diagonal arrows: to compare scans.
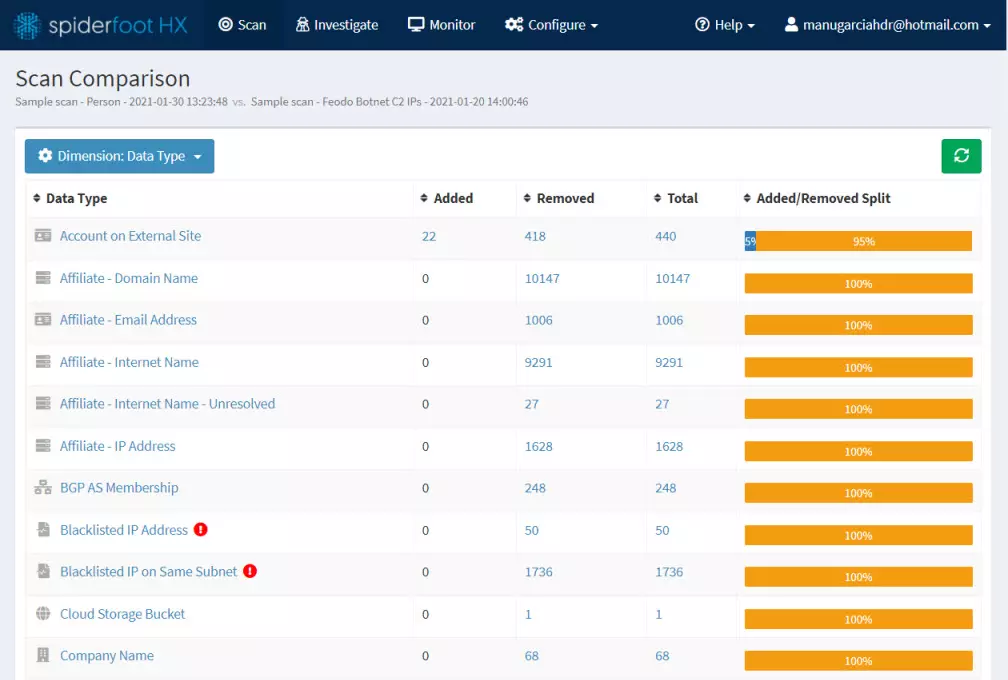
For example, if we activate two boxes and press the blue button to compare two scans, we obtain these results:
On the other hand, if we want to do a new scan to know everything about a user, domain or e-mail, we will click on the button New Scan.
Next, a screen would appear where you could configure the options that we want that scan to have. We give it a name, the target we want it to scan and then we change modules, options etc. if we think it is convenient.
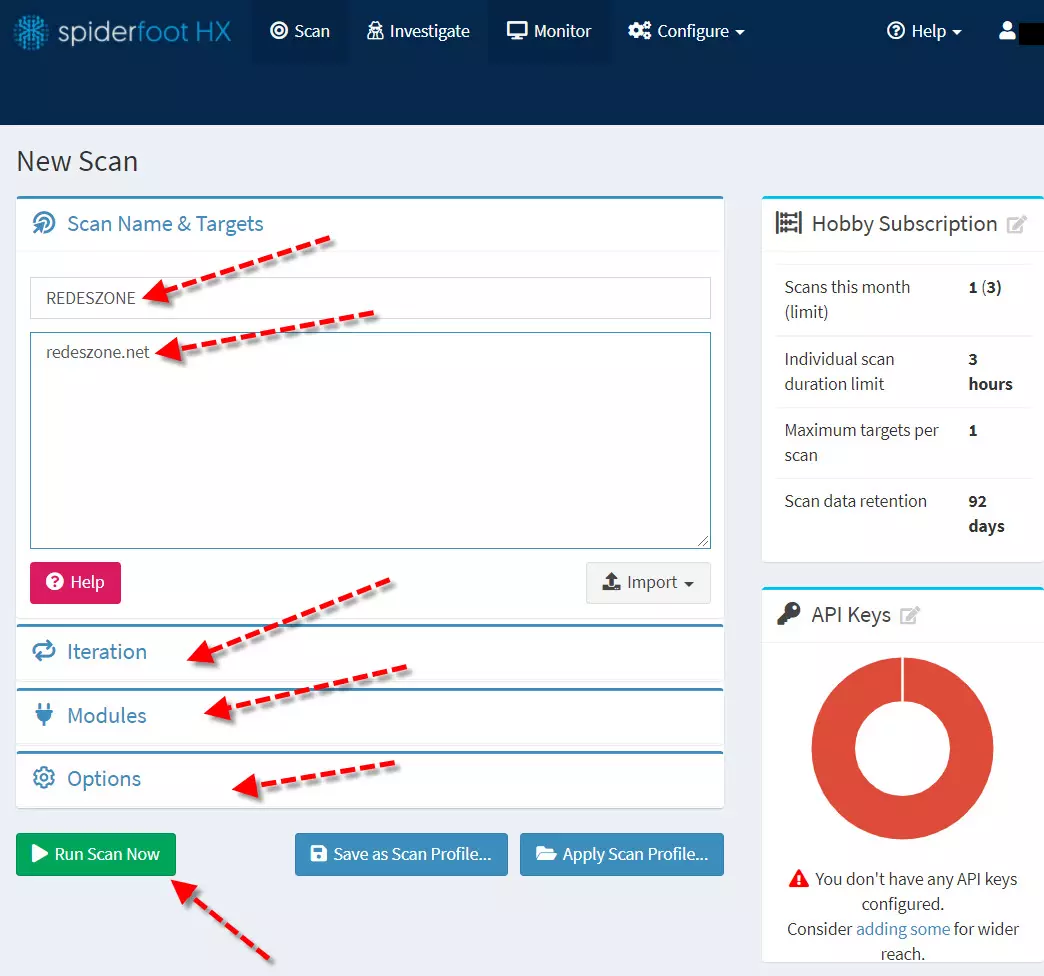
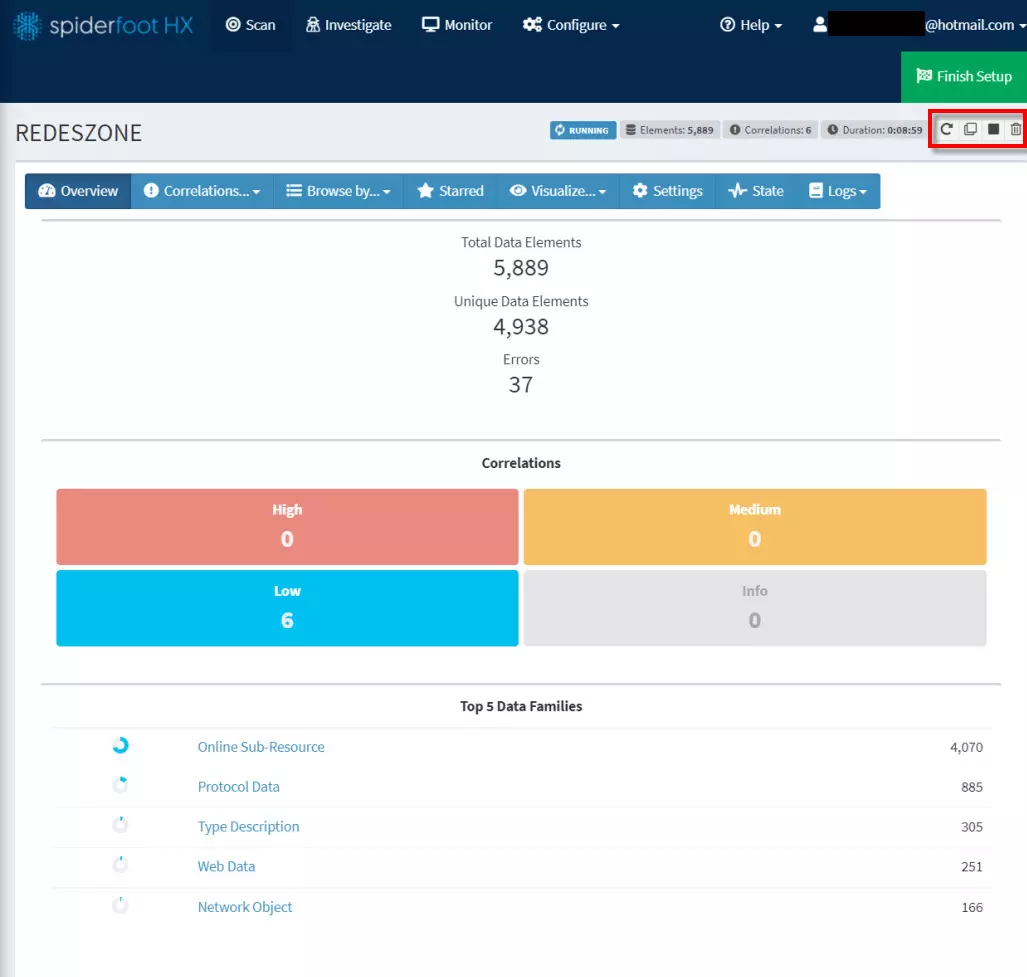
Then we click on Run Scan Now and starts scanning according to the guidelines we have assigned to you. The longer it is, the more accurate the results will be. In the red box you can control the scanning options, for example you could stop it if you think it is convenient.
Thanks to SpiderFoot we will be able to know everything about a user, domain, e-mail through this complete tool, if we acquire the paid version we will have many more possibilities and options to carry out OSINT to different people, and find out everything about those people.