Once we know the network that we are going to configure, we are going to show you step by step all the configuration that we will carry out.
DSR-1000AC router configuration
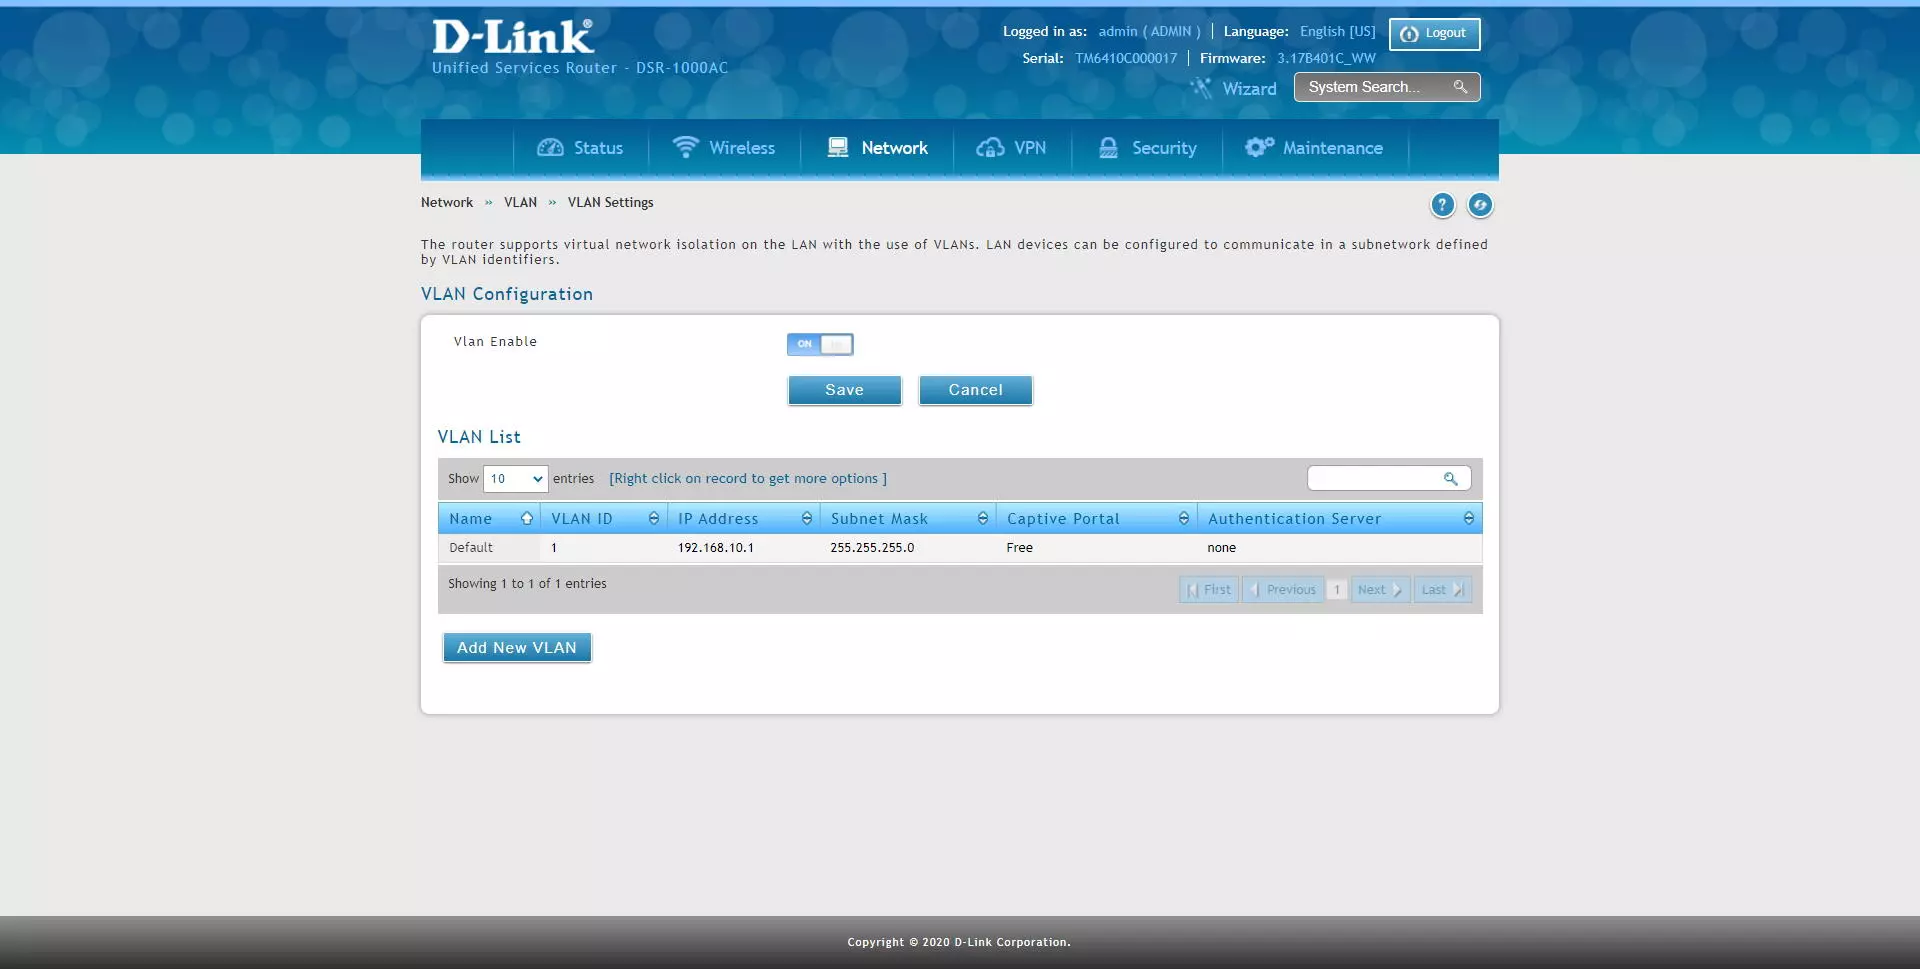
The first thing we have to do in the DSR-1000AC or in any other router with support for VLANs, is to configure the VLAN ID 1 that is created by default, in our case, the configuration of this VLAN ID 1 is with IP 192.168. 10.1 and with DHCP server activated, but we will modify it later.
Creating a new VLAN is as simple as clicking on «Add New VLAN», assigning a VLAN ID and also configuring the subnet, both the IP address of the default gateway (the router) and the DHCP server with the DHCP range that we need. We can also configure the DNS servers and other options that, in principle, we do not need.
Once we have configured it, we click on “Save” and the changes will be applied automatically.
The process to configure VLAN ID 1 is exactly the same as VLAN ID 100, we enter the list of VLANs and modify the configuration with whatever we want, finally, we click on «Save» to save the changes.
To create the VLAN ID 200 with the corresponding subnet and DHCP server, the process is exactly the same as the one we have done previously with VLAN 100, therefore, we repeat the same process, but putting a different VLAN ID and also a different subnet.
Once we have everything configured, we must define a port as “trunk” that has all the VLANs configured, in this case 1, 100 and 200. We can do this on any port, then this port that we have configured as “Trunk” we must connect it to the switch where we have all the VLANs configured as “tagged”.
Of course, the router also allows us to configure the VLANs as “access”, to connect devices via cable without problems to this VLAN.
Once we have configured it, we can configure the managed switch with all the VLANs previously created.
DGS-1100-08Pv2 switch configuration
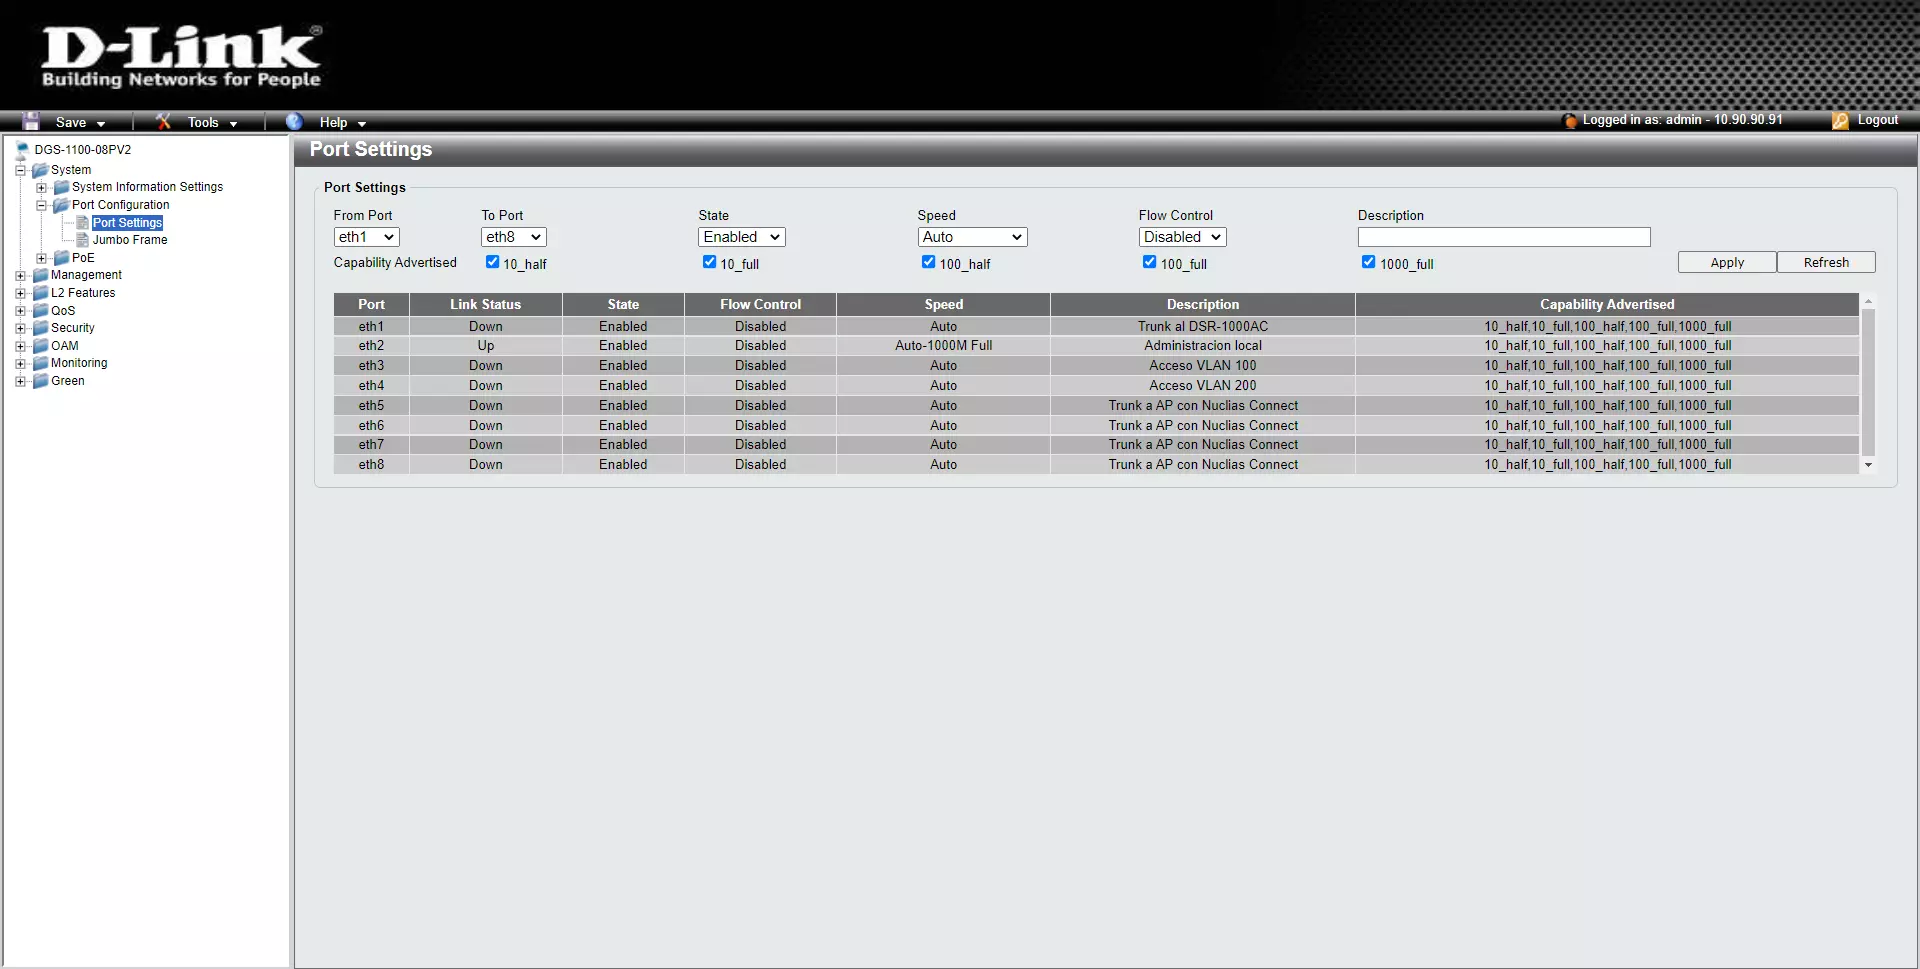
The first thing we have to do in the DGS-1100-08PV2 switch is enter its configuration web interface through IP 10.90.90.90, then our recommendation is that you configure the ports with a description according to the configuration that we are going to To make. In our case, the configuration will be the following:
- Port 1: we will connect this port to the DSR-1000AC router that we have configured as “trunk”.
- Port 2: local administration, keeps VLAN 1.
- Port 3 and 4: we configure VLAN 100 and 200 respectively in access mode, with the VLAN “untagged” if we want, we have left it unconfigured.
- Ports 5 to 8: we configure these ports as trunk, exactly the same as port 1, it is where we will connect the manageable APs.
Next, you can see the configuration made:
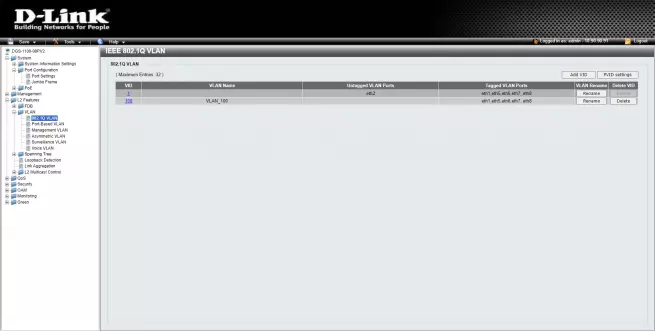
In the VLANs section is where we will have to configure everything, by default VLAN 1 is as “untagged” in each and every one of the ports. We must remove it from the ports where we are going to configure other VLANs as untagged. It is not possible to have two VLANs as untagged on the same physical port. We only leave port 2 as untagged which is where we are managing this switch.
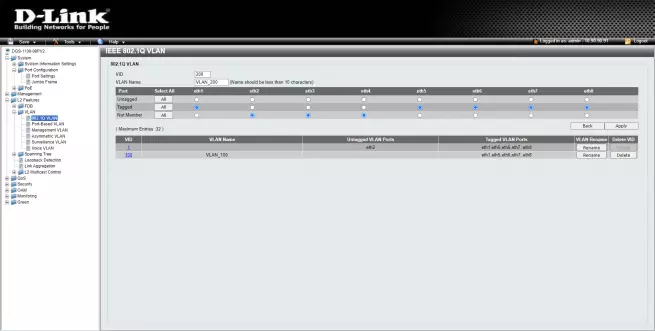
We create VLAN 100, optionally put a descriptive name, and define as tagged on ports 1 (towards the router) and 5-8 (towards the PoE APs), we will also configure port 3 as untagged if we want, just like we have said previously.
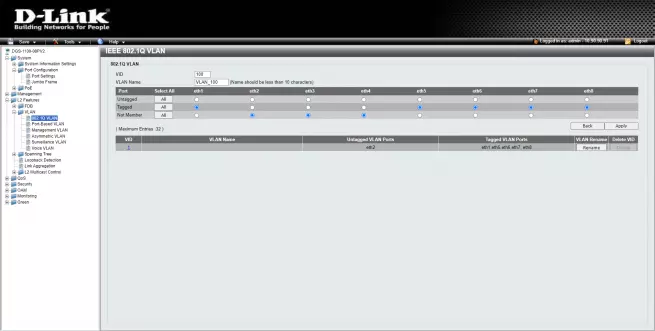
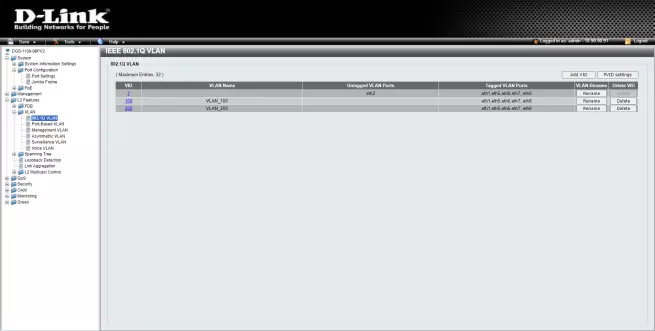
We create VLAN 200, optionally put a descriptive name, and define as tagged in ports 1 (towards the router) and 5-8 (towards the PoE APs), we will also configure port 4 as untagged if we want. This configuration is exactly the same as the previous one.
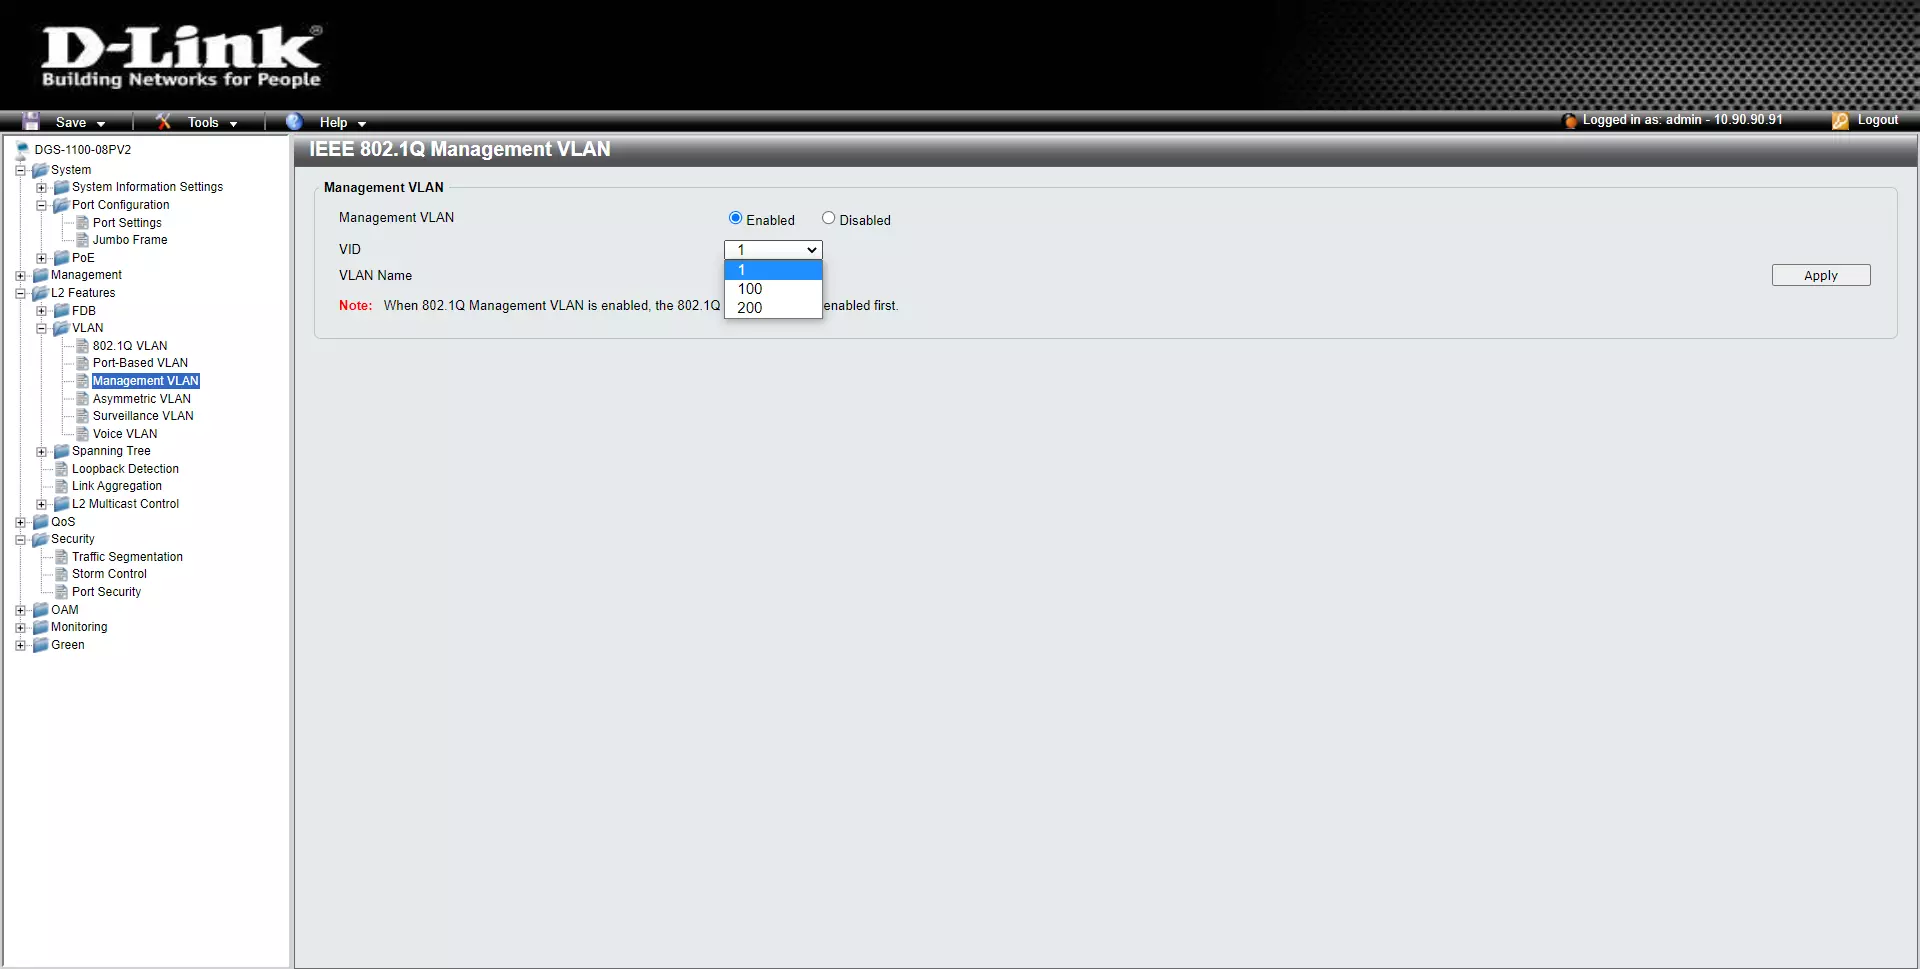
A very important detail if we want to manage this switch through the network is to configure the management VLAN, by default it is deactivated, but if we activate it it will be in VLAN ID 1, we can leave it like this, in this way, the switch will take an IP address in the range 192.168.1.0/24 thanks to the DSR-1000AC router.
Once we have successfully configured the switch, now we have to configure the WiFi access points.
Configure WiFi access points with Nuclias Connect
In RedesZone we have explained on several occasions how to register a WiFi access point with Nuclias Connect, assuming that you already have the access points registered correctly, we are going to carry out the specific configuration with the VLANs that we have created. The management VLAN will be VLAN 1, which is already registered by default.
The only thing we will have to do is add VLAN 100 and VLAN 200 in the same way, defining the physical ports always as “TAG”, and in the SSID we will configure it as “UNTAG”, either in the 2.4GHz band as in 5GHz if our AP is dual band.
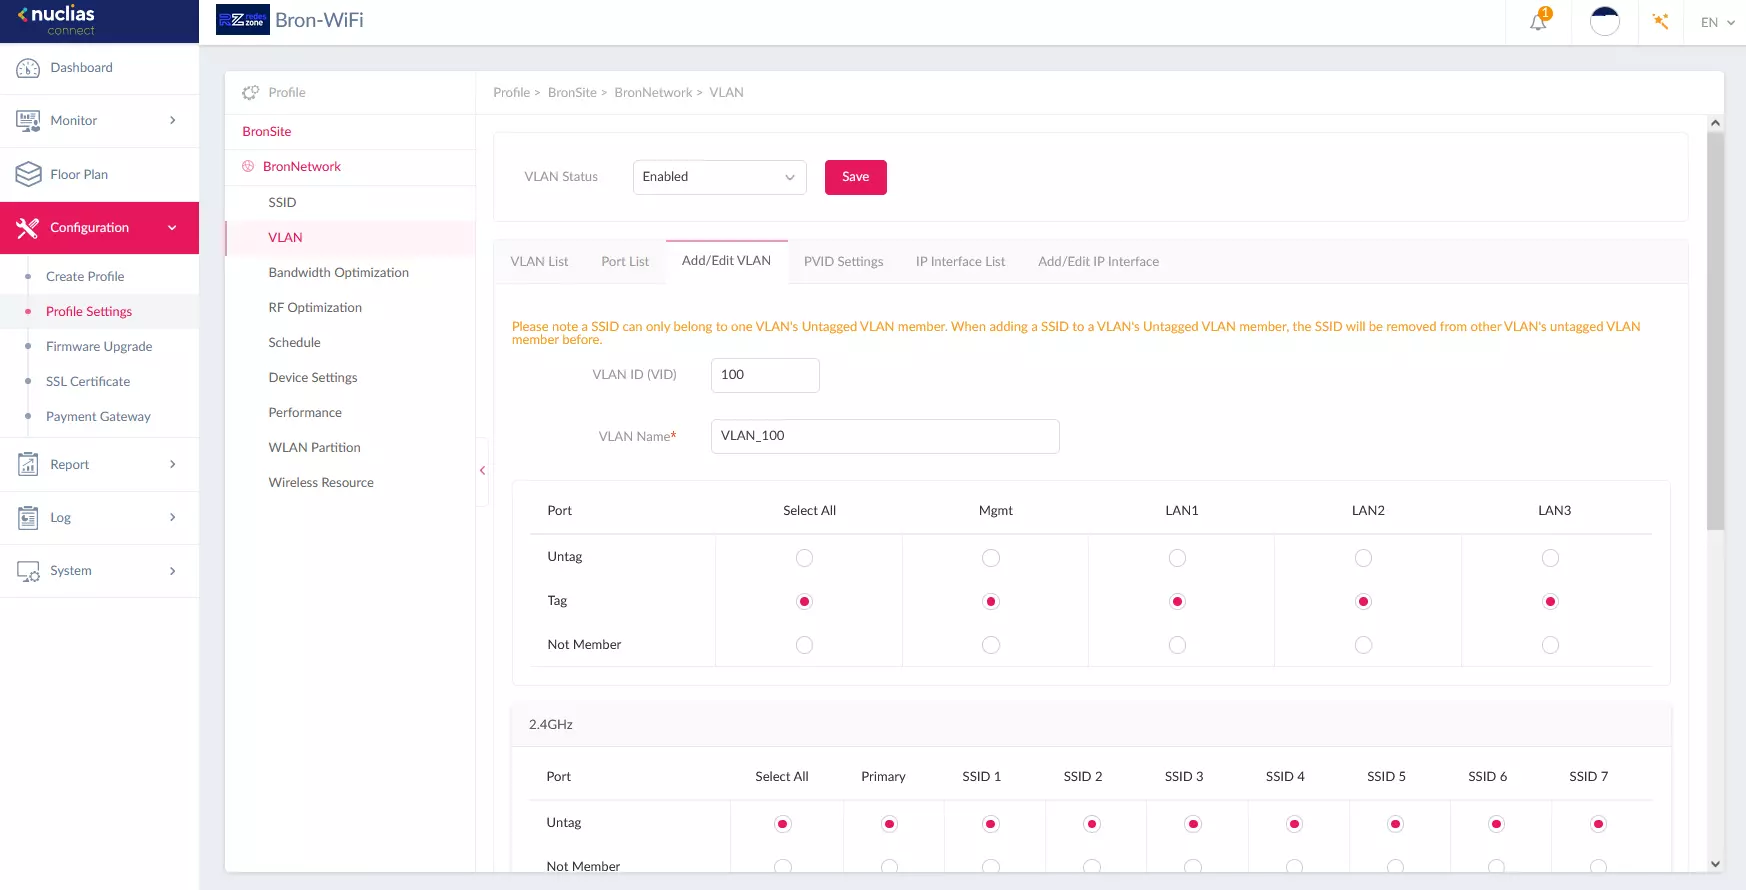
Once we have registered the two VLANs, we are going to go to the “PVID Settings” section to check that everything is correct. The PVID that we should see in the part of «Mgmt», LAN 1, 2 and 3 is VLAN ID 1.
The configuration of the different frequency bands must be: Primary VLAN 100, SSID 1 as VLAN 200. In this way, we will be creating an SSID for each VLAN that we must register later, this is created directly in the “SSID” menu .

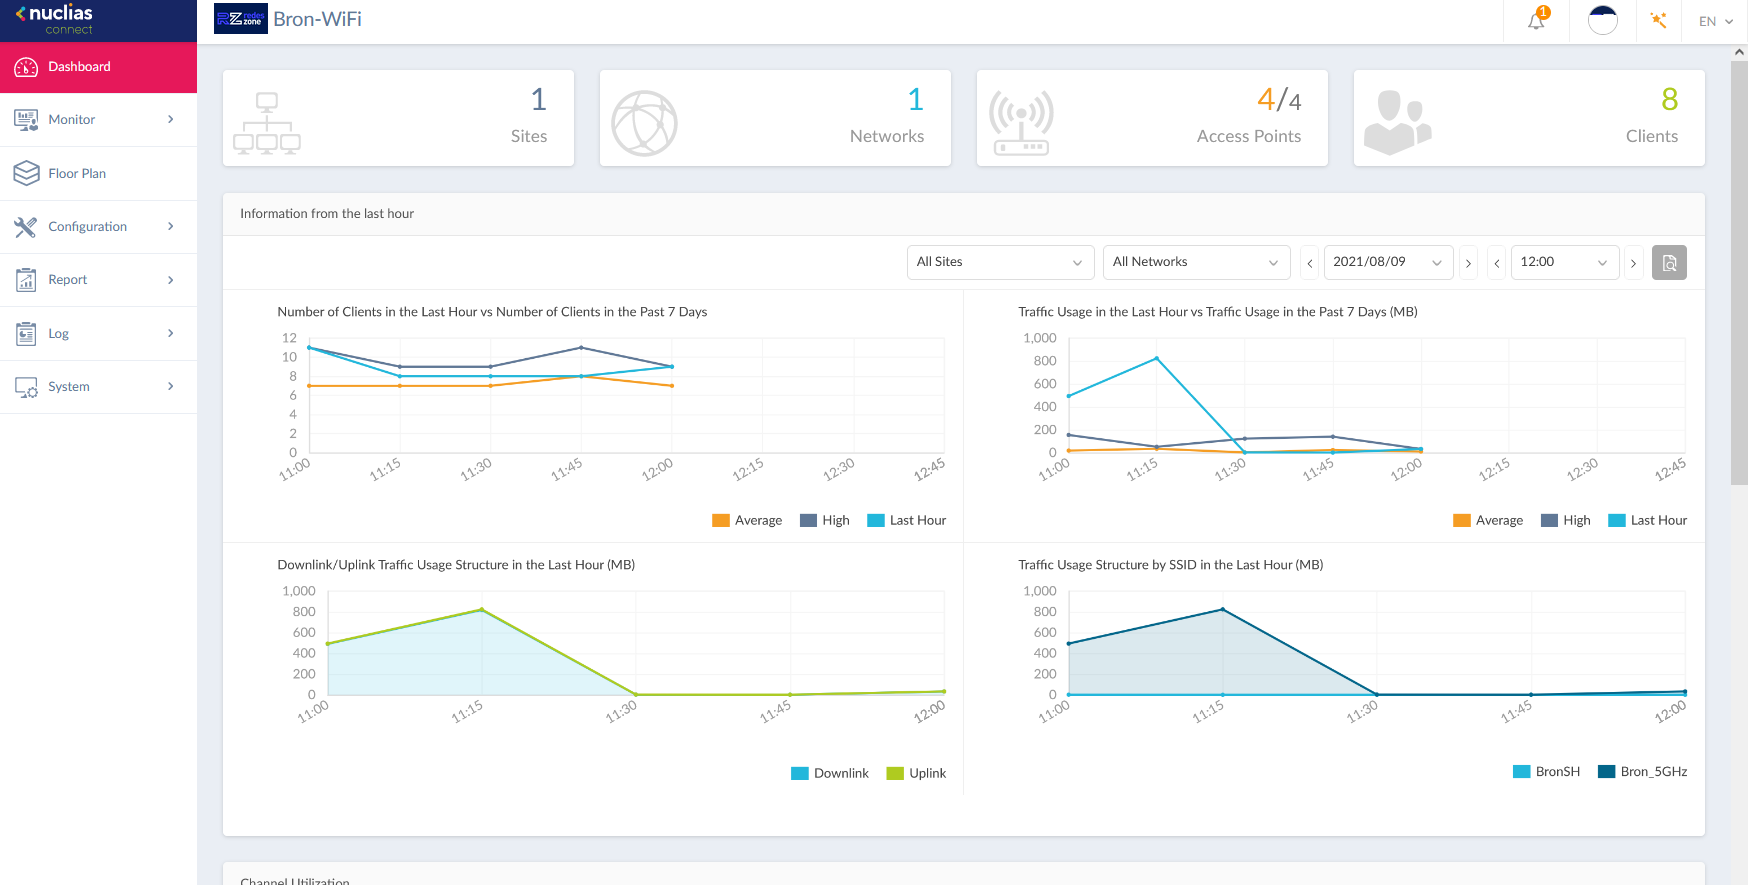
Once everything is configured, in the main menu we should see something like the following, with a «Site», a «Network», different WiFi access points and different WiFi clients currently connected.
In the following video you can see all the configuration options of Nuclias Connect in video:
As you have seen, setting up a professional WiFi network with VLAN segmentation is quite simple, although we must take into account the most important part: a router that supports VLANs in the LAN, otherwise, we will not be able to configure the switch and the APs. with VLANs because the router will not be able to segment the traffic correctly. We hope that with this guide you can set up a professional WiFi and wired network at home without spending too much money, the most expensive thing is the router that supports VLANs, the rest of the equipment will depend on its technical characteristics.