- They allow you to preview the email that the recipient is going to receive.
- You can add images.
- Supports HTML tags.
- Compatible with rich text.
- It allows attached files in the form of a link that allows them to be downloaded or viewed.
- It can be applied to multiple recipients.
- The created templates can be updated or modified.
- They can be shared with other users or groups.
When using them we must bear in mind that it is only possible to create a copy of the body of the message. All the additional information that we want to add such as the recipient, the files that are attached, the subject to be dealt with … must always be added manually, once we have added the personalized template. In addition, it is possible to add new information before sending the template as part of the message.
How to create templates from Outlook
The Microsoft email manager allows us to create an email template in two different ways. One through a built-in function called “Quick Items”, another through the “My Templates” plug-in, or also from the “Save As” option. Next, we will see how to create them through these methods.
Save as template
To begin, we open Outlook and in its start window we click on the New email button or use the keyboard shortcut “Ctrl + Shift + M” directly. This will open a new window where we will write the content that we want within the body of the message that the template that we are going to create will incorporate.
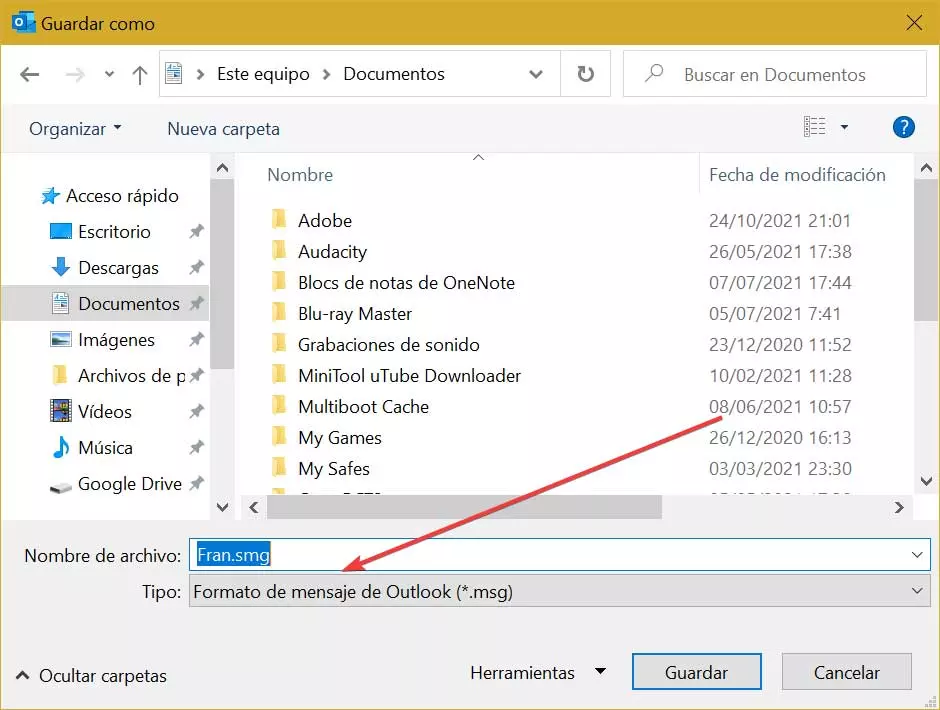
Once finished, in the message window, we click on the “File” tab and choose the “Save as” option. Later, within the Save As dialog box, we display the tab in the «Type» section and select the option to “Outlook Template (* .oft)”. In the “Name” section of the file we write the name that we are going to give to our template and finally we click on the Save button and choose the desired location.
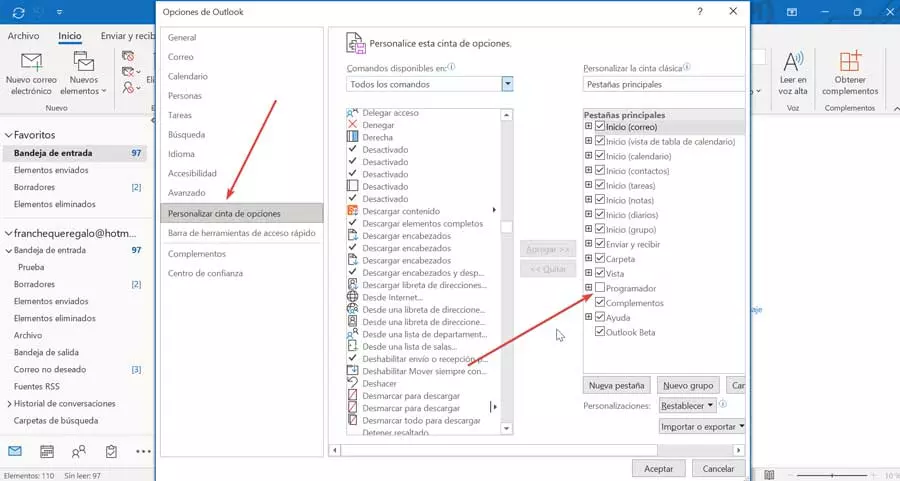
To use it we must have activate the Developer tab on the Outlook toolbar. If we don’t have it, click on the “File” and “Options” tab. In the new window, click on “Customize ribbon” and mark the “Programmer” box that we find on the right side. Finally, we press Ok.
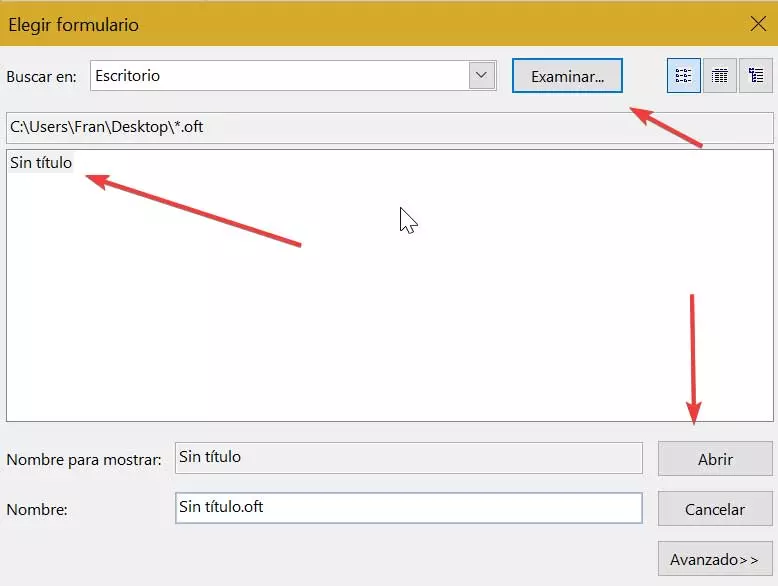
Next, we can click on the Developer tab and then click on «Choose form».
In the new window we display the “Search in” tab and place the path where we have saved the template. This will make it appear in the window, so all you have to do is select it and click on the “Open” button.
Use Quick Items
The first thing we are going to do is open Outlook, and in its main menu, click on «New email». Next, we write the content of what we want our template to be to later highlight it. Now we go to the upper toolbar and click on the tab «Quick elements» and we click with the mouse to open its drop-down menu. Here we select the option of “Save selection to quick items gallery”.
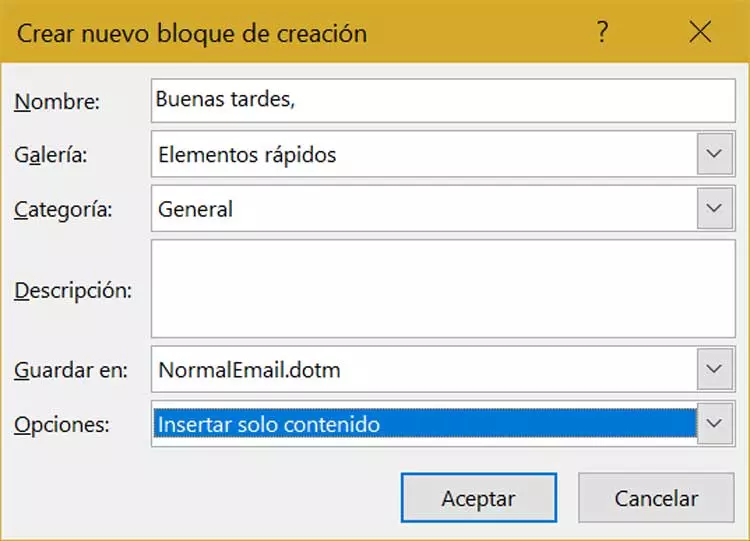
This will open a new window for us to make a new building block, where we must complete the fields that appear. On the one hand, in the “Name” section we indicate the unique identifier that the Quick Items function will use for each entry, listing them in alphabetical order. In the “Gallery” section, it will be used to save the content in specific galleries, while, in Category, they are like subfolders that belong to the gallery, so we must stick exclusively to “General”.
Later we find the “Description” section where we can indicate a comment that helps us describe the template. In “Save as”, we must make sure that the template is available in NormalEmail.dotm so that we can use it in future emails. Finally, in the “Options” section, it will help us to determine how to insert each entry. Once finished, click on Accept so that all changes are saved.
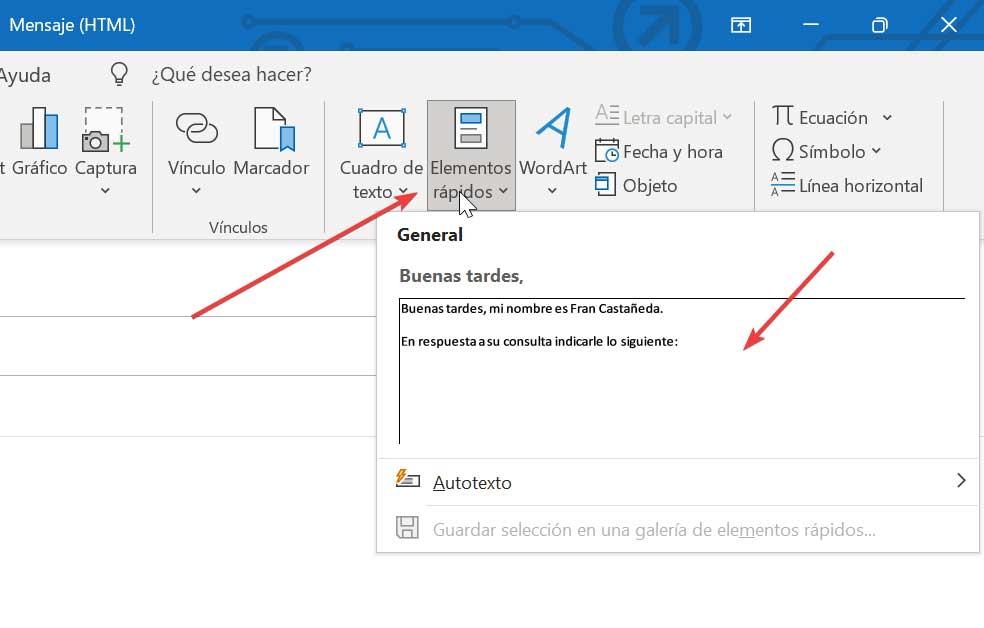
Once we have our new template created, we will be able to use it. To do this, we go to the part of the email where we want the template to appear. Next, click on the “Quick elements” tab and we click on the template that we are going to use.
Carry it out from My templates
Another possibility to carry out this process is to use the “My Templates” add-in that we will also find by default in Outlook. This add-on will allow us to create templates that can be added to the messages by selecting the function of «Insert template». In it we can include both text and images and later save them in the location we want. In this way it will be possible to store phrases that we use frequently and add it to our emails when we consider it necessary.
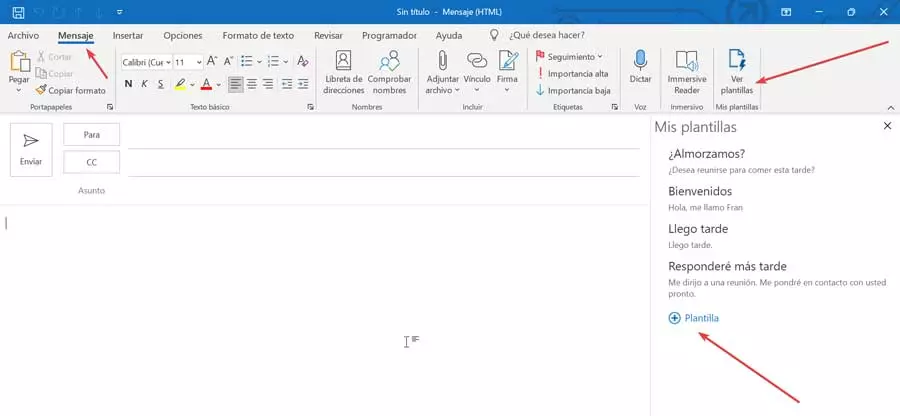
To begin, we open Outlook and click on the “New email” button. In the new window, click on the “Messages” tab and in the “My templates” section, click on «See templates». This will make a new column appear on the right of the screen where we will click on the button «(+) Template».
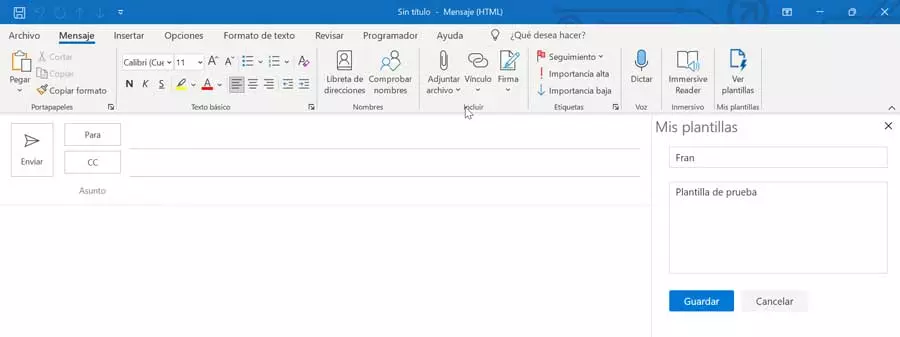
Now in the empty boxes, we must provide a new title to be able to differentiate it later and a new body that will be the one added to an email every time we use it. Once finished, click on the “Save” button to ensure that we always have it available later.
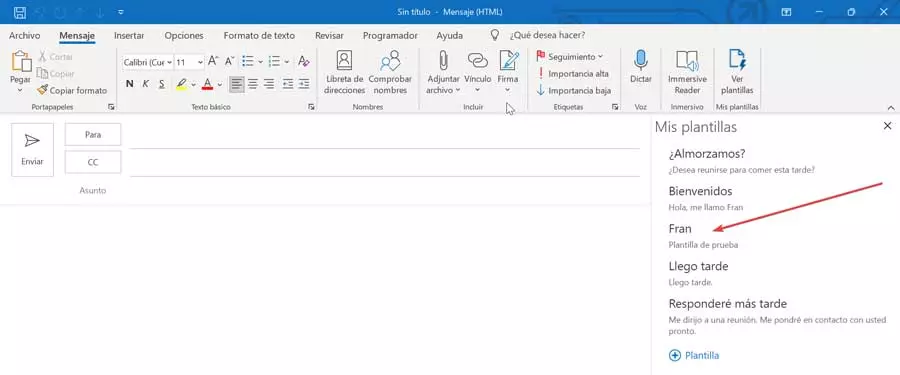
As we can see, the new template created is added to the existing ones, so it will only be necessary to click on it when we need to use it in an email.
