Networked computers are very common
It is very common to have devices that connect to the network. This will allow them to be used from other connected equipment, be it computers, mobile phones, tablets or any other. We have more and more devices of what is known as the Internet of Things. More devices that are part of our day to day.
We can connect these devices both through cable and wireless networks. The operation is similar and the errors that may appear may also be present. Sometimes a bad configuration would affect the operation of the equipment. Also a problem with the hardware, the software we use to manage it or that we are even victims of a malware attack.
In any case, having computers connected to the network is very common today and therefore the ideal is that they work correctly. We must make sure that when we connect, it will show us the information as it should, they will allow us to interact with others devices and, ultimately, serve the function they have.
But of course, as we have mentioned, sometimes they work badly and there are problems. These errors can be due to different reasons. Sometimes we could not use them normally. But it may also be the case that Error message that it launches is actually of no use to us and we want to prevent it from appearing.
Could not connect network drives
This is a message that may appear in Windows 10, the most used operating system on desktop computers, when we start it and it does not recognize a network drive or for some reason it can not reconnect it. It is usually some disk, for example, that you are trying to mount and it is not available at the moment. This could affect the performance of the computer and even when using some programs that may be installed there. Hence, it launches that alert.
It is very common for example if we have a NAS server installed. We use it as an additional drive to store files and it acts as if it were just another hard drive. However, in case it is disconnected or if there is an error, the operating system will send us a message saying that all network drives could not be connected. This alerts us that there is something wrong so we can take action.
Normally, the operating system has mapped that drive. Thus, automatically, every time we start it, it will recognize it and it will be available. However, there could be a variety of problems that prevent the system from being able to use that unit at any given time. It could even happen that we voluntarily have it turned off.
What to do so that this message does not appear? If we go back to the case we gave as an example, it could happen that we do not want that NAS server to be always on. We simply decide to connect it when we are going to use it and the rest of the time we have it turned off. But of course, Windows will try to connect it automatically. If it is off, it will launch a message indicating that all network units could not be connected. Luckily this is easy to remove.
How to avoid the error message on network drives
Preventing this annoying message from appearing in Windows 10 is very simple. It is possible that we are not interested in having this information thrown at us every time we start the computer and we do not have the NAS server connected, for example.
For this we are going to use the Windows’ register. We can access it through different methods, but the simplest is to simply press the Windows + R key combination and type regedit. We can also go to Start and write it there and open it. This is the Registry Editor, from where we can carry out some changes in the operating system.
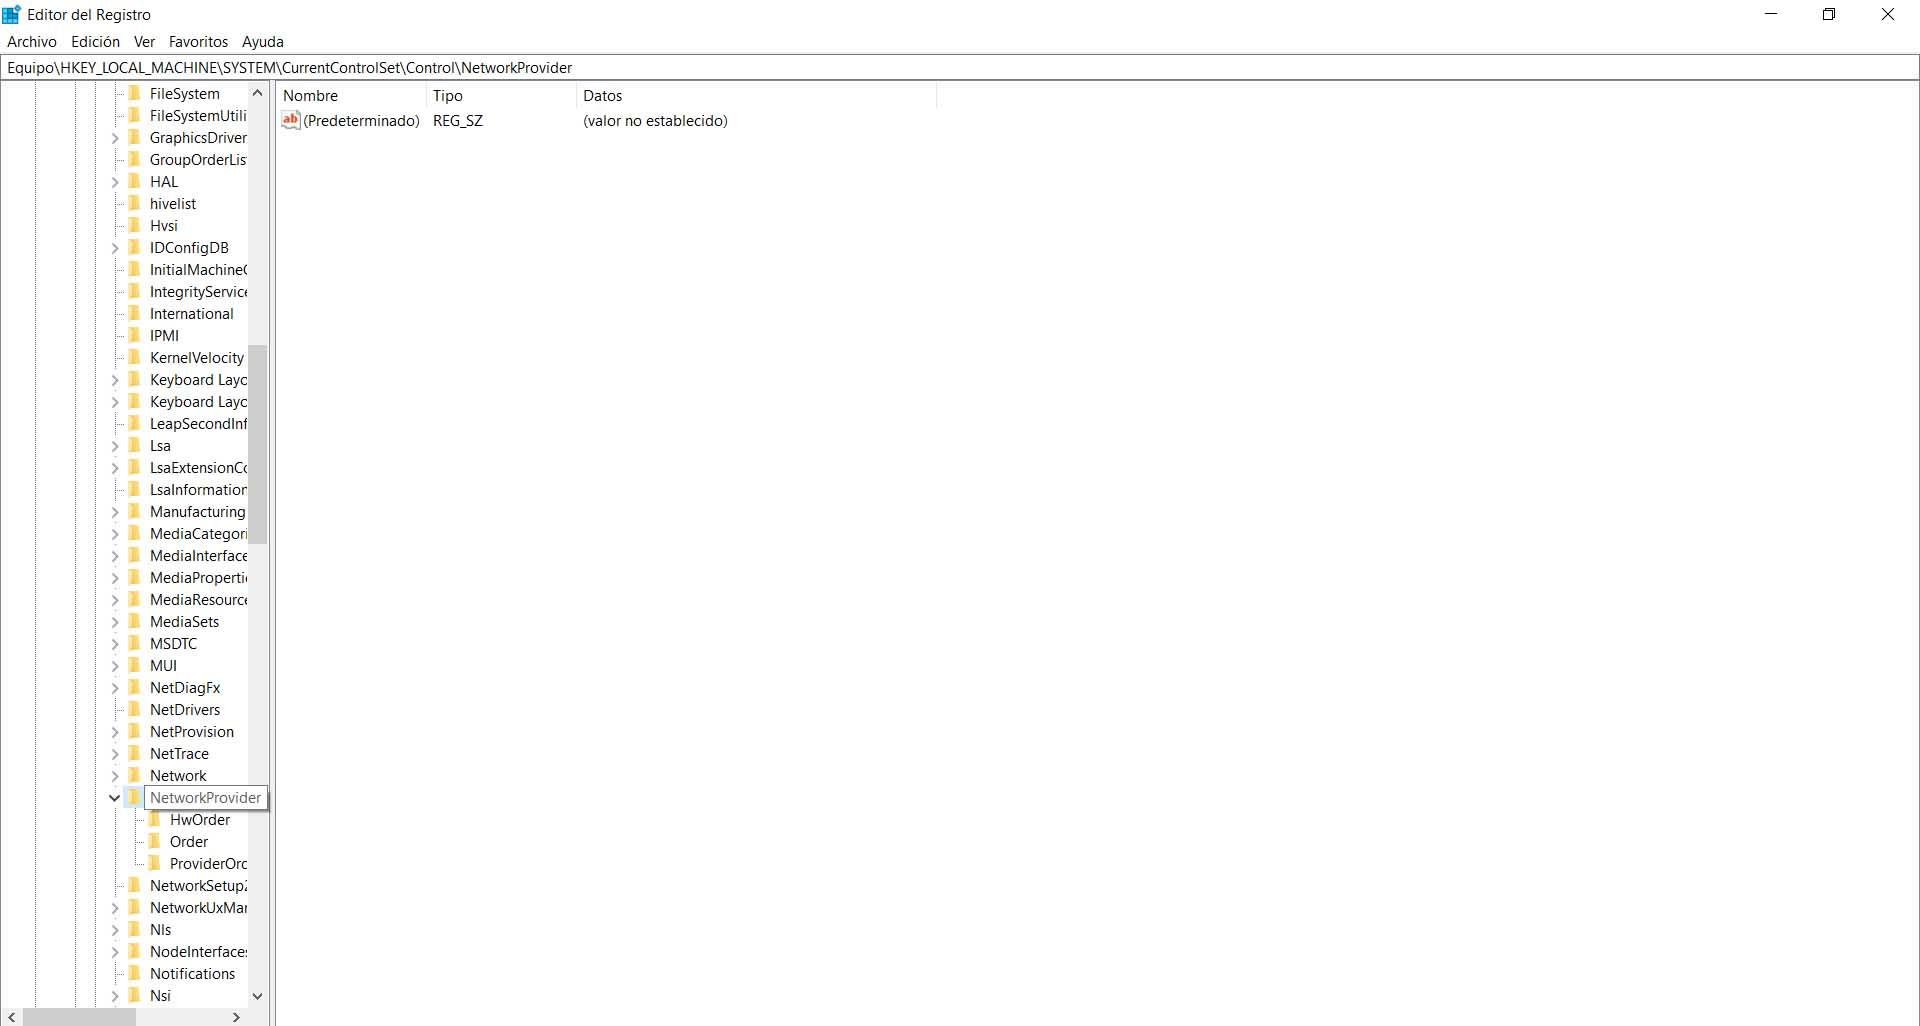
Once we are here, we must go to the path EquipoHKEY_LOCAL_MACHINESYSTEMCurrentControlSetControlNetworkProvider. You just have to navigate from the left panel until you get to that point.
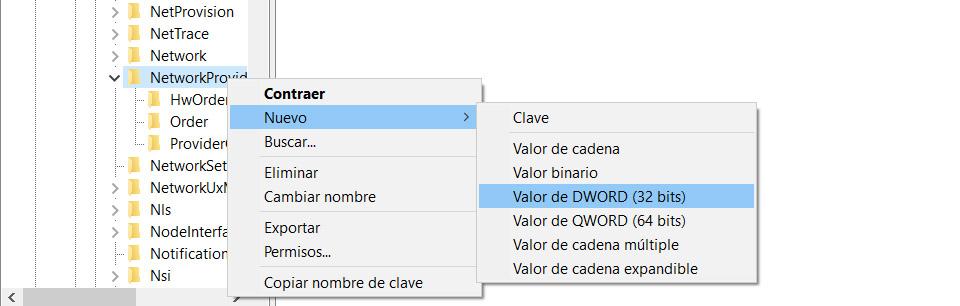
When we are here we are going to create a new registry value. To do this, click on NetworkProvider with the second mouse button, we give New and DWORD Value (32bits).
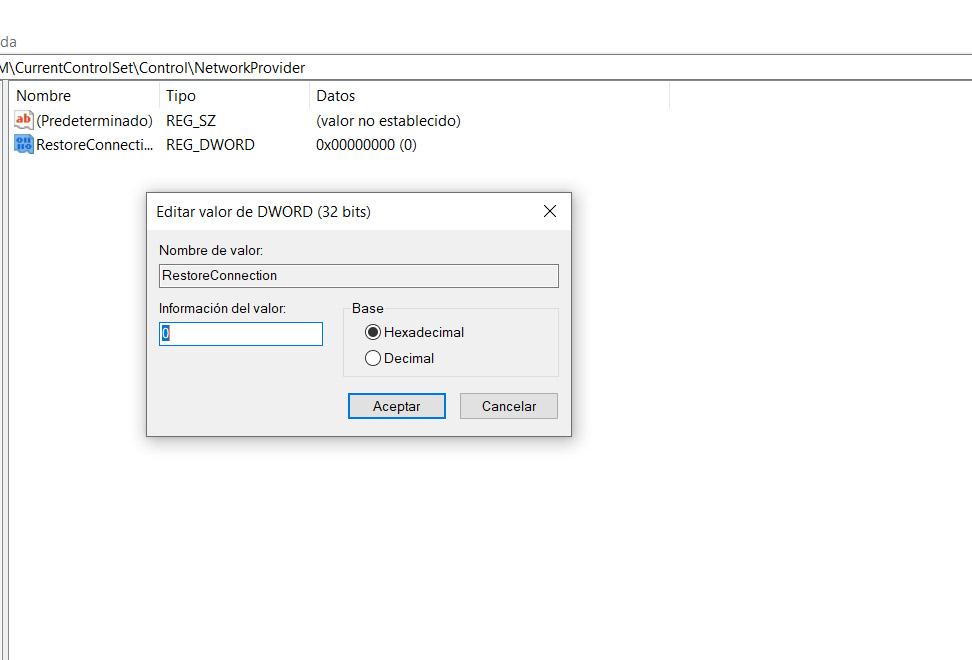
The name that we have to give to this record that we are creating is that of RestoreConnection. We do not need to give it any value other than the one that comes (0). If we double-click on it, we can confirm that it is properly configured, as it appears in the image below.
And you don’t have to do anything else. We just have to close the Windows Registry and that’s it. If we restart the computer, we will see that this message no longer appears. It will no longer tell us that could not connect all network drives.
If at some point we want to reverse the situation and alert us to it again, we simply have to follow the steps again. As we do with any change in the Windows Registry, we would have to go back to the exact path and delete that registry that we created.
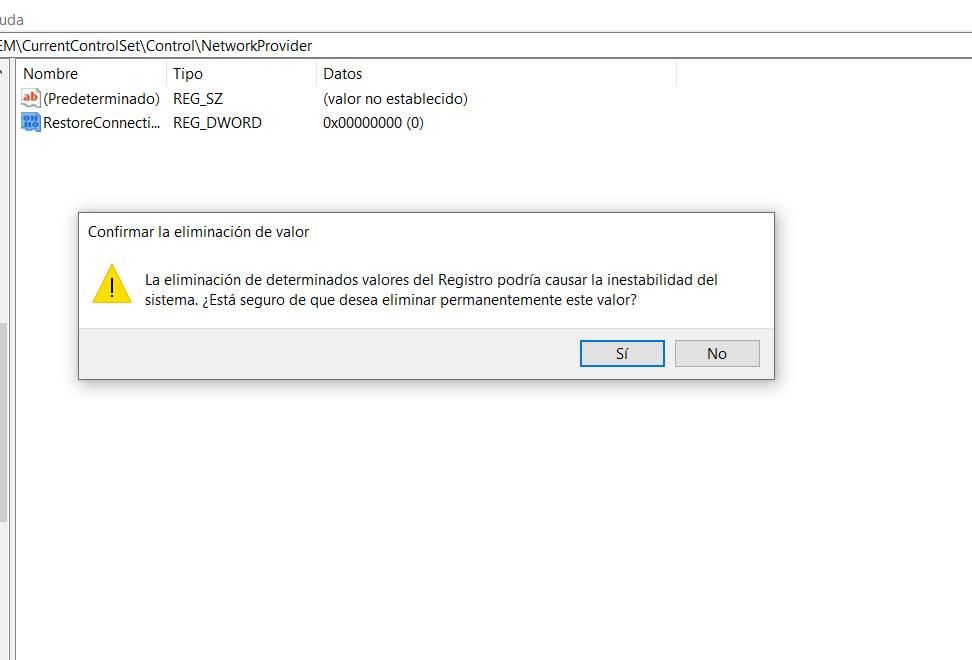
A dialog box as we can see in the image above and we would only have to accept. That record is automatically deleted and everything returns to the previous state. We can restart the computer and see that the changes have taken effect.
In short, if the message that Windows shows us when it cannot connect to a network drive is annoying, we can avoid it. You have to follow the steps we have mentioned and modify the Windows Registry. It is a simple and fast process. In a short time we will have changed it.