Did you know that the file ‘/etc/hosts‘ is also present in Windows? This file, which many people associate with Linux and Unix and Unix-like operating systems, is actually an old traveling companion that allows you to map hostnames to IP addresses.
The hosts file or ‘/etc/hosts’ (although that is not the only location it can be found, since that depends on the operating system) was originally called HOSTS.TXT and was originally made available to through file sharing by the Stanford Research Institute for members of the ARPANET, the first computer network created on behalf of the United States Department of Defense. Basically what it contained and still contains are hostnames with their IP addresses to resolve domain names.
The network, due to its constant growth, became too large for manual maintenance, so between 1983 and 1984 DNS (Domain Name System) appeared to provide a framework for instant and dynamic resolution of host names.
Although DNS has greatly reduced the use of the hosts file, it is still useful for tasks such as redirect local domains to test pages, block internet content and prevent contact with activation servers in certain application hacking processes.
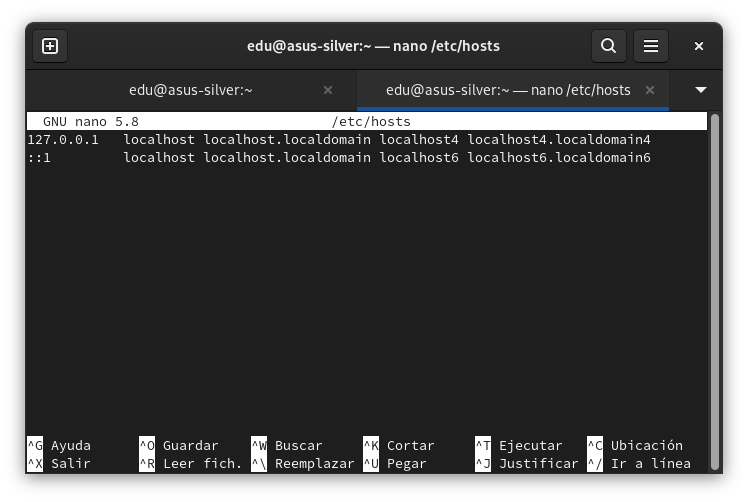
‘/etc/hosts’ file on Linux
However, the hosts file also can be an attack vector for malware. In this circumstance, the malware could modify the hosts file so that it redirects traffic to servers that host malicious or unwanted content. For example, it is possible that the infected user ends up seeing strange advertisements or mining some cryptocurrency through their web browser, these scenarios being apparently more likely than seeing their computer unusable (although that can never be ruled out). Malicious actors often prefer their malware to go unnoticed in order to avoid detection.
Despite its inconveniences, the hosts file can be used, in addition to what has already been mentioned, to configure a small test environment within a local area network (LAN). That is the scenario that we are going to cover in this post to teach how to configure the hosts file in Windows in a basic way.
Where is the ‘/etc/hosts’ file located on Windows?
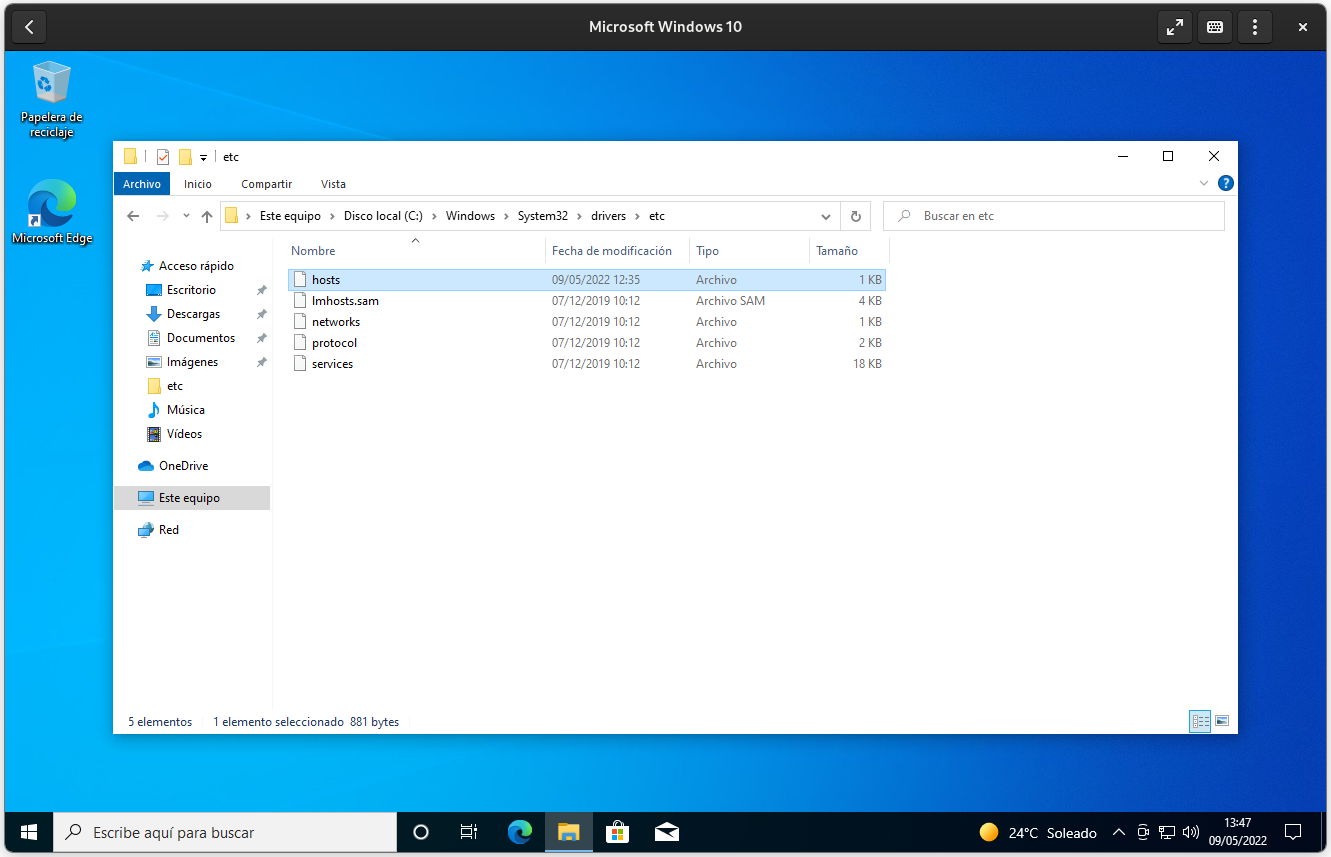
Without further delay, the path to follow with Windows Explorer is as follows: “This computer” > C: > Windows > System32 > drivers > etc > hosts (the last element of the path is the file).
The path without the file is as follows if you want copy and paste your location in the file explorer (first you have to press ‘Ctrl+L‘):
C:\Windows\System32\drivers\etc
And this is the specific location of the file ‘/etc/hosts’ in Windows (remember that the Microsoft system doesn’t care about the address of the ‘/’ and ‘\’ slashes):
C:\Windows\System32\drivers\etc\hosts
How to modify the hosts file in Windows
The successive versions of Windows have been introducing limitations in the critical directories of the system in order to prevent the user from modifying or deleting them (at least with the default configuration of the operating system). If you want to modify any content within System32, you need to use the System Administrator account, since the common one, despite being defined as administrator by default, does not have permissions to write there.
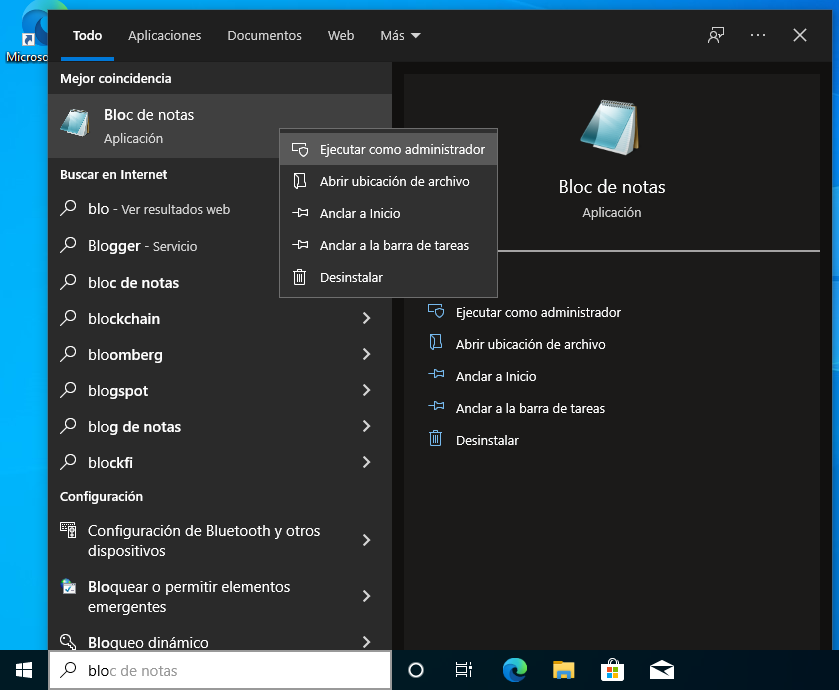
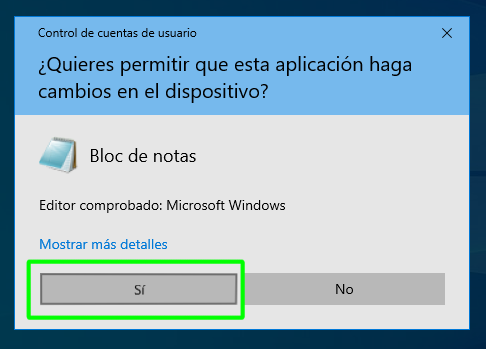
To modify the hosts file in Windows, you must first open Notepad as Administrator. To do this, open the Start menu of the system, write “Notepad” in the search engine, click with the right mouse button on the entry of the application that we want to open and select “Run as administrator”. The system will ask the user if they want the app to make changes to the device, to which they obviously have to say yes.
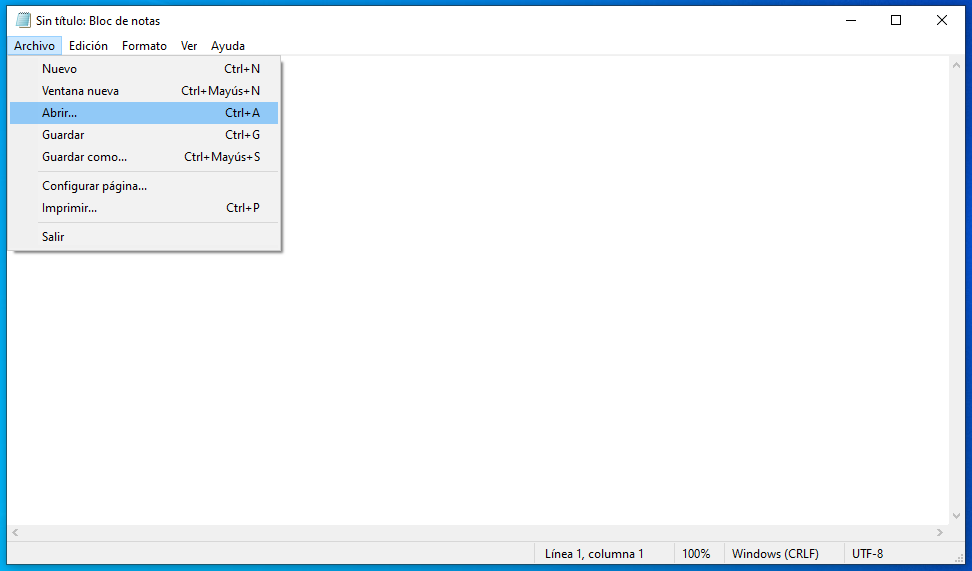
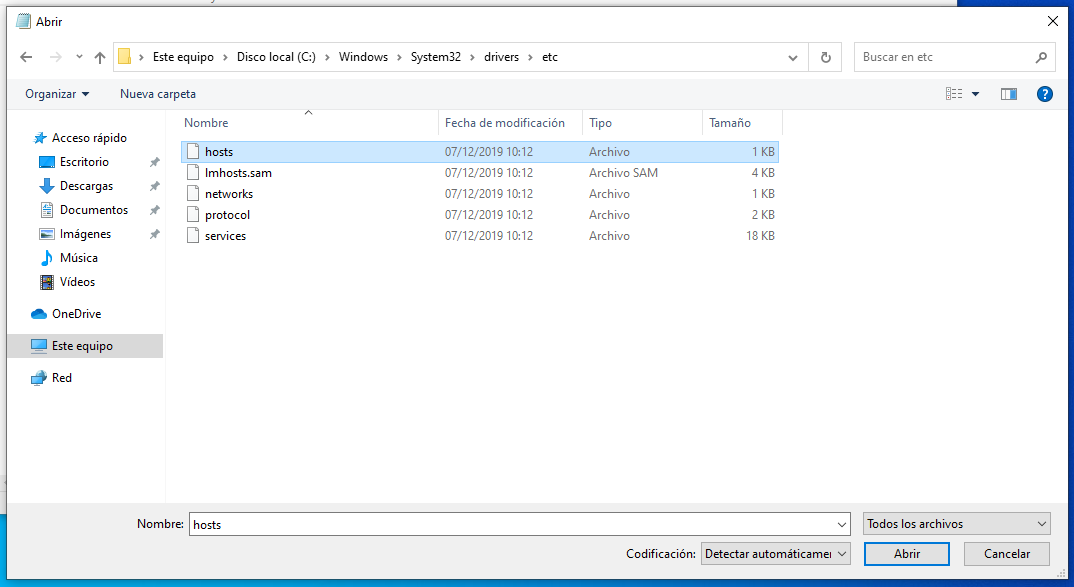
Once you open Notepad as Administrator, go to the menu File > Open to proceed to open, worth the redundancy, the Windows hosts files.
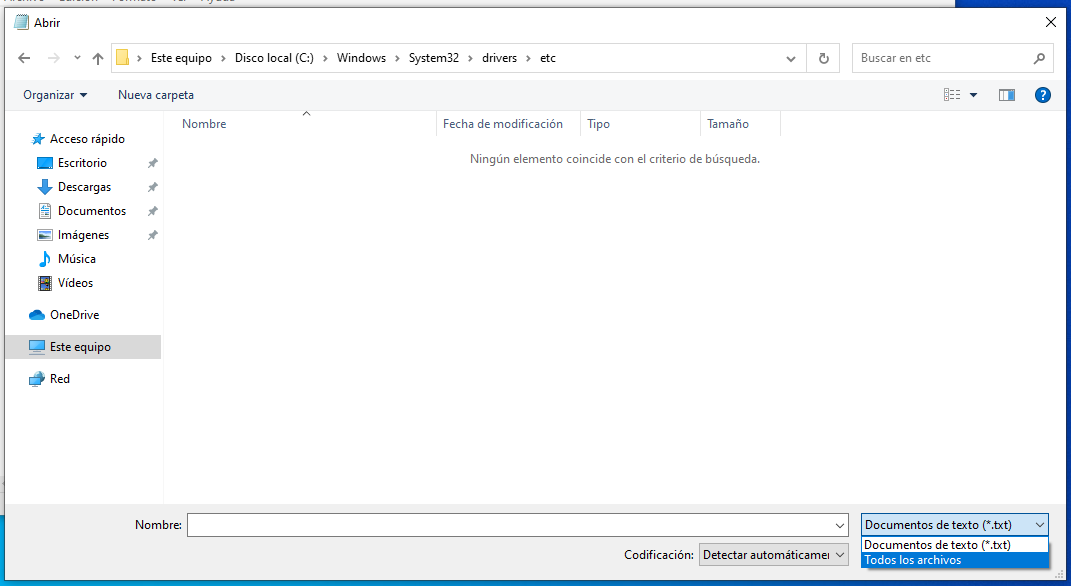
We remember that the path to find the hosts file in Windows is “This computer” > C: > Windows > System32 > drivers > etc. However, when you get there you find that the folder is apparently blank because Notepad can’t find any files with a ‘.txt’ extension. This is solved by selecting “All the files” in the dropdown at the bottom right corner of the dialog.
Alternatively, once the “Open” dialog is open in Notepad, you can press the “ctrl+L” key combination and then copy and paste the following into the address path. This will result in the direct opening of the file:
C:\Windows\System32\drivers\etc\hosts
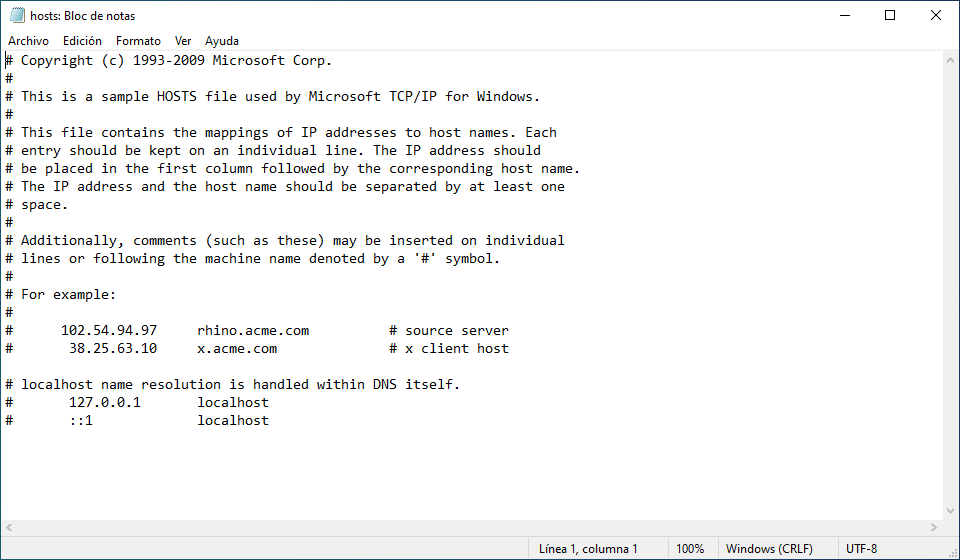
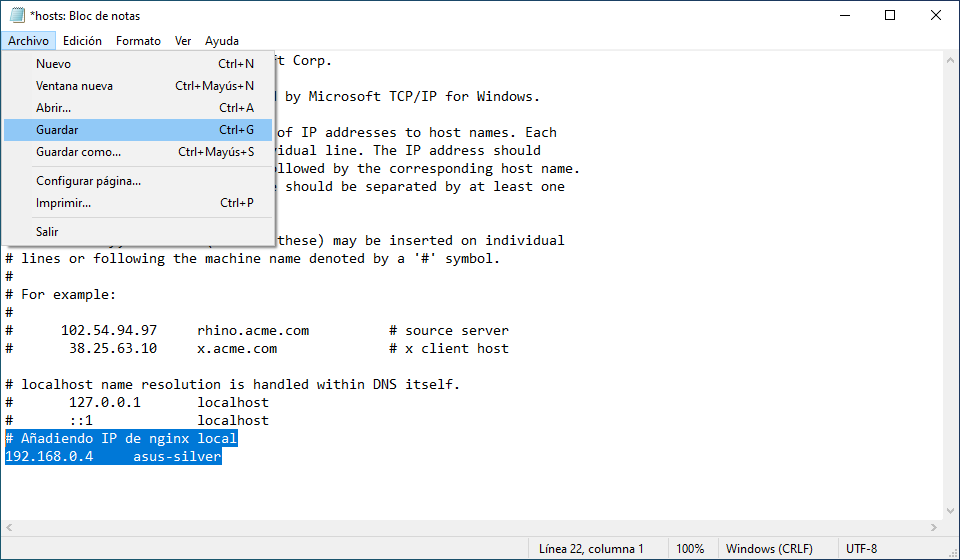
Once the file is open of hosts on WindowsThis is what it looks like in the app:
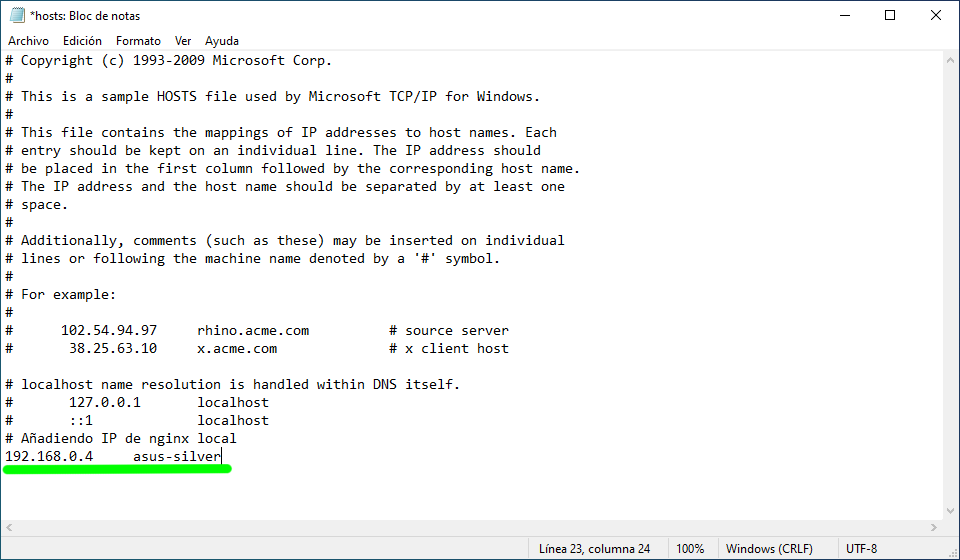
In this case we have a Windows 10 instance running in a GNOME Boxes virtual machine, so we have introduced the Host machine IP next to hostname (asus-silver). All lines that have a hash (#) in front of them are comments and therefore are ignored at the configuration level, but they can be useful to introduce descriptions of what the file or a specific line does.
After introducing the pertinent modifications in the file, it is saved as usual, going to the File menu and clicking on Save.
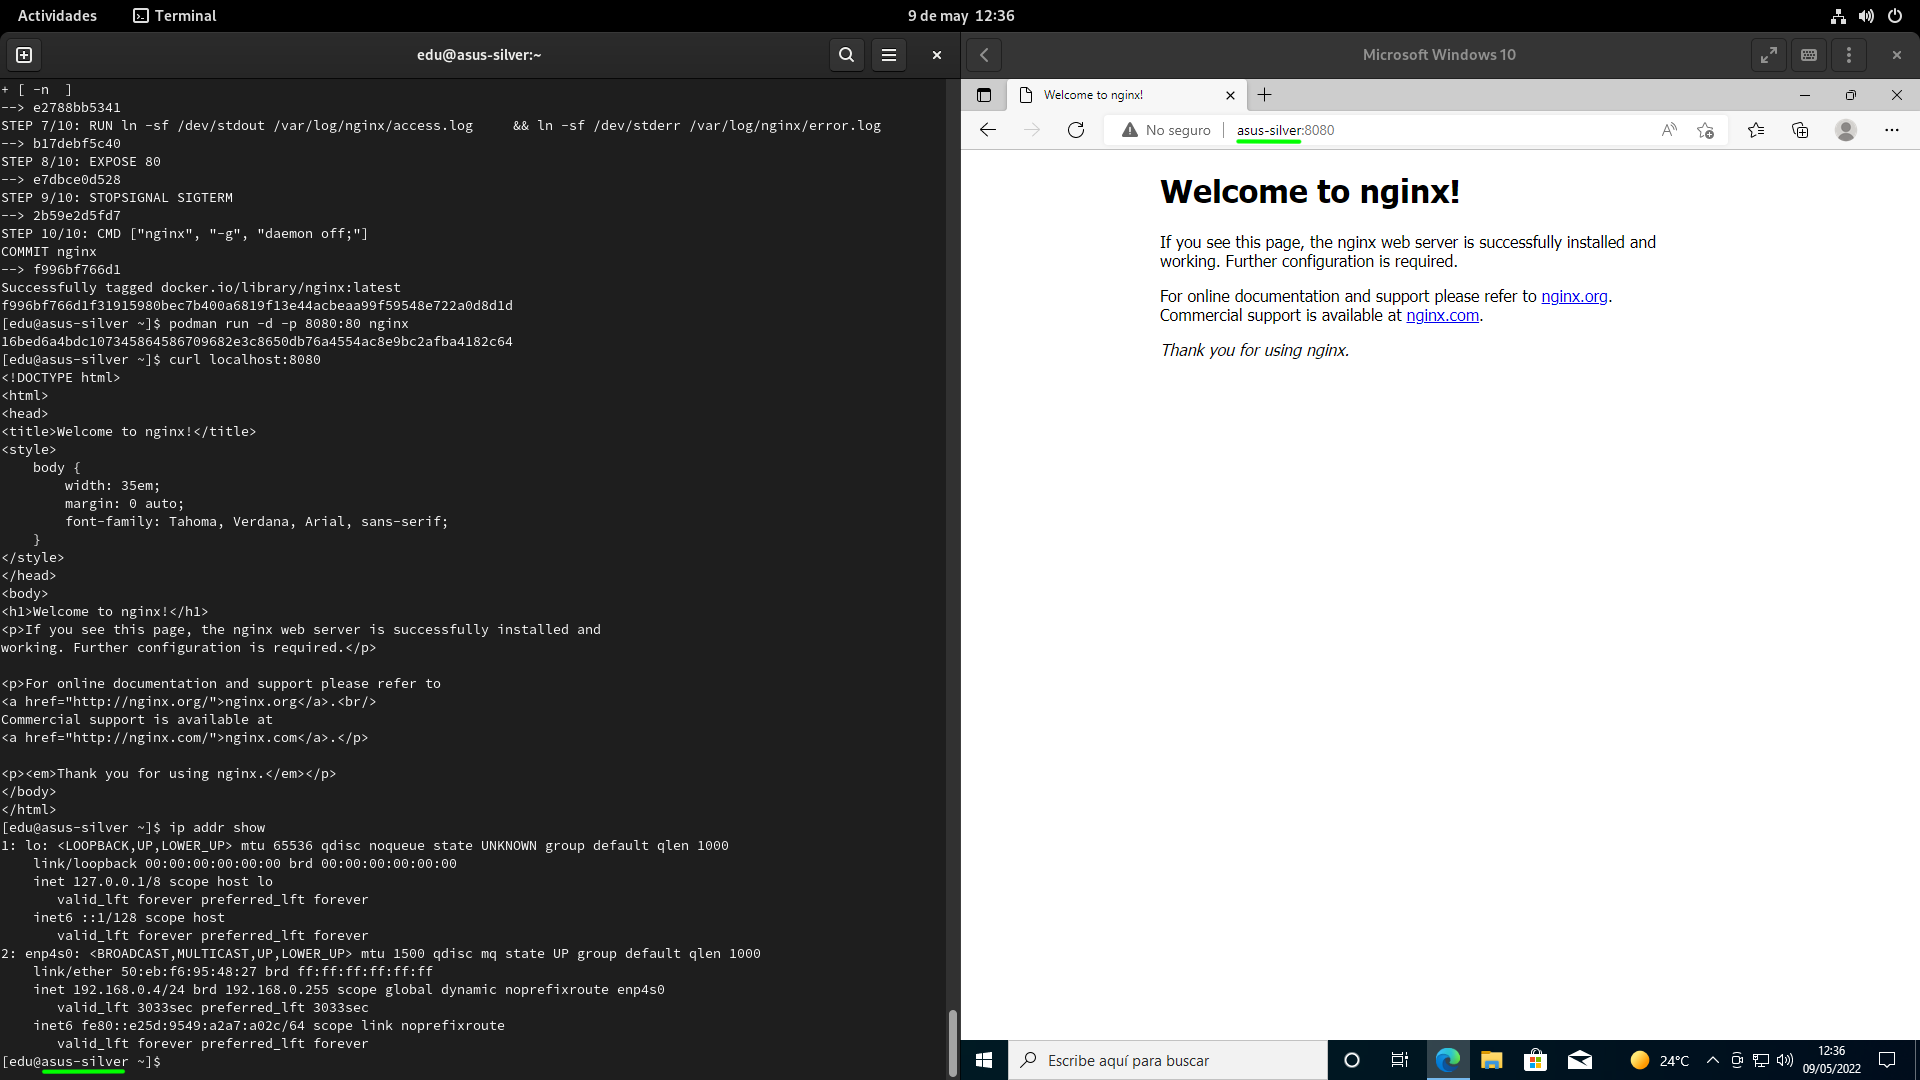
With the changes made to the file, we have tried trying to access an HTTP server (nginx) running on the host machine through a Docker container with Podman. Instead of putting the IP, which is a number that can be difficult to remember, we have put the name of the equipmentand from what you can see in the following image, the Windows hosts file correctly does its job to display the content served by the host machine through the HTTP server.
Location of the hosts file in other operating systems
The hosts file essentially fulfills the same function in all operating systems, so we are going to mention its location through various examples in which we will mention several operating systems that may or may not be popular. We warn that we have not taken into account if the user has permissions, even indirectly, to modify it.
location in Android:
/etc/hosts # Que es un enlace simbólico hacia /system/etc/hosts
location in iOS Y macOS:
/etc/hosts # Que es un enlace simbólico hacia /private/etc/hosts
location in haikus:
/system/settings/network/hosts
location in Linux,UnixUnix-like and POSIX:
/etc/hosts
conclusion
Although its use has fallen quite a bit over the decades, the hosts file is still useful for certain contexts, and as we have seen throughout this article, not only for the creation of a small test environment through a local network, but also for defensive purposes or restricted access to certain resources.
Of course, we remember that it must be handled with great care. As basic advice, we recommend not entering any public IP in it unless you are very clear about what you are doing. If you want to tinker with it, it’s best to just enter IP addresses from the local network.
