The first thing we are going to do is explain the reasons why we may be interested in configuring this service. Next, we will talk about the previous configurations that we must make in the router or in Windows. Then we will explain how to block websites with OpenDNS, creating an account and configuring it appropriately. One thing to note is that OpenDNS is currently owned by Cisco.
What can the use of OpenDNS contribute to us?
Currently some routers incorporate firewalls that allow us to block access to certain IPs or web pages. The problem with these types of solutions is that it is not always easy to configure them, and also, on large websites like YouTube they are not entirely effective.
Therefore, block a web page with OpenDNS it can be an attractive and simple option. In this sense, it can offer us a series of advantages such as:
- Websites will load faster and we won’t have to worry about web pages inaccessible due to DNS outages from our ISP.
- We have more than 50 customizable filtering categories. This can allow parents and schools to control the websites that minors visit.
- It also blocks Phishing web pages that try to steal our identity and credentials.
Preparations before using OpenDNS
If we want to block websites with OpenDNS, the first thing we have to do is put their DNS. For this we could do it in several ways:
- In Windows TCP / IP.
- Putting your DNS on the router.
- Manually configuring that device.
To do it in Windows 10 we would follow these steps:
- Start Menu.
- Setting.
- Network and Internet and inside to the left we look Ethernet if we are connected by cable or Wifi if we are doing it wirelessly.
- Change adapter options.
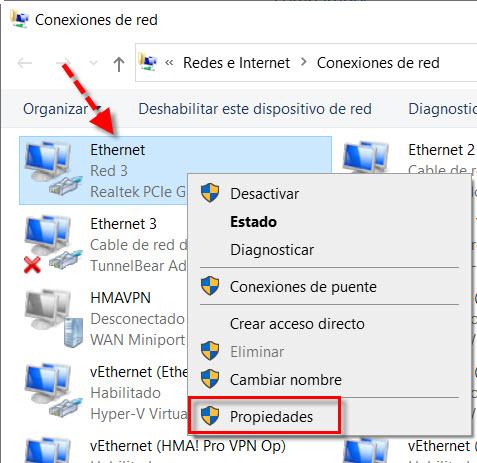
Then we look for the network adapter that we are using, we click and with the right mouse button click on Properties.
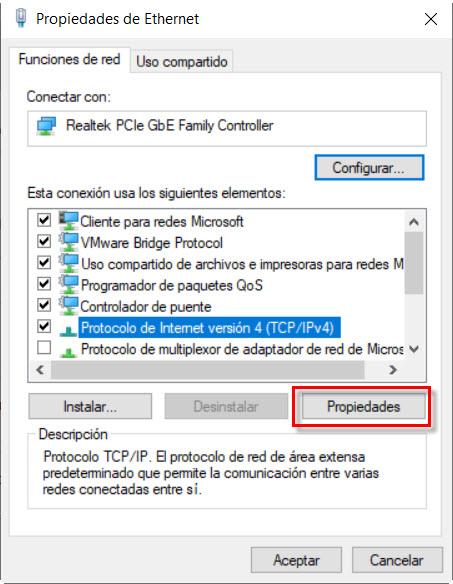
Now we are going to Internet Protocol version 4 and press the button Properties.
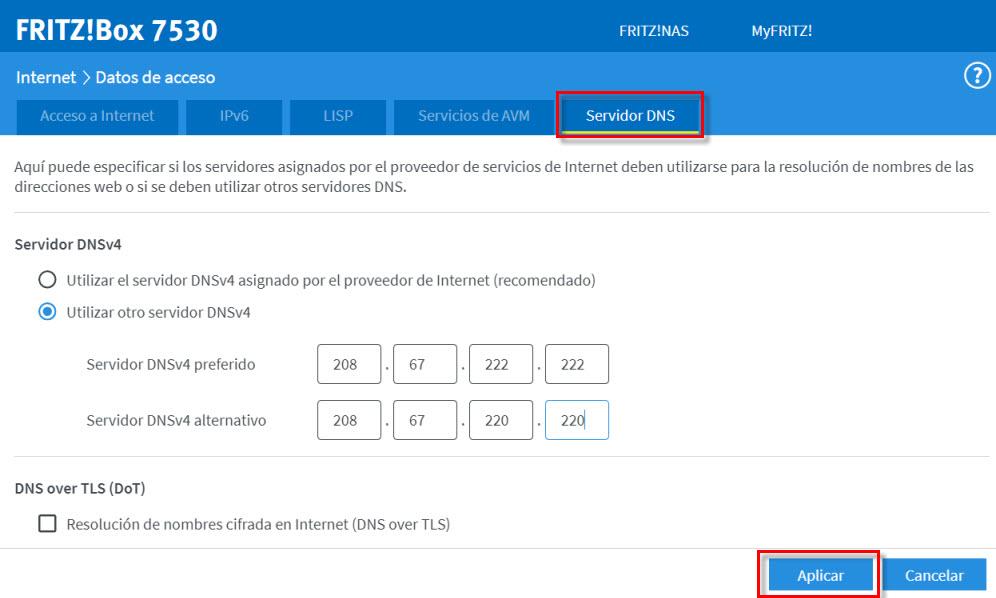
Here what we have to do is put the OpenDNS DNS as they appear in the red box:

Here we would fill in like this:
- Preferred DNS server: 208.67.222.222
- On alternate DNS server: 208.67.220.220
A very good solution to block websites with OpenDNS can be to put your DNS in the router. Thus, automatically and unless that establishes otherwise by configuring it manually, all devices would use it. To do this, we enter the router configuration through the web, we look for where the DNS is put and we put the same as in Windows.
OpenDNS also offers manuals to do it with computers with other operating systems, even for Android and IOS in the section on Smart devices and more. For this you have to click on this link. On the other hand, if you want to check that you have done the previous steps correctly to block web pages with OpenDNS, you can do it here.
Registration and first steps with OpenDNS
The first step we have to take is to register on the OpenDNS website, exactly in the section OpenDNS Home that it is a free service designed for domestic environments. To register we will click on this link and you will see a screen like this.
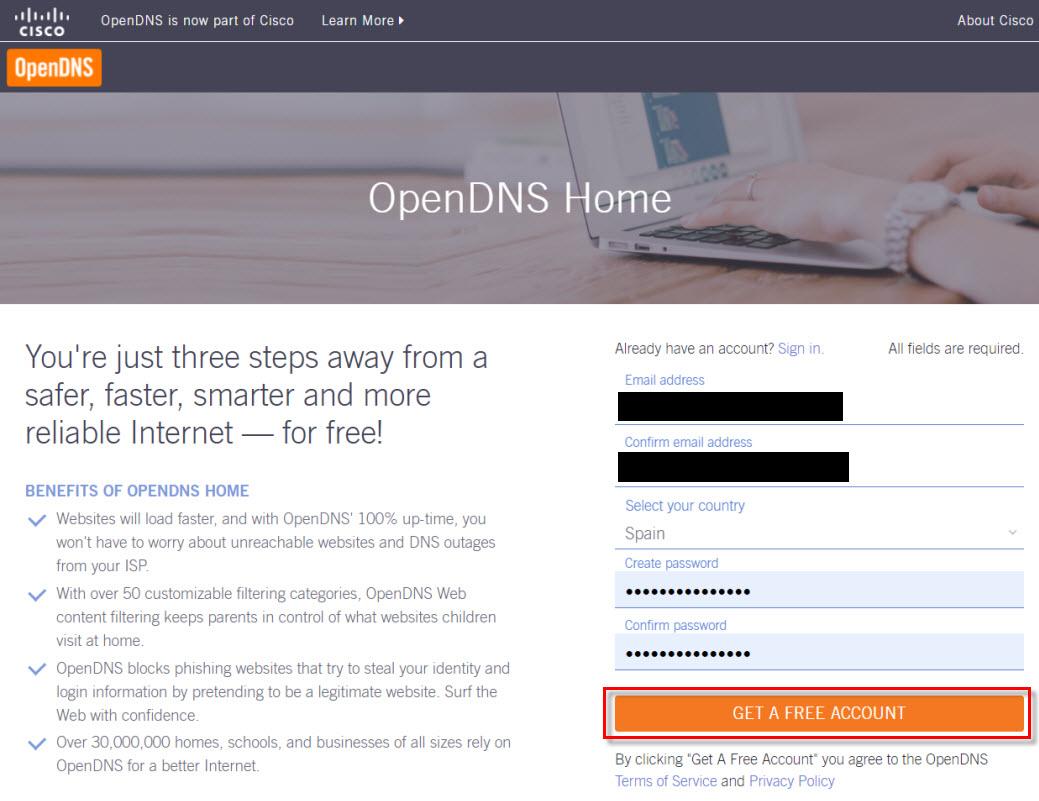
Here what you have to do is enter your email twice, select your country, enter the password twice and click on the button GET A FREE ACOUNT.
Once done, we will see a screen like this where he thanks us for choosing Open DNS, and offers us a series of guides for different computers. This is what we did in the previous section, so we are ready to start working with the devices that we have previously configured.
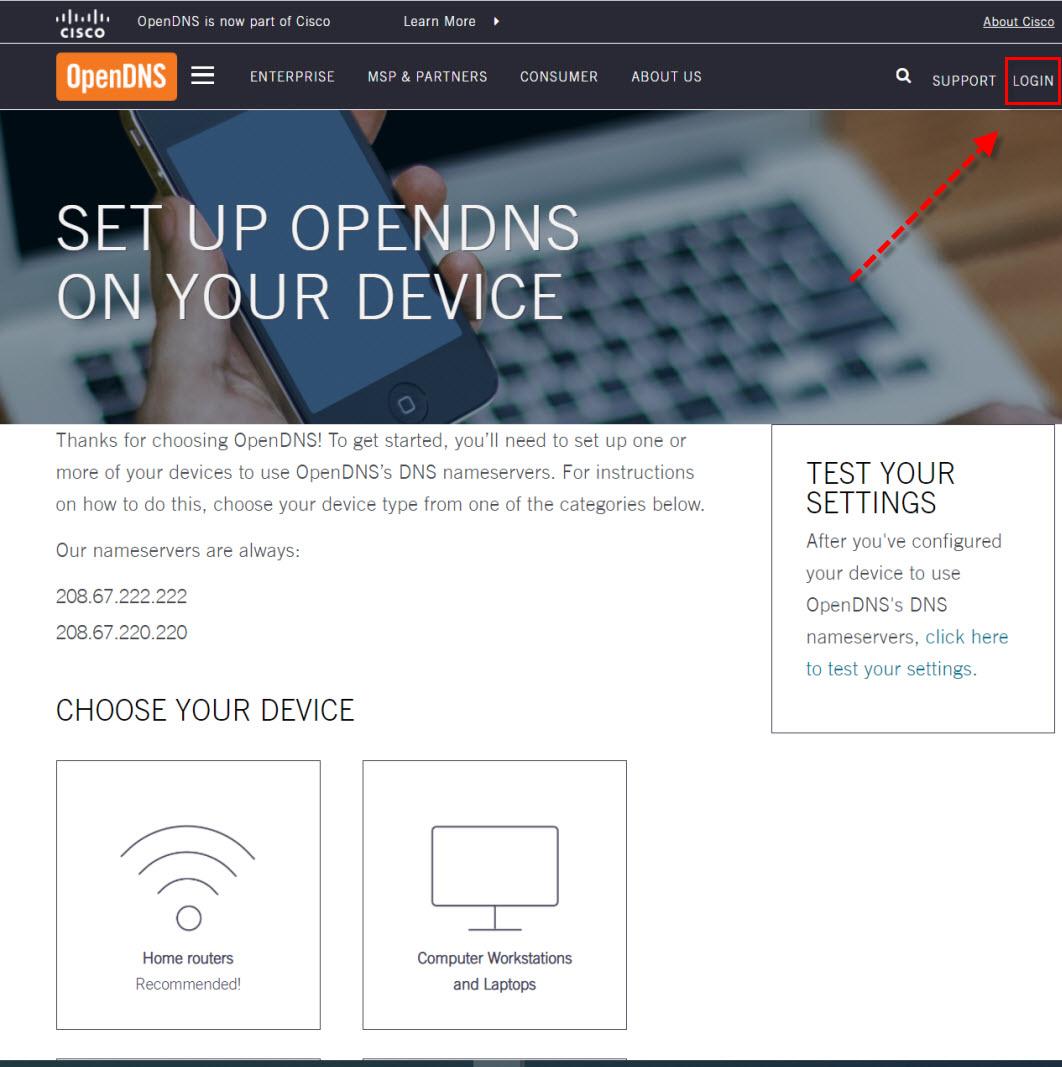
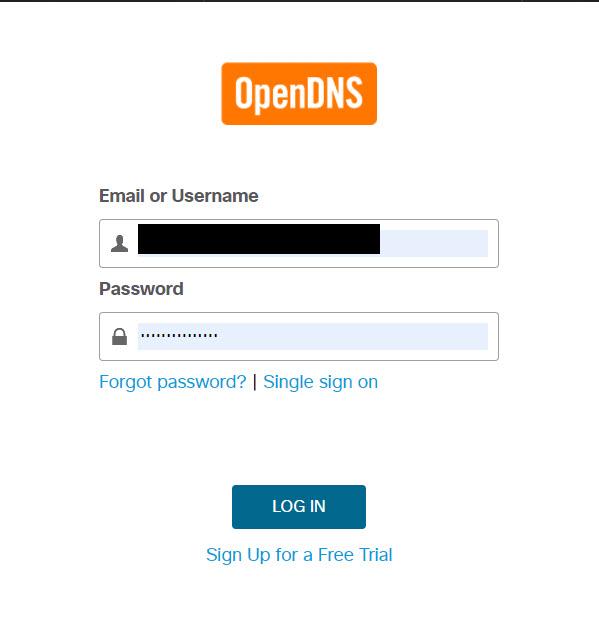
Now what we have to do is click on LOGIN or the following link. Then simply to start blocking web pages with OpenDNS we enter the e-mail and password that we entered before.
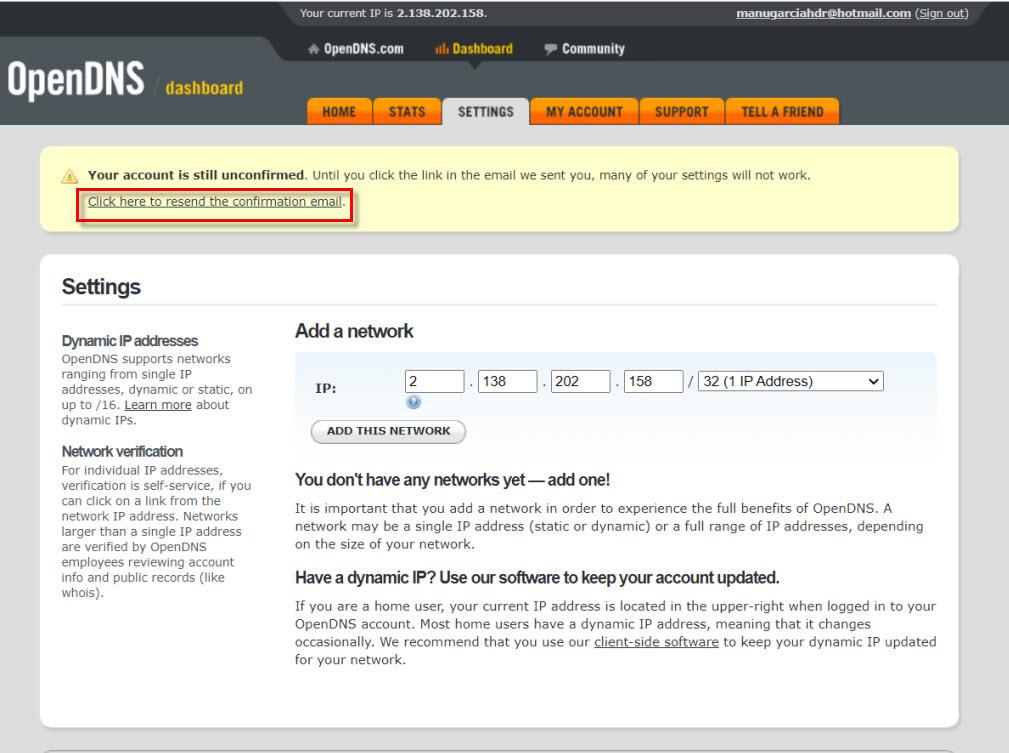
The first time you log in, you will get a sign saying that your account is unconfirmed and that until we do, there will be some things that will not work. Therefore, we click on that link, we go to our email account and activate the account with the link that they provide us.
As for the most relevant sections we have:
- Stats: to check usage statistics.
- Settings: used to add our networks, later we can block the websites with OpenDNS using custom lists.
- My account: here we can change our password, set our time zone, contact information and more.
- Support: in case we need help of any kind.
Block web pages with OpenDNS
We are going to carry out this function through the section SETTINGS in which our first task will be to add a network.
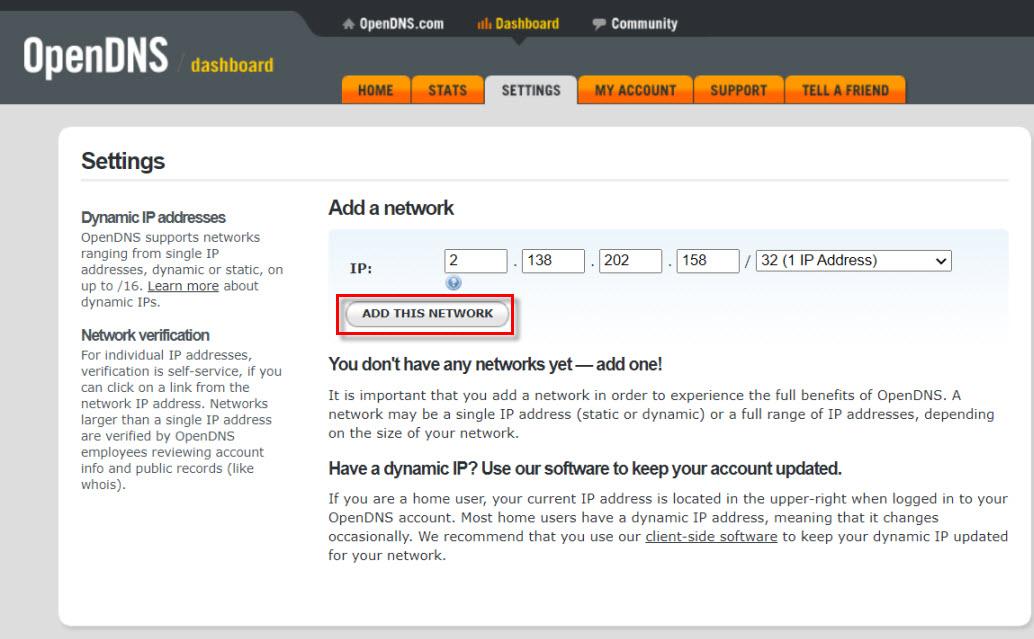
Here, our public IP will appear and we have to click on the button ADD THIS NETWORK. An important consideration is that, if our public IP is dynamic, when they change the settings we make will not work. To solve this problem, below offers a client to keep our public IP updated, even if it changes.
The next thing we have to do is give our network a name and install that client if we have dynamic IP.
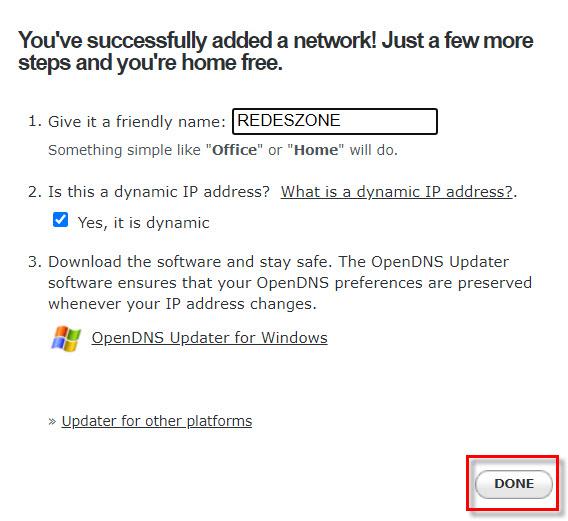
Next, we will see how our new REDESZONE network has already been added and we can start working with it.

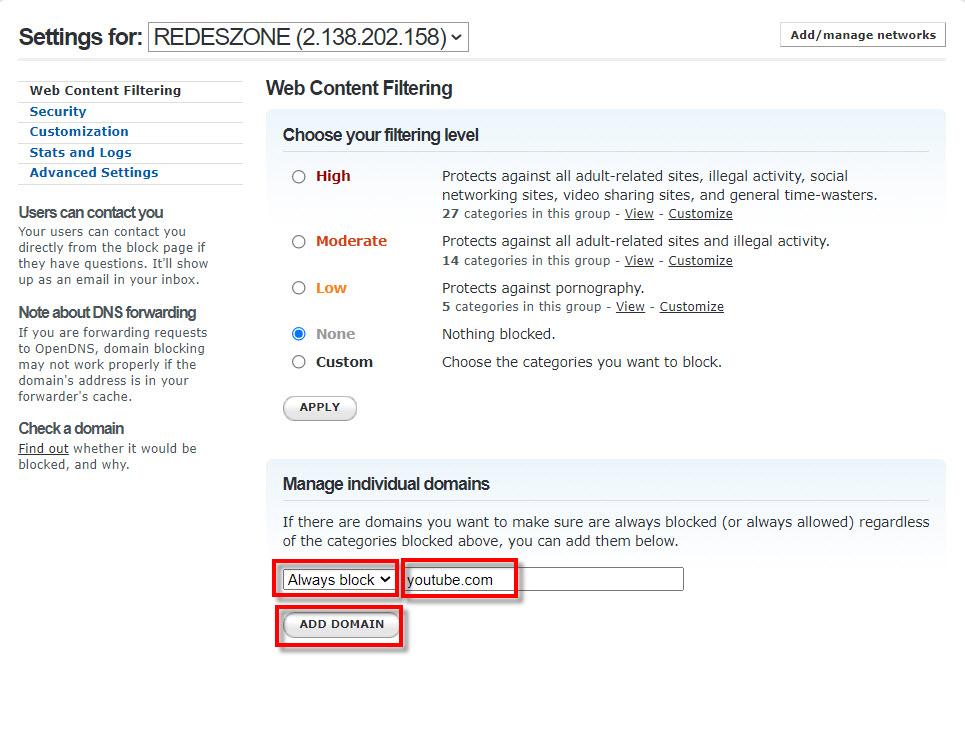
After creating the network we have the button DELETE to delete it, and if we click on the IP we can start blocking websites with OpenDNS using its filters. Once the IP is pressed, it will take us to a new screen, where we can choose between several degrees of filters, the most restrictive being High and None, the one that does not apply any.
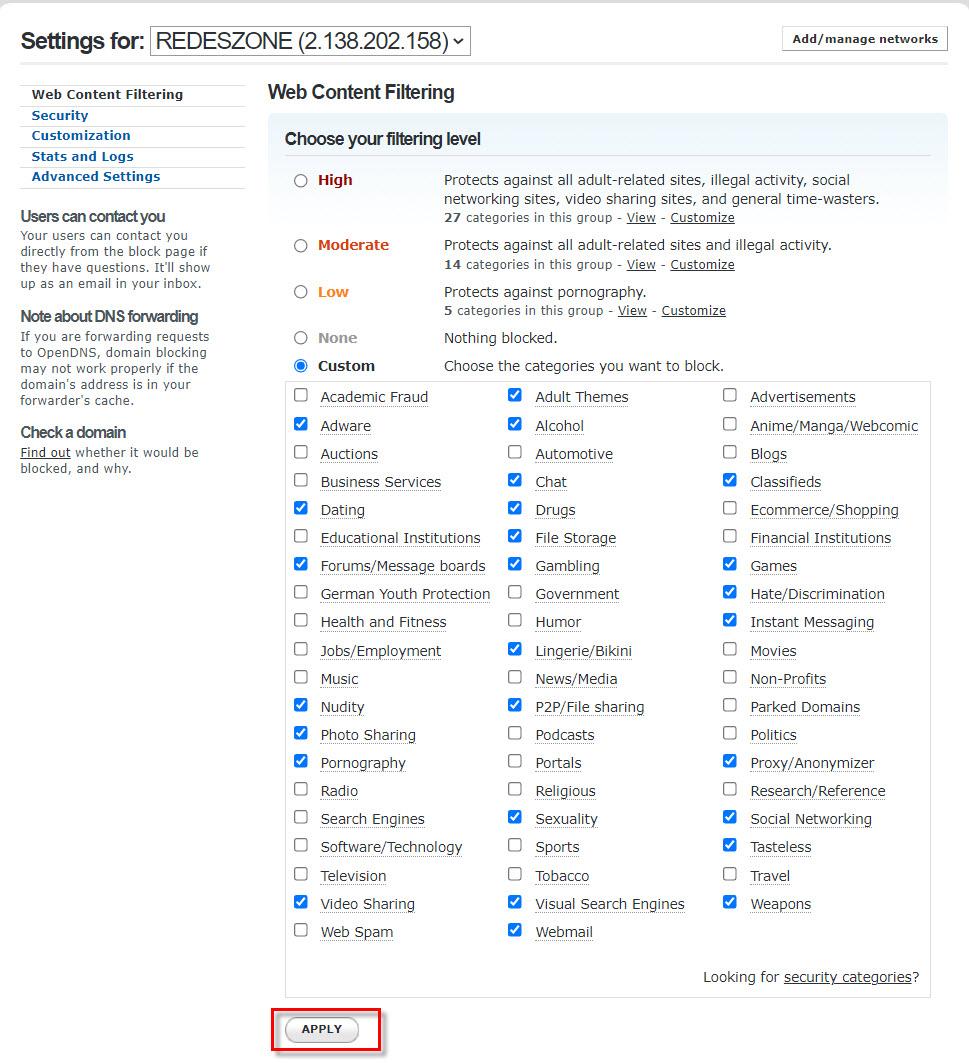
If we click on Customize, in any of them we can add or remove categories and when we finish we will click on APPLY. Also, in the filter Custom We can do the same starting from scratch. Then, if we want the Moderate profile, we select Moderate and press the button Apply.
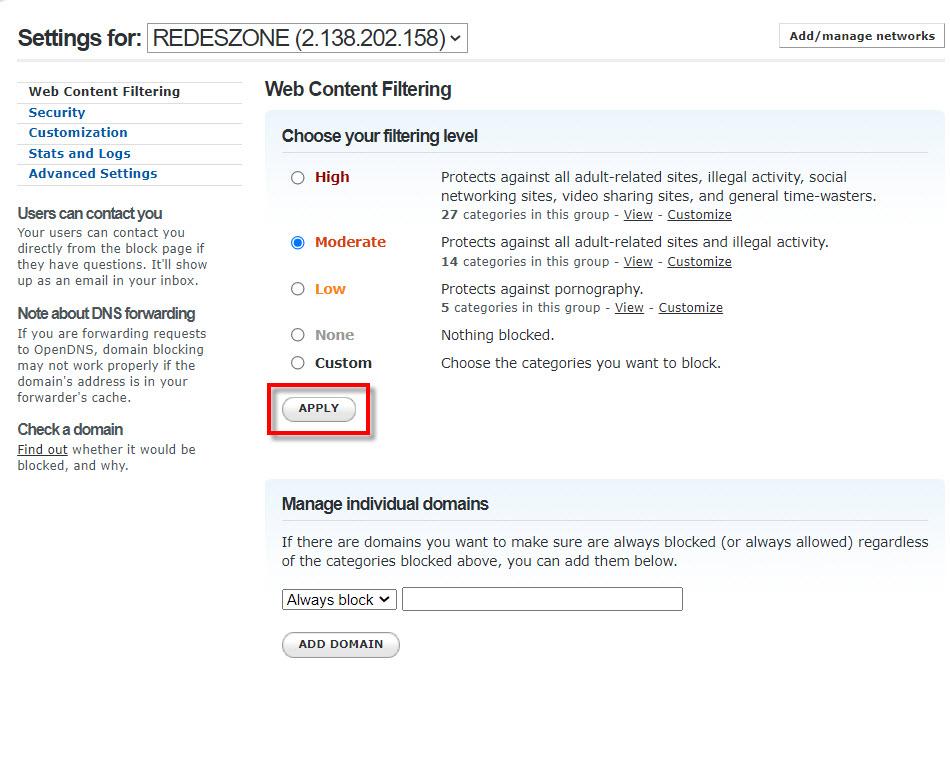
On the other hand, if we want to establish rules for a specific domain, below we have Manage individual domains. Here he offers us two options:
- Always block: always block that domain.
- Always Allow: always allow that domain, which can be useful for adding exceptions to the filters above.
Now we are going to choose Always block to block a domain with OpenDNS and add in the blank “youtube.com” (without quotes). Then we click on Add domain We can choose if we only want to block that domain or all the domains related to its category, in this case, all the domains related to video over the Internet.
Next, it will let us apply the filter in two different ways:
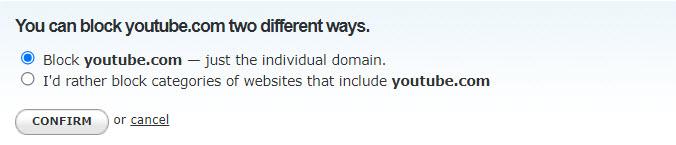
In case of choosing the second option, within the filter categories we mark the box «Video Sharing»And all video sites will be blocked, not just YouTube. Another thing to comment is that the changes we make in any of the sections related to the filters take 3 minutes to be applied so you must be patient. Then every time we want to access that domain it will tell us that we have no connection:
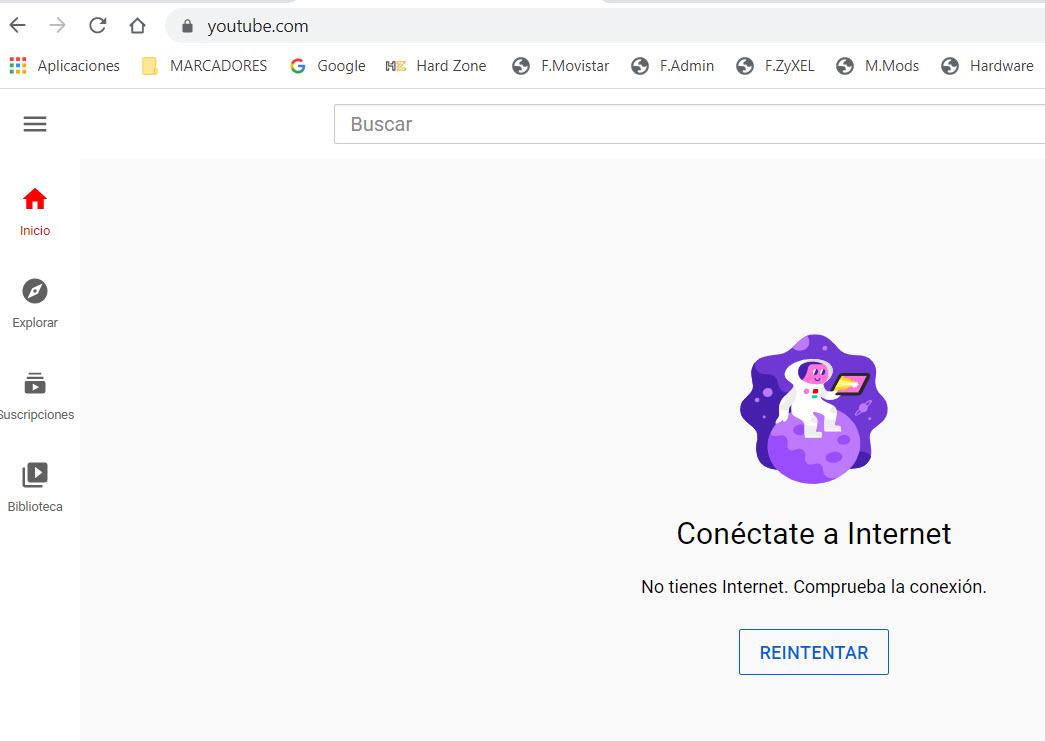
Another option that can come out is a red icon that warns us that the connection is not private, and if we continue later, we will see the following:

As you can see, blocking web pages with Cisco OpenDNS is a simple task, but one that requires some time.