In this case, we must know that Microsoft Word has functions that will allow us to protect any document so that it can be edited by other people. In this way we can restrict changes by limiting the available format options or by restricting the areas that can be edited. In the same way, it is possible to use the Windows Rights Management Service (RMS) to be able to restrict, according to the user account, the editing of the document.
Restrict the use of a document in Word
When it comes to prohibiting another user from editing a part of a document that we want to remain unaltered, we can do it in different ways using Word. One of them is by placing restrictions on the format to prevent it from being altered and the other by placing restrictions on its edition. The last option is to do the blocking using RMS, which we will only find available for those users who have a Windows domain, such as university or corporate.
Format restrictions
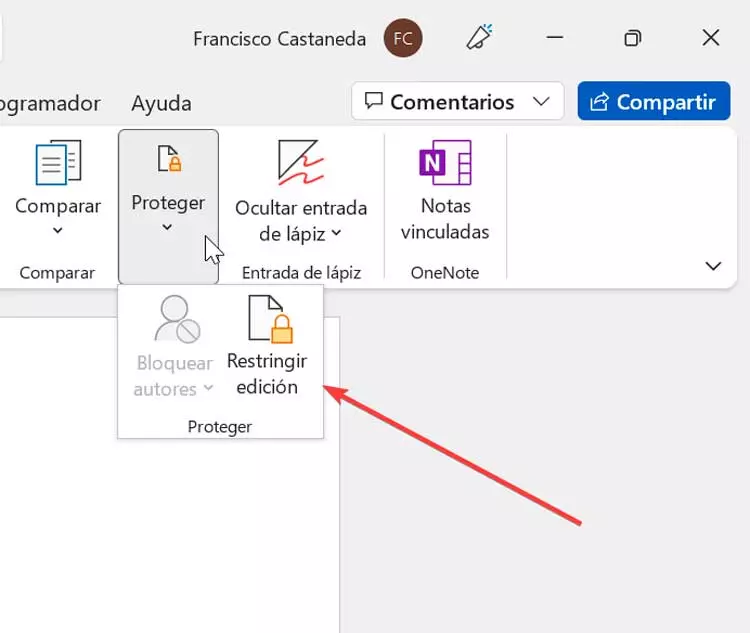
One of the options we have available is the possibility of blocking any change in the document format. To do this we must open the desired document and at the top click on the “Review” tab and then on “Protect”. This will open a small drop-down where we will click on “Restrict editing”.
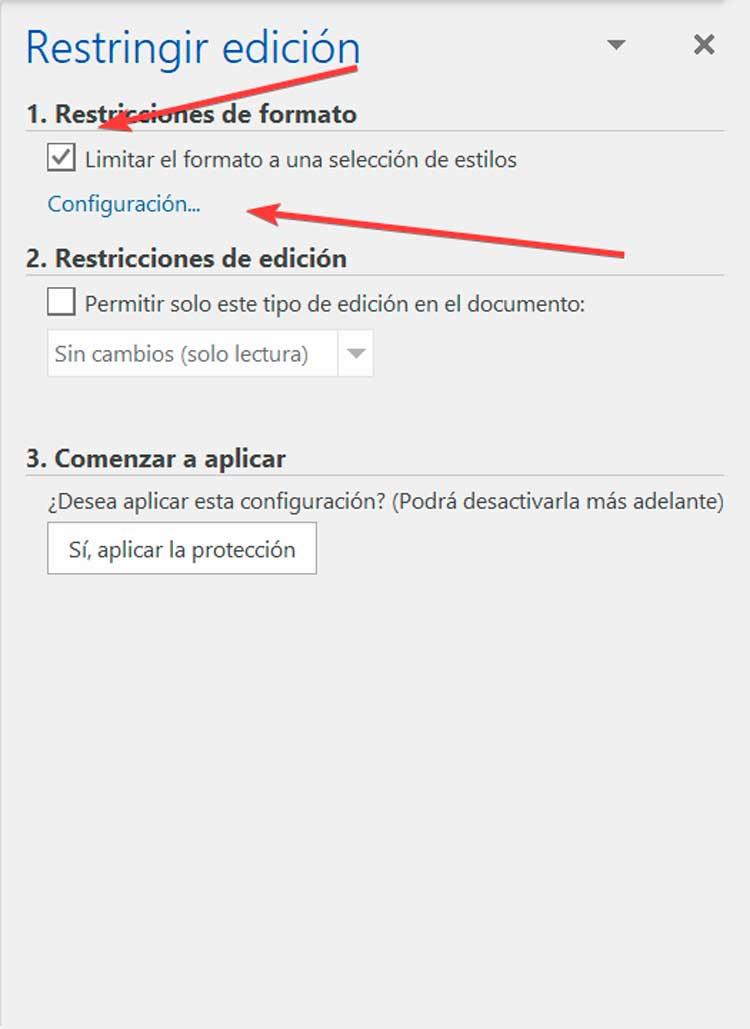
This will bring up a new menu on the right side. In the section “Format restrictions” we can check the box “Limit the format to a selection of styles” that we can configure to block the use of certain formatting styles. To do this, click on Settings, just below.
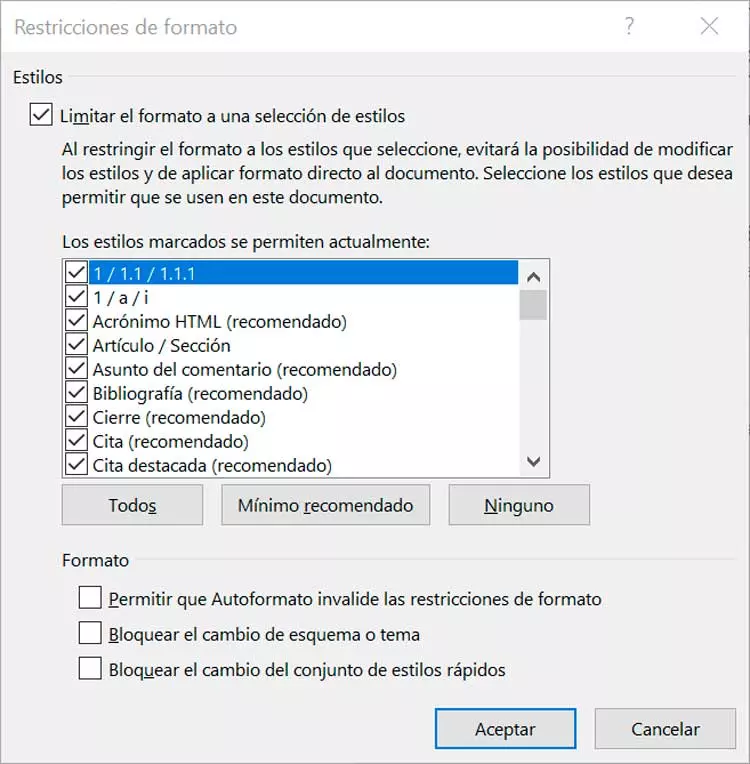
In the new screen that appears we can select those styles that we wish could allow in the document. If we press the button «Recommended minimum», it will only leave the basic styles recommended by Word. We can also select “All” or “None”. Once finished, click on “Accept” to save the changes.
Next, in the “Start to apply” section, click on the “Yes, apply protection” button. This will open a new window where we must optionally set the password to prevent other users from deactivating the protection.
Editing restrictions
It is also possible to limit the changes that can be made to certain parts of a document, which we can also make from the Restrict edition section. To do this, with the document open, click on the Review tab, then on «Protect» and «Restrict edition».
In the new menu that opens on the right, we go to the “Editing restrictions” section. Here, we click on the box «Allow only this edition in the document» and we keep the option of «No changes (read only)». With this we avoid that any part of the document that is not covered by exceptions can be edited.
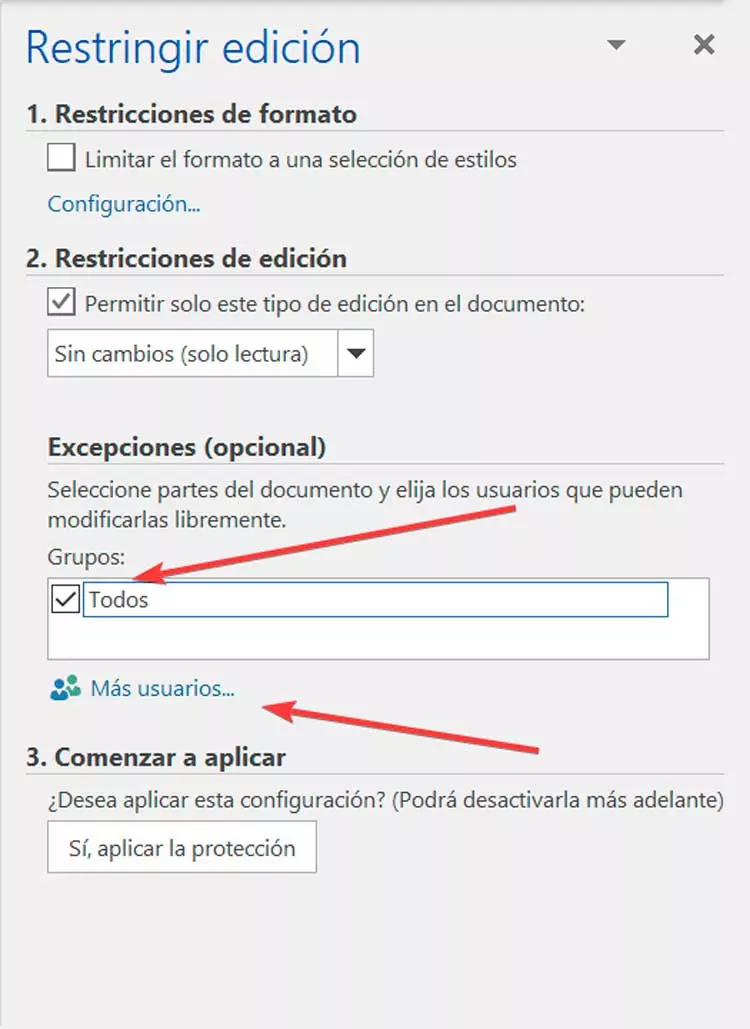
It is also possible to add exceptions, from a word to a block or a whole page. To do this, we must select the desired part and then click on the “All” box found within the Exceptions section (optional). In this way we allow all users who have access to the document they can edit that section.
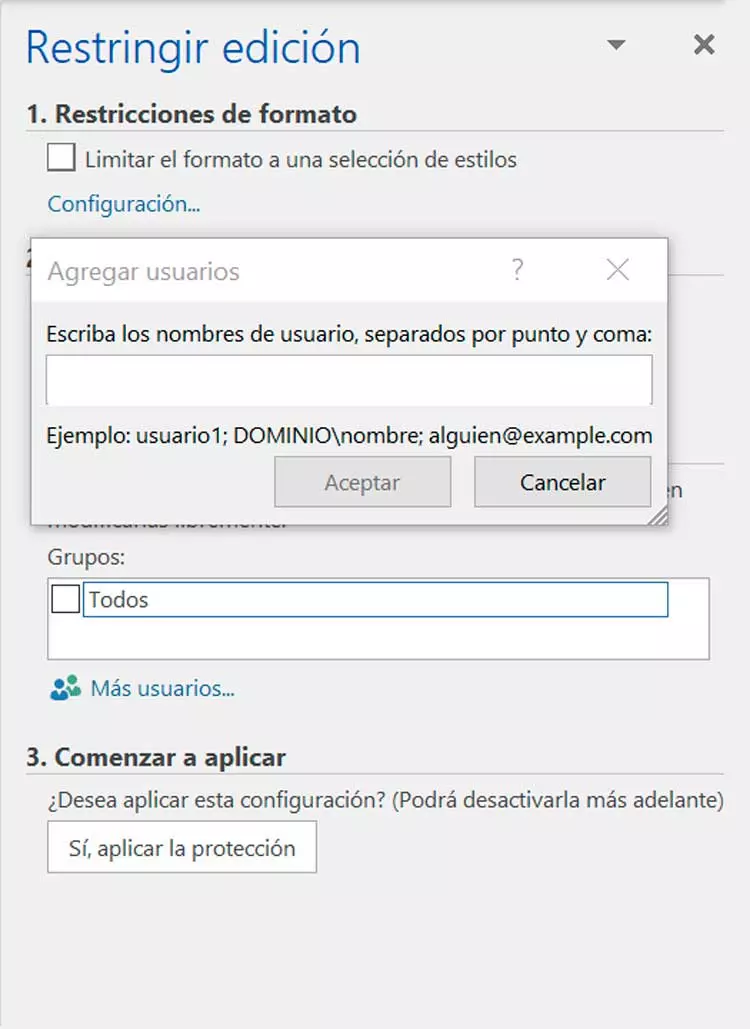
We can also add exceptions somewhat stricter. To do this we select the content and click on the “More users” section. This will open a new window where we must add the names or accounts of local Windows users and click on “OK” to save the selection. In this way, only this user will have permission to make changes.
To confirm the restrictions, it will be necessary to click on the “Yes, apply protection” button found in the “Start to apply” section. This will open a new window where we must enter a password to prevent anyone from changing these restrictions and click OK to save. In this way, only users with access to the file will be able to make changes to the restrictions that we have established.
Via RMS
Windows has the Rights management service (RMS) to help users who do not have the corresponding authorization to read, make changes or print certain documents. This is only available for those users with a Windows domain, such as university or corporate.
In this case we must open the Word document and click on the “File” tab and then on “Information”. In the new menu we click on “Protect document”, then on “Restrict access” and “Restricted access”, where we must enable the “Restrict permission to this document” check box. Later we will add the email addresses of the users we want to give access to the document. Click on “Read” or “Change” to give them read or write access and click on “OK” to save the changes.
Unlock a protected file
At the time it may be useful to be able to unlock a Word document that we had previously blocked so that it could not be edited. For this we will need the password that we have applied as protection, changing the file format or trying to use the DocRecrypt application.
Using password
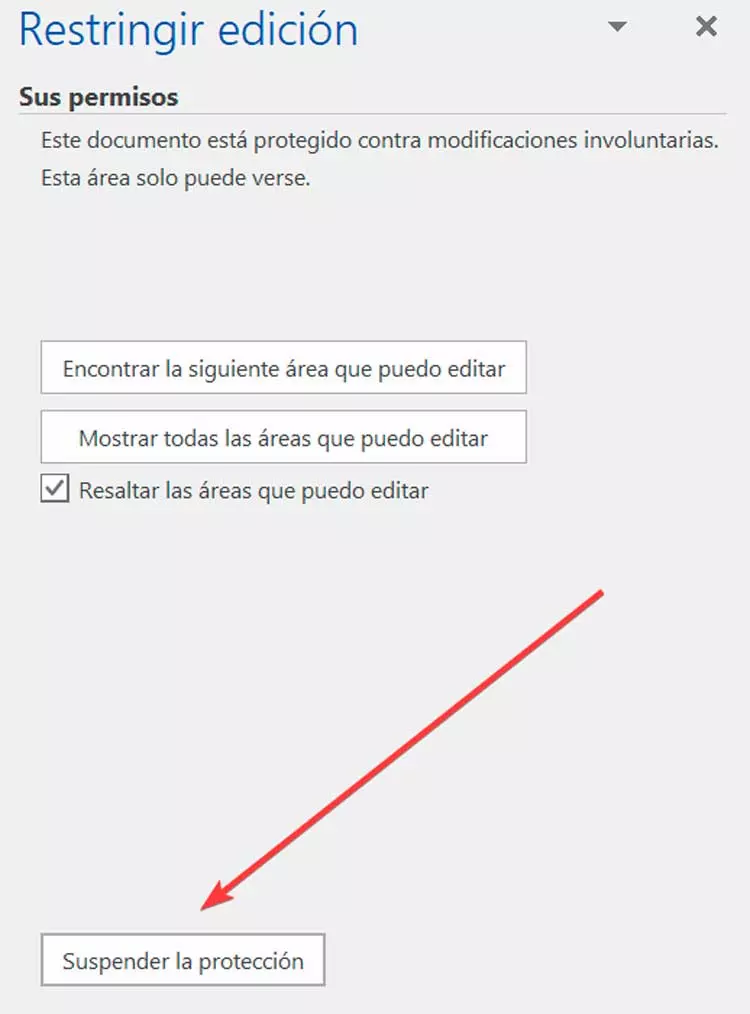
The most common method that we will use to unlock a protected file will be using the password that we entered at the time as a request for protection. To do this, with the document open, click on the “Review” tab. Later on the button «Protect» and «Restrict edition». Now at the bottom, we click on the button «Suspend protection». Once this is done, a pop-up window will appear where we must enter the correct password so that the file is unlocked.
Try DocRecrypt
It may be the case that over time we have forgotten the password that we entered at the time to lock a file. In this case, we can use a tool called DocRecrypt that is compatible with certain versions of Word. It can be downloaded directly from this link to the Microsoft website.
This program allows you to remove the protection of encrypted OOXML, Word, Excel and PowerPoint files, as well as to modify the password. We can use the private key to access the data that is protected by password. We can choose between making an unprotected copy of the file or creating a new password for the document.