What is the built-in firewall on the router for?
All professional routers internally incorporate a firewall to allow or deny traffic, although normally firewalls are used to allow or deny network traffic from the local network to the Internet and vice versa, on this occasion, by having the possibility of managing different subnets with VLANs and the DMZ, we will also have the possibility to allow or deny network traffic in these subnets, and not only in the Internet WAN interface which is where the firewall would normally be located.
In the case of the firewall of the D-Link DSR-1000AC professional router, we will be able to create a complete list of rules sequentially to allow or deny network traffic, we will be able to configure origin and destination, both at the interface, subnet, IP range as well as specific IPs, in addition, we can filter by different protocols at the IP level, TCP, UDP, ICMP and much more.
The first thing we have to do to configure the router’s firewall is to enter via the web the IP address of the default gateway, which is 192.168.10.1, therefore, we will have to put https: //192.168 in the address bar. 10.1. The default username and password is “admin”, however, the first time we enter the router it will force us to change the access password. Of course, being a professional router, we will have the possibility of creating different users with different permissions, in this case the router is highly configurable.
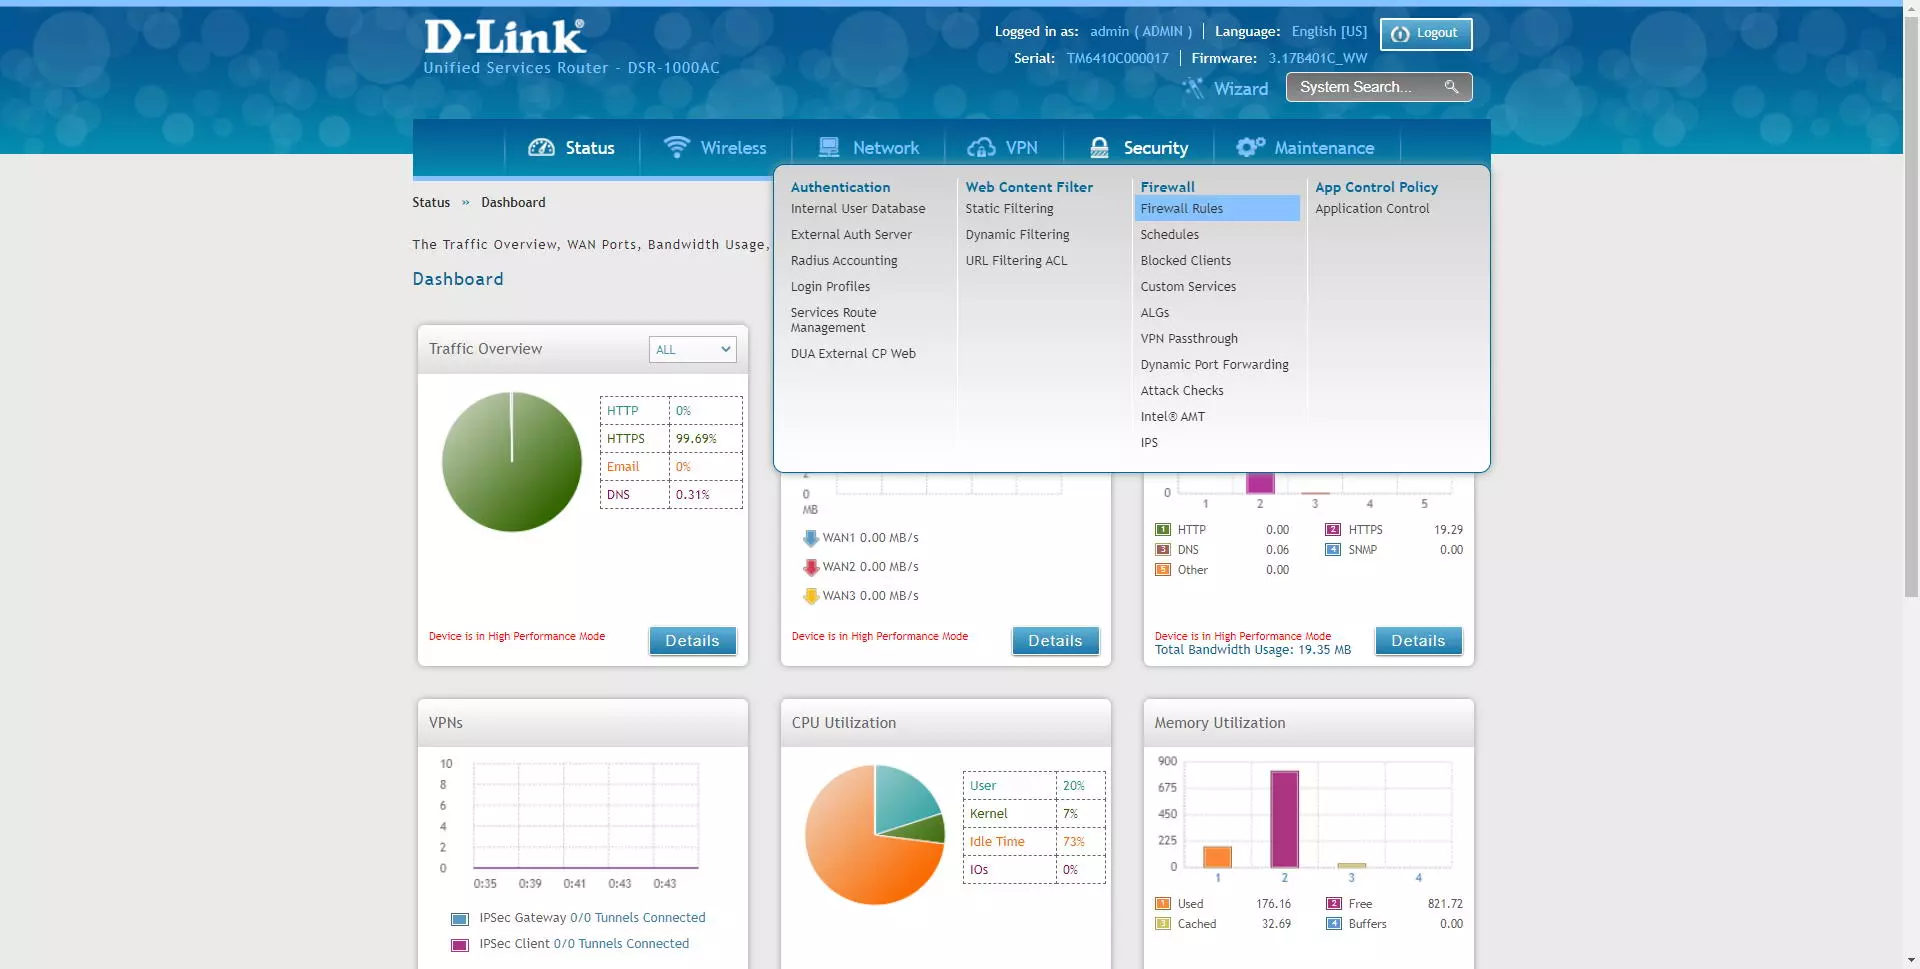
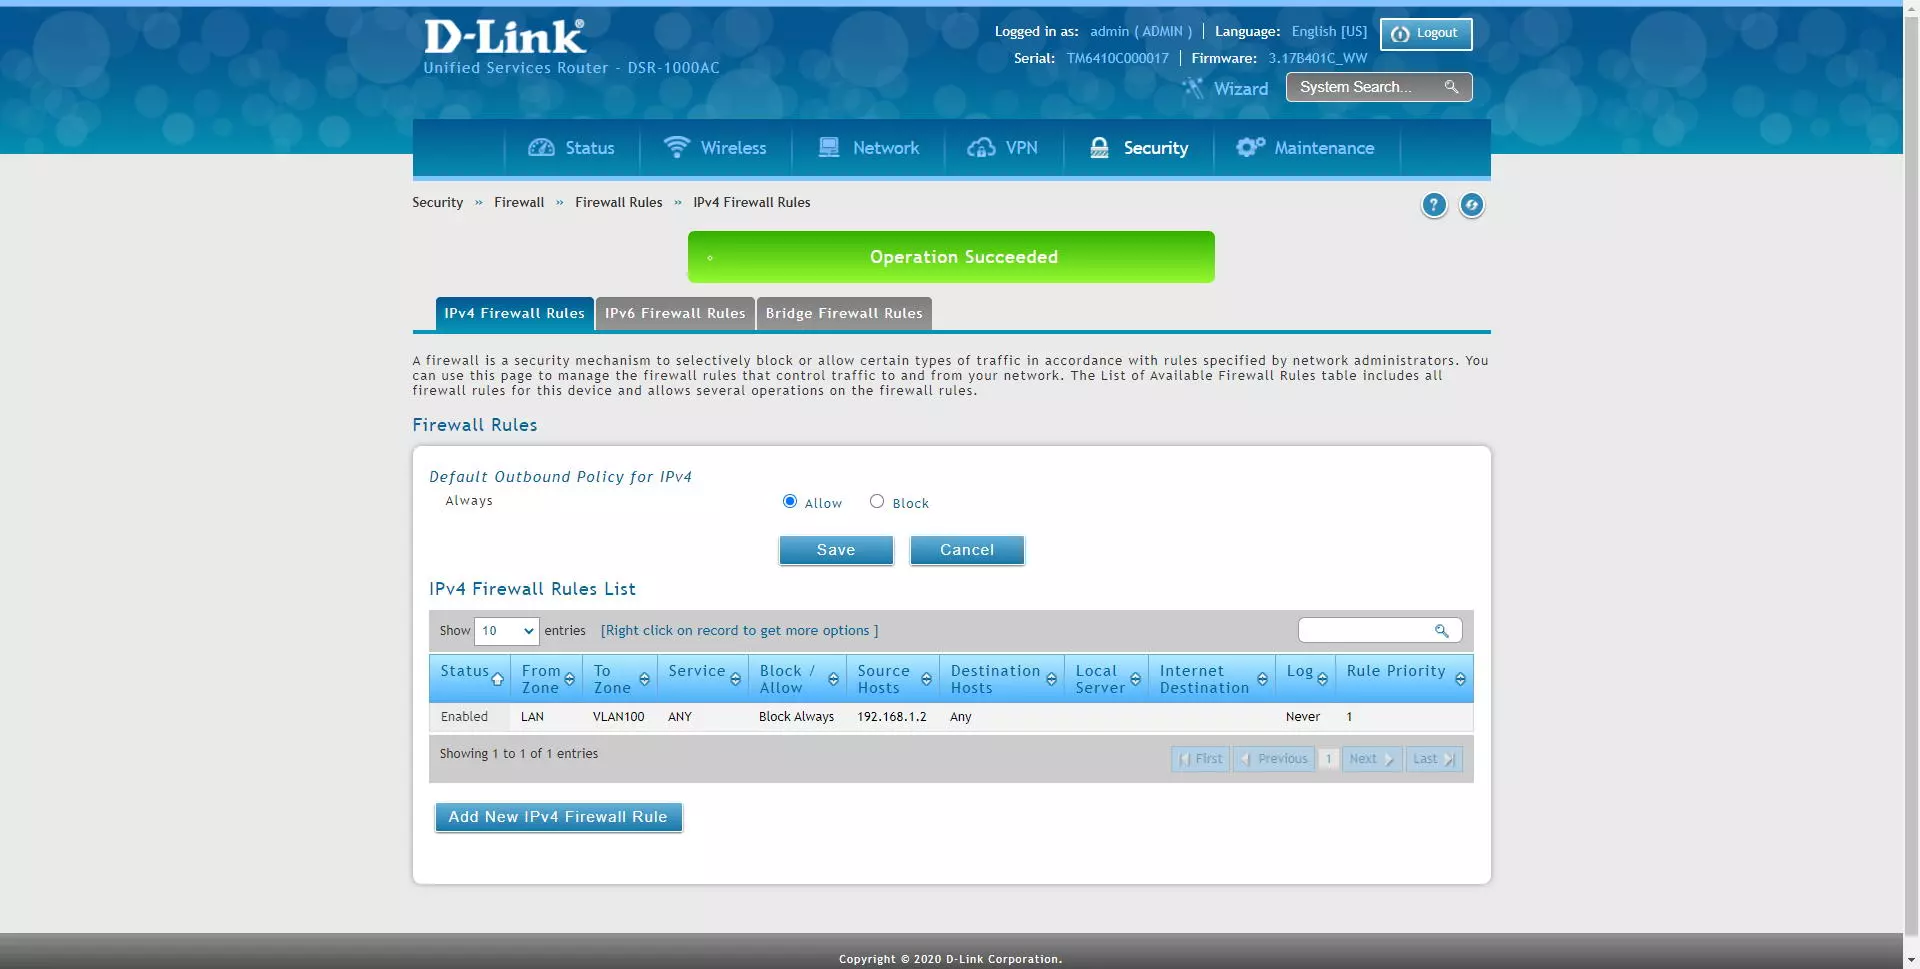
From the configuration menu, we have to click on «Security / Firewall / Firewall Rules»And we will go directly to the menu where we can enter all the rules in the firewall.
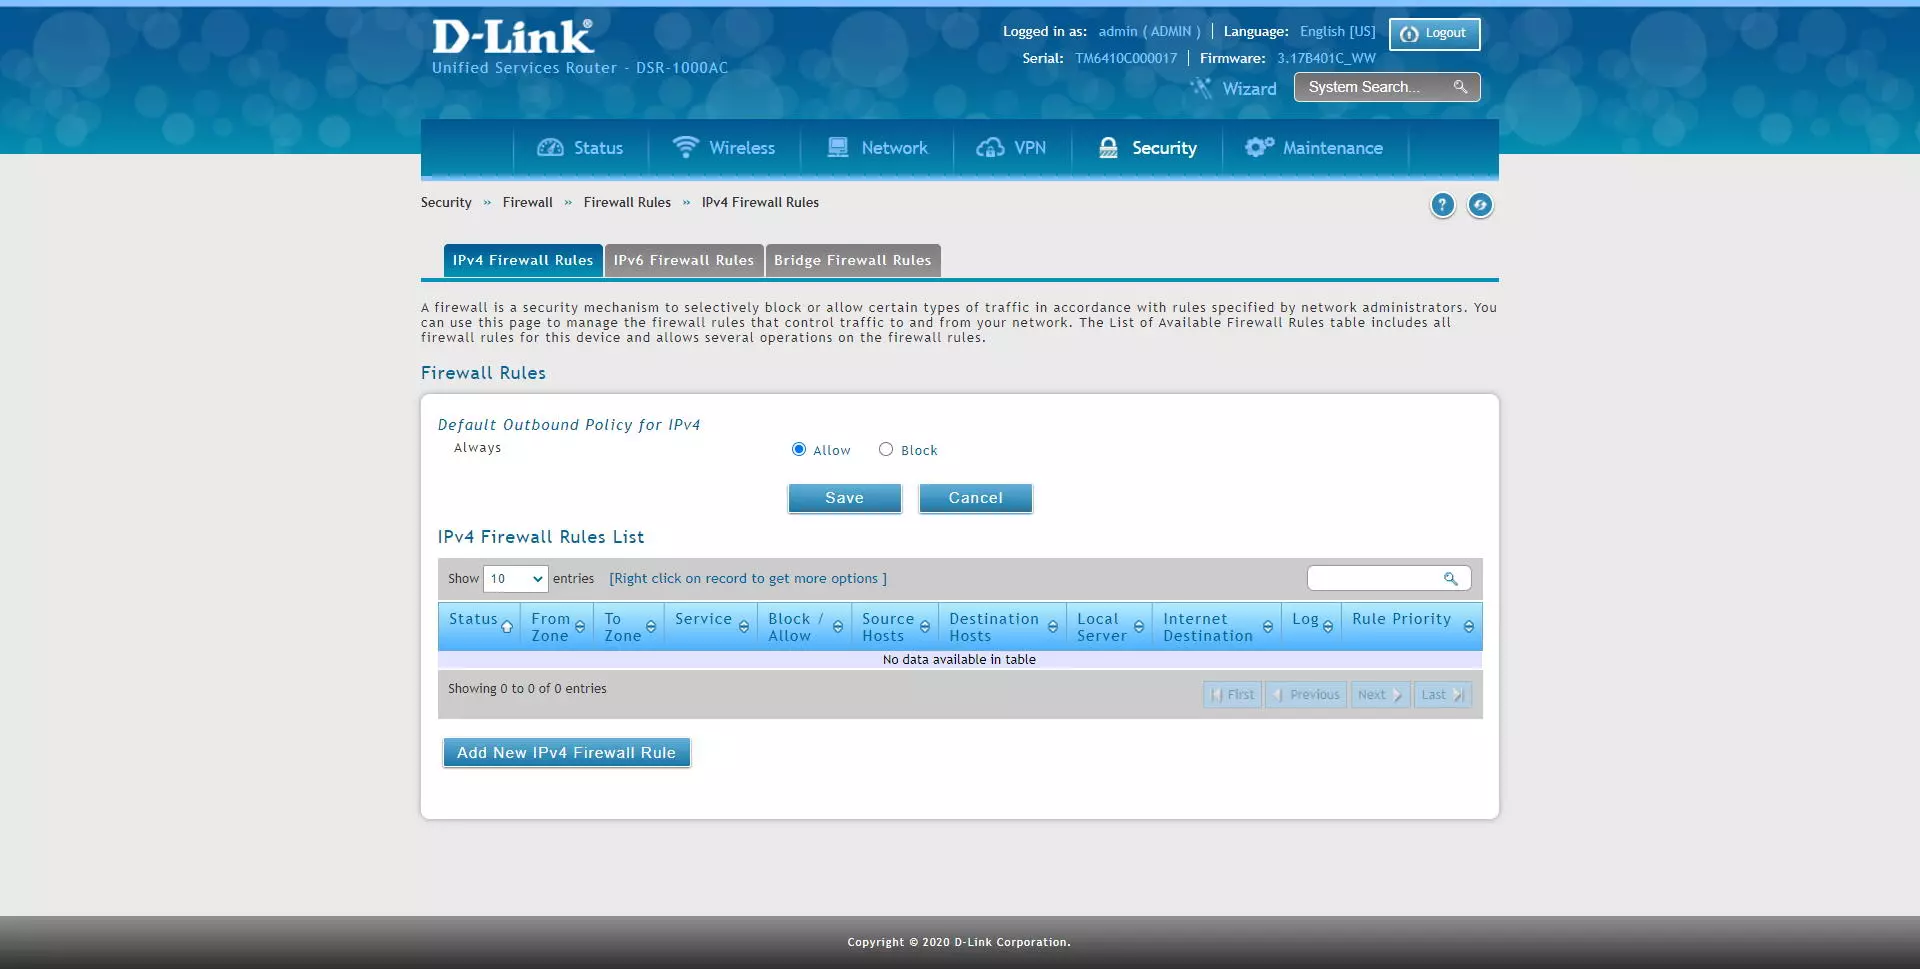
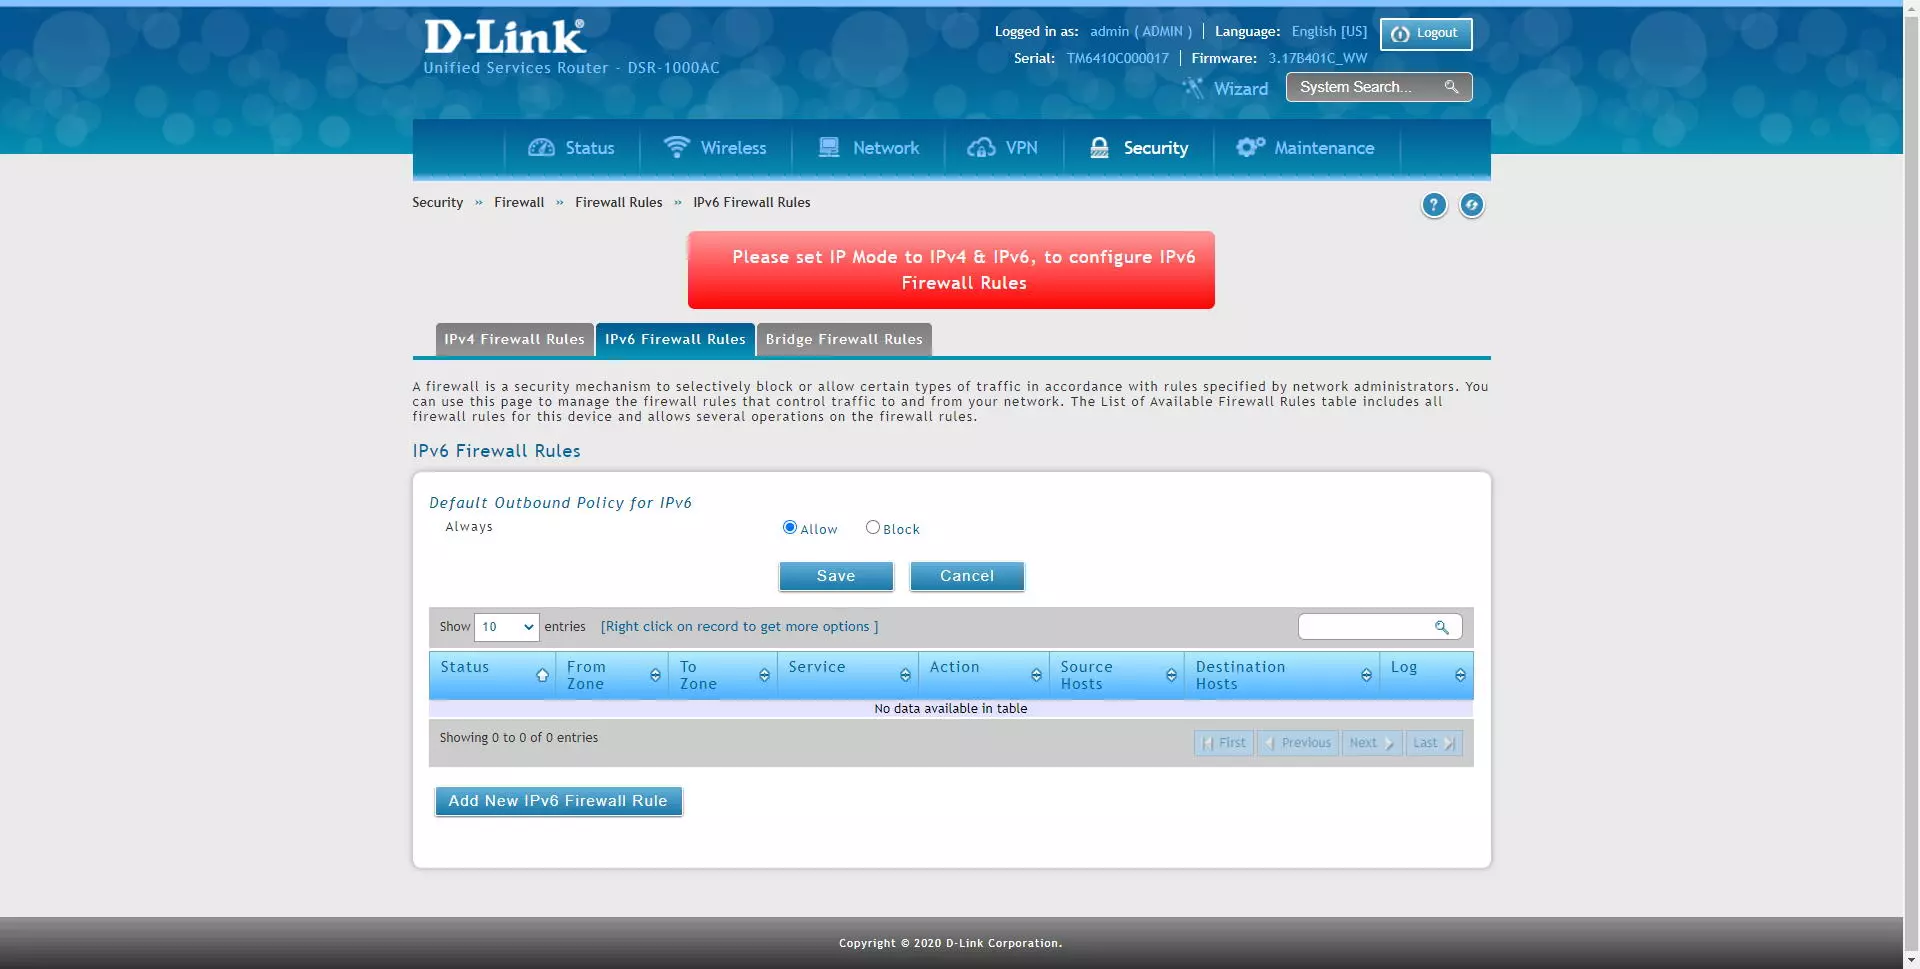
D-Link allows us to configure different rules depending on which protocol we are using, we can configure the rules in the «IPv4 Firewall Rules»If we have the IPv4 protocol, we can also configure rules in the« sectionIPv6 Firewall Rules»For IPv6 networks, and we will also have the possibility of creating rules in the firewall if this equipment acts as a« bridge », that is, between local interfaces.
In the main menu we will have a default rule of “Outbound” or “Outbound”, in this case, the normal thing is that the firewall allows any external connection by default, if we set it to block, we will have to create a specific permission rule Otherwise, we will not have communication with other networks, including the Internet connection.
If we do not have the IPv6 protocol activated, we will not be able to get into the rules section for this protocol, something logical because we would have to activate it first, we will get an error in red that will indicate it:
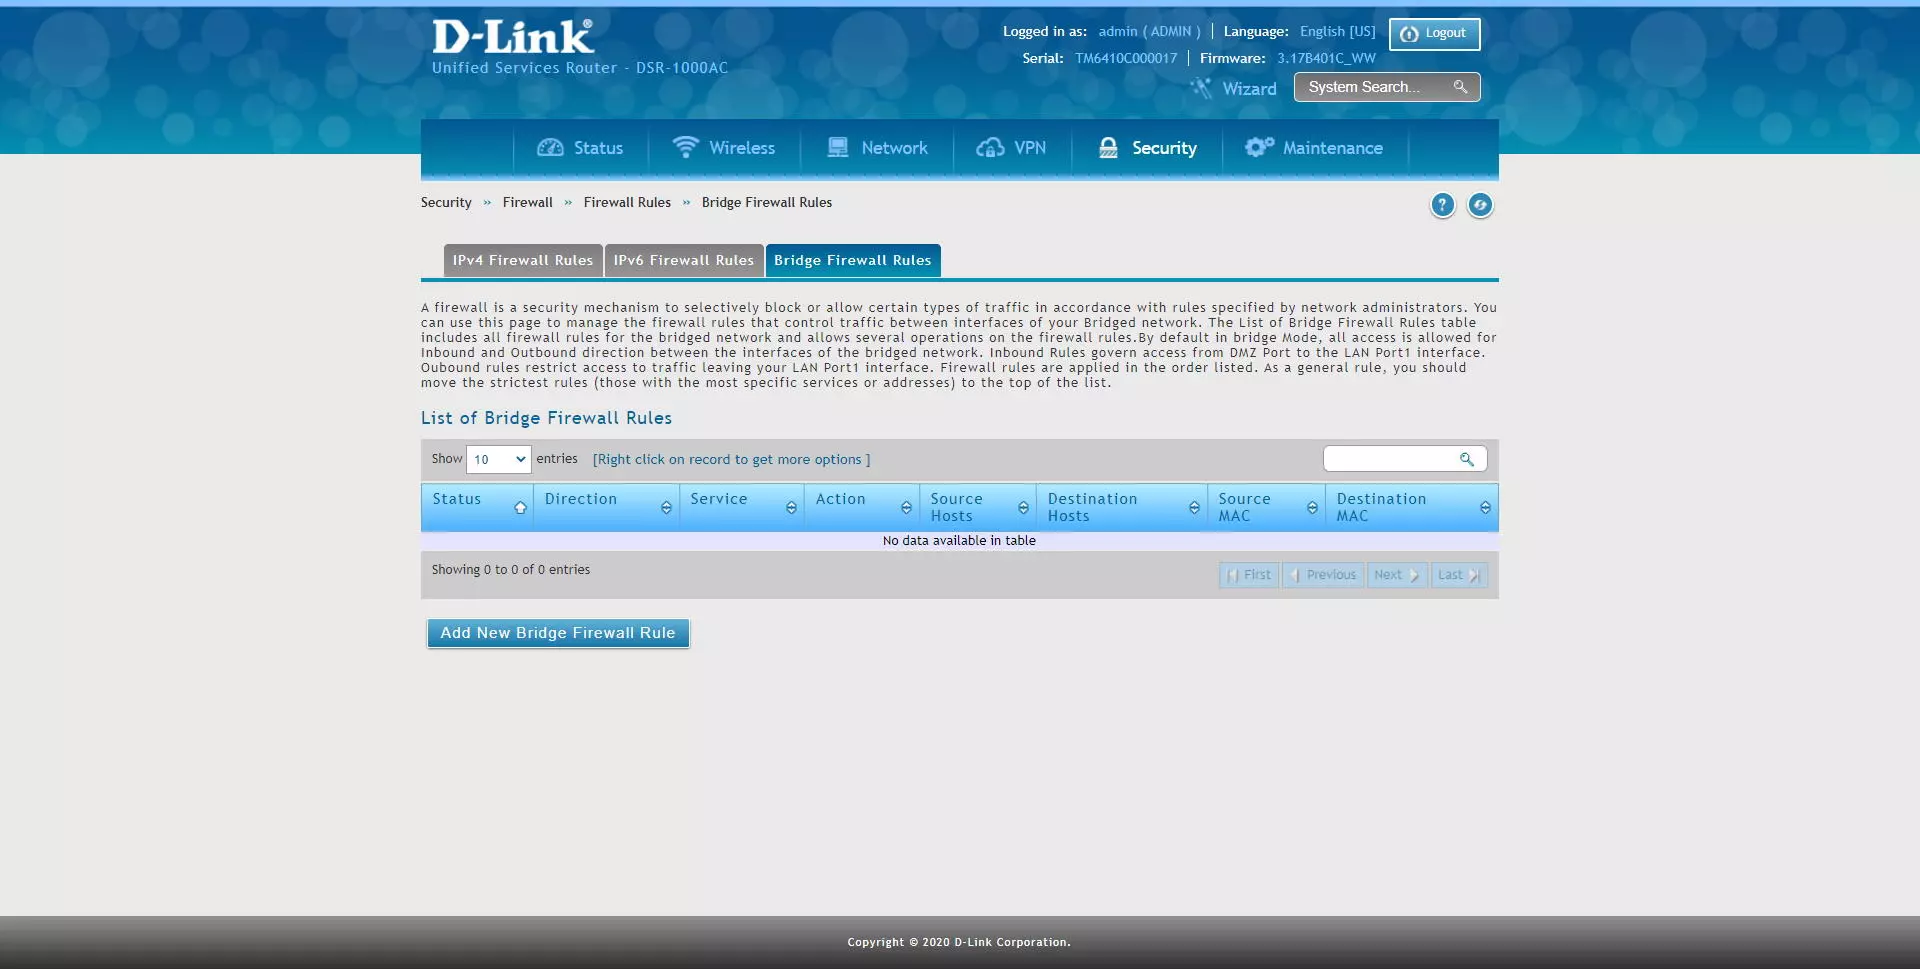
In the section of “Bridge Firewall Rules»Is where we can allow or deny incoming and outgoing traffic from different interfaces of the LAN and the DMZ. By default, this rule allows inbound and outbound access between network interfaces. The incoming rules are in charge of accessing from the DMZ port to the LAN port, the outgoing rules restrict the traffic from the LAN port. Of course, all the rules are applied in the order that we have listed, therefore, the more specific rules should be above the more general rules, as is the case with any firewall.
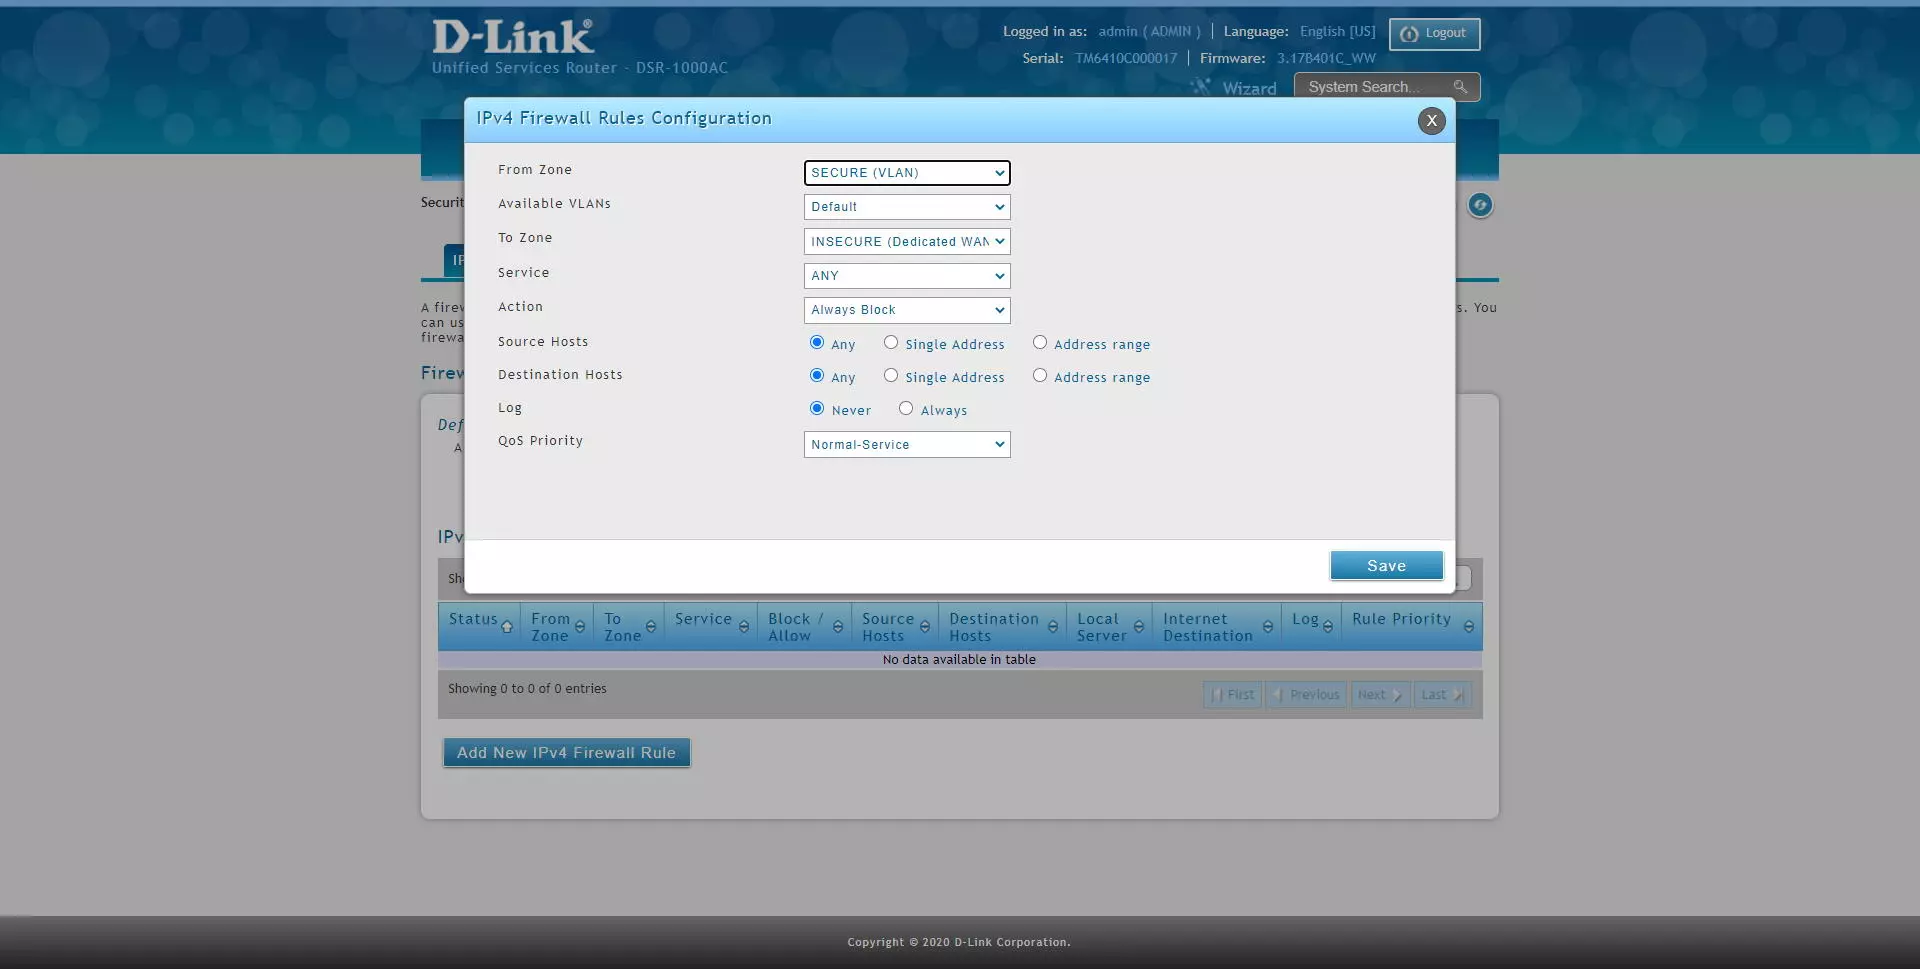
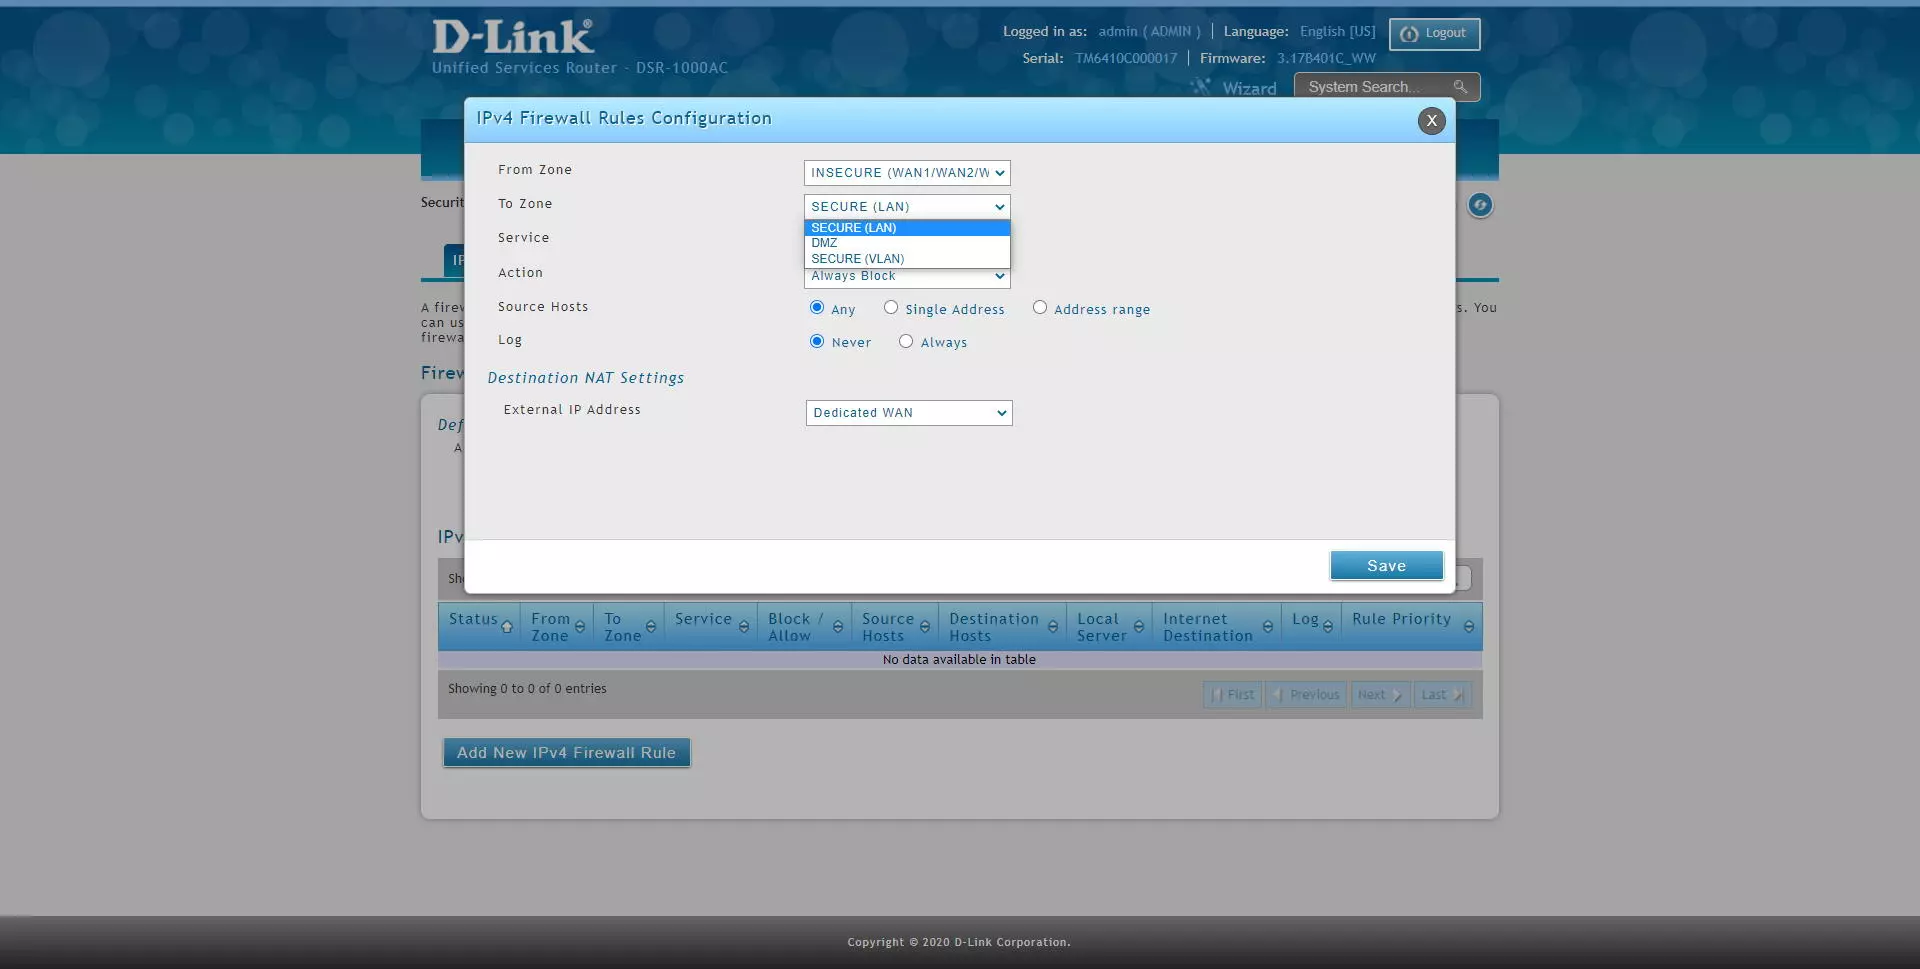
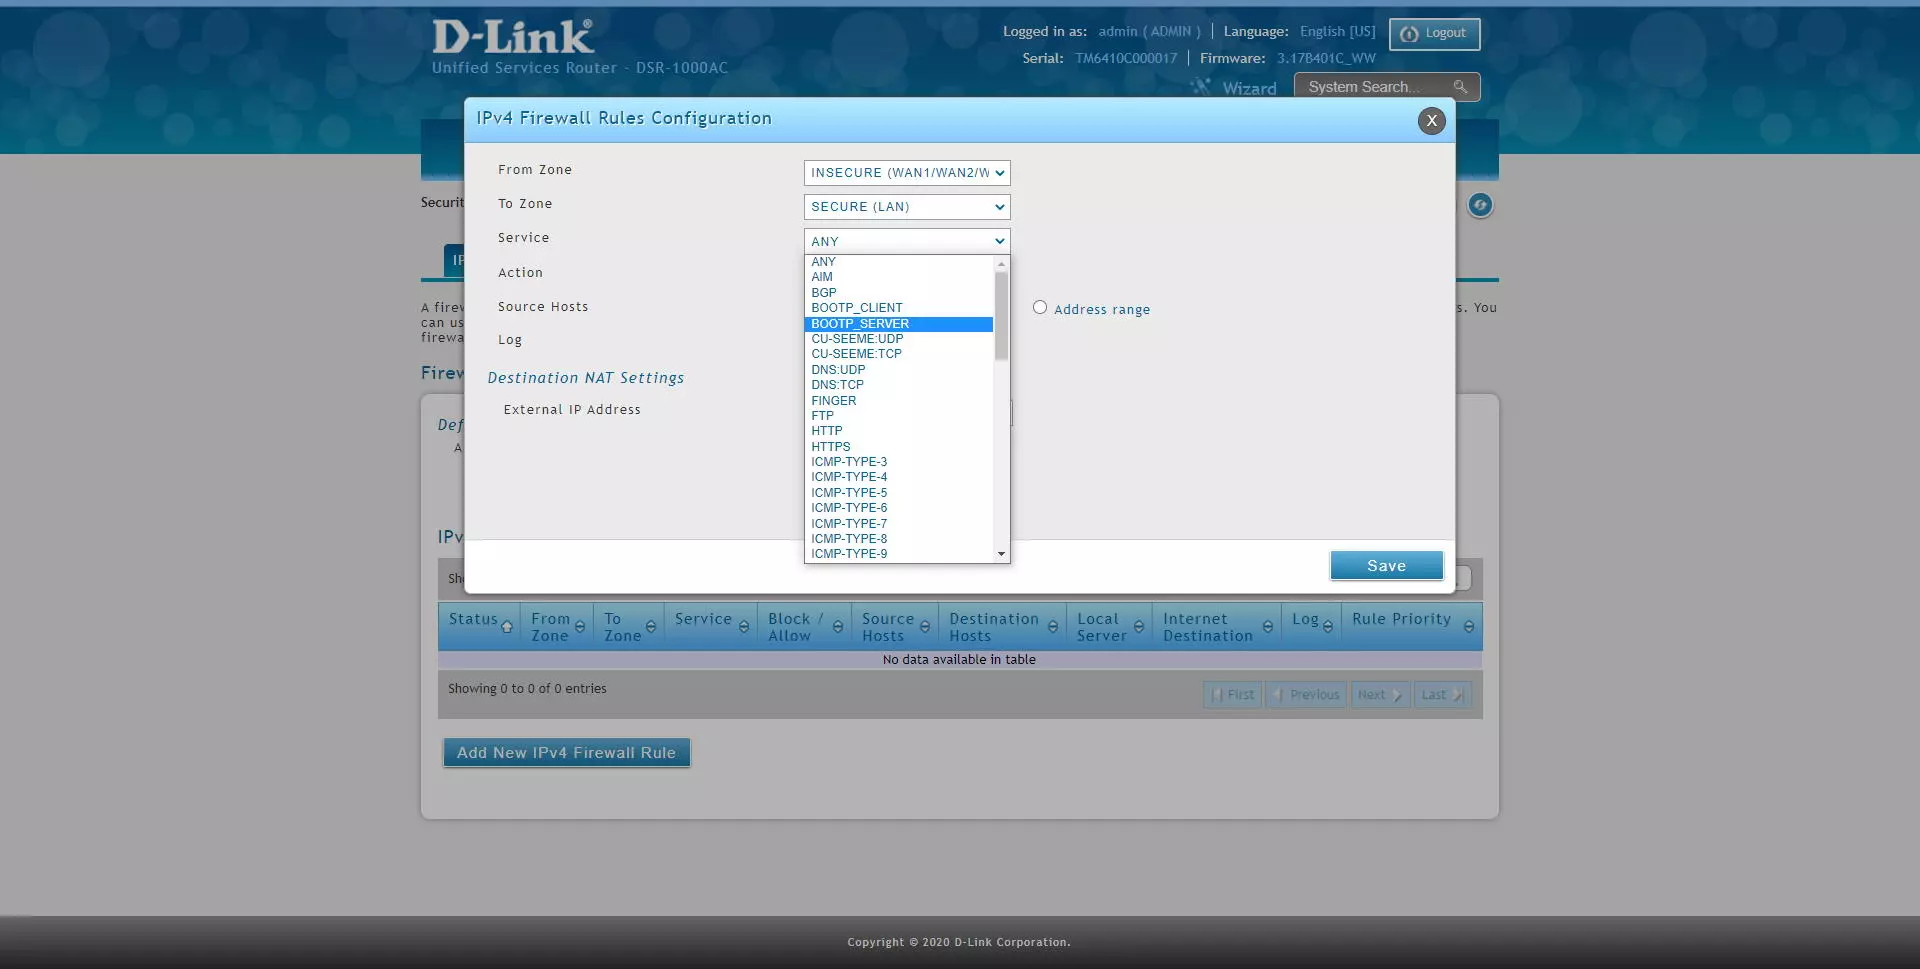
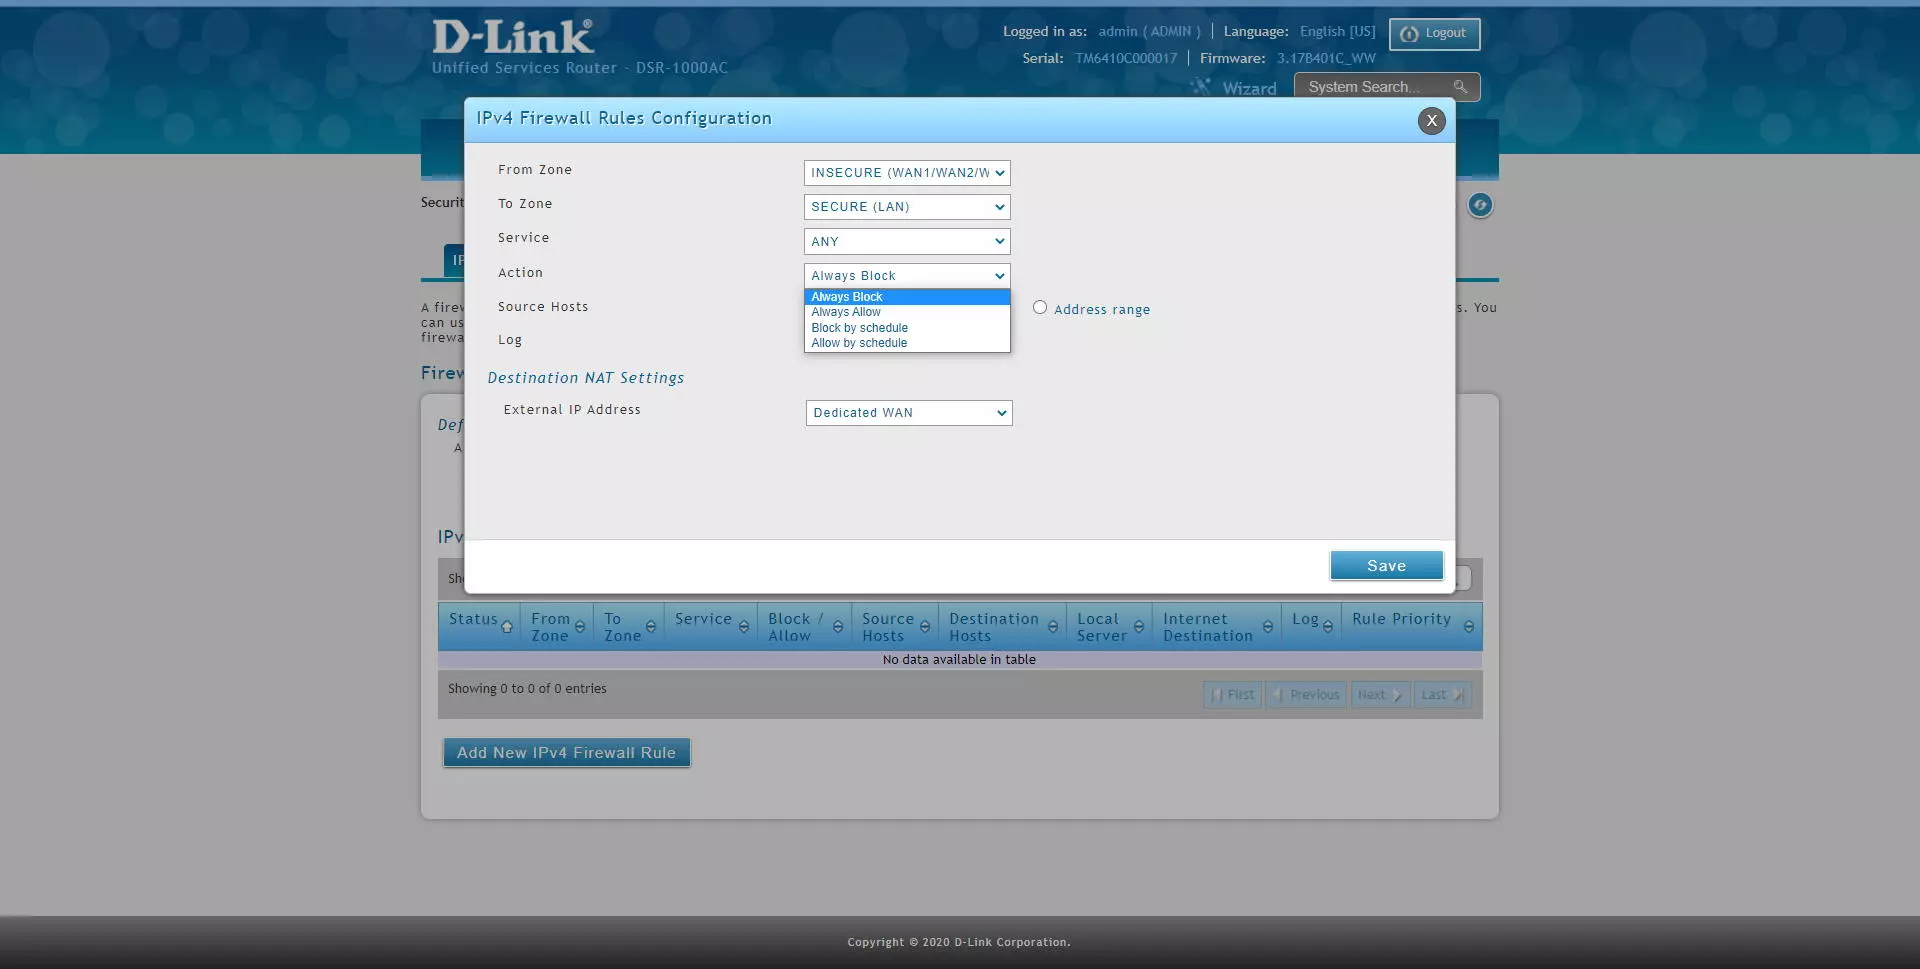
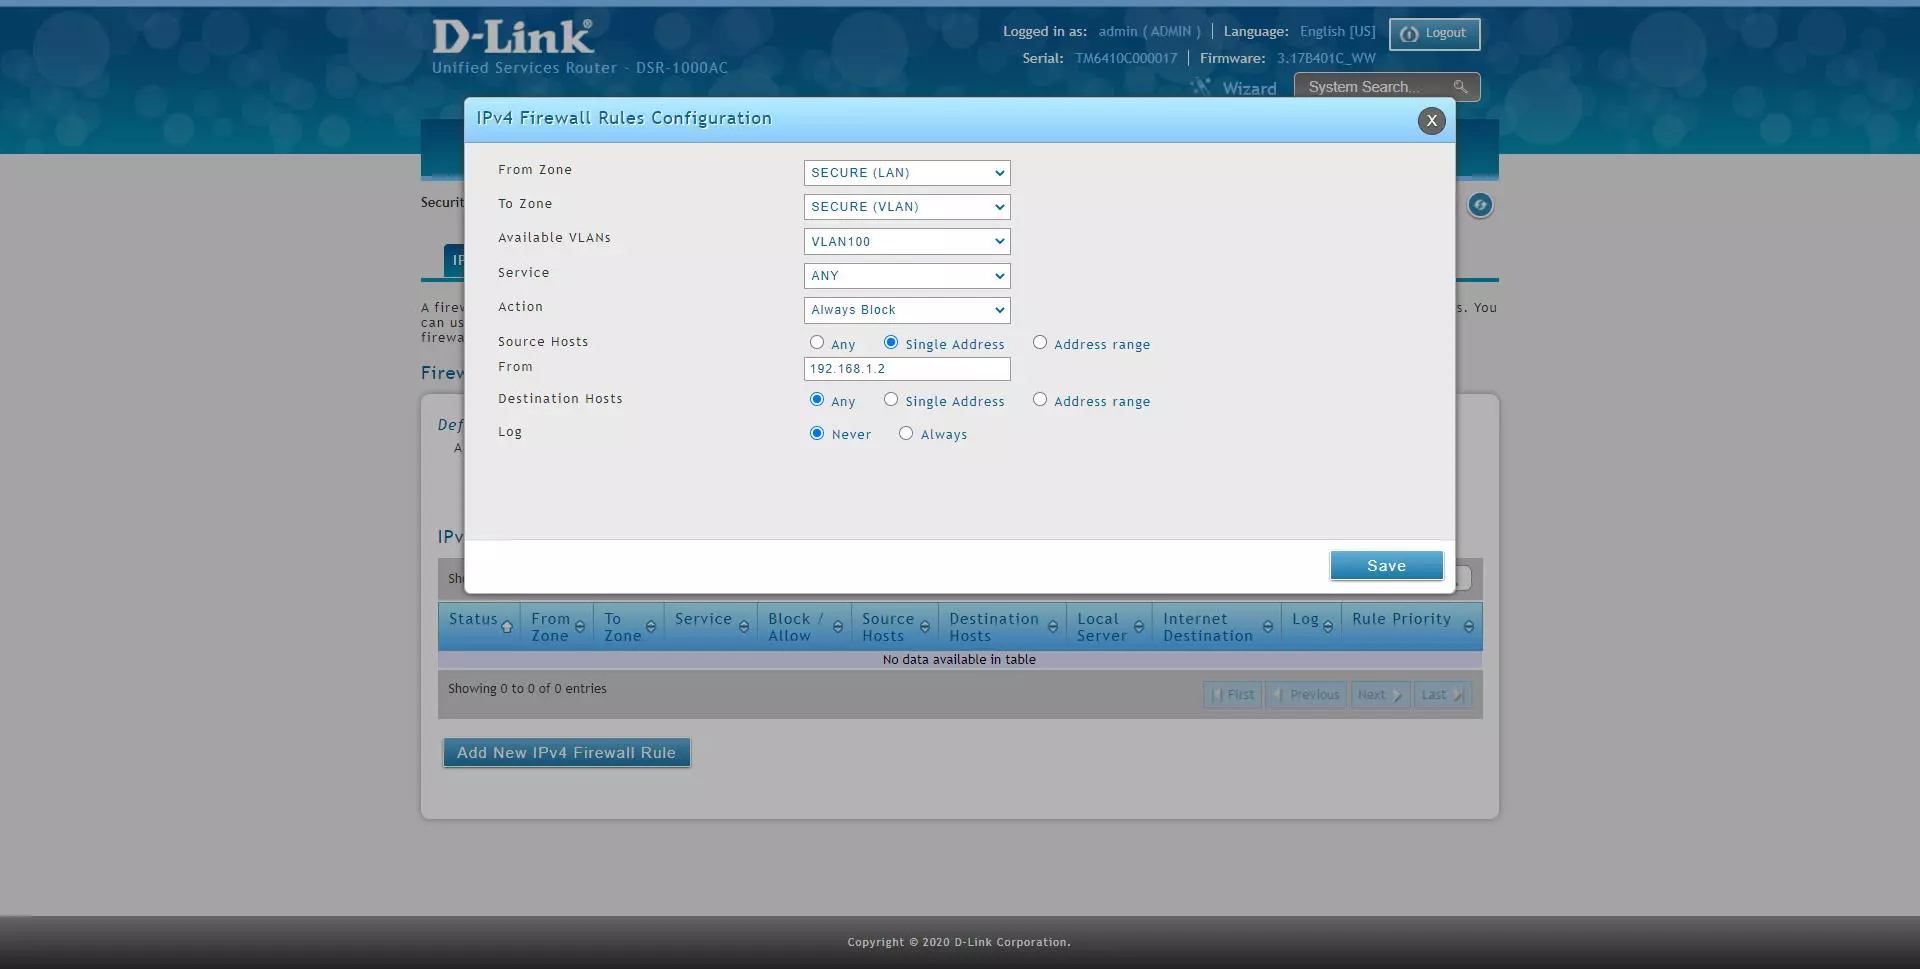
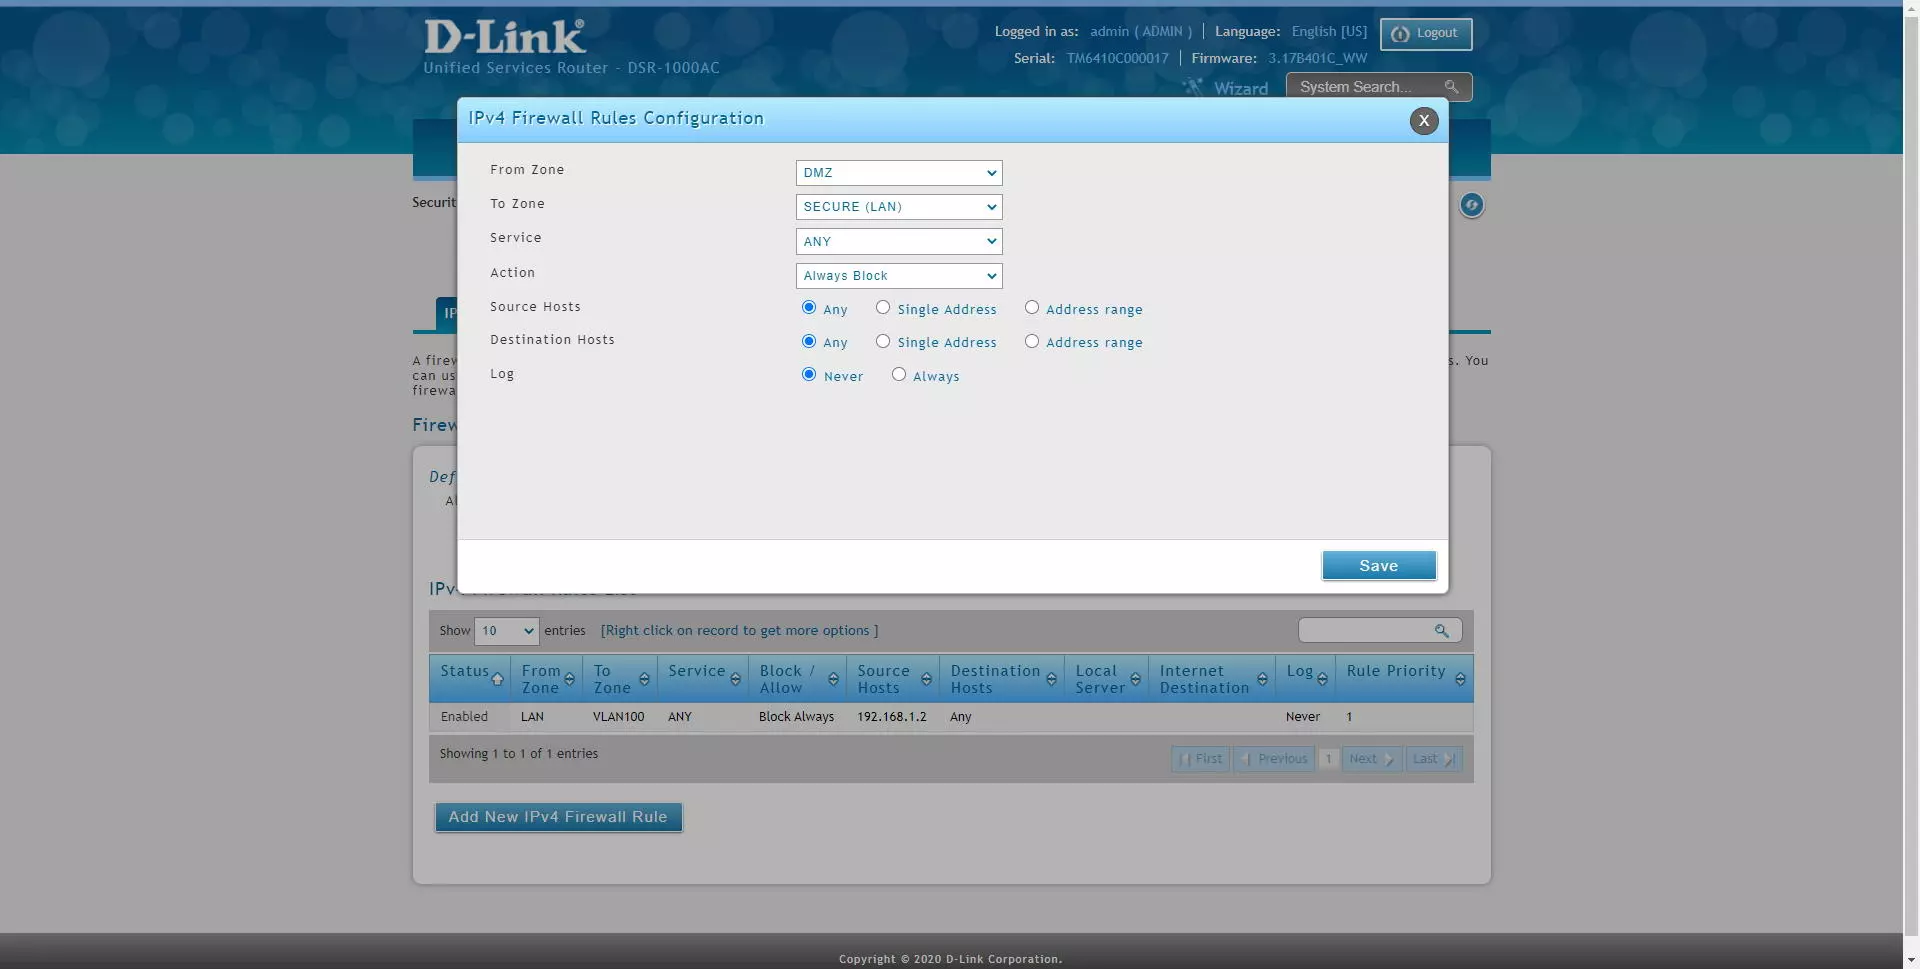
In the “IPv4 Firewall Rules” section is where we can add different rules, then we indicate all the options available to apply in the firewall:
- From Zone: in this option we have the possibility of marking the source traffic by interfaces with LAN, a specific VLAN, WAN, DMZ etc.
- To Zone: in this option we have the possibility of marking the destination traffic by interfaces with LAN, a specific VLAN, WAN, DMZ etc.
- Service: we will be able to filter different network services, whether it is TCP, UDP, ICMP and many other protocols. If you want to filter at the IP level, you must choose “Any”.
- Action: we will have different actions for this rule. If the packet meets the source, destination, and service condition, then this action will be executed. We have a total of four configuration options.
- Always Block: always block packets
- Always Allow: always allow packages
- Block by schedule: blocks according to a schedule that we must define in another firewall menu. The service will be blocked in the selected time, and in the non-selected time it will be allowed.
- Permit by schedule: allows based on a schedule that we must define in another firewall menu. The service will be allowed in the selected time, and in the non-selected time it will not be allowed.
- Source hosts: we can filter by any host of the interface chosen in the origin, by a specific IP address, or by a range of addresses.
- Destination hosts: we can filter by any host of the interface chosen in the destination, by a specific IP address, or by a range of addresses.
- Log: if we want to log the packages that satisfy this rule.
- QoS Priority: if we want to add priority via QoS to the packets
Next, you can see all the configuration options:

If we select a VLAN as the source zone, we will get a drop-down menu to select the VLAN that we want, as you can see. We can also choose any destination, including another VLAN to block inter-VLAN traffic as we want. In addition, thanks to “service” we can block at the IP level, TCP and UDP protocols and more.
We can also configure the firewall to block or allow traffic from the Internet WAN to the LAN or a specific VLAN, with the same configuration options. However, if we select the WAN as the source zone, at the bottom it will indicate the “Destination NAT” configuration, that is, against which interface we are performing the NAT / PAT.
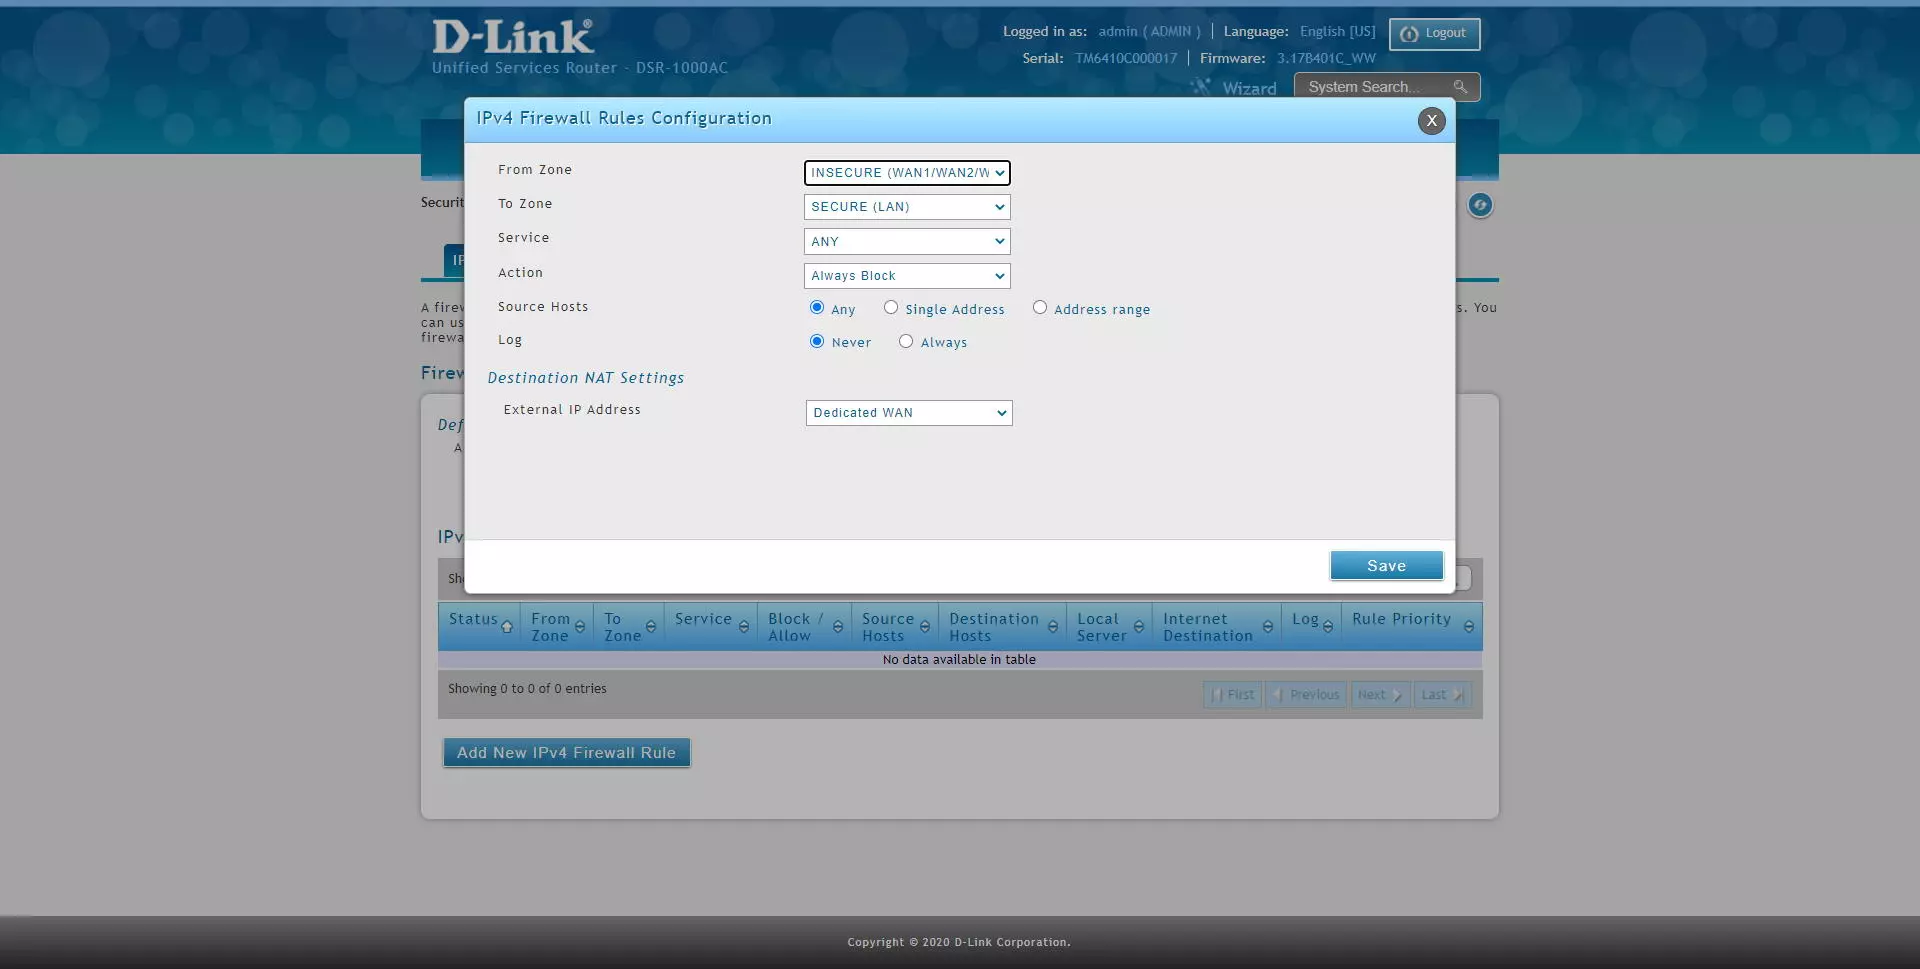
As you can see, if we select the WAN source zone, as a destination we can block traffic that goes to the LAN, a specific VLAN or directly to the DMZ, if we have it configured, because the latter is optional.
Regarding the «Service» options, we can filter by all the protocols at the application level and at the network level, ideal for filtering or allowing only what interests us. This DSR-1000AC router is really complete in this sense, we can configure in detail all the firewall services that we want.
As we have explained before, we will have a total of four options to allow / block, a strict policy of “always” and based on a time schedule that we can configure.
As you can see, we can choose both in origin and destination that we only filter an IP address:
Once we have created, we click on “Save” and we will have the rule configured and created. A very important detail: all the rules are verified from top to bottom sequentially, therefore, our recommendation is the following:
- Configure the more specific rules above (IP addresses are more specific than an entire subnet).
- Configure the most general rules below
- Configure the rules that will be used the most above, to optimize performance.
Of course, we can also configure any rule from the DMZ to the LAN:
As you have seen, the firmware of this D-Link DSR-1000AC router is a really complete device with a very powerful firewall, with which we can make a large number of rules.