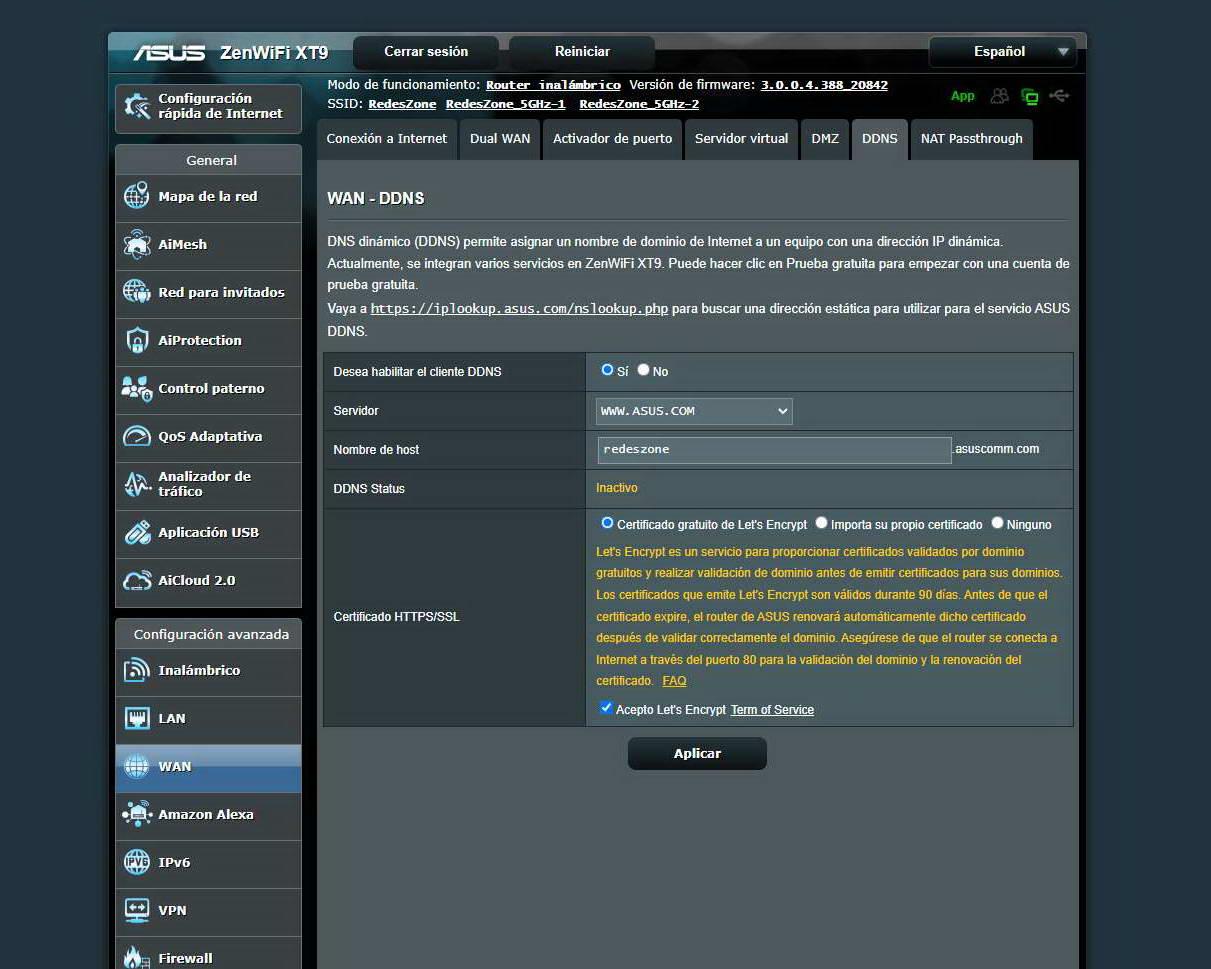
In our case, we have chosen “Server: WWW.ASUS.COM» because the manufacturer itself provides us with a totally free dynamic DNS, we simply have to put the host name that we want, and the domain will end with asuscomm.com, as you can see below.
In the event that we want to access the router remotely, we can do so and generate a free certificate with Let’s Encrypt, ideal so that the web browser does not tell us that it is an insecure website because it does not have a valid SSL/TLS certificate. This is totally optional, the most important thing is that you have dynamic DNS, no matter what provider we have it with.

Now that we have the Internet connection and also the dynamic DNS configured, we are going to go to the VPN server section where you will be able to see how easy it is to configure this VPN server in our router or ASUS WiFi Mesh system.
Configure WireGuard VPN Server
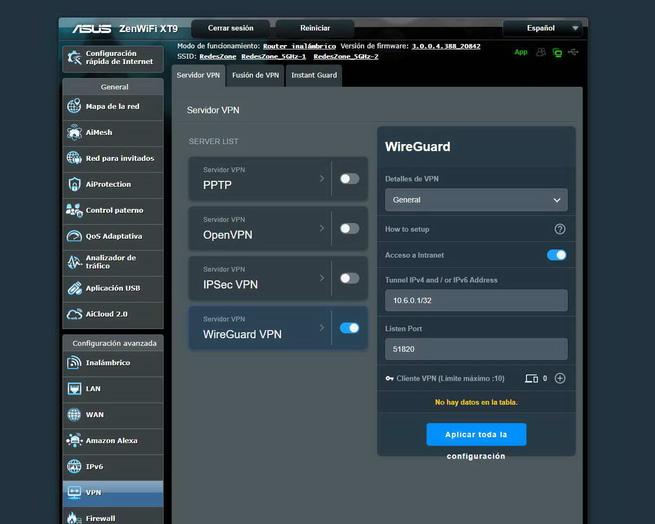
To configure the VPN server with WireGuard, we have to go to the «Advanced Settings / VPN«. Once we are here, we click on the “WireGuard VPN” section and we can see both the general configuration and the advanced configuration with the different configuration options available:

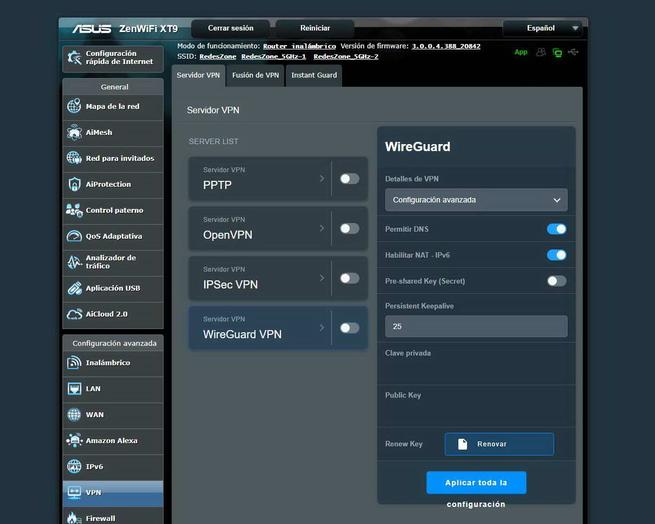
In order to make the different changes to the server, we must activate the VPN service and then apply the changes that we want. The ASUS router allows us to make the following configurations:
- General:
- Allow or not access to the intranetthat is, to the home local network.
- Tunnel IP addressby default it’s fine and we shouldn’t touch it, unless we want to modify the default subnet.
- listening UDP portis the default port and we can put the one we want.
- Advanced configuration:
- allow the use of DNS of the router.
- Enable NAT for IPv6 networks
- Activate or not pre-shared keythis key must be on all clients.
- Keep Alive: The value that is there is the default and correct.
Once we have configured all the general parameters, click on «Apply all settings«, and the same when we configure the different parameters of the «Advanced configuration» section, we proceed to click on the «Apply all configuration» button.
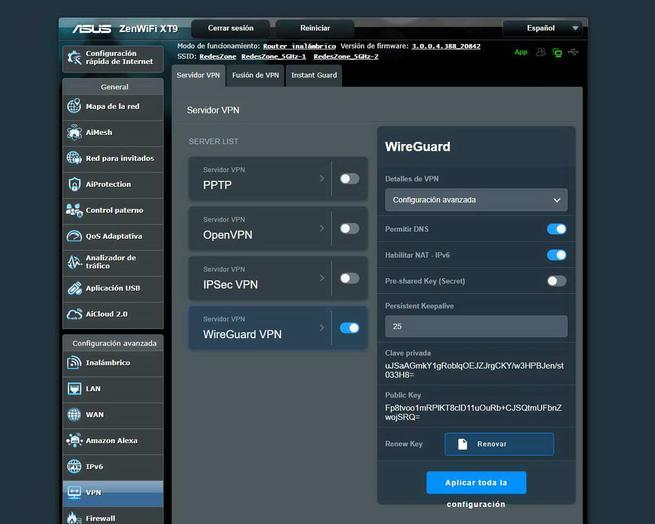
Finally, we have to click on «Renew key: Renew» to generate the public and private key of the server, which is generated only if we click on the button, otherwise it will not be generated.
Now that we have configured the VPN server correctly, we have to create the different VPN clients that are going to connect to the server. In this same menu in the “General” section is where we have to create them, and then pass the configuration to computers, smartphones and other devices compatible with WireGuard.
Client configuration
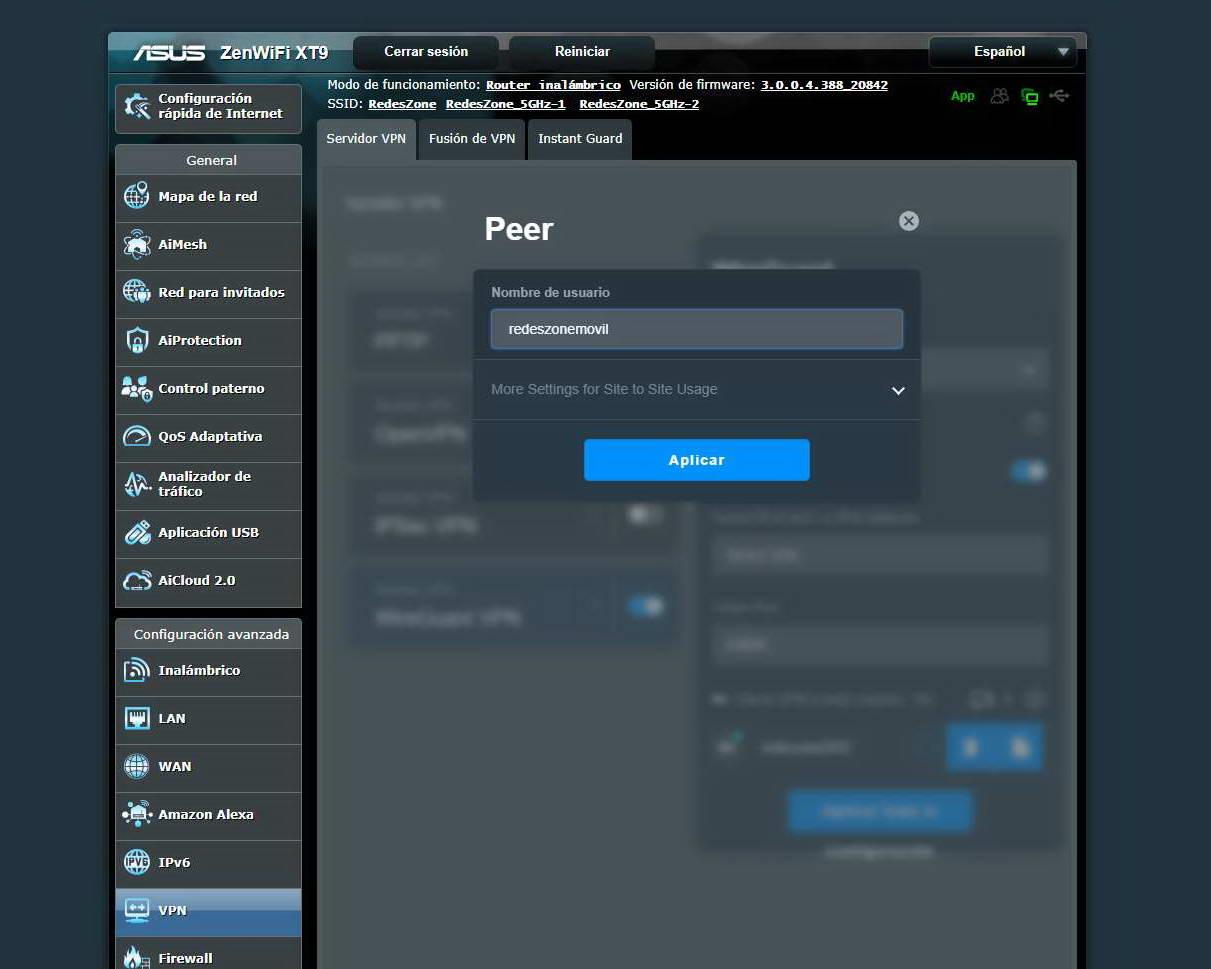
Configuring the clients is a fairly simple task because ASUS will provide us with everything we need, by clicking on «General > VPN Client» on the « icon+» we will be able to add a new client. The first thing that will ask us is the username that we want to register, then the router will generate the IP address of the client, which IP addresses are allowed on the server and also which addresses are allowed on the client.
It is very important that the VPN client has the addresses 0.0.0.0/1 to redirect all network traffic through the VPN, otherwise we will have a “split-tunnel”, that is, we can have access to the local network but not redirect network traffic. In principle, we should not touch this configuration that it proposes.
Once we click on “Apply and Enable» We can access a QR code to scan with our Android and iOS smartphone, if you use iOS you will have to enter the IP address of the DNS manually, but on Android it is all automatic. In the event that you are going to configure it on a PC, you will have to click on the “Export” tab and we will see the code that the configuration file must have, we can also click on the “Export” button to download it to our PC.
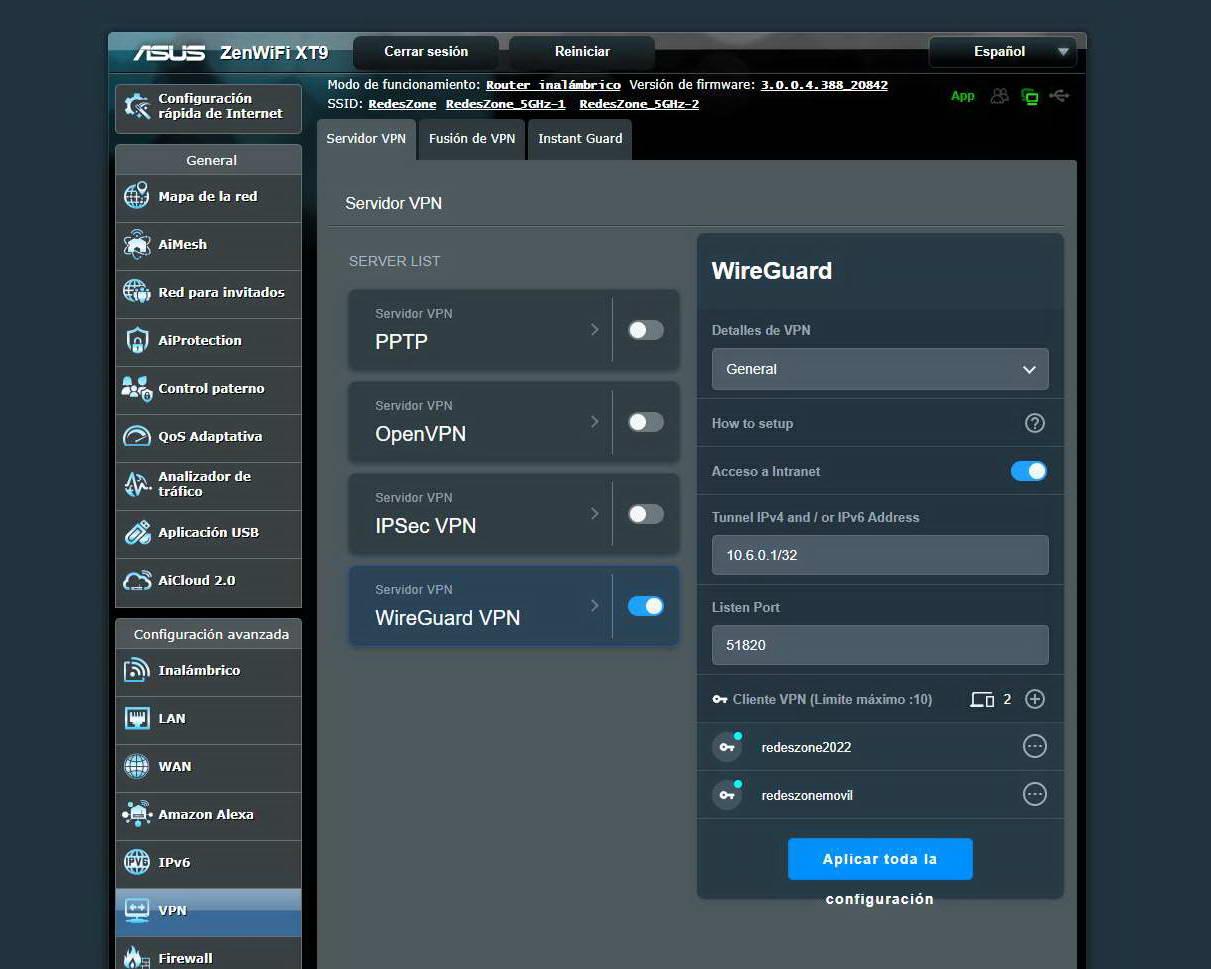
Once we have created the client, we can see it in the client list, we will be able to create a maximum of 10 VPN clients with WireGuard, it is a limitation that you must take into account.
Now that we have the client created, we can install the VPN client (software) for our computer or mobile, on the official website of the project you can find all the available installers, we simply download the correct one for our operating system, install it and that’s it.

We have tested the VPN client for Windows, it is the same for Windows 10 as it is for Windows 11, so there are no differences. We open the program and we have to click on «Import tunnel from file«, we look for the configuration file that we have exported from the router (and saved on our PC), and it will automatically load all the configuration that the configuration file has.
If we click on the button “Activate«, we wait a few seconds and we will have established the VPN tunnel between the client and the server, it will inform us of how much traffic we have exchanged and we can also see the complete record of everything the client has done to make it work correctly.
As you can see, when the tunnel has been successfully established, on the router we can see that this client is currently connected to the server.
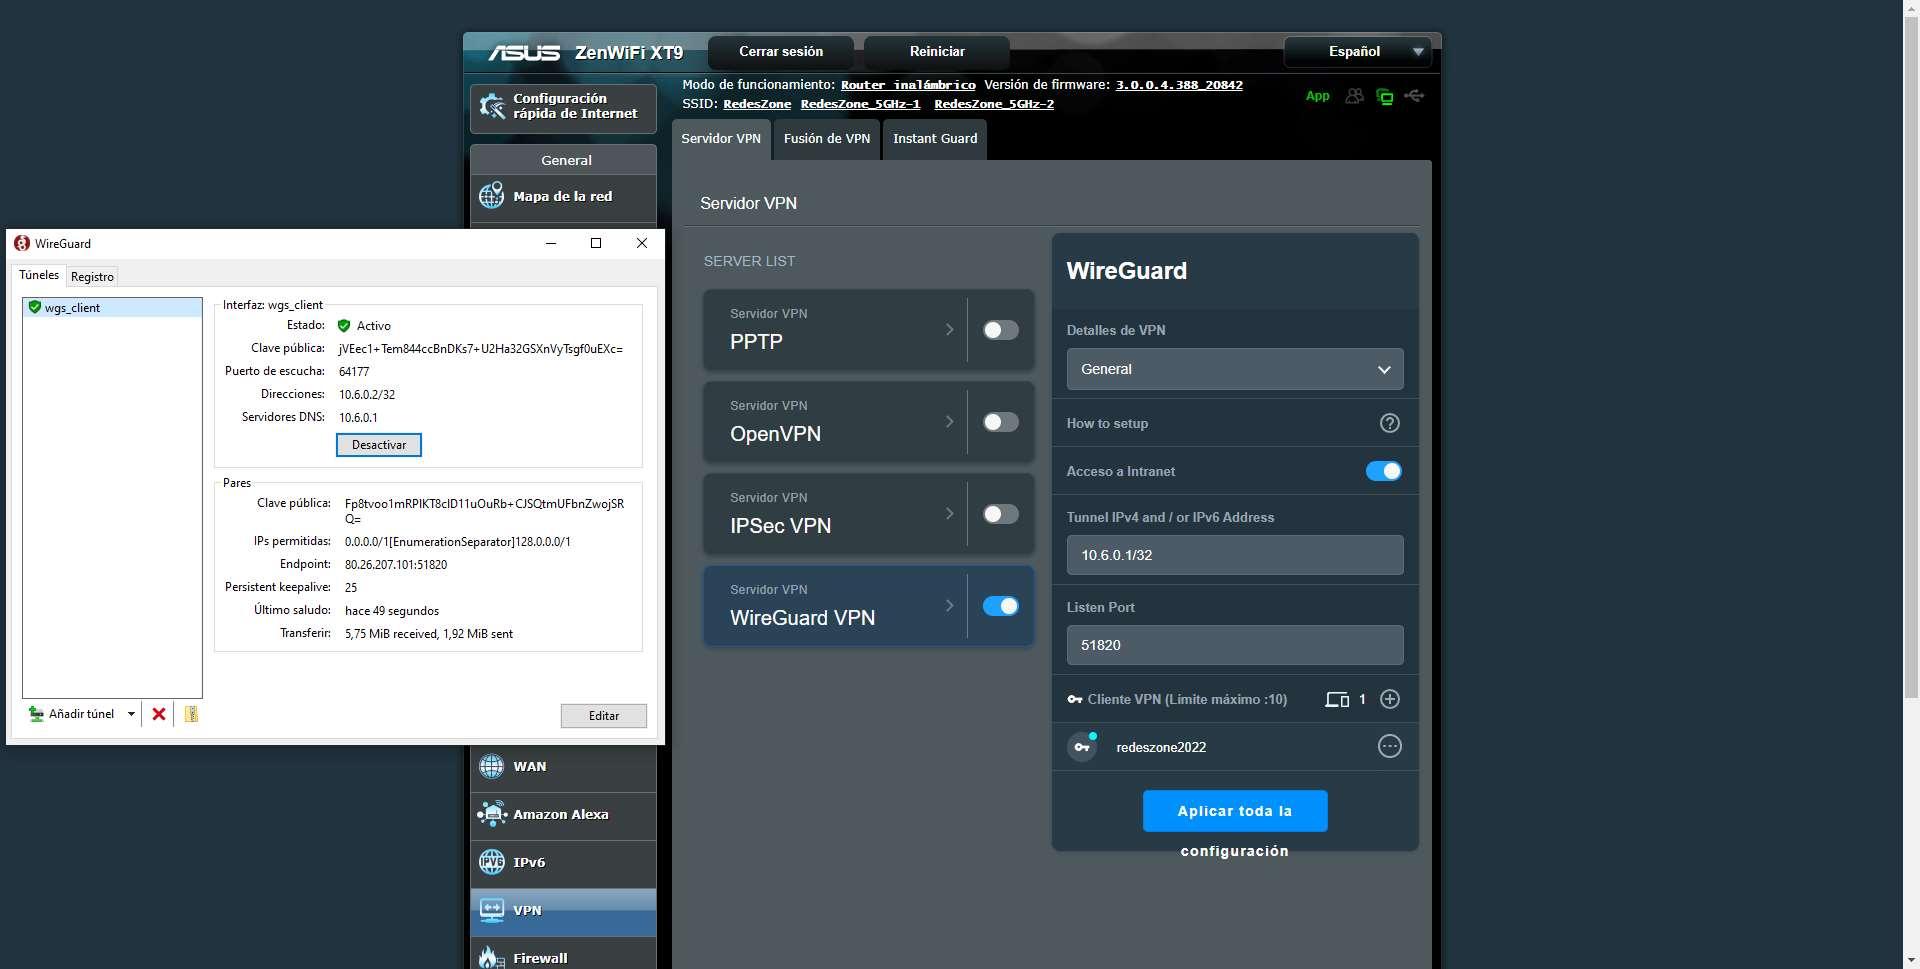
We will also be able to see in the routing table that we have a new wgs1 interface up, something totally normal to be able to correctly route the packets through the different networks.

If we create a new “Peer” client for our mobile device, the process is exactly the same. We click on “Add VPN client”, we give it a username and click on “Apply” because the rest of the configuration is automatically generated without us having to do anything else.
In the smartphone application, we open WireGuard and proceed to scan the QR code that the ASUS router shows us, then we give it a name and we can activate the VPN whenever we want. We simply have to activate it on our smartphone, click accept if it asks us for VPN connection permissions, and we will be browsing the Internet through the ASUS router with the virtual private network.
Of course, in this case we will also be able to see how much data has been transmitted in the established tunnel, the same thing that happened in the client for Windows computers.
If we go to the ASUS router, we can see that the two clients are connected correctly and without problems.
As you have seen, setting up the WireGuard VPN server on ASUS routers is really easy. We are going to have the maximum possible security without the need for complicated configurations, an important aspect is that we are going to have a high bandwidth compared to IPsec or OpenVPN, because this new protocol is much more efficient. In addition, we will have “roaming” between networks, so if you change from WiFi to mobile data, you will not have to reconnect to the server, but it will automatically try it itself without you having to do anything else.