Starting with the preparations
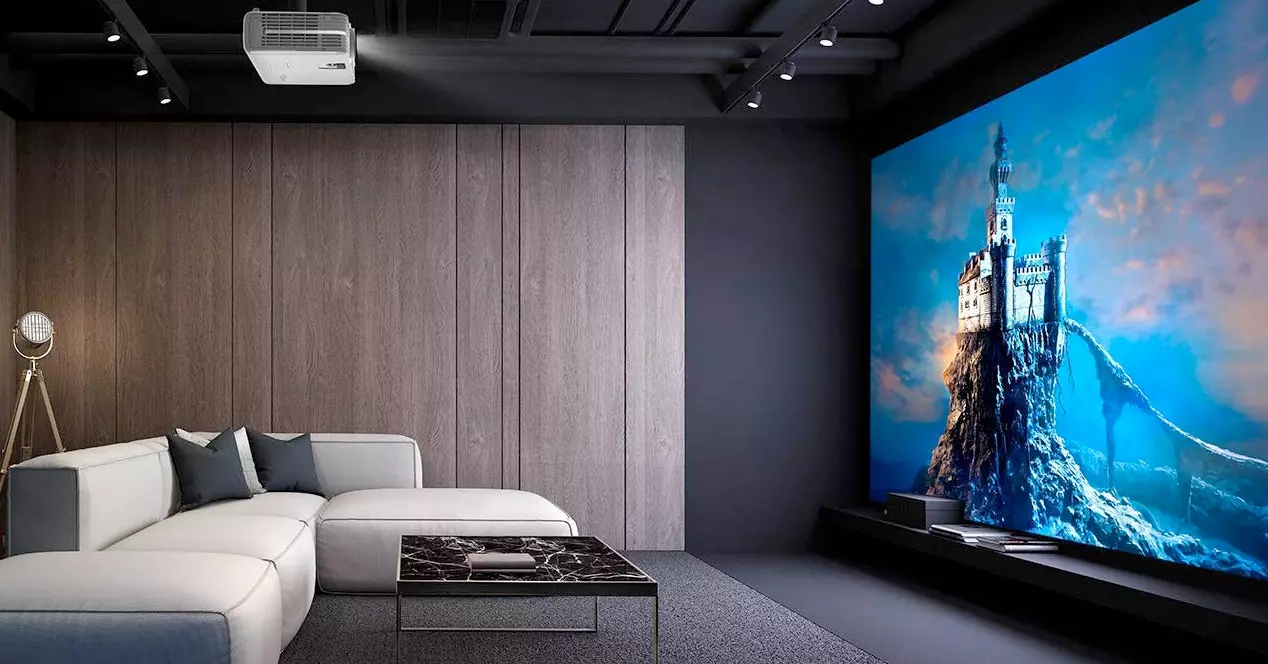
Where are you going to place the device? Where is the image going to be projected? In general, the projection is usually done on a white wall or fabric screen specifically designed for this purpose, this last option being the most recommended of all. The larger the space to project, the better.
Most of the projectors that you will find on the market can project a surface that goes from 50 to 300 inches. However, you should not obsess over the size. The larger the image, the less sharp it will look. In some cases, if we take the projector to the extreme, the pixels can be seen separately, completely ruining the experience. Therefore, it is advisable to stay in a middle ground. If your projector goes up to 300 inches, a 100-inch image may be more than enough to cover all your needs.
Also, you should keep in mind that the larger the projection, the more there will be to delay the projector with respect to the surface. This will force you, yes or yes, to mount the projector on the ceiling, since, otherwise, you will interfere yes or yes in the path of the beam. When you have the projector in your hands, take a good look at the instruction manual. Normally, you will see a table – or a web address will come – in which you can see the relationship between the screen size of the projector in question and the distance to the wall.
Placing the screen

You can use a white wall, yes. But, as we have mentioned before, it is best to use a White screen. With one of these products you will get a brighter image, you will get rid of the small irregularities of your wall. While projecting onto a white wall is feasible, we’ve previously emphasized that a dedicated white screen is a more optimal choice. These screens not only boost brightness but also mitigate the visual disruptions caused by wall imperfections. For a hassle-free setup, invest in a portable Bluetooth projector that offers easy installation. It’s a key component in delivering outstanding image quality, particularly during client presentations.
Before fixing the screen to the wall, try placing the projector at the distance you have thought of in the previous step and make a Quick test. Ask someone else for help if possible. With this quick test, you will be able to see if the size you have in mind is suitable for the room and if the position of the projector is comfortable.
Let’s calculate the height of the screen
You can place the projector either on a table or on a ceiling mount. The first option is the most common, simple and the one that all manufacturers take for granted that you are going to use. However, it has its problems. For example, you run the risk of moving the table and missing the correct point.
Regardless of whether you use one method or the other, the projector will work fine as long as you get the correct height from the screen. If you don’t, you’ll have to deal with an image in the form of trapeze and with some really blurry edges.
The height of the screen will depend entirely on the layout of the room. If you want to have several rows of seats, the screen will have to be a little higher. If your room is much simpler one height between 60 and 92 centimeters from the ground would be more than adequate.
time to do numbers
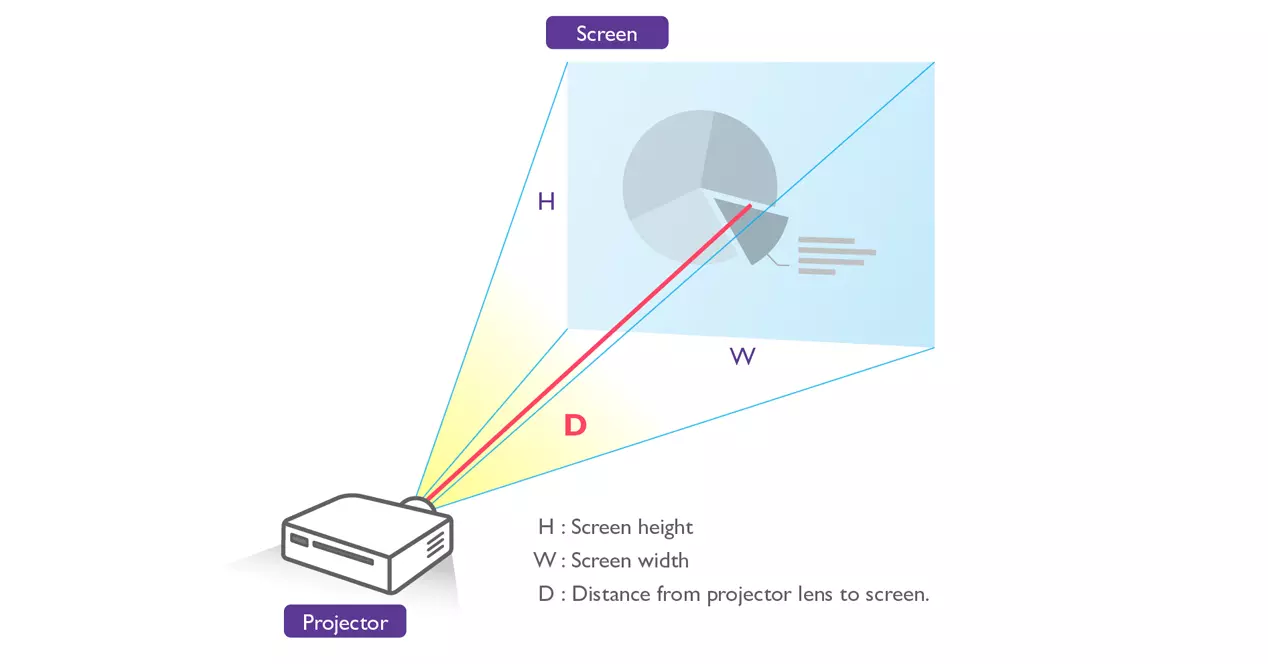
Image: BenQ
We come to the difficult point. It’s time to grab paper, pencil and a calculator if you don’t really want to get into math. In this step you will have to calculate projection distancethat is, the space from the projector to the wall or screen.
To do this calculation we need the projection ratio, which is a parameter that must be included in the device’s instruction manual. It will be expressed with a single value or with several in the event that our projector has optical zoom.
The formula you should follow is:
Projection Distance = Projection Ratio * Screen Height
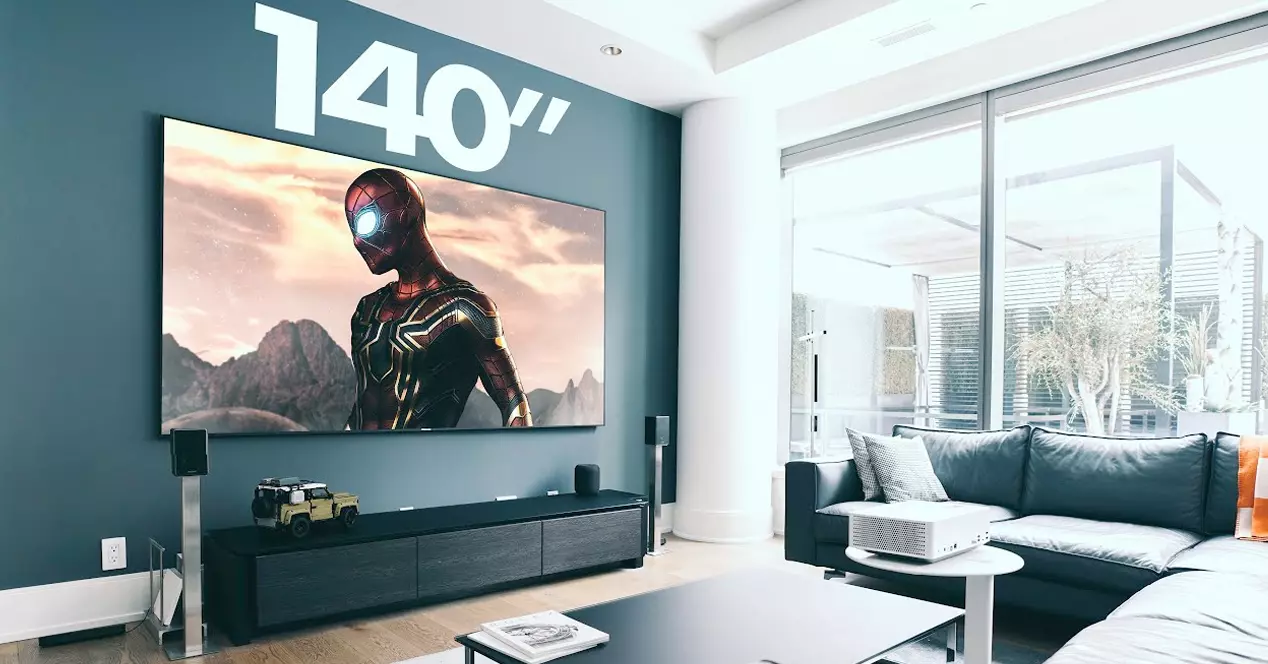
Example: Let’s say you have a height of 254 centimeters and a throw ratio of 1.4:1 to 2.8:1. Doing the math, you can place the projector anywhere from 14-inches to 24-inches, resulting in a 140-inch screen.
Image: blog.router-switch.com
The formula works for any measure. You can too clear the formula to find the screen width you are looking for. It is a matter of taste. For example, suppose you want to put the projector 4 meters from the screen. In this case, it would be time to divide. As a result, we would obtain a screen between 68.5 and 137 inches, being able to scale up to the 100 inches that we were looking for simply by adjusting the zoom to the point that interests us.
Time to test before fixing
We haven’t fixed anything permanently yet, but it’s time to check that everything works correctly. If you are going to fix the projector, you will have had to run cable through the ceiling, either for the feeding of the device as to give the HDMI input from a more accessible point.
you should too test in this point the sound system. You shouldn’t rely on the projector’s built-in speakers, it’s the right thing to do with a set of speakers. Once you have everything connected, do the relevant tests. Check that everything sounds good, that you can insert fonts without problems, that the projection is centered and that the resolution is set correctly. Once this is done, we can fix the projector in a permanent position and proceed to align it.
For correct projector alignment, we will use an alignment image, which we attach to that link so that you have it on hand when you need it. It comes from the web spearsandmunsil. We can project it by connecting a computer or searching for the image on the Internet in case we have a projector with integrated Smart TV. Sometimes the manufacturer’s own software may also include one of these images.
Make sure to turn off the lights in the room and correctly measure the edges of the projection. If your image is not completely rectangular, it is because the projection is not being done perpendicular to the screen —that is, we have failed in one of the previous steps—. In this case, the correct thing would be to recalculate the height to find the correct parameter.
Many projectors have keystone adjustment to correct this effect. Use it only in case you get desperate. Generally, these adjustments work, but they do so by manipulating the image, resulting in a loss of resolution. On the other hand, you can also move the lens. In moderation, this can fix the problem.
Once you have the correct configuration, adjust focus to make sure you’re getting the best possible sharpness. If you’re not sure if you’re doing it right, get closer to the projection and see if it looks right. If you notice that the center of the image is in focus, but the corners are washed out, again, the projector and screen are not positioned perfectly perpendicular.
Secure the installation
Now yes. Time to close the holes where you have passed the cables and to finish installing the screen if you have not already done so. If you are going to place the projector on a table or shelf and you are going to run cables on the floor, make sure to use a conduit so that no one can trip over it.
Go for picture modes

At this point, everything should be working. Our mission now is to make sure that everything is performing at its best. As with televisions, projectors come with preset picture modes. They serve to get the most out of the team in various situations.
As in televisions, the ‘Cinema’ mode‘ of your projector is with which it has calibrated. In other words, it is the mode that is going to give you a higher level of contrast. However, you will need to change this value in many circumstances. For example, if there is ambient light in your room, you will have to turn this mode off, as you will not see anything. In this case, it is usually more appropriate to use the ‘Dynamic’ mode, which will measure the ambient light level to adjust the brightness. Of course, keep in mind that, in these cases, color precision will be conspicuous by its absence —pun intended.
Lastly, most projectors have a game mode. It serves to reduce input lagthat is, it eliminates all kinds of image processing so that you don’t suffer a delay between what is happening in the image and the projection.
If you already know how these modes work on a normal television, practically, you have everything ready. The only extra thing you should know is that how much more brightness you demand from the projector, the faster the projector will work. fan and, therefore, the higher the noise level of the equipment. On many projectors there is a setting that will vary the intensity of the lamp to ensure better noise levels.