This keyboard combination will be familiar to you, because it is the usual shortcut to take a screenshot on an Android device.
If you’re one of the lucky few with a Google TV that has this feature built in, great. You don’t have to do anything else, you will see the screenshot animation appear and it will store the image.
Some televisions of this type have it built-in and, in fact, allow you to easily save or share the screenshot.
However, it is very likely that it will not work for you and you spend a good time squeezing and getting frustrated as in my case, since the models that wear this are few.
Don’t worry, there are more methods.
With the Button Mapper app
The other option to get that screenshot is to install a apps external which link function make screenshots of your Google TV (which is always there) with a remote button that you don’t use often.
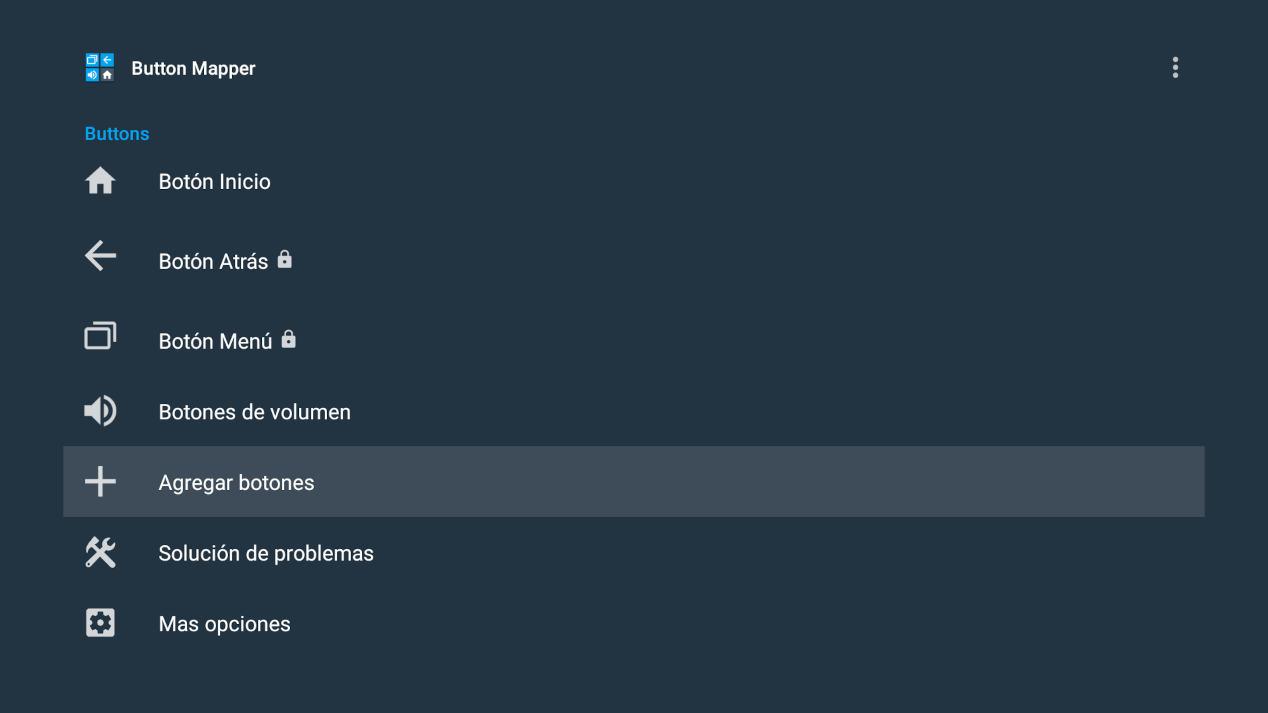
For that, you just have to go to the Play Store application store of your Google TV and look for the apps call Button Mapper. Install it like any other app and open it.
You will see that as soon as you start, asks for access to the Accessibility options of your television. It’s very simple and you just have to go to Device Preferences > Accessibility > Button Mapper > Enable.
Once done, Button Mapper can now assign the buttons on the controller to the functions you want. In the app, select the “Add Buttons” option.
Next, choose a button you don’t use often, so as not to alter the use of the command. There is always one that accumulates dust because we don’t give it much with our finger.
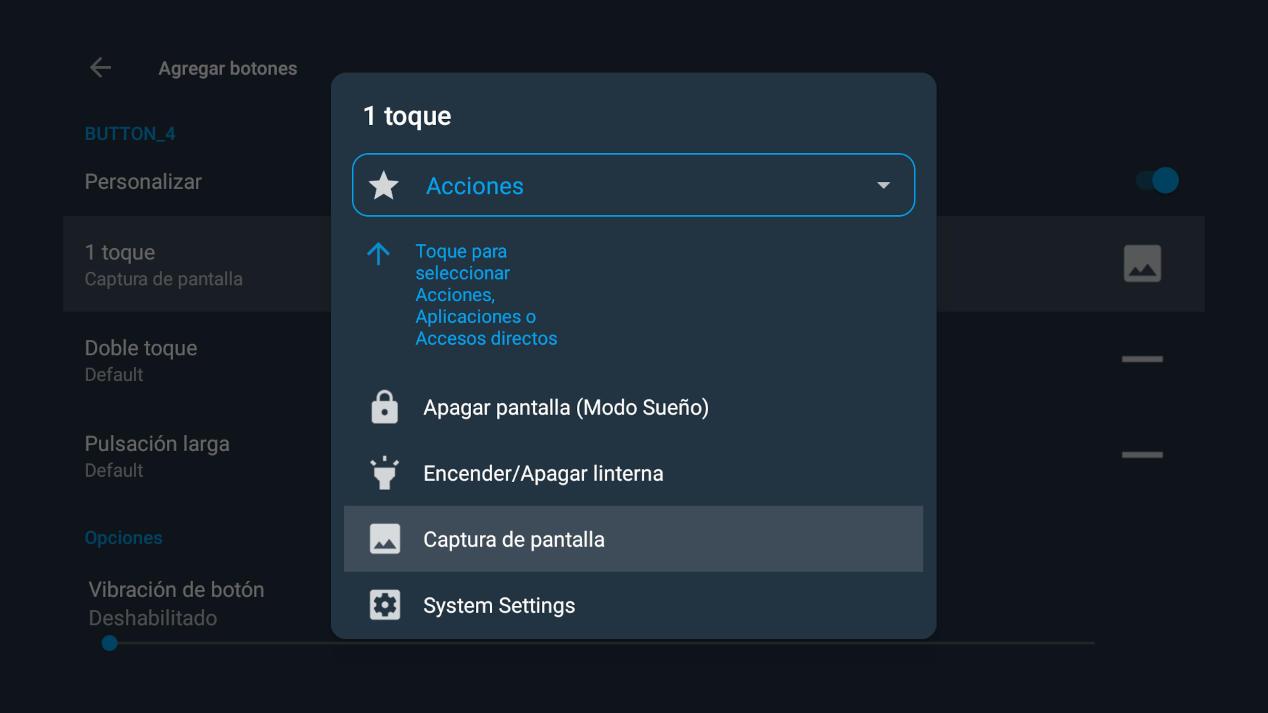
Click on the “1 touch” section of the screen that appears and you will access the actions.
Scroll down until you see the “Screenshot” option as you can see in the image below. Press and, from now on, every time you press that button on the remote, you will make a screenshot to your Google TV.
However, the article does not end here, because we want to give you a complete guide and soon you will ask yourself an important thing: How do I take screenshots from my Google TV?
Don’t worry, we’ve got your back. Let’s see how to send images from your Android TV to your mobile (and vice versa).
How to send images from your Google TV to your phone and vice versa
Again, we give you the two simplest methods that work best.
How to send and receive images from your Google TV with TV File Transfer
If your television is connected to the Internet by WiFi, you have it very simple.
Find the TV File Transfer app in the shop Play Store of your television and install it.
Now, look for the same app on the phone in which you want to receive the screenshots of your Google TV (or from which you want to send images to the television) and install it too.
Run the app on both devices and make sure both are connected to the same WiFi. When this is the case, the two devices can easily exchange files with each other. You will see that this screen of the application appears on your television.
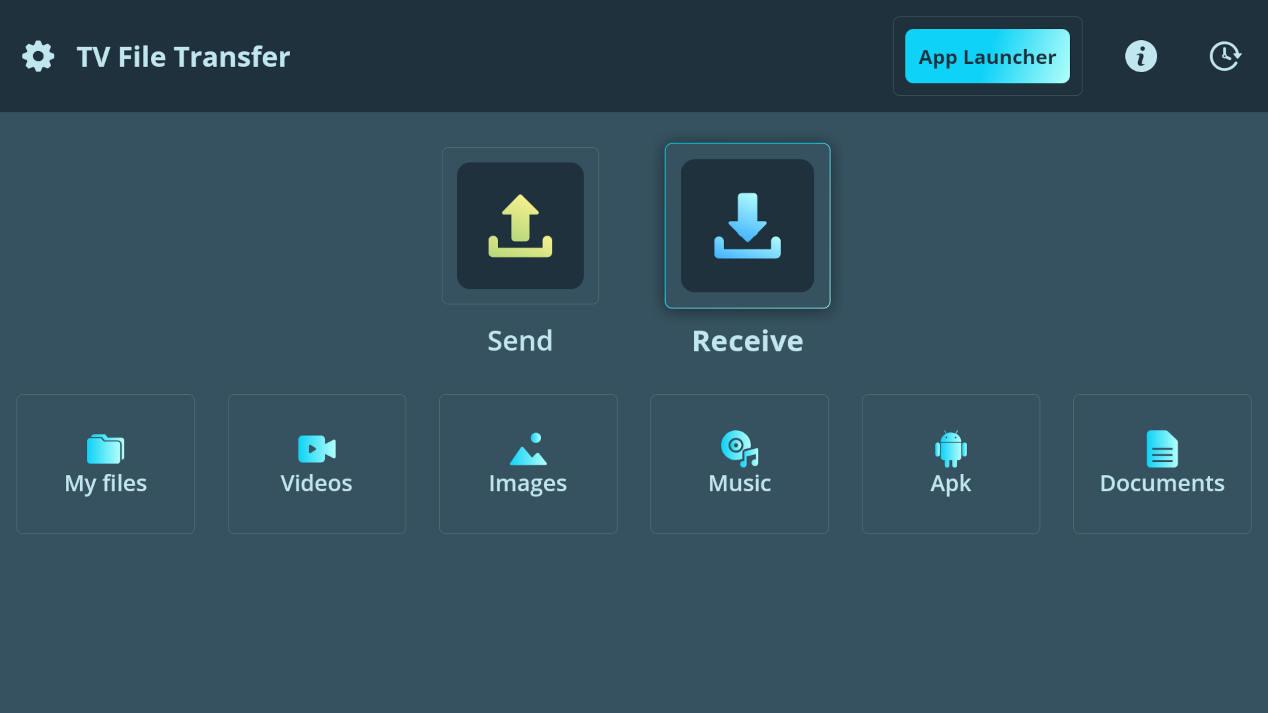
If you choose «Send» you can take those screenshots that you have made and send them to the mobile. They are in Internal Memory > Pictures > Screenshots.
If you choose “Receive”, you will be able to send images from your phone to your Google TV, for example, photos that you have taken and want to show off on TV.
with the same system you also have the “Send Files to TV” applicationalso available at Play Store.
However, if for whatever reason it doesn’t work for you, or you have the television connected by cable, as is my case, and you don’t want to complicate yourself by reconnecting to WiFi, don’t worry, there is another option.
How to take screenshots from Google TV to mobile with Solid Explorer
The other way to get those screenshots from your Android TV is use a file manager that allows connection to a cloud storage serviceand copy the screenshots to that cloud.
In this way, you will have them available on any other device, such as your mobile or your computer.
For that, you can do it by installing on your television Solid Explorer app. This will give you a trial period of about two weeks, but it will be enough to extract the images from Google TV.
Once Solid Explorer is installed, you must choose the three vertical dots from the options menu dropdown on the left.
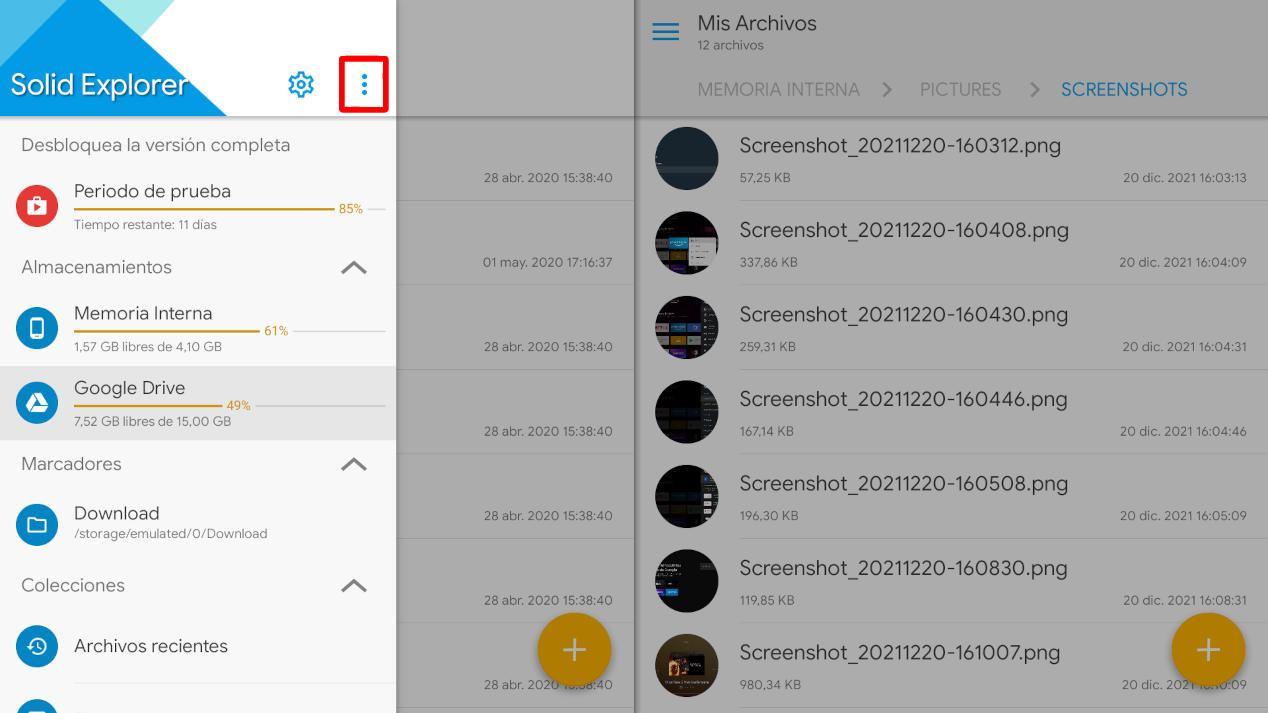
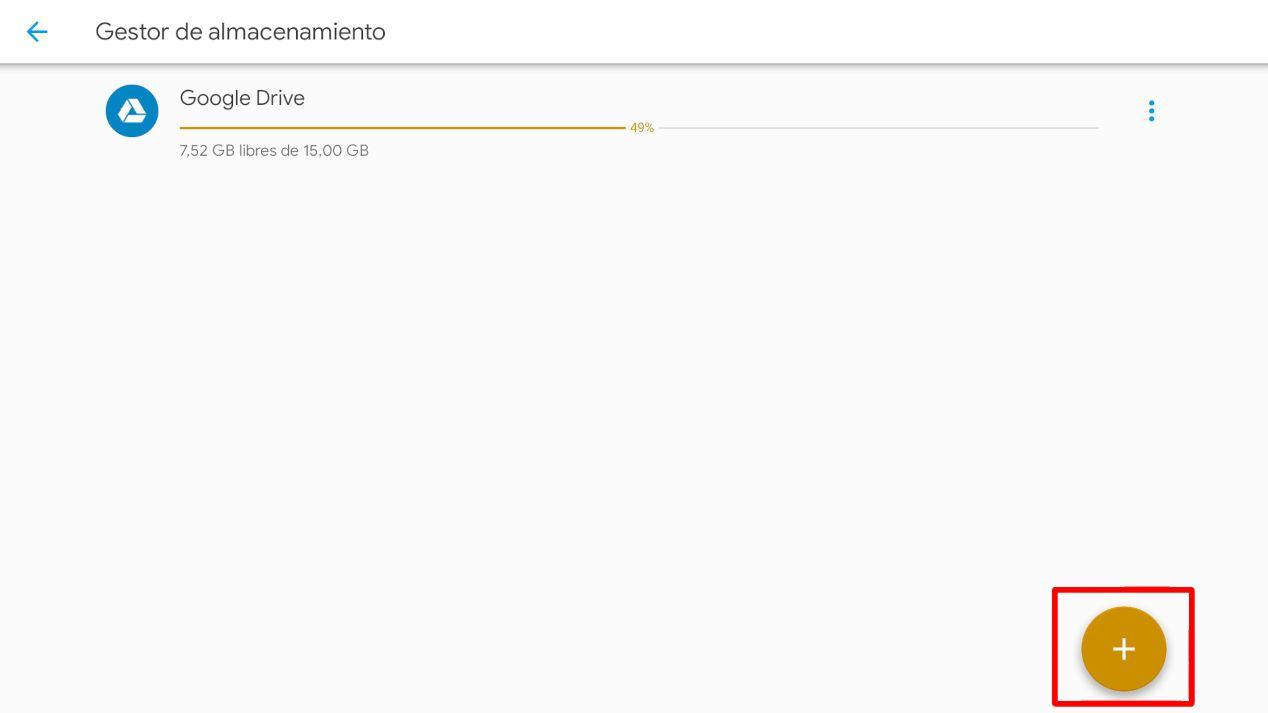
The pop-up that comes up, now choose “Storage manager”.

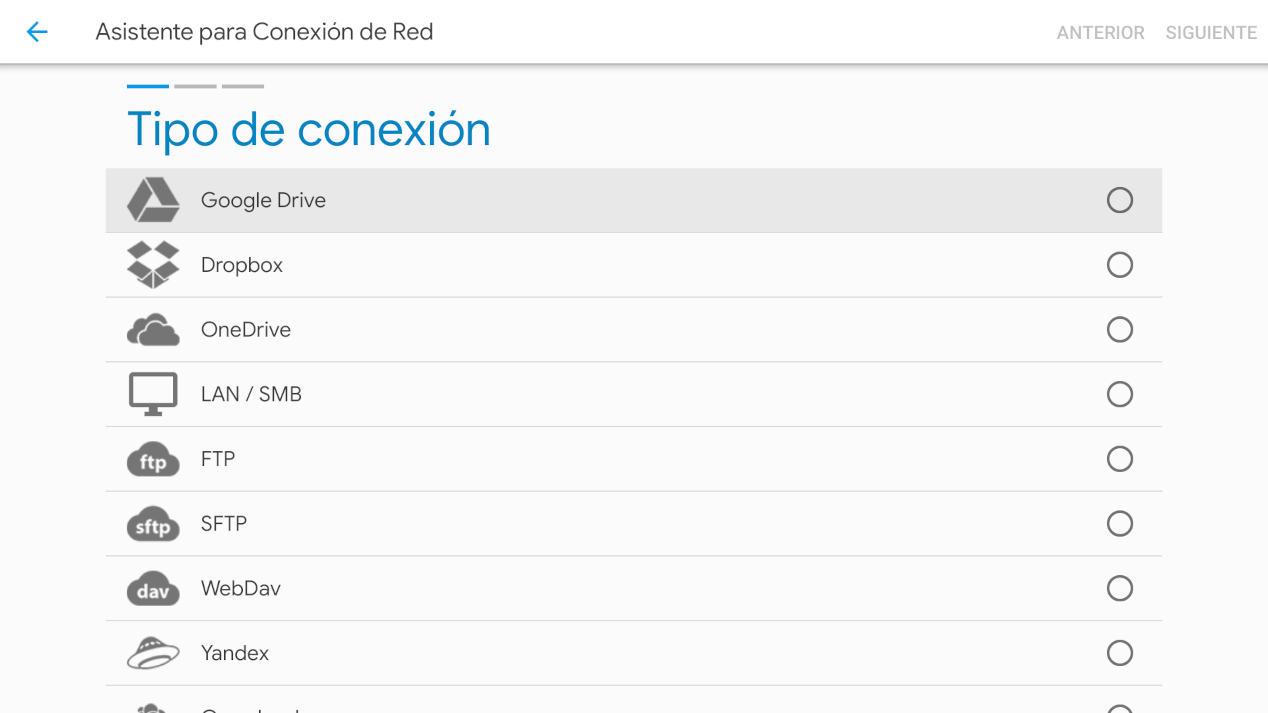
On the new screen, click on the yellow button with the “+” sign to add a new connection. Google Drive already appears to me because I had it installed, but it should come out blank for you.
We choose the appropriate connection type, in my case and for this example, Google Drive. If you have a Google TV, you will have a Drive account, but if you prefer Dropbox or Onedrive, no problem.
It will ask you which Google Drive account to choose (if you have more than one). You select yours and you will now have the ability to copy files from your television to the cloudso that you can take the screenshots you have made.
As you can see in the previous images, Solid Explorer works on a split screen. On the left side you can enter the folders of the Google Drive you just connected.
On the right side you can access your screenshots that are in Internal Memory > Pictures > Screenshots and copy from one to another, choosing the files with a long press.
As you can see, if you don’t have the native function of taking screenshots enabled on your Google TV with the usual shortcut (most likely), you’ll have to resort to external applications such as Button Mapper. But if you follow the instructions we have seen, it is very easy to do screenshots on your Android television… And get them out of there.