Security is an important aspect when we tend to use the computer and keep it on for many hours continuously. In the event that we are not going to be in front of the screen for a period of time, Windows uses the screen lock after one minute has elapsed since its use. This prevents prying eyes from prying what we are doing.
What is the lock screen in Windows
On our Windows computer when we lock the session, either from the “Lock” option found in the Start menu or by pressing the “Windows + L” keyboard shortcut, the system will show us the lock screen. And there are many users who configure it as a security and protection measure, because it gives us the security that nobody can use our equipment while we are absent at any time, so it is useful if we share the computer with other users. This screen is customizable and shows us relevant information such as the date, a clock and some notifications, as well as a fantasy background.
By default, Windows has a default timeout of 1 minute for this screen. After this time, the screen turns off. Therefore, if we have the lock screen enabled and we lock the computer, the screen will turn off. If we want modify the waiting time On the lock screen we can do it from the Power Options (after modifying the registry), using some commands from the Command Prompt or through the Group Policy Editor.
Modify the registry to change the timeout
To begin, we will need to make some changes in the Windows Registry editor to later be able to configure it from the Power Options section.
Windows Registry Editor
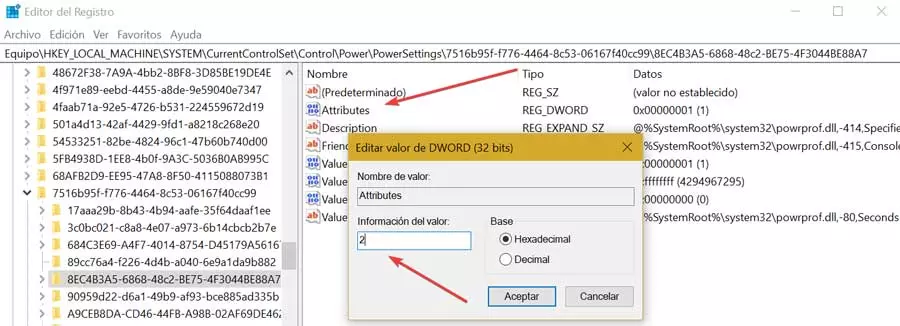
In order to enter the Windows Editor, we will press the keyboard shortcut Windows + R, which will cause the Run command to be launched. Here, we will write regedit and hit Enter. This will make the editor appear, from where we will have to navigate to the following address:
HKEY_LOCAL_MACHINE / SYSTEM / CurrentControlSet / Control / Power / PowerSettings / 7516b95f-f776-4464-8c53-06167f40cc99 / 8EC4B3A5-6868-48c2-BE75-4F3044BE88A7
Once in this direction, we find the right panel the REG_DWORD value with the name “Attributes”. We double click on it and in the Value information box, delete the 1 and write 2. Finally, click on OK. Once this adjustment is made, it will result in the incorporation of a new option within the Power Settings of the Control Panel, which will allow us to modify the lock screen timeouts.
Energy options
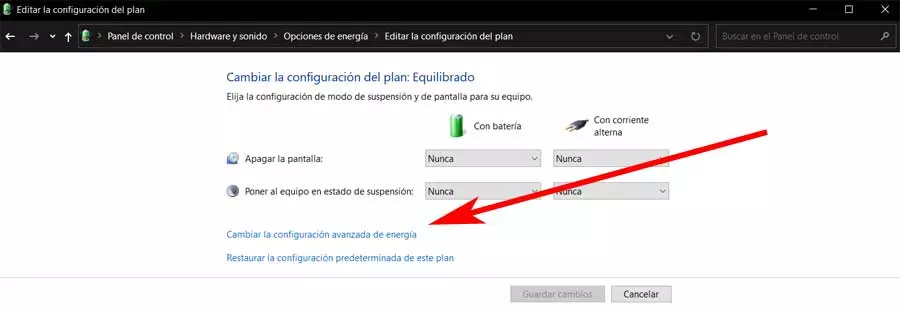
Once we have changed the number in the Registry Editor we have to access the Power Options section within the Control Panel, which we can access directly from the Start menu search box, by typing control panel and selecting it. Later we select the section of “Energy options”.
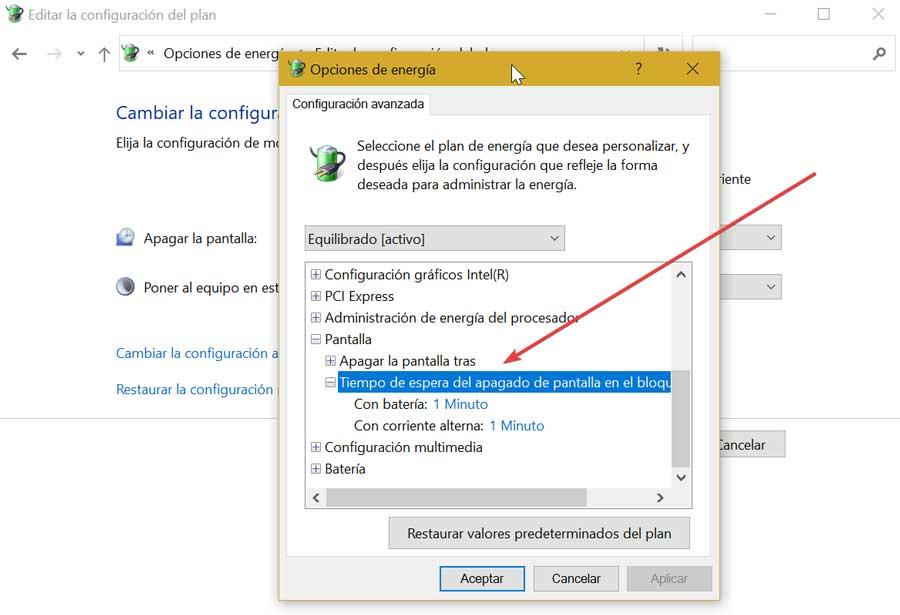
Once inside, we will click on “Change plan settings” and later, “Change advanced power settings”, which will give us access to the window from where we can change the lock screen timeout.
Now we only have to open the “Screen” section and click where it says “Screen shutdown timeout in the console lock.” Here we must change the time to which we consider appropriate. By default, the time is set to 1 minute, so we can change it, taking into account that it must always be less than the time we have set to turn off the screen.
Set the timeout with the Command Prompt
As an alternative to making modifications in the Windows Registry Editor, we can also set the lock screen timeout through the Command Prompt tool. We will do this by executing certain commands. As we have seen before, firstly, it will be necessary to establish a paid time to turn off the screen, so it is essential that turning off the screen is not disabled.
To do this, the first thing we must do is type cmd in the search box of the Start menu, which will allow us to select the Command Prompt, something that we must do by selecting the option to Run as administrator that we find on the right side.
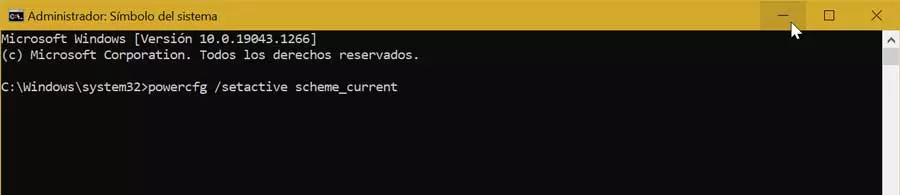
Once we access the Command Prompt, we must write the following command and press Enter:
powercfg /setacvalueindex scheme_current sub_video videoconlock 600

We have set the value 1000 as an example and it represents the time in seconds (10 minutes), so we can replace it with the value we want to set. By default this function is set to 1 minute (value 60).
In the case that our computer is portable and is connected by battery, we must replace the command that we just finished with this one and press Enter:
powercfg /setdcvalueindex scheme_current sub_video videoconlock 600
Later, we write this other command and press Enter:
powercfg /setactive scheme_current
Once finished, we close the Command Prompt window. Now we can block the user session by pressing the keyboard shortcut Windows + L and we will check how the time set is maintained before the screen turns off.
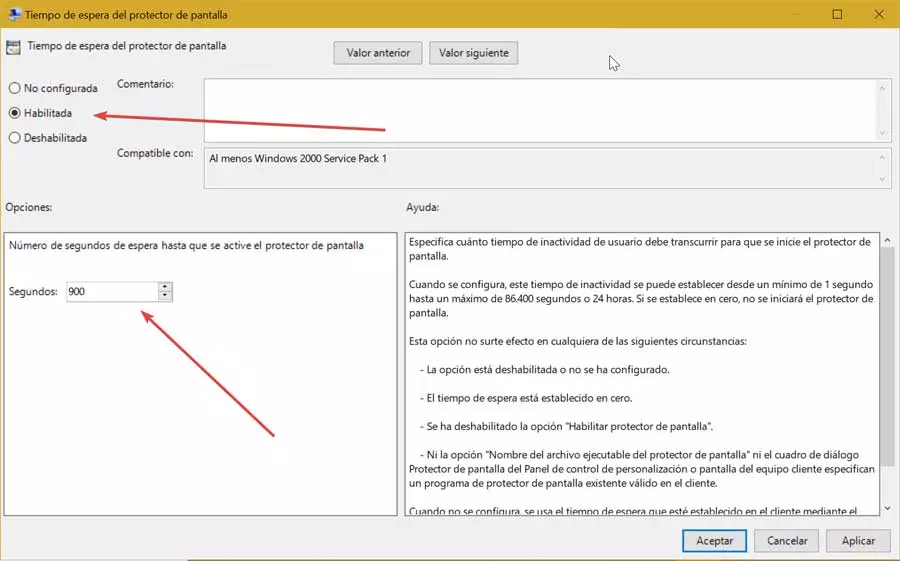
Use Local Group Policy Editor
You can also use the Local Group Policy Editor to change the timeout on the Windows lock screen. To do this we will press the keyboard shortcut Windows + R to launch the Run command, type gpedit.msc and press Enter. Later we will navigate to the following address:
Configuración de usuario / Plantillas administrativas / Panel de control / Personalización
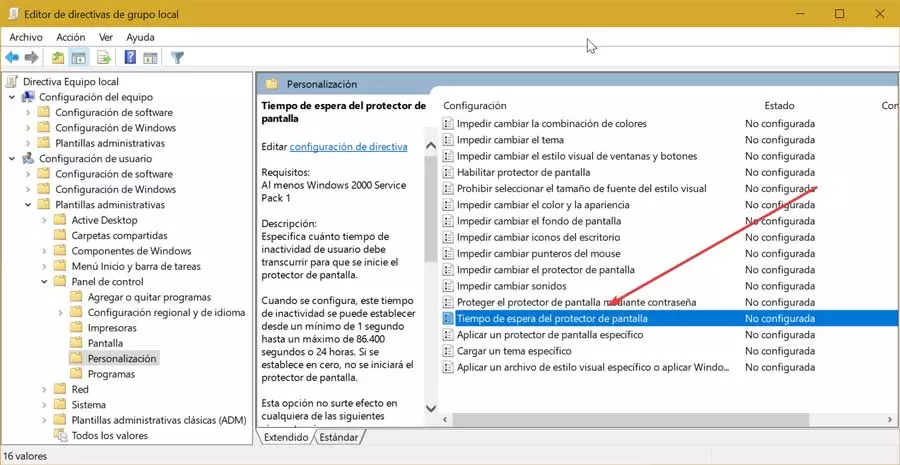
Now in the right panel we will double click on the option «Screen saver timeout» in order to be able to edit its value. This will open a new window where we will click on the “Enabled” option. This will activate a second panel at the bottom where we should insert time in seconds on standby until the screen lock is activated. Finally, we click “Apply” and “OK” to save the changes.