If we carry out all these tasks we will have a secure network that allows us to better manage our network and also more efficient control over access from outside to devices and data on the network. You can also allow parents the ability to decide what content their children access. For example, many current routers allow you to restrict access to a URL with content that is not suitable for minors, limit the use of the Internet by certain devices by time, and much more.
Router commissioning
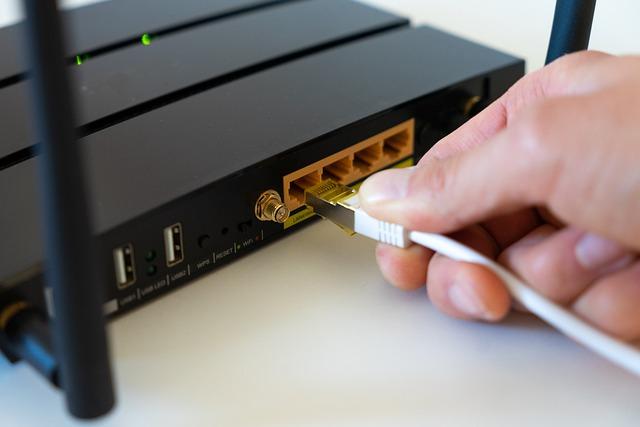
Here it is convenient to start by reading the instructions of our new router. Then, when we are clear about where the Ethernet ports, the rest of the connections and buttons are, we are ready to start. Our first task is going to be to locate the power supply of the router, insert it into the power connector and then plug it in.
Next, we wait approximately a couple of minutes, until we see that it starts correctly. Next comes the time to add the wiring we need to access the Internet. Usually in routers this wiring is inserted in the back.
Depending on whether the router is fiber optic or ADSL, the steps will vary. In the case of a router replacement, a good idea before starting to do anything is to write down how the cables are placed or take a photograph. Then we will proceed to the placement of the wiring as follows:
- If it is a fiber optic connection with the ONT, we connect the network cable to the port labeled “Internet” or “WAN”. Then that cable is inserted into the corresponding Ethernet port of the ONT.
- In the case of a fiber router with integrated ONT, we connect the fiber patch cord to our fiber optic rosette. An example is Movistar’s HGU.
- If it is an ADSL router, we plug an RJ-11 cable into the router’s DSL port and then insert it into the telephone jack. In the event that we need to add a telephone, we must add the corresponding microfilters.
- We ended up adding an Ethernet network cable to our laptop or computer to set it up. It could also be done over Wi-Fi but you would have to enter your default Wi-Fi network. The inconvenience of doing it over Wi-Fi is that later when you change the parameters for security, you will have to change the connection.
Access the web configuration of your router
Typically, most routers have a default IP address or gateway that is 192.168.1.1. Then to access it they have a user that is usually called “admin” and a password that is usually “admin” or “1234”. In some cases these parameters change, but what is common in many is that under the router there is a sticker with all the access data.
One thing that can cause problems when configuring your home network from scratch is having Windows TCP/IP set to manual. The latter is ideal for establishing a local fixed IP to use P2P programs or create a server of some kind. Since the router comes from the factory with DHCP enabled and can assign local IPs, it is best to set Windows TCP/IP to automatic.
To do this in Windows 10 or Windows 11 we will follow these steps:
- We are going to Start Menu.
- We wrote See network connections and press enter.
- We select our Ethernet or Wi-Fi connection (if it is the case) and with the right button we click on Properties.
- We double click on Internet Protocol Version 4.
Then we will configure it like this to leave it on automatic:

Once this is done, to access the router configuration via the web, we write the router IP in the address bar of our browser and press enter. Then a welcome screen of this style will appear:

In this case, all we have to do is enter the password and click on the button Log in.
Configure the security of your router
A good idea to start with is change router password. Some the first time you access them force you to change it. (sapns2.com)
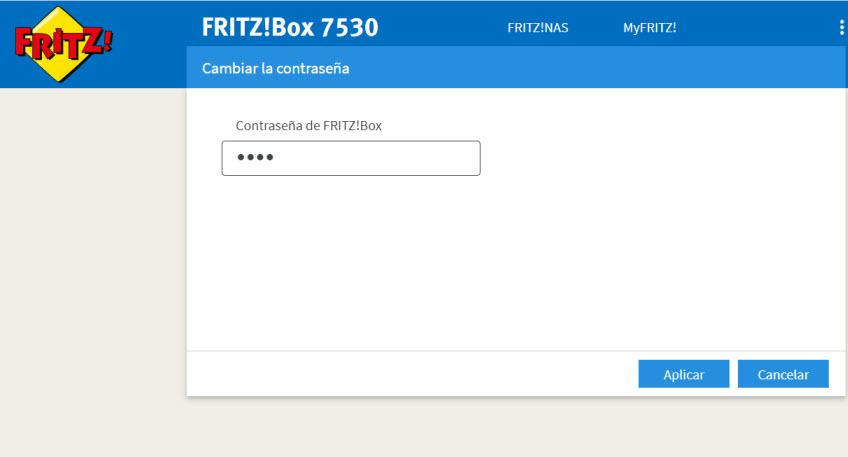
However, many routers such as those from Internet Service Providers (ISPs) or some manufacturers do not. The configuration of the password is often found in a section of the interface usually called “System” or “Administration”.
Another good idea would be modify the SSID or name of our Wi-Fi network . The SSID is the name used to identify our wireless network. In this case it is better to use a unique name that your neighbors are not using to avoid confusion. On the other hand, we need our Wi-Fi connection to be secure. In that aspect we have to look at the encryption and the password. As for the encryption we must check that it is at least WPA2, but if it supports WPA3 much better. Then we have to establish a password that contains at least 12 characters that include uppercase, lowercase, numbers and special symbols such as @.
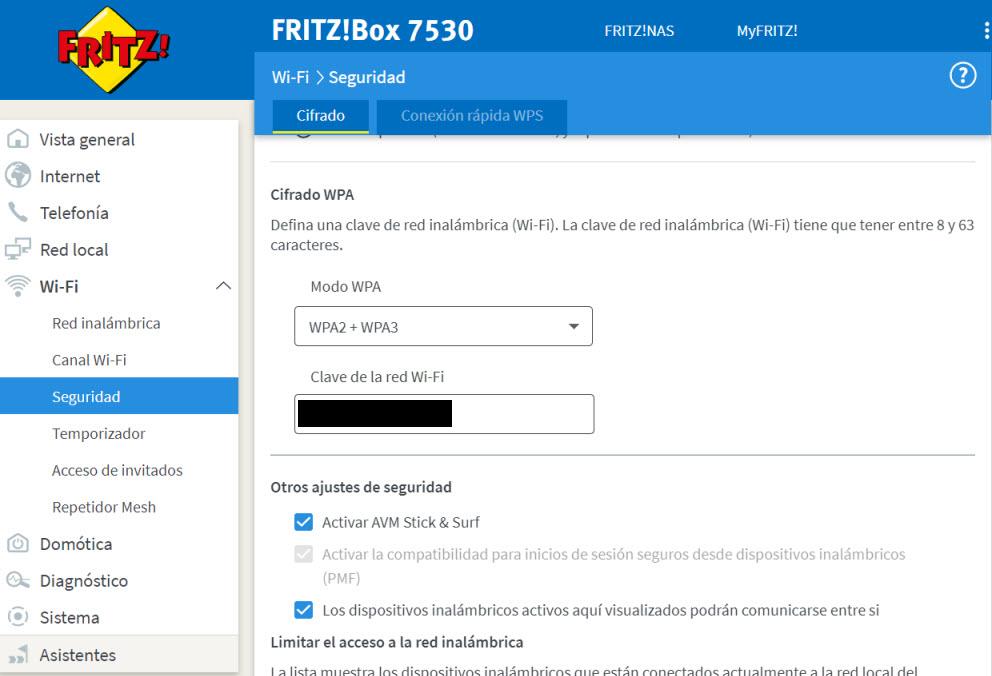
WPS is a good alternative to using a PIN to avoid having to write a complex password on our devices. The problem is that many vulnerabilities come from having it activated. Therefore, at RedesZone we recommend deactivate the WPS of our router.
Also a good idea is create a Wi-Fi network for guestsThus, users of this access will only have access to the Internet and will connect in an isolated manner. In that aspect they will not see our computers or network shares.
As to open ports, it is not convenient to open them unless you plan to create a server or use a P2P program. On the other hand, if it is done, it is necessary to try that if it is opened by ranges, they are as small as possible. As well it would be convenient to put the DNS servers, which are the ones used when DHCP is set to automatic. A good example are those of Google that are 8.8.8.8 and 8.8.4.4.
Set up local home network in Windows
Microsoft operating systems offer us the opportunity to configure your network so that you can then share files. We are going to give an example using Windows 10. One of the things that we are going to need is to create users. This can be done locally or with a Microsoft account. The easiest way is to do it locally.
We are going to “Start Menu, Control Panel, User account«, and we click on another access called «User account” and we finish by clicking on «Manage another account«.

Then we will follow these steps:
- Add a new user in settings.
- Add another person to this team.
- I don’t have the login details for this person.
- Add a user without a Microsoft account since we are going to create a local account.
Next, we choose a username, I’m going to put it REDESZONE and then I’m going to add a password. At the end we will see all the users next to the one we just created. Then if we double click on REDESZONE or the name you have chosen and it will show you new options.
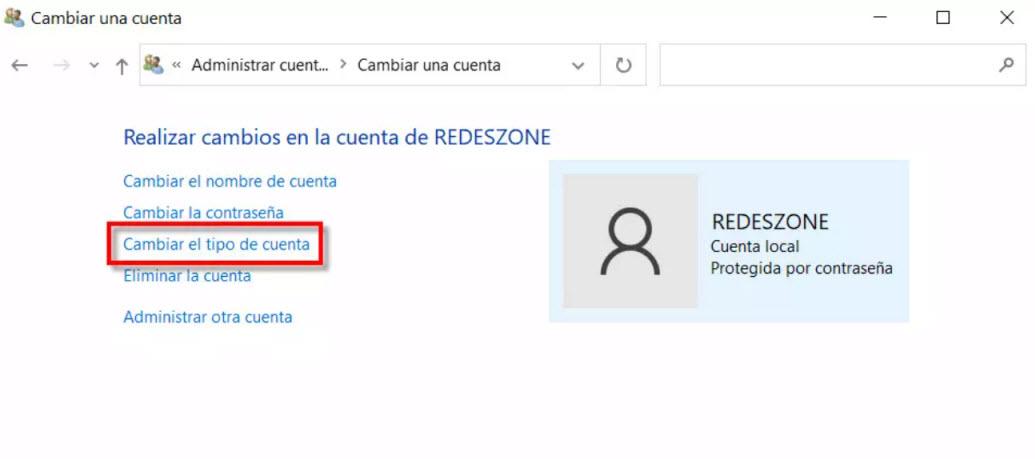
Here what we are going to do click is Change account type. This will allow us to choose between a standard user with fewer permissions or one with all that would be the administrator account. If we are going to use it only ourselves or it is a totally trusted person, we can choose the administrator account.
Set up the file sharing network
Our next step is to go to Start Menu, Settings, Network and Internet. Then we have to go to the section Ethernet if we are connected by network cable or to the Wifi if we are wirelessly. already inside Ethernet and we would click on the icon of my current connection which is Network 3.

In this case you have to select Private network profile which is the one used for home, work or other trusted networks. Next, we return again to Network and Internetwe choose the section Conditionand in advanced settings click on Center network and sharing. Then we click on Change advanced sharing settings.

So, we proceed to configure your network as follows:
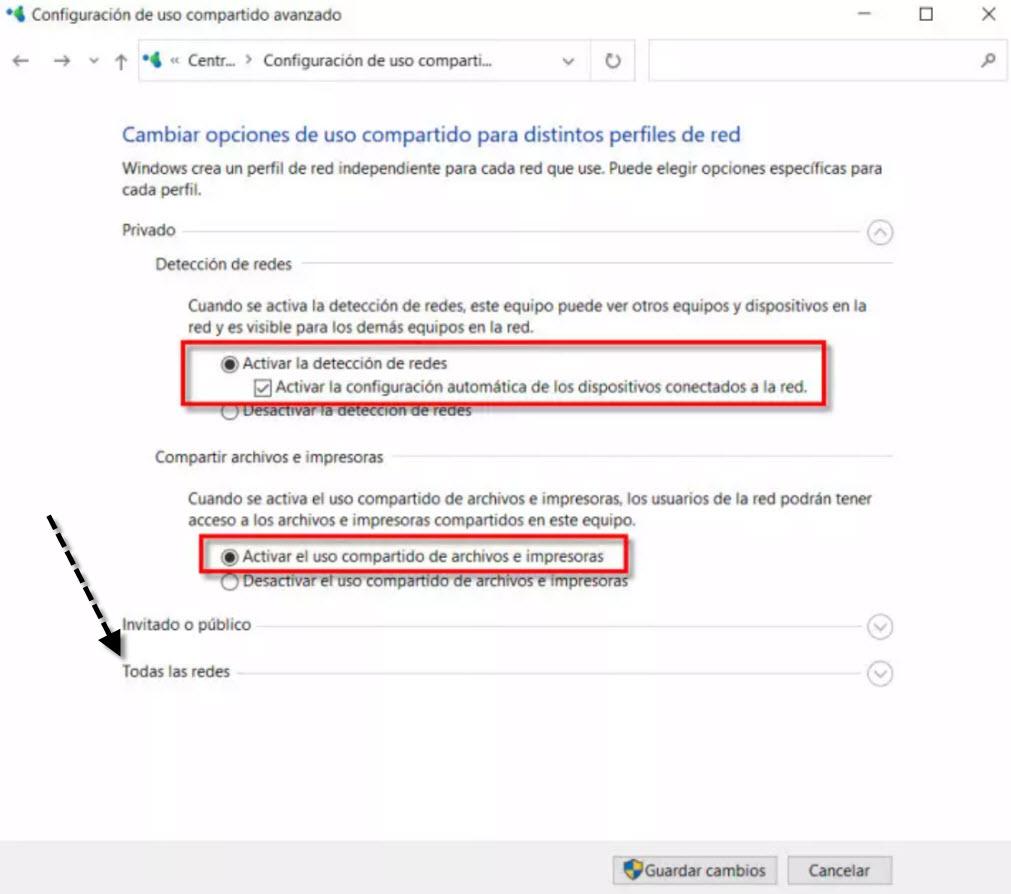
Then we click on all networks to display more options and configure like this:
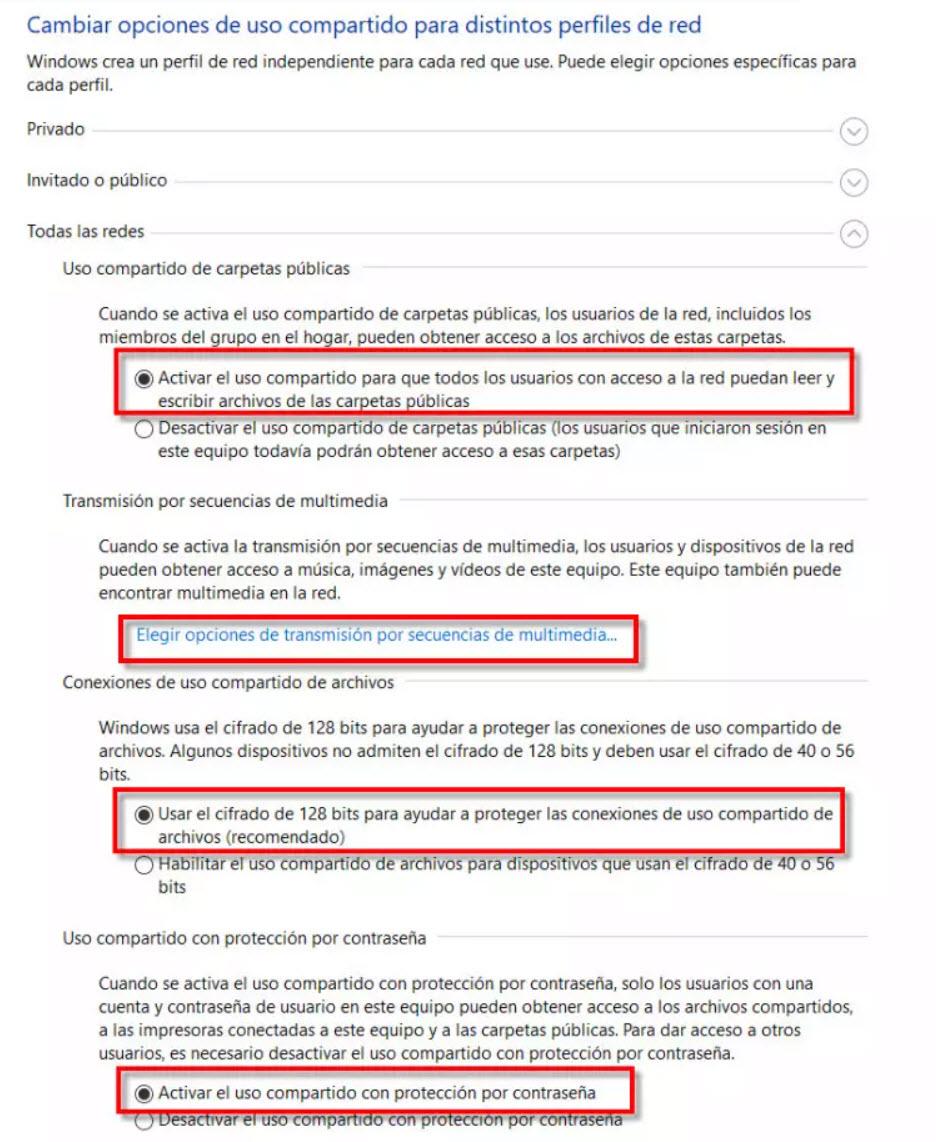
The Media Streaming setting is optional to configure.
Configure your network to add computers
For computers to work on a network, they must have a name and belong to the same workgroup. To do this, we will follow these steps Start Menu, Control Panel, Security system, System and then we’ll click Advanced system settings.
Then we will go to the tab Name of the teamwhere we will add a Equipment Descriptionwe click on Apply and click on the button Change.

Then we will see a screen like this:
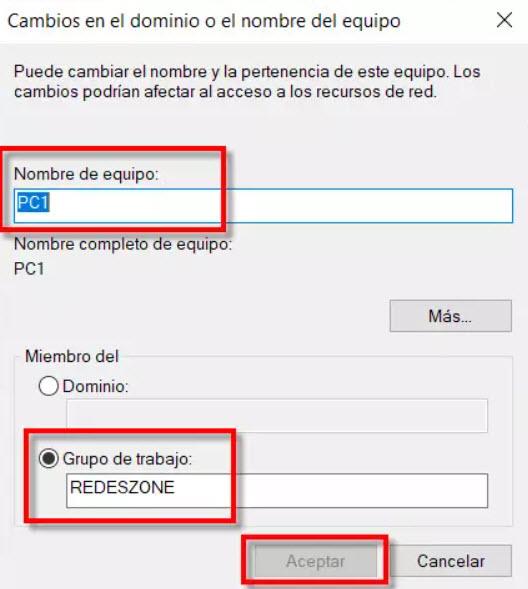
Here what we have to do is write a team namea Workgroup and press To accept. Remember that all computers must belong to the same workgroup. Once done, you have to restart that computer for the changes to take effect.
As you can see, when we want to configure a home network from scratch, we must take into account several very important aspects related to security and functionality. By following these tips and steps, you can safely enjoy your local network.