- Processor: Minimum, Intel Core i3 Gen 8, AMD Ryzen 3000, Qualcomm Snapdragon 8c (or better).
- Architectures: x64 or ARM64.
- RAM: minimum 8 GB; recommended 16 GB.
- Storage: solid state drive (SSD).
- Virtualization enabled on our computer.
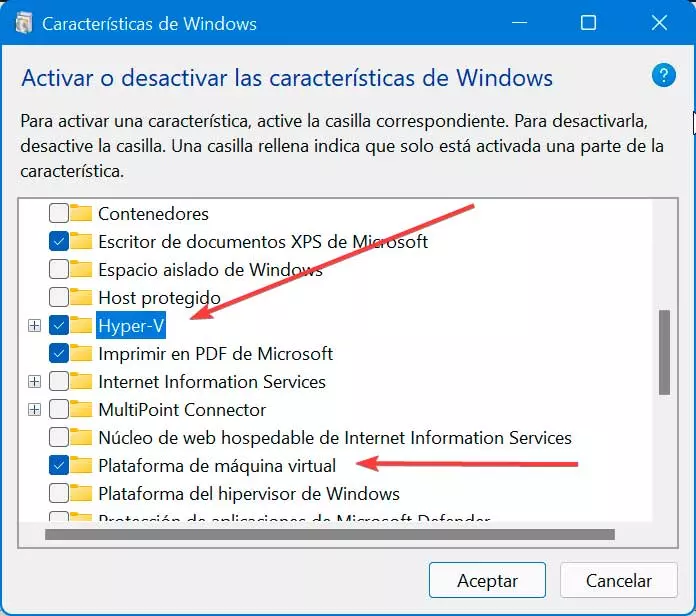
In the event that we do not have virtualization enabled, we must access the Windows + I Configuration menu. Then click on Applications and Additional Features. Then click on More Windows features and check the box. Hyper-V Y virtual machine platform for the necessary components to be installed.
The principal problem What we find is that the Windows Subsystem for Android has been released only officially in the United States. That is why with our current copy of Windows 11 we will not be able to download it.
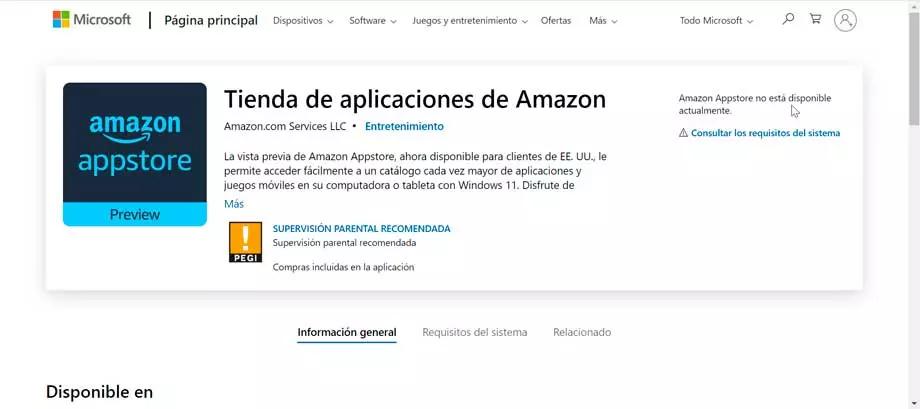
That is why if we want to install WSA on our computer it will be necessary configure Windows 11 as if we were in the United States to later download the Amazon AppStore Preview from the Microsoft Store. From it it will be possible to download the applications and games to run it on our computer.


Developer: Amazon.com Services LLC
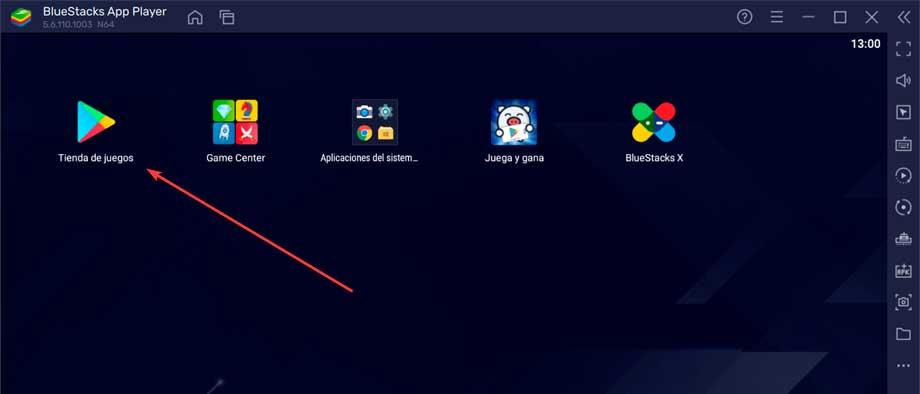
Try emulators
The easiest way to be able to run Android apps on Windows is to make use of different emulators. In them we will have the possibility to access the Play Store with our account and download and run any content, be it applications or games.
BlueStacks
This emulator is one of the easiest ways to run Android apps and make them work on Windows. Its mission is focused on running a complete and modified Android operating system, from which we can access the Play Store and download the content. In fact, what BlueStacks does is pretend to be an Android device by showing up in the list of Google Play devices. We can download BlueStacks for free from its website.
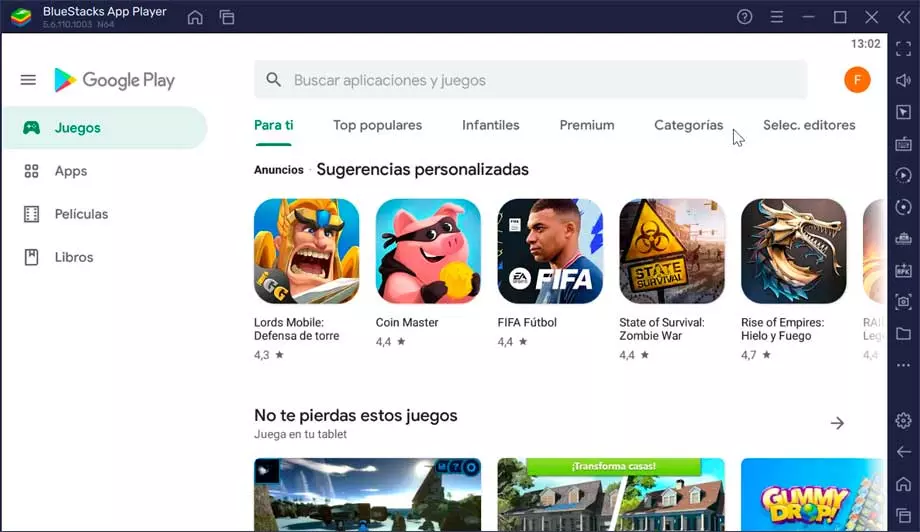
Once downloaded, we start it and a window will open on our desktop, from which we will have access to the Play Store, just as we would from our mobile phone to download any application. To do this, we would only have to log in with our user account. The interface is extremely simple, very similar to what we can find on any mobile and it is also in Spanish.
NoxPlayer
This Android emulator for PC can be used by all types of users and it will allow us to access the Play Store to install applications and games in the same way that we would from our mobile phone. We can download NoxPlayer for free from the developer’s website.
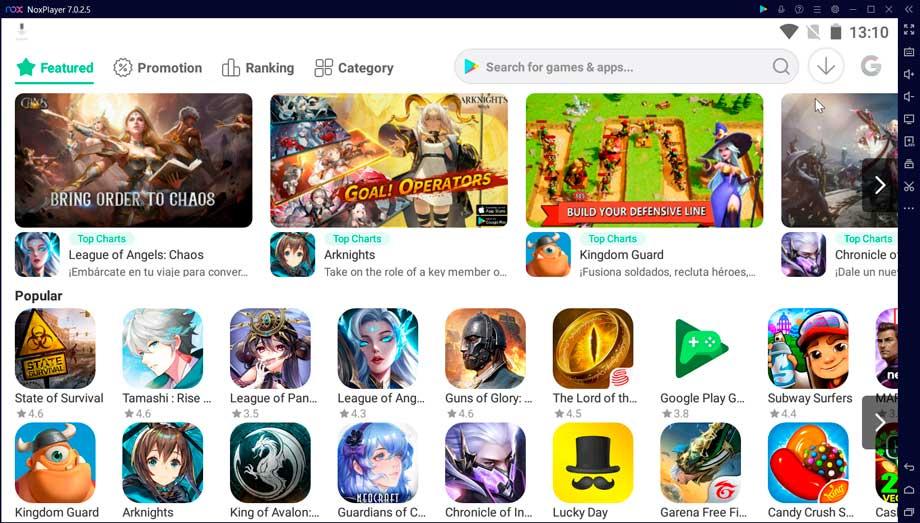
The program is mainly used to run Android games since it has different functions and features focused on optimizing the user experience and its fluidity, since has its own graphics engine dedicated, which helps you in its execution. It also has other interesting features such as the ability to change the keys on the keyboard to perform any action quickly. Once we run it, its main menu appears quite similar to the one we can find in BluStacks. Thus, we will only have to click on the Google Play button and access with our user account to be able to download applications.
Android Studio for developers
This tool is the integrated development environment, IDE, officially created by Google to create applications, from scratch, for Android. Its functions include a complete android emulator that allows us to emulate a Google device (mobile, tablet, Android TV) and install the Android version we want on it even with Google Play. In this way we can download and install applications to test it. It is not a program dedicated to home users, but for developers. We can download its latest version for free from its website.
Yes, for be able to install and use Android Studio We must meet a series of requirements, which may be a bit high:
- 64-bit operating system: Windows 8/10 or Linux
- 2nd generation Intel Core processor (or AMD equivalent) with Hyper-V support.
- 8 GB of RAM.
- 8 GB of hard drive space.
- Screen resolution of 1280 x 800 pixels.
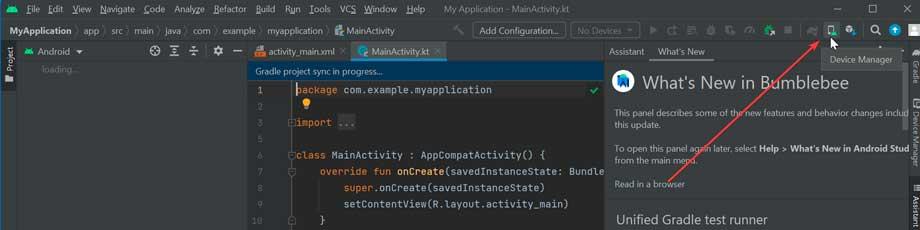
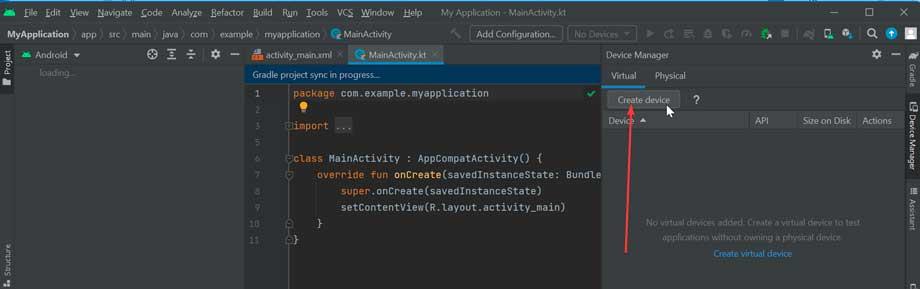
Once installed, we run Android Studio and click on the button “Device Manager” that we find in the upper right part of the tools menu.
Later we must create a new device by clicking on the button «Create device».
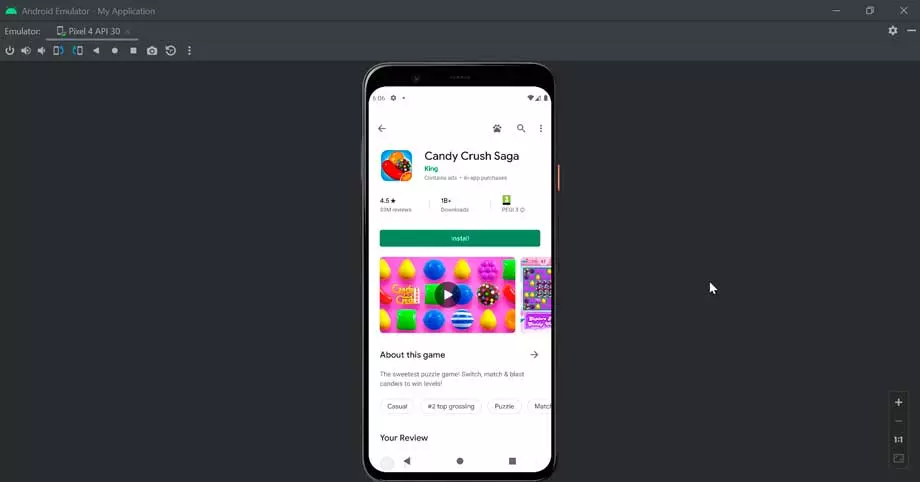
Now we must choose the device we want to emulate. Of course, it is important that we notice that, next to the device appear in the Play Store column the store logo, this means that it includes it and we can use it to download applications and test them. We will also need to choose the system image that we are going to install on the virtual device.

If everything has gone well we will have a new virtual device, so we must click on the play button for the emulator to launch. This will take a while to appear, depending on the power of our computer, but finally the virtual device that we have chosen with Android will appear. Now we only have to enter the Play Store with our credentials to log in and download the application we want.
Use Android apps with VirtualBox
It is also possible to run Android applications on Windows using a virtual machine for it like VirtualBox. This free application will allow us to virtually install an Android operating system on our computer and use all the applications from the Play Store. To do this we download VirtualBox and install it.
Now we need download an Android x86 ISO image in order to carry out its installation. To do this we must access the project website and press the “Download” button.
Create virtual machine
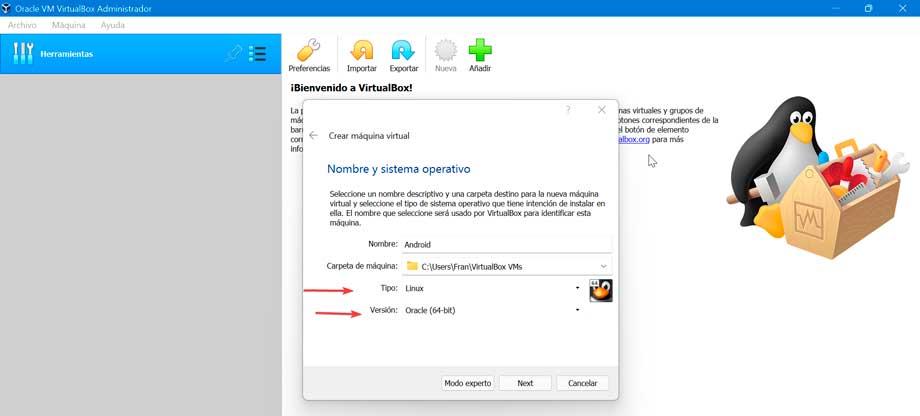
Now we will create the virtual machine in which we will install Android. To do this, we open VirtualBox and press the button to add a new virtual machine. This will open its wizard that will guide us through the entire process. First we give it a name and choose the operating system which should be Linux and Other Linux (64-bit).
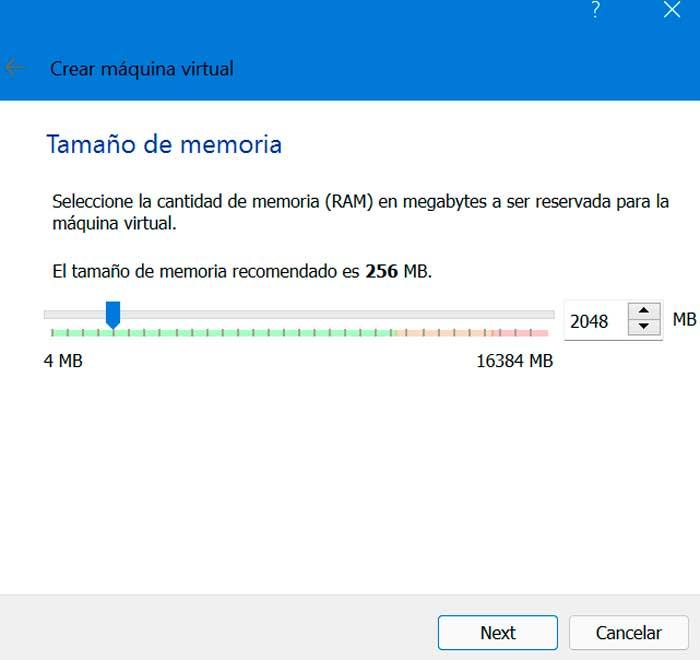
On the next screen we will allocate the amount of RAM memory depending on the total we have available. If we have 8 GB of RAN or more we assign at least 2 GB, and if we have 4 GB then we assign at least 1 GB.
Subsequently create a virtual hard drivewhich is the folder where all the files of the Android operating system that we are going to install will be saved.
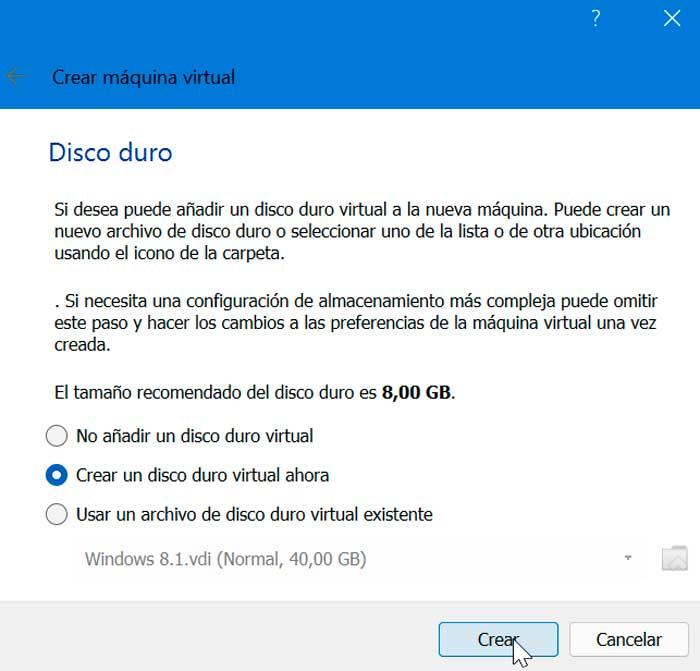
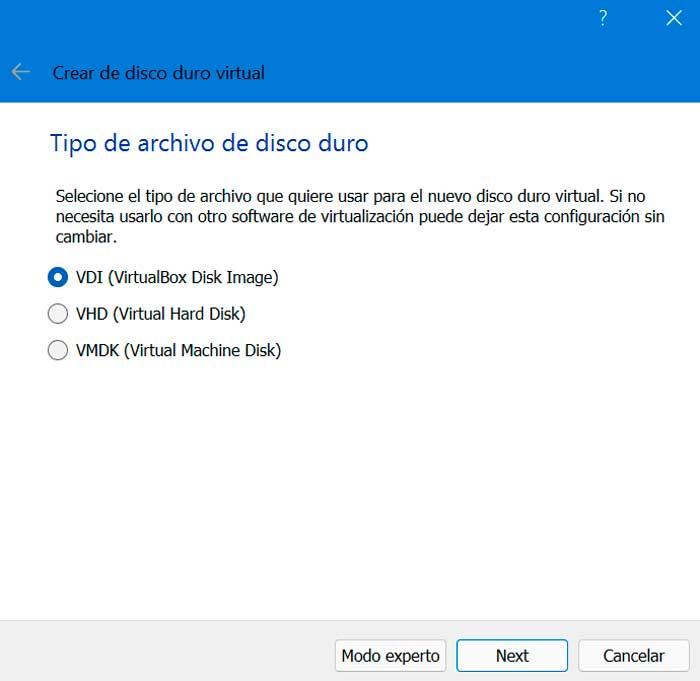
Then, we choose the format of the virtual hard disk, choosing DVI and on the next screen, we assign a dynamic size so that the folder grows little by little instead of reserving all the space at the beginning.
By last, we choose the maximum size that we want the virtual hard drive to have and we will have everything ready to be able to run our Android operating system.

install android
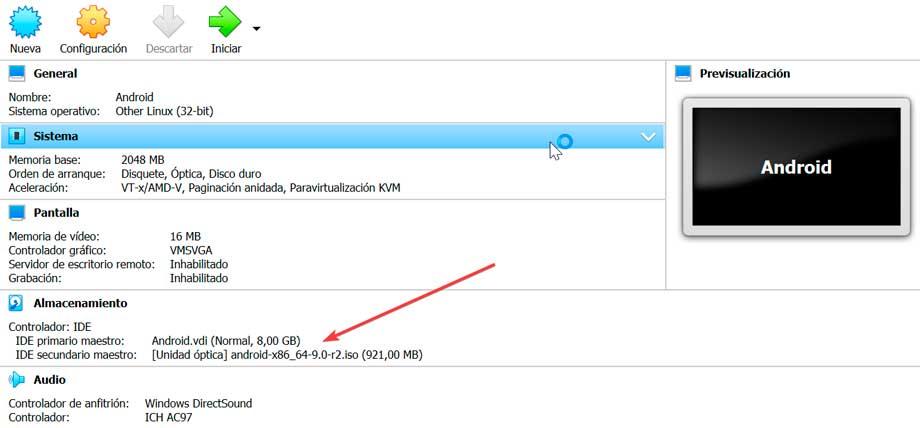
Now in the storage section, inside the Secondary IDE teacher We must load the Android ISO that we have downloaded and click on the “Start” button.
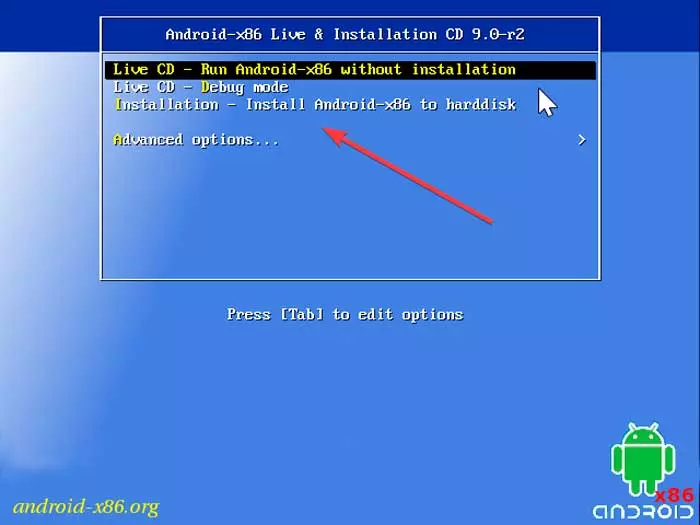
Once it starts, a screen appears where we can run Android directly without having to install it, for which we click on the first option “Live CD – Run Android x86 without installation” to continue. In case we choose to install it, click on “Installation – Install Android x-86 to harddisk”.
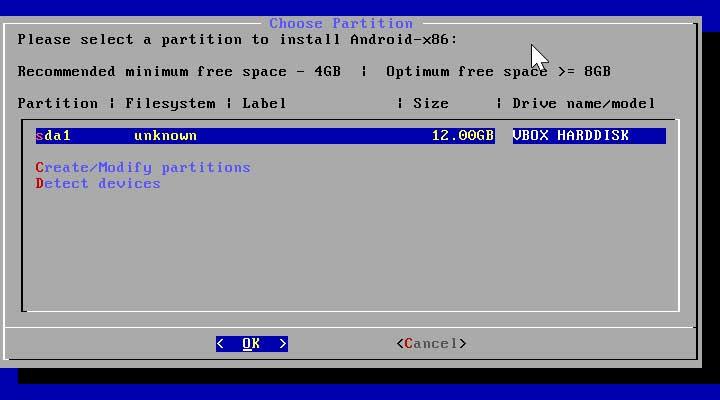
Now we select the virtual hard disk that we created at first and we format in ext4the best option for Android.
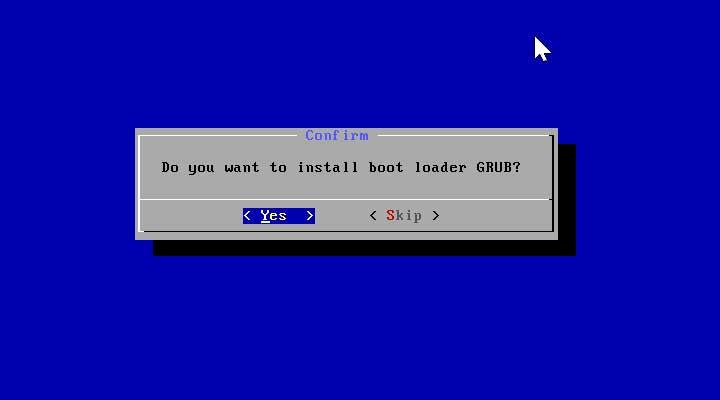
When the assistant asks us if we want install GRUB boot loaderwe select “Yes”.
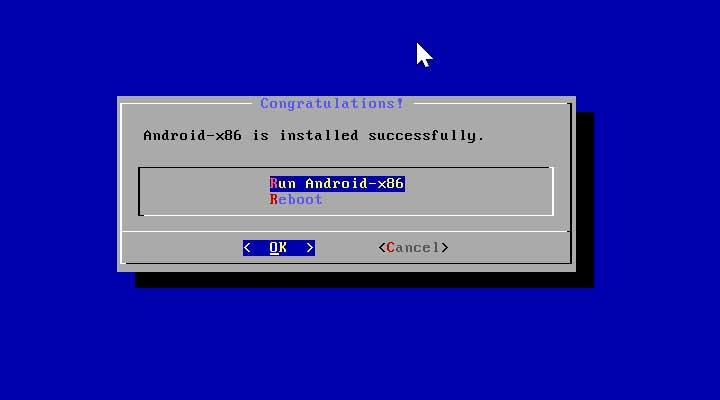
Once its installation is finished, a message appears informing us that the and we only have to select «RunAndroid-x86″ and click OK to run Android in the virtual machine.