What is the DNS cache on Mac
When browsing the internet, it is normal to visit different web pages in order to consult a media outlet or a social network. All these sites have associated with a specific IP address, but for domestic use it is not entered in the search engine, since it would not be comfortable. All users what we do is enter the domain as such, such as www.lamanzanamordida.net. Typing this address opens the specific web page.
So what the browser must include is a converter. This tool is responsible for convert the domain lamanzanamordida.net by the IP address specific. This is an operation that is not visible, as it is automatic and uses the DNS resolution service. This will be in charge of being able to give an IP address as a response when a specific domain is presented.
In order to gain performance, a record is made of all the responses that are given, this being the DNS cache. in this list are stored temporarily the IPs that are associated with each domain. In this way, you do not have to constantly perform a conversion, reducing response times. But obviously these records can end up causing problems, just like any type of cache or temporary file that is stored on a specific device.
Why should you remove it?
Keep in mind that a web page can change the IP address without notice. This can be a big problem for the DNS cache. This is because if in this “list” it is noted that the domain lamanzanamordida.net has the IP 78.852.21.23, but this has suddenly changed to 81.256.321.23, the browser will not be able to access it and will give an error.
That is why if while you are browsing the internet you find that a website does not load, this is one of the solutions that can be given. Without a doubt, we are facing an unusual situation, but one that any advanced Mac user can come to think of. After verifying that the internet connection is adequate to be able to access a specific website, you must go on to empty the cache.
Is there any danger in removing it?
This is undoubtedly one of the big questions that you can ask yourself in these situations. Whenever there is a need to delete something from the system, you can become suspicious if you are going to get rid of vital information. In the case of the DNS cache, the only thing you are going to end up forcing is that a response from the DNS service is requested again. In this way the list will re-associate the domains with an IP address that is requested again.

Obviously, when entering a new website you will have to make this request. This will lead to an increase in the time needed to access through this intermediate step. But when it comes to putting it into practice, it can be seen that the increase in time is minimal, so you won’t end up noticing that you’ve removed this list of domains. What must be taken into account is that personal information will never be lost or that it affects the operation of the equipment in general.
The Ways to Flush DNS Cache on Mac
Once you take into account what exactly is the DNS cache on Mac, you can already follow the different systems that exist to be able to delete the cache on an Apple computer, regardless of whether it is a MacBook or an iMac.
Via Terminal
One of the fastest and most efficient systems that exist to be able to eliminate the DNS record of browsers on a Mac is through Terminal. On some occasions, the use of the computer console can give a lot of respect to some users. This is due to the thought that it can be very difficult to use, or it is intended for advanced users. But the truth is that if you know how to use it, you will be able to get a lot out of your team.
In order to carry out this cleaning process with this system, you will simply have to follow the following steps:
- Click on Command and space bar at once.
- Write the word Terminal and press Enter.
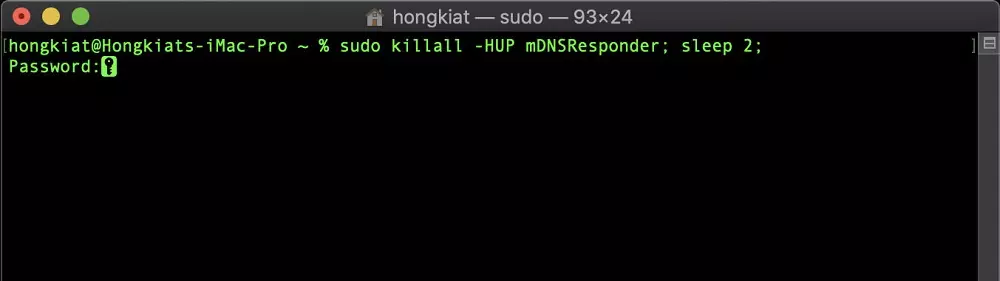
- Copy and paste the following command into the console:
sudo dscacheutil -flushcache; sudo killall -HUP mDNSResponder - Enter the mac password with which you unlock it.
- Close Terminal and access the browser.
The only problem that can be found is that the command used in the console changes depending on the operating system. In the steps we have shown above, the command is intended to be used in macOS Mojave, Big Sur, and Catalina. In the event that you have an older operating system, you will simply have to enter the following commands:
- macOS Sierra and High Sierra:
sudo killall -HUP mDNSResponder - Mac OS X El Capitan:
sudo killall -HUP mDNSResponder - Mac OS X Yosemite:
sudo discoveryutil mdnsflushcache;sudo discoveryutil udnsflushcaches;say flushed - Mac OS X Mavericks:
dscacheutil -flushcache;sudo killall -HUP mDNSResponder
Use of third-party programs
Although the use of Terminal is the most common to be able to delete the DNS cache of any Mac, there are also other alternative methods. In this case, the cleaning and performance improvement software that can be installed on a Mac should be highlighted. These have the characteristics of eliminating junk files, and the DNS cache is also included, although it is not as well known as the cache traditional that we all know.
Programs like CleanMyMac integrate this very useful tool. In these cases, it is recommended to use them when the previous command has not worked correctly. It can also be useful if you are a user who does not dare to use the computer’s console, because he is afraid that you will not do it correctly and affect some important registry. Obviously, it is a process that should not be carried out on a regular basis, and only when there is a relevant problem that requires this action. Although, software like the one mentioned allows you to eliminate that fear quickly by doing it automatically.