AirDrop is a very practical functionality that users of Apple devices have had for years, since it allows us to transfer files between our devices in a safe way.
It is designed to securely send or receive almost any type of file. We can send from photos and videos, to contacts or passwords for example.
This data transfer is done using Wi-Fi and/or Bluetooth, but sometimes it doesn’t work properlyand it can make us a little nervous if we do not find the cause of the possible failure.
In this article we are going to see some options to solve the typical problems that usually occur.
Check that your device supports AirDrop

The first thing we must check is that our device is compatible with AirDrop, since not all of them are, we are going to see which devices do have this function:
- iphone: AirDrop is supported on iPhone from iPhone 5 and later.
- iPad: In the case of the iPad it is from iPad 4 and later, and the fifth generation iPad mini is also compatible.
- iPod: iPod Touch fifth generation and later are also supported.
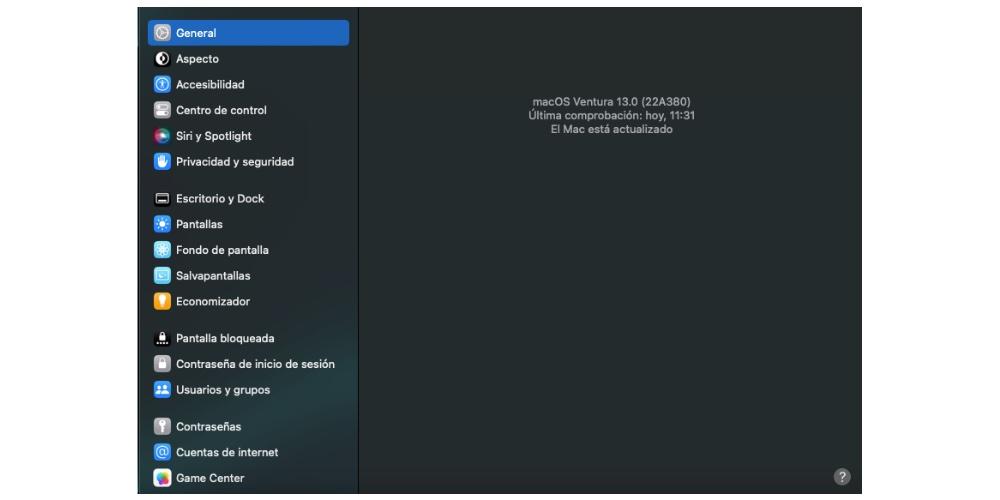
- Mac: Mac computers released after 2012 are supported as long as they are running OS X Yosemite or newer operating systems.
If you like check if your Mac supports AirDropyou can do it from the Finder icon in the Dock and selecting the GO option in the menu bar, we will see if AirDrop is shown in the drop-down, if the option does not appear, then your device is not compatible.
Check AirDrop settings
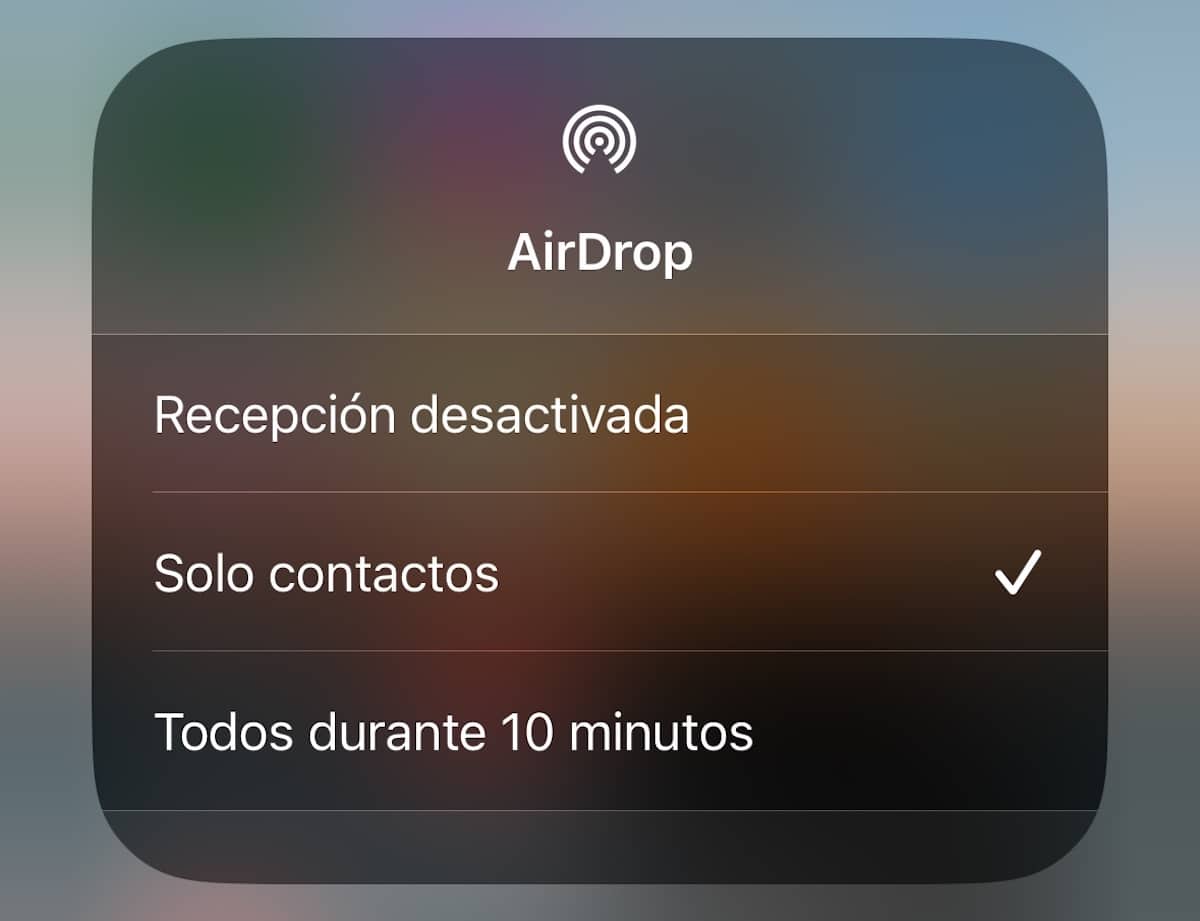
There are several possibilities for set up airdrop to our liking. We can activate <reception off>, we can put that we only want to receive files from our contacts by selecting the option <Only contacts> which is limited to the people we have saved on our iPhone, either with a phone number or email, and finally we have the option of <Everyone for 10 minutes>.
It is important to choose this configuration carefully, so as not to receive an unwanted file or information on our device.
A possible option to solve a recurring error is to select the alternative <Everyone for 10 minutes>, and sometimes the reception or sending of files is already activated.
AirDrop on iPhone or iPad:
- Start the app Settings on your iPhone or iPad.
- Scroll down and tap on the option General.
- click on airdrop.
- Tap
.
We also have the possibility of quickly set up AirDrop from Control CenterTo do this, we will display the control center on our iPhone or iPad, click on the Wifi, bluetooth… box and the menu will be displayed. In it we will see the AirDrop icon, we keep pressing said icon and we will see the submenu, being able to choose between the aforementioned options: Reception disabled, Only contacts and Everyone for 10 minutes.
Activate AirDrop on Mac

- Open a window Finder’s on your Mac.
- Choose airdrop in the Finder sidebar by pulling it down from the GO option. If AirDrop is not listed, you can use the keyboard combination Command-Shift-R to open it.
- We can select one of the three alternatives that it proposes: No one, only contacts or Everyone.
Just like on the iPhone or iPad, on the Mac we can configure AirDrop a little faster from the Control Centertop right in the menu bar we can display the control center and see AirDrop.
If by any chance AirDrop does not appear in the Control Center of your Mac, we are also going to show you a trick that allows you to launch AirDrop directly from the Dock of your Mac, to make it much easier to manage.
Having the AirDrop shortcut in your Dock will allow you to access it from any screen, regardless of which app you’re using, and without having to open a Finder window first.
How to add AirDrop to the Dock on your Mac
- Open a Finder window or click on the Desktop.
- In the Finder menu bar, select Go -> Go to folder.
- Paste the following directory path into the dialog and press enter:/System/Library/CoreServices/Finder.app/Contents/Applications/
- The Contents/Applications folder will appear inside the Finder.app package. Using your mouse, drag the AirDrop app to the desired location on the Dock.
- Close the Finder window.
And that’s it, the next time you want to open the AirDrop window to share something, just click the app icon on your Mac’s Dock.
Switch between Wi-Fi and Bluetooth

As we said at the beginning of the article, the transfer of information is done by Wi-Fi and/or bluetoothso another alternative to solve a possible failure is to deactivate both completely and activate them again.
To turn it off completely we cannot do it from the Control Center, since since Apple modified that section in the new operating systems, we must go to the settings to deactivate them completely. To do this we will follow the following steps:
Toggle Wi-Fi/Bluetooh on iPhone and iPad
- We go to Settings on our iOS device.
- we play Wifi I bluetooth
- Tap the switch next to Wifi or bluetooth to turn it off, then press it again to turn it on.
Toggle Wi-Fi and Bluetooth on Mac
On a Mac it’s a little easier, yes.If we want to turn Wi-Fi and Bluetooth on or off, we will simply go to the Control Center located at the top right in the menu, and select the option that we want to activate or deactivate. The icon will appear in gray if it is disabled or blue if it is enabled.
Disable personal hotspot
If you are using your iPhone or iPad as a personal hotspot to provide Internet to another device, you should know that AirDrop will not work at that time.
If you want to use it, you’ll need to turn off personal hotspot, so the device in question will lose internet connection, but you can always turn it back on once you’ve transferred the files via AirDrop.
Since iOS 13.1, Apple does not include an on/off switch on Settings for Personal Hotspot. The idea behind this change is that the personal hotspot is always ready to provide Internet access to other devices whenever they need it.
To prevent unwanted devices from connecting to our personal access point, we must go to the Control Center and hold down the icon Bluetooth and if the button personal hotspot It is green, we click on it, and it can no longer be detected.
Make sure your iPhone or iPad is unlocked

If your device is locked or turned off, it won’t appear to someone else as an available device to send an AirDrop file. If you want to receive something via AirDrop, make sure your iPhone or iPad is on and unlocked with the screen on.
Move devices closer to each other
When a shared Wi-Fi network isn’t available, AirDrop relies exclusively on Bluetooth to find nearby devices and transfer files.
Bluetooth has a range of approximately 10 meters on newer iPhones, so make sure you are in close range, otherwise AirDrop won’t work.
Limited AirDrop on Mac

Sometimes we are trying to send files from AirDrop with our Mac, but we are not able to show the computer as a sending option. It may be that our firewall is too rigorousLet’s check it:
- On your Mac, click the Apple symbol in the menu bar and select System preferences.
- Select preference security and privacy.
- Click the lock and enter your admin password or use Touch ID to make changes.
- Click on Firewall Options…
- Uncheck the box next to Block all incoming connections.
- Check the box next to Automatically allow embedded software to receive incoming connections.
reset your device
If none of the options mentioned above have solved your AirDrop issues on your devices, be it iPhone, iPad or Mac, we need to reset our device.
Something very basic and first computer science. This process is different depending on the model in which we need factory reset.
Contact Apple Support

If still, none of the above steps have resolved our AirDrop issues, could be a hardware problem of any of the connections, either Bluetooth or Wi-Fi. For this and in case of doubt, I believe that the best way to act in this case is to contact the Apple support to try to solve the problem online and almost immediately, since we can do it from the device itself, scheduling an appointment, opening a conversation in the technical support chat or even through a call.
If you are lucky enough to have an Apple store nearby, you can always be assisted by a Genius, so that they can check the equipment and have a more accurate and faster diagnosis.