What is two-factor authentication?
First of all, what we want to tell you is what two-factor authentication really is. It is a additional security layer to the existing ones for your Apple ID, so that you can have the peace of mind that you are the only person who can access your account, and therefore, all the data you have in it.
This mechanism allows you to make sure that whenever you want log in to a device for the first time, you have to provide two types of information to correctly identify yourself and prevent another person from accessing only your Apple ID and password. It is done by sending a Verification code which is sent to your trusted devices or your phone number. In this way your account, your data and your privacy will always be much more protected. Obviously, it is a function that from La Manzana Mordida we recommend you use to provide all your data with greater security and privacy, for this you just have to follow the following steps.
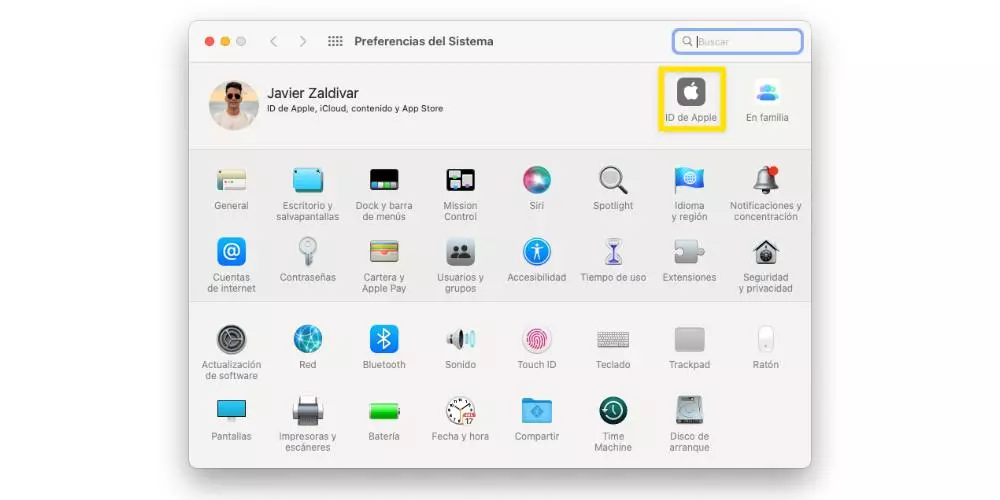
- On your Mac, select the Apple menu.
- Click on “System Preferences”, and then on “Apple ID.”
- Select “Password and security” in the sidebar.
- Click “Set up two-factor authentication” and click Continue.
- Answer the verification questions and tap Verify.
- Enter your phone number to verify, select a verification method, then click Continue.
- If prompted, verify your identity with the six-digit verification code that is sent to your trusted phone.
So you can use them
Once you know what two-factor authentication consists of and how you can activate it from your Apple computer, it is time to tell you how you can use it in different scenarios and situations. We encourage you to pay close attention to all the situations in which the use of this function may arise, since it is very important that you know how this system works.
Sign in to a device or browser
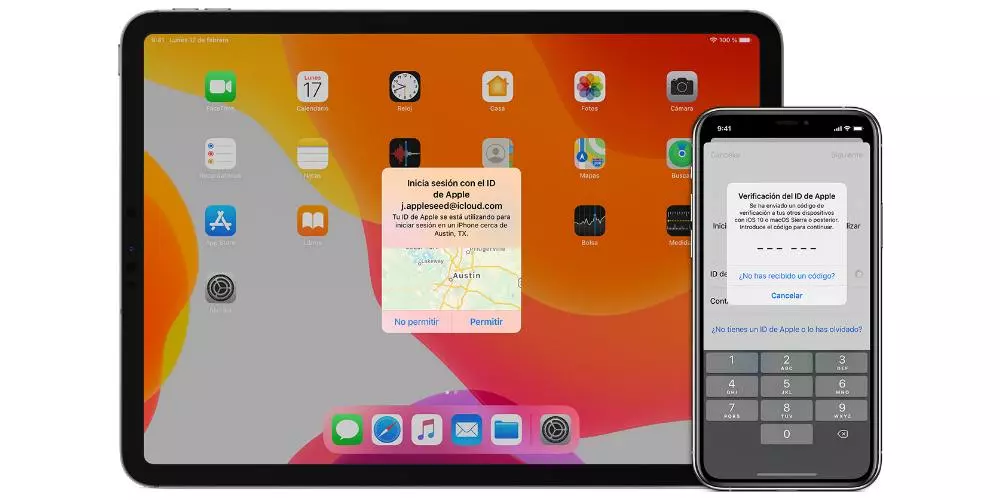
Once you have activated two-factor authentication, whenever you buy an Apple device and go to log in for the first time, you will automatically have to carry out two actions. First you will be asked your Apple ID password, and immediately afterwards the Verification code. It is a temporary code, which is only sent to your trusted devices or to your phone number and it is very important that for your security and privacy you do not share this code with anyone. The steps to be able to use this code when logging into a new device or browser are as follows.
- When you are asked for the verification code, check your devices or trust number to find out. If you want to send it to your phone number, you just have to click on “Have you not received a verification code?” In the notification and then select the phone number.
- On a trusted device, tap Allow to see the code.
- Enter the code.
Get a verification code when you are offline
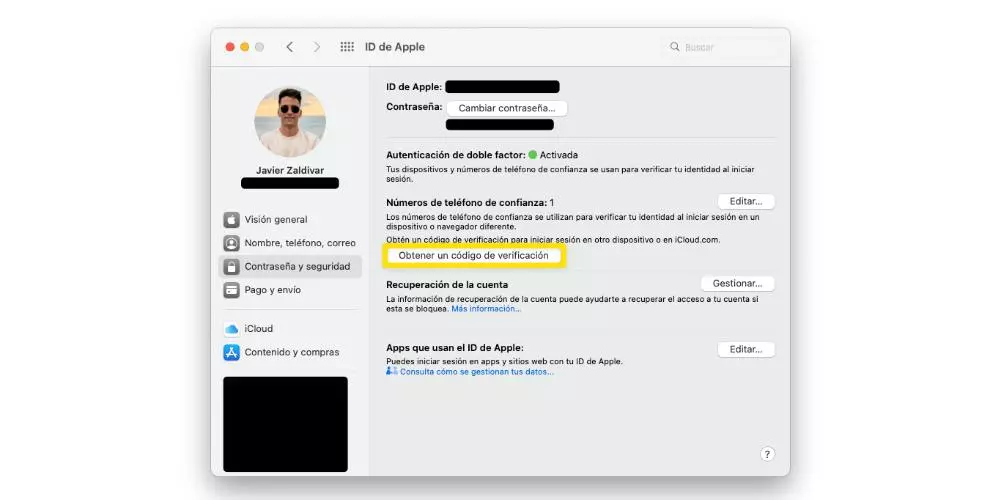
One problem you may find yourself in is that the moment you want to log in for the first time on a device or in the browser you cannot receive the verification code on your phone or on any of your trusted devices, since you don’t have them on hand or they are not available. However, Apple gives you the opportunity to get a verification code even if the Mac is not connected. To do this, you just have to follow the following steps.
- On your Mac, choose the Apple menu.
- Click on “System Preferences” and then on “Apple ID.”
- Select “Password and security”.
- Click on “Get Verification Code.”
- Write down the verification code or enter it in the notification.
- Click OK.
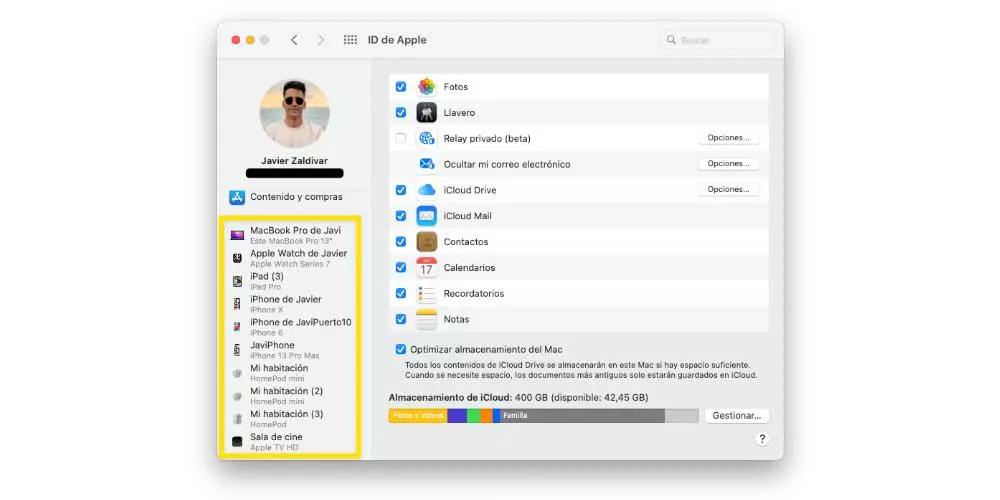
Add or remove trusted device
Another aspect that you have to take into account is to manage all the trusted devices, both when adding new devices, and if you want to remove them from the list so that they never receive any type of verification code again. . If you want see what your current devices are trusted, follow the steps below.
- On your Mac, select Apple menu.
- Click on System Preferences and then on Apple ID
- At the bottom of the sidebar you can see which are your trusted devices.
- If you want to see the details of one of the devices, select it.
It is possible that at any time you acquire another Apple device such as a Mac, an iPad or an iPhone and want to add it to the list of trusted devices. To do this you have to follow a series of steps that we are going to indicate below and that will take you a few seconds to carry them out.
- To add a Mac with macOS Catalina or later:
- Select System Preferences.
- Click on “Login”
- Enter your Apple ID and follow the instructions on the screen.
- To add a Mac with macOS 10.14 or earlier:
- Select the Apple menu.
- Click on System Preferences.
- Click on iCloud and then on «Sign in».
- Enter your Apple ID and follow the instructions on the screen.
- To add an iOS or iPadOS device:
- Open Settings.
- Click on your name at the top of the screen.
- Verify your identity with a six-digit verification code.
Once you have performed these steps on your device, you will never be asked for it againUnless you sign out of your Apple ID completely, erase your device, or need to change your password for security reasons. However, adding trusted devices is not the only thing you can do, you can also remove them, for this you just have to follow the following steps.
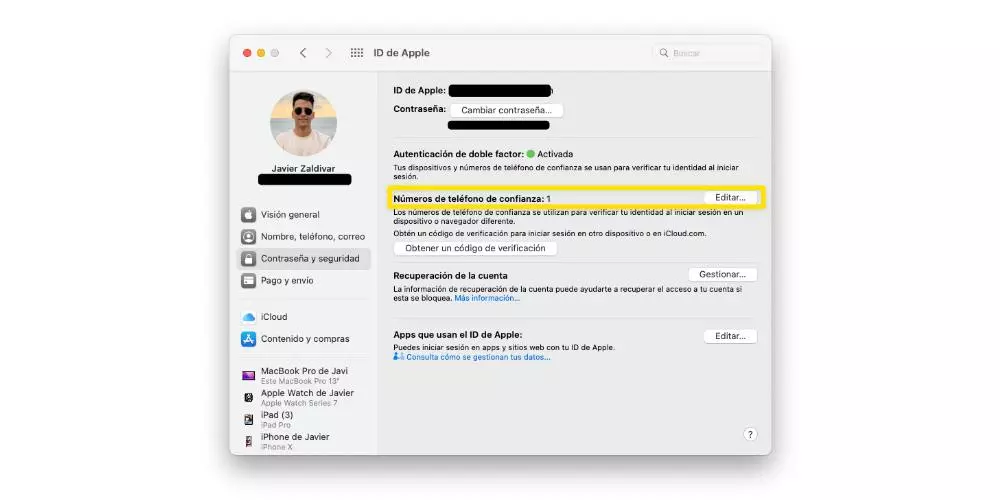
Add or remove a trusted number
Finally, we also want to tell you, since it is vitally important, how you can both add and remove trusted phone numbers. Have at least one, is one of the essential requirements that you have to meet if you want to use two-factor authentication. Follow the steps below if you want to add or remove a number from your trusted number list.
- On your Mac, select the Apple menu.
- Click on “System Preferences” and then on “Apple ID.”
- Select “Password and security” in the sidebar.
- Click Edit, and then do any of the following.
- If you want to add a phone number.
- Click the “Add” button.
- Enter your Mac login password.
- Enter a phone number that can be used to verify your identity. 4. Select whether you want to be contacted by text or by phone and click Continue. 5. Enter the code sent to the email address or phone number and click Next.
- If you want to delete an email address or a phone number.
- Select a phone number or email.
- Click the Delete button.
- Click Delete.
- If you want to add a phone number.