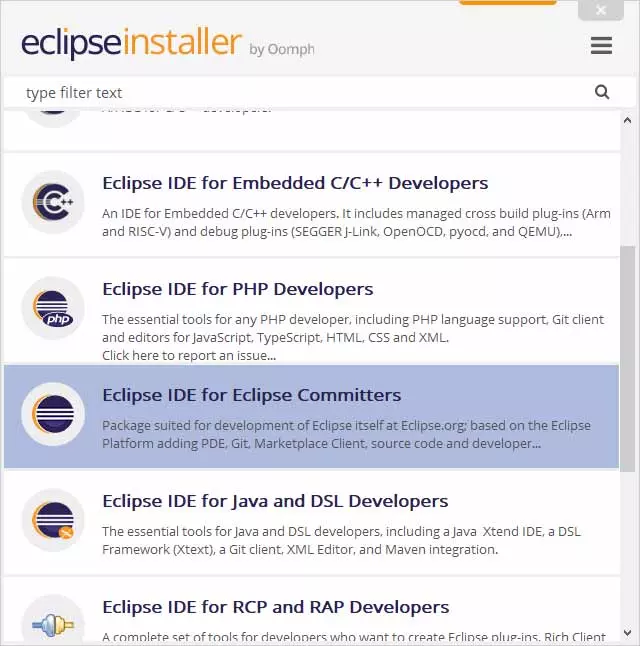
When executing the installation file, Eclipse will not invite us to select which IDE we want to install. In this case, we will select Eclipse IDE for Eclipse Committerssince it includes a Git client to be able to manage the versions of the code of an application.
Next, we accept the terms and wait for the installer to download the necessary files and install the selected IDE. Once the process is finished, press the Launch button with a green background. Next, we must select the directory where we want to save the projects.
By default, the directory is eclipse-workspace inside the Windows users folder, if we perform this process from a Windows PC. On other operating systems, the directory will have the same name and the location will also be the users folder.
In older versions of Eclipse, it was necessary to install the egit plugin in Eclipse from the Eclipse store. However, nowadays, it is no longer necessary to carry out this operation, since it is installed natively, so the process is much faster.
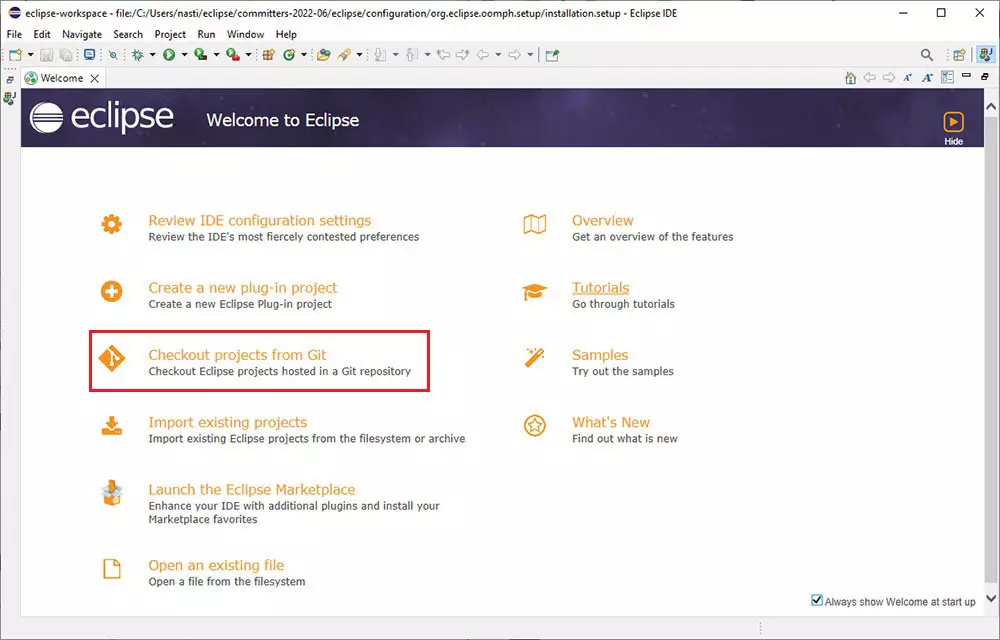
To access the projects stored in Git from Eclipse, we must access the Eclipse home screen and select the option Checkout project from Git.
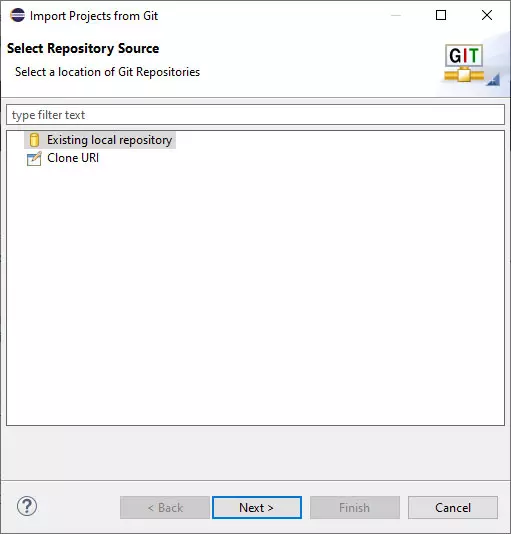
In the next window, we must access the path where the Git projects are stored and finally click on Finish.
From this moment on, all projects, both new and those that we modify from this moment on in Eclipse with version control.
Push a project to GitHub from Eclipse
Once we have created or modified our project, the time has come to upload it to GitHub, taking advantage of Git’s functionality to independently manage all the versions of the project and that any user has free access to the version they want, either to contribute to the same, improve it, solve operating errors. But, before upload the project to GitHub from Eclipse, it is necessary to have an account on this platform that is now in the hands of Microsoft.
GitHub offers 3 price plans, the free option being valid for any user who is taking their first steps in the world of programming and who works individually. The rest of the available plans are designed for work groups and large companies. The free version also includes free access to GitHub Copilot. If you don’t want to use the web version, you can use the desktop application, an application that you can download at this link.
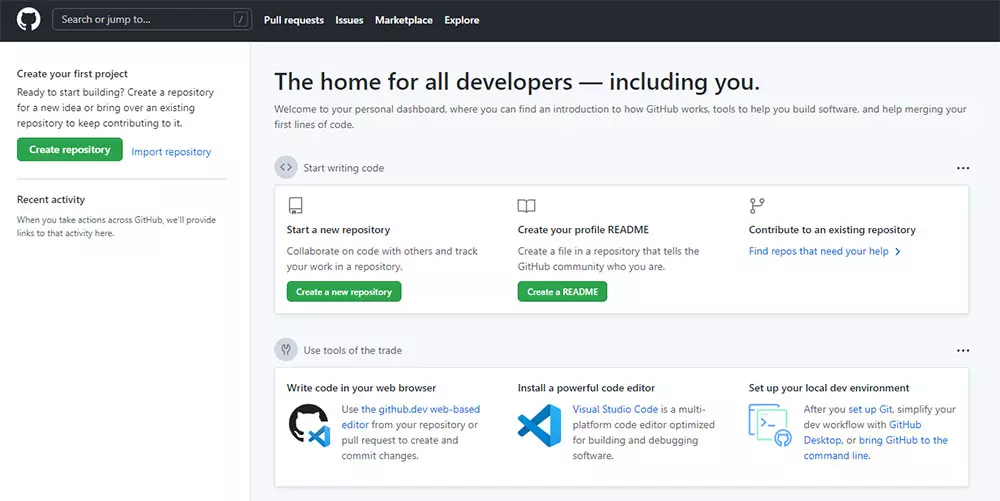
Once we have created an account on GitHub, the first thing we should do is create a new repository where we are going to upload the project we are working on. If we had it stored on another platform, we can import it from the platform.
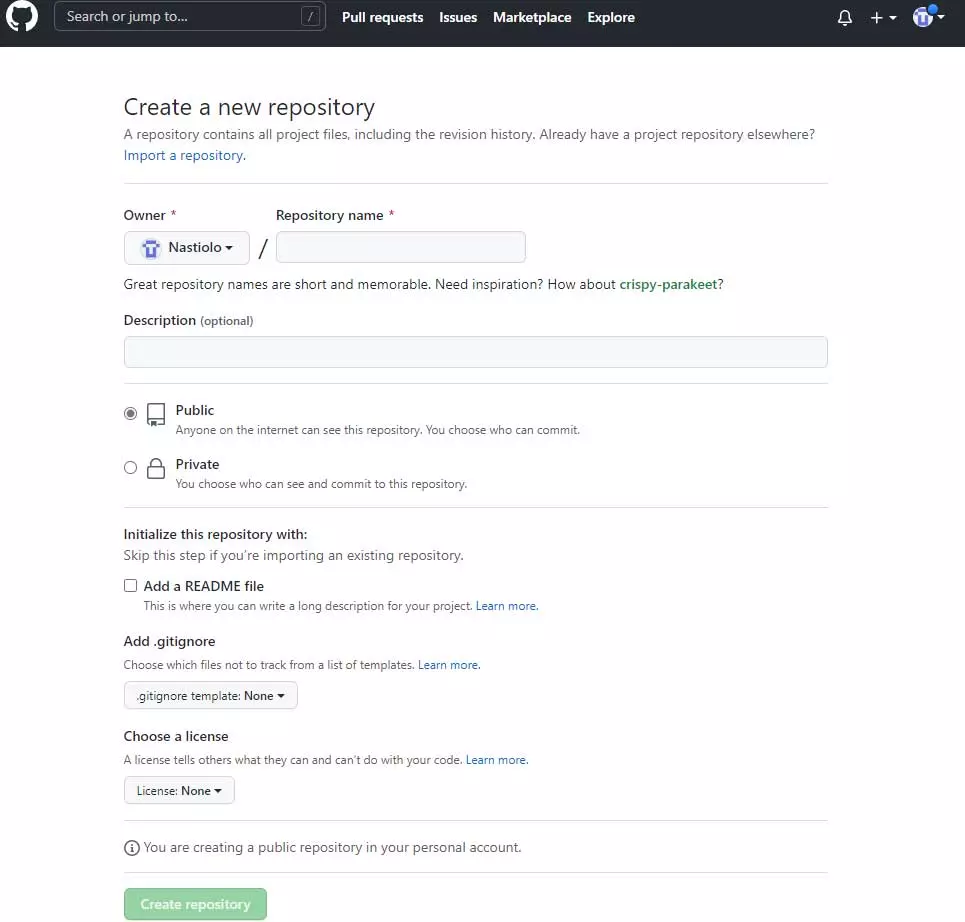
Next, we must write the name that the repository will have (it will allow us to identify it through Eclipse to upload the project), we add a description if we think it is necessary, we establish if we want it to be public or private, we check the box Add a README File (where we will write a description of how the project works), if we want GitHub to ignore certain files, we check the box Add .gitignore and finally we establish that type of license will have the project so that other users know what they can and cannot do with the code.
Once we have created a GitHub account and the repository where we are going to store the new project, we open Eclipse to upload it to the GitHub platform. It is recommended to have installed the GitHub application since, in this way, all the content available on this platform will also be available on your computer and it will not be necessary to configure access or use URLs.
Before uploading the project to GitHub, we understand that we have previously connected Eclipse to the local Git repository. Now we are going to connect to GitHub, a remote repository from which we are going to share the project. If you have not configured Git in Eclipse, we recommend that you visit the previous section where we explain all the steps to follow.
Next, from our project, click on Team and then in commit to enter a note with changes that we have made since the previous version available. For the first version it is not necessary, but for the successive ones.
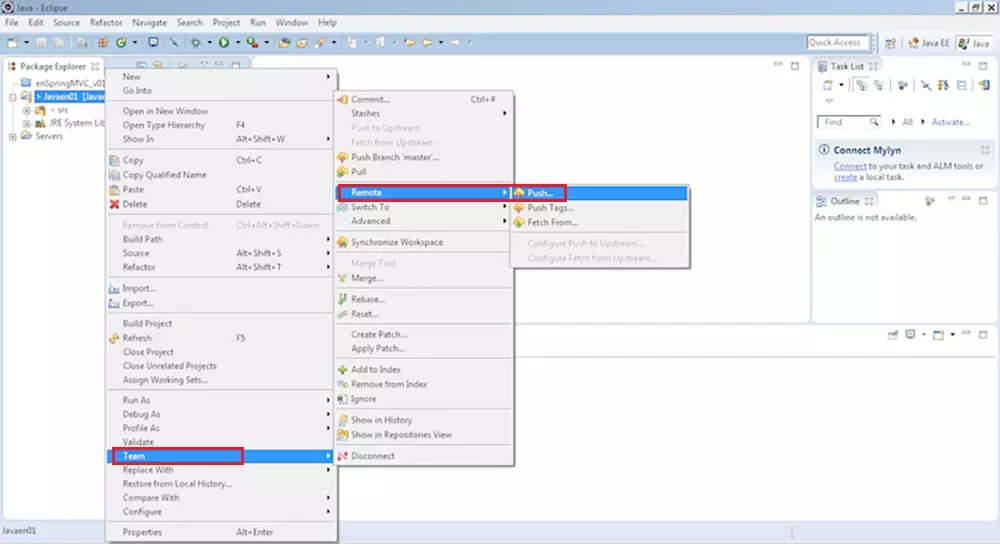
Next, we access Team > Remote > Push.
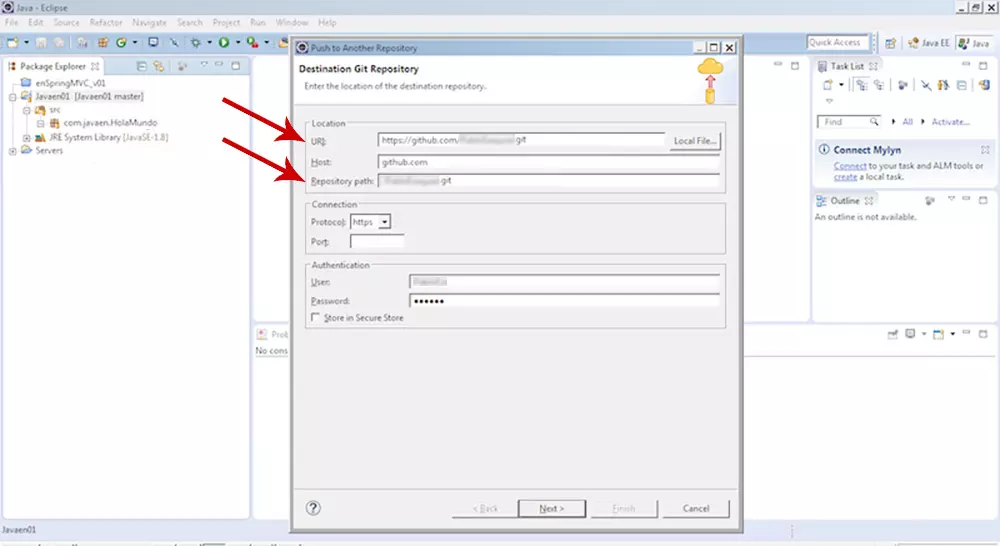
If we have the GitHub application installed, we can select our GitHub account and enter the name of the repository where we want to upload the project by clicking on Local file If not, we must enter the data of our GitHub account and write the name of the repository where we want upload it so that Eclipse accesses the platform and uploads the content.
Finally, we access the GitHub website with our credentials to check if the whole process it has been realized correctly. If you use the GitHub application on your machine, you can also check, after waiting a few seconds, if Eclipse has done its job correctly.
This process does not usually cause any problems, so in 99% of cases it is carried out without problems. If Eclipse has a problem during the process, it will show us an error message inviting us to solve it.