Printers with a Wi-Fi connection work independently, that is, they do not need to be connected to a computer and that it is turned on at all times in order to be used by the rest of the computers that are part of a network. That, these printers are more expensive than those that are connected by USB cable to a computer, and we can place them anywhere in the house, since they connect to the equipment through the Wi-Fi signal. If the printer cannot connect to a Wi-Fi network, for whatever reason, we can connect it to a PC via the USB cable thus sharing it with the rest of the connected computers, however, it loses the main advantage of this type of printers.
Share a network printer
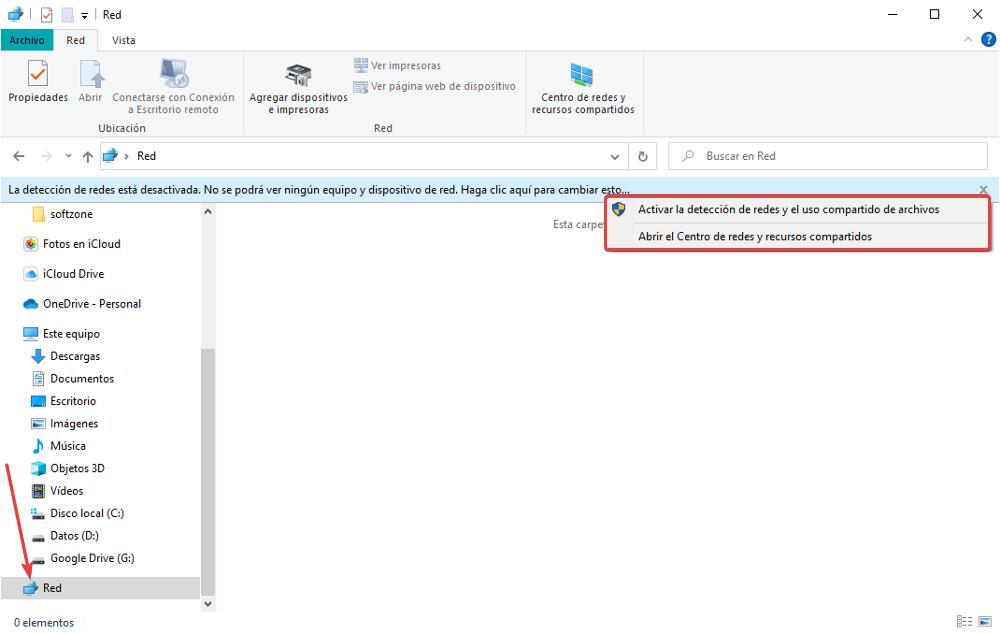
Windows, by default, has disabled file, folder, and printer sharing in Windows 10 and Windows 11, both on public networks (any network we connect to) and on private networks (our home or work network, For example). When we connect a PC to a network through an Ethernet cable, by default, the type of network associated with it is Private. When we connect to any wireless network, when establishing the connection, Windows will ask us what type of network it is: Public or Private. Depending on the type of network in question, Windows will apply one configuration or another based on the type of network.
Turn on network discovery
Once we are clear about the operation of the networks and the different types of connections, the first thing we must do is access the File Explorer and, in the left column, click on Network. Since sharing is disabled, in Windows we It will display a message in which it invites us to activate network detection and file sharing. Click on the blue banner and select the Activate network detection and file sharing option.
Activation of this function can only be done by the system administrator, so if you are using a standard user account you will not be able to continue with the process. Next, based on the previous explanation, we must select the first option: No, make the network I’m connected to a private network.

Then the file explorer will show all the devices connected on the same network.
Share the printer on the network
Once we have activated file sharing, the next step is to share the printer on the network in which we are connected, which must be the same network where all the computers with which we want to print through the printer are connected. connected to the computer from which we are sharing it. It seems a bit convoluted, but if we read them slowly, we will surely understand it.
To share the printer, we access the Control Panel through the Windows search box. Inside of the control Panelwe access the Hardware and sound section and, then, click on See devices and printers.
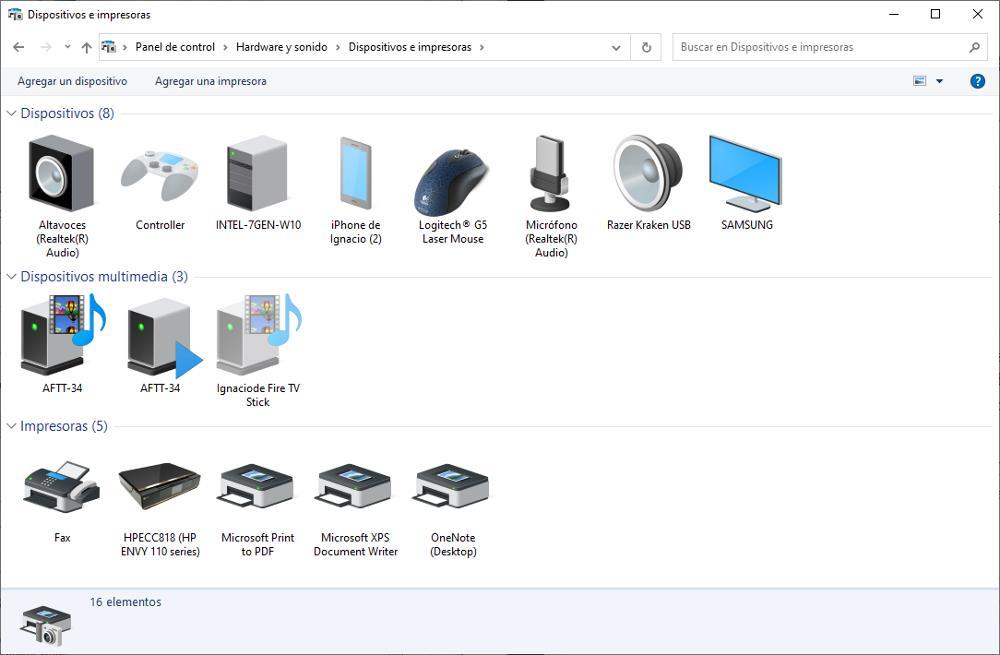
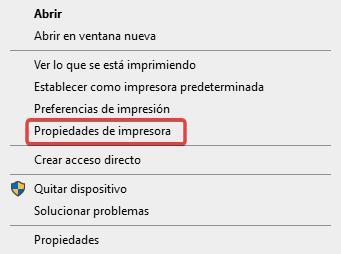
Next, we place the mouse over the printer that we want to share, click with the right mouse button to select the option printer properties.
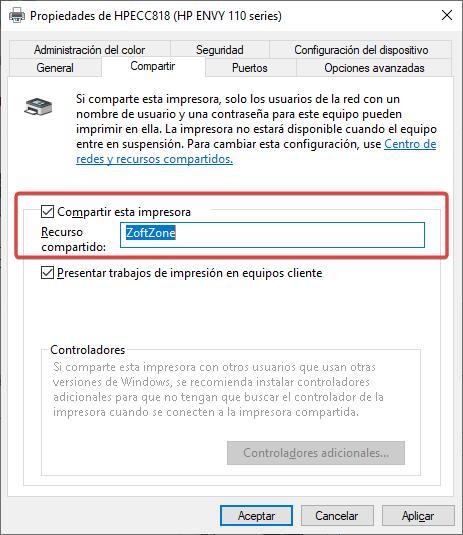
In the window shown below, click on the Sharing tab and activate the box Share this printer to then enter the name by which it can be identified on the network. To start sharing the printer, click Apply and then OK.
Next, the Devices and Printers screen will be displayed again and we check, if we have done the steps correctly, such as the printer icon, now shows the Windows share icon. This icon means that we are sharing the printer on our network.

Print via a shared printer
Once we have shared the printer from the computer where it is connected, we are going to show you how you can print through this printer from other computers. To start using the printer that we have shared from another computer connected to the same network, we go to the Windows configuration options (Win + i), click on bluetooth and devices and then in Printers and scanners (the process is exactly the same in Windows 10 and Windows 11, the only thing that changes is the graphical interface).
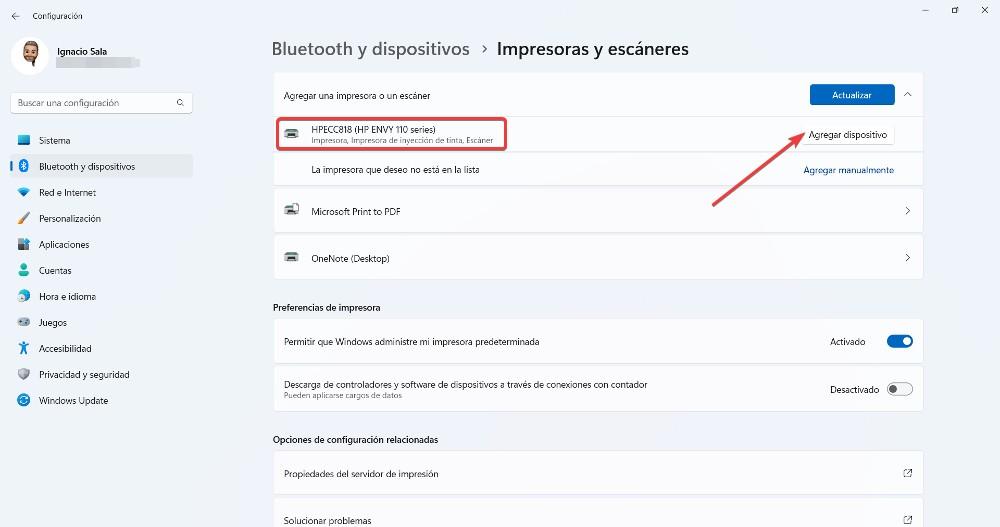
Seconds later, automatically, the printer that we are sharing will be displayed. To add it to the team, we just have to click on the button add device and wait for the necessary time for Windows to download the necessary drivers and install it correctly on the computer. If we don’t have any printer connected to the computer, this will become the default printer.
Problems connecting to a network printer
If Windows can’t detect the printer and you’re left wondering, it means you have a problem. To find the solution, click on Add manuallyoption that is just after The printer I want is not ready. Next, the following image will be displayed with different options to solve the problem. The easiest and fastest solution is to select the option Add a printer with an IP address or host name.
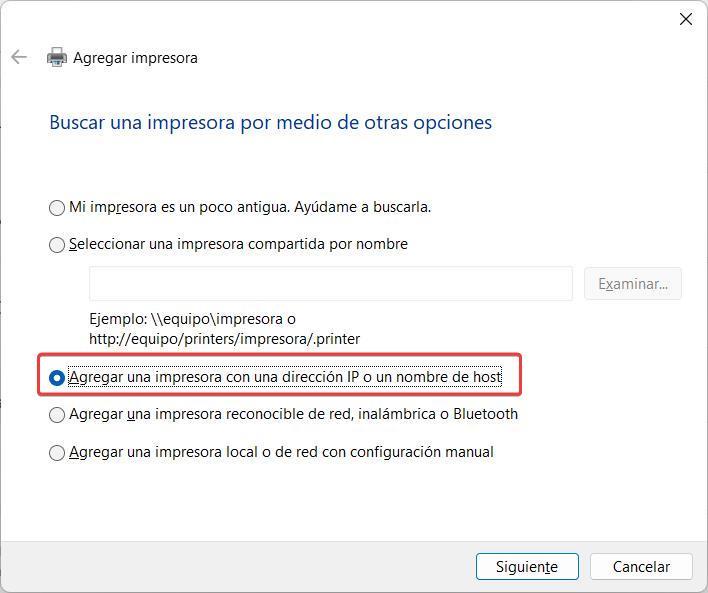
We select this option and click on Next. Next, we must enter the IP of the printer that we have shared, so we must go to the computer where it is connected, access Network from the File Explorer, place the mouse over the shared printer and, with the right button, select the Properties option.
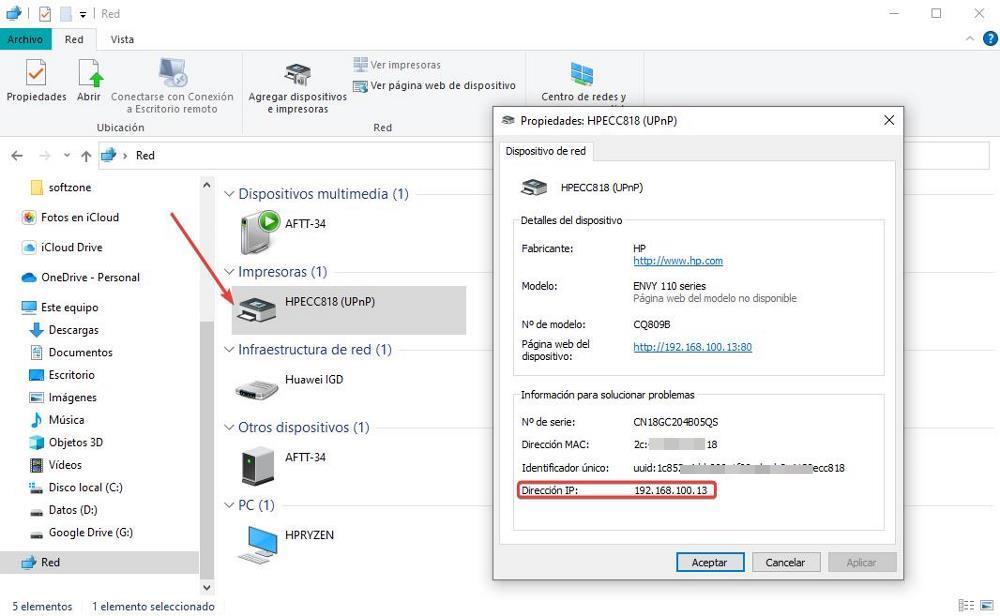
The IP of the printer is in the section Troubleshooting Information, specifically in the IP Address section. Those four numbers separated by points represent the IP address of the printer within our network and it is the number that we must enter in the section Add a printer with an IP address or host name.