Another of the positive points of Pages is that in the same way that it is present in macOS, they are also present in other devices and operating systems such as ios. Therefore, this action that we have described can also be carried out from the iPhone by following the steps that we indicate below.
- Position yourself on the page where you want to add the image.
- Tap on the «+»And then click on the content icon.
- Touch photo or video.
- Select the image you want to add.
- Drag any of the blue dots to resize image, and then touch OK.
In addition, in order to guarantee that images that you add look with qualityOn iOS devices you have to click File> Advanced> Optimize videos and images for iOS. In this way, whenever you view the document on an iPhone or even an iPad, the images will be seen with total clarity.
Use images as content markers
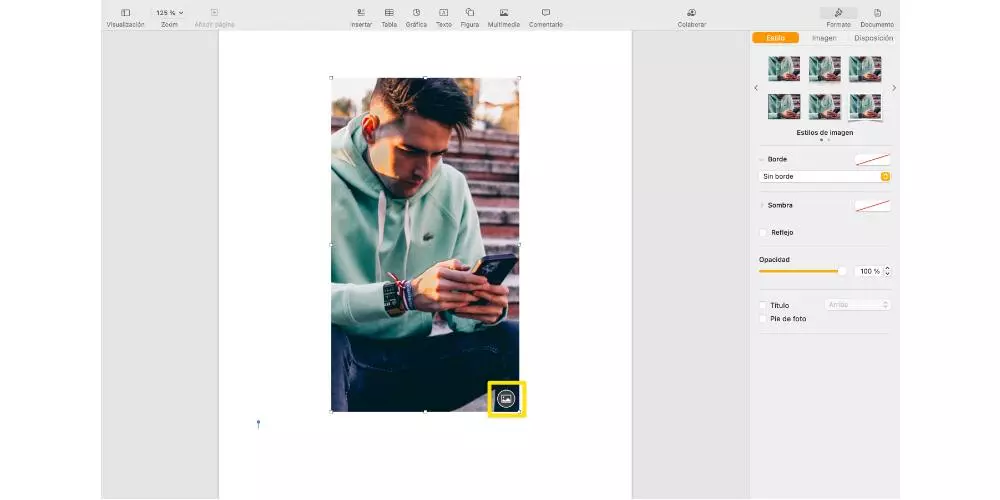
Another function for which you can use all the images you want to add to your Pages document is to make them content markers. For be able to identify content markers You just have to check if they have an image icon in the lower right corner. Here are the steps you have to follow to carry out this process on Mac.
- Add an image to the document.
- Apply the format with which you want that image to appear. You can add a mask, a border, rotate the image, change its size, etc.
- Select the image, then select Format> Advanced> Set as content placeholder.
It is possible that when going to replace an image or another object, this is a master object and, therefore, cannot be replaced by a different element. However, what you can do is make it editable and then be able to replace it. To do this, carry out one of the following two actions that we propose below.
- Select the object, in the Format sidebar, click the Layout tab, then click Unlock.
- Select the object, click Layout> Master selections> Allow selection of master objects.
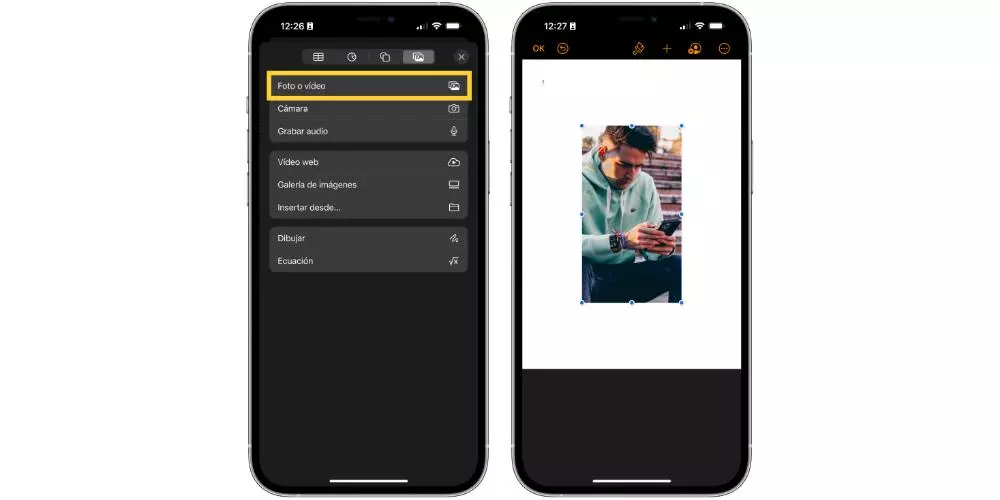
Obviously, all this process can not only be carried out on your Apple computer, but is also available for be able to do it on your iPhone. In addition, you can see below how it is really easy to do, and it will help you a lot when it comes to wanting to replace multimedia content without affecting the rest of the document.
- Add an image to the document and give it the format you want it to have.
- Touch the image to select it. Then tap the paintbrush icon, tap Image, and then tap “Set as placeholder.”

Options to edit photos
Once we have already told you what are the actions you can do to vitaminize your text documents through images, we want to show you the options that Pages gives to edit the images that you have included in your document. Obviously it is not a photo editing application, but it has really interesting tools that will allow you to achieve a very attractive result.
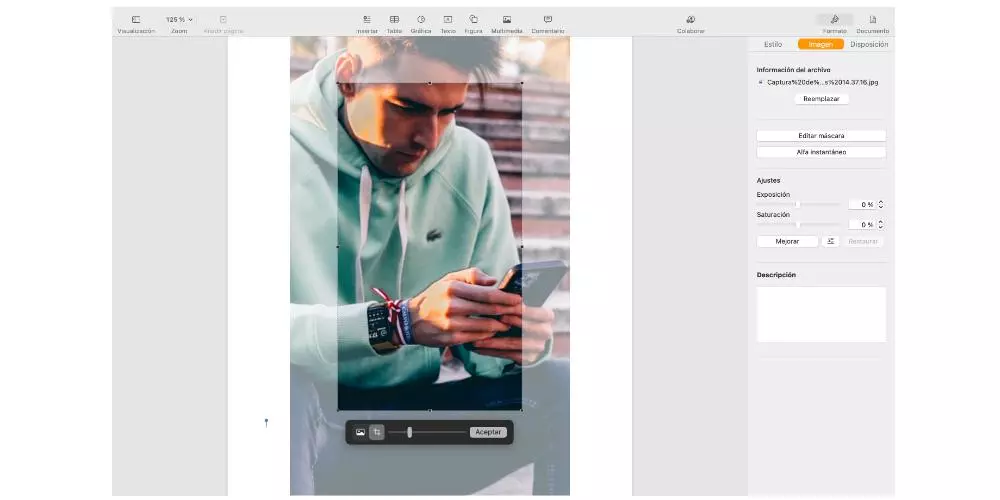
Crop the images
The first thing you have to know how to do is cut out the image that you have included in your document. This is vital to be able always adapt the image to your taste or your needs. Also, as you can see below, the steps you have to follow are really simple, both on macOS and iOS. Let’s start with the Mac.
- Double click on the image you want to crop.
- The skin controls appear, which by default will be the same size as the image. In case you want to have all the skin controls, click hard on the image with the trackpad until you feel a deeper click.
- Use the controls to surround only the parts of the image that you want to be visible.
- Once you’re done, click OK.
As we said, this process of being able to cut the image or images that you have in your document is not only available through the macOS application, but it is also a process that you can carry out without any problem through your iPhone. Here are the steps to follow for this.
- Select the image.
- Click on the brush icon.
- Click on Image and then on «Edit mask».
- Use the controls to crop the image as you need it.
- Click OK.

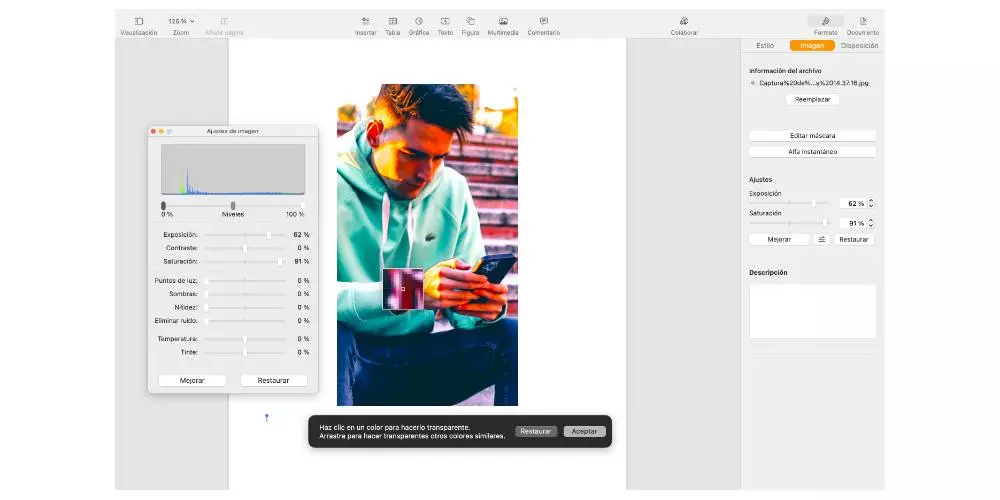
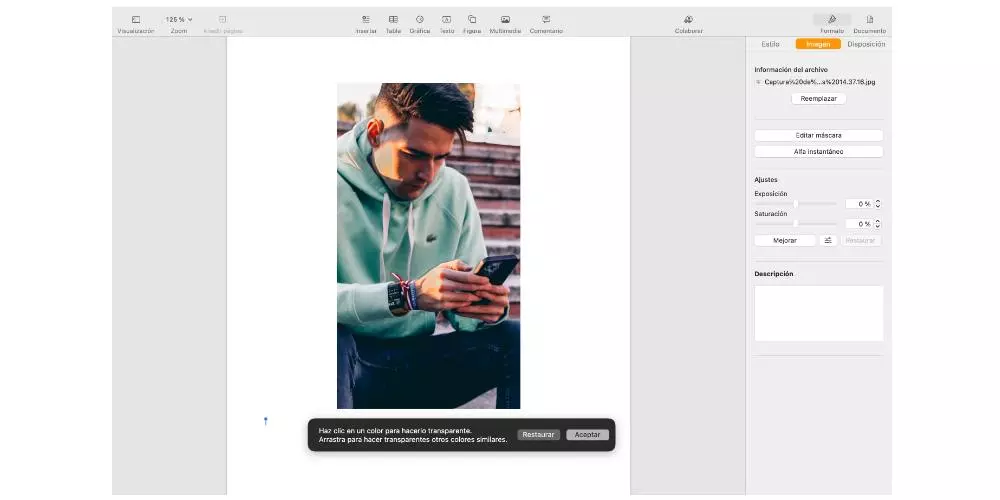
Remove background from photo
We continue with more really interesting actions that you can perform within the Pages application itself, and surely this will be especially useful for you in many moments. It is the action of removing the background from a photograph and leave only the main object or person. The steps you have to follow to do it on macOS are as follows.
- Select the image.
- Click the Image tab in the Format sidebar.
- Select “Instant Alpha.”
- In the image, click on the color you want to remove and drag the pointer slowly over it. As you drag, the selection grows to include different areas that use similar colors. Press and drag the pointer repeatedly to remove multiple colors.
- To remove all color, press the Option key on your keyboard while dragging.
- To add a color back to the image, press the Shift key on your keyboard while dragging.
- Click OK or Restore to undo all the changes you have made and restore the image to its original state.
You already have the steps you have to follow to be able to remove the background of an image on your Mac, but you also have to know how can you do it on your iPhone. Actually, the action is really simple as you can see and it hardly differs from the steps you have to do in macOS.
- Select the image.
- Click on the brush icon.
- Go to the Image tab and click on “Instant Alpha”.
- In the image, select the color you want to remove and slowly drag over it. As you drag, the selection will grow.
- Click OK or Restore to undo all the changes you have made and restore the image to its original state.

Edit the basic parameters
Finally, another of the actions that you have to keep in mind in order to adapt the image that you have added to your document to your needs is to edit the image itself by touching some of the basic parameters in photographic editing. Unlike the rest of the actions that we have discussed so far, the option to edit an image only available for macOS, we tell you the steps below.
- Select the image.
- Click the Image tab in the Format sidebar.
- Use the available controls to make the adjustments you want
- Exposure: Changes the overall lightness or darkness of the image.
- Saturation: Changes the richness of color in the image.
- Enhance: Automatically adjusts the image by evenly spreading the red, green, and blue tones across the histogram.
- To view the image’s histogram and adjust more advanced components, such as contrast, highlights, shadows, sharpness, noise removal, temperature, and tint, click the histogram icon.