In these times we have the possibility to choose between several music streaming platforms. Perhaps the most popular and that surely sounds familiar to most of you is Spotify, which also provides us with multiple functions to customize its operation and use.
Many of you will already know first-hand that here we have a way to enjoy all our music for free. Of course, here we find some limitations of use and some annoying advertising that interrupts playback every so often. If we want to have access to all the features of the music platform and at the same time eliminate advertising, we will have to opt for one of their payment plans.
At the same time, we will have the possibility of creating endless playlists with our favorite songs corresponding to all kinds of genres and authors. So what we achieve is to take all our favorite music and be able to listen to it from the mobile or the desktop computer. But as we say, we have multiple parameters to customize the operation of this online music service. Next, we are going to talk about how to avoid cuts between theme and theme that we have, for example, in a playlist.
In this way we can listen to all our music and that there are no pauses between songs when using the Spotify platform. For all this, it offers us a useful functionality that is deactivated by default in its Windows application and that we can start. That is precisely what we are going to show you below and that you can change easily in a matter of seconds.
Activate the crossfade function of Spotify
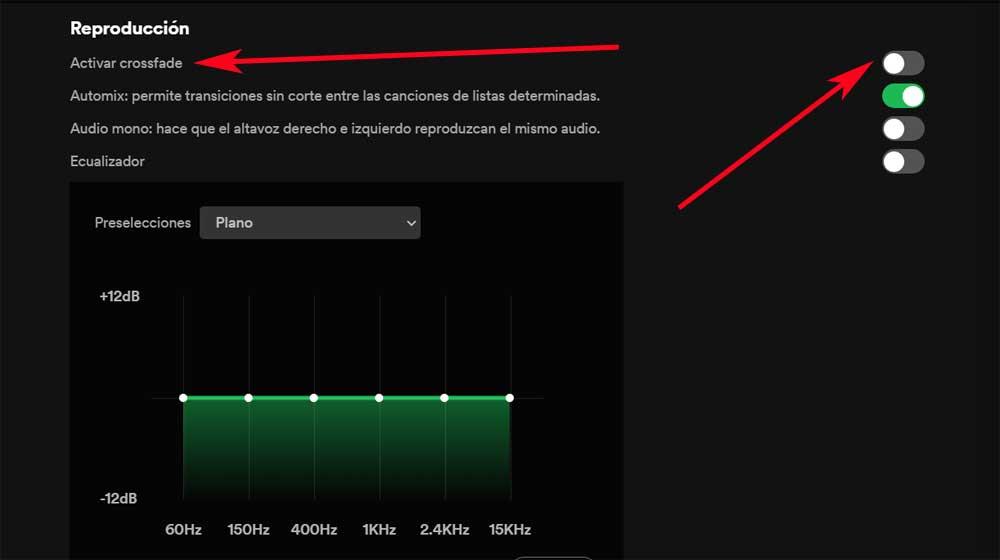
Specifically, what we are going to do here is activate the functionality called crossfade in the streaming music platform application. What this feature actually does is remove that space of silence that is usually generated between the songs that we are playing in the same list. In this way we achieve that all our music that we have loaded at that moment is heard continuously, without pauses.
To achieve all this that we tell you, the first thing we do is access the application that we have installed on Windows of the Spotify platform. Obviously, first of all we will have to enter our corresponding access credentials to enter our personal account. Once we have achieved this, the main interface that appears on the screen, click on the icon of our user. We see this in the upper right part of the program window.
In the drop-down list that will then appear, click on Setting to access the window that allows us to customize this spotify client. To activate the functionality that interests us now and listen to music without interruptions, we locate the section called Playback. And it will be there where we find the selector of the function that we are looking for and that, as we mentioned before, it is deactivated by default. All we have to do is click on Activate Crossfade so that from now on we will no longer find pauses between the playback songs.
In order to disable this functionality we just have to go back and take these same steps to undo the change.