We must bear in mind that current PC operating systems are programs that are both complete and complex at the same time. This is largely due to the fact that they are composed of a large number of elements that make the whole work in our equipment. However, when installing an operating system like Windows, sometimes we have to install or update some of these components independently. This can become a somewhat cumbersome task, so in these lines we are going to try to make things easier for you.
This is something that we are going to achieve through an application that has been around for a good number of years and that continues to have many followers. In particular we refer to the software called nLite. Some of you may already know that this is an application that tries to facilitate and automate a little more the installation process of the Windows systems.
In this way, what we are really going to achieve is to greatly automate a somewhat annoying process such as the Windows update. This is because in the custom image that we create with nLite, many additional elements are included to the system as such. So all this will be installed on our PC by itself without having to interact with the installation process.
How nLite makes it easier for us to install Windows on our PC
To give you an initial idea of what this program that we are commenting on gives us, let’s see what its main objective is. We must know that nLite are totally free applications that allow you to create CDs with custom Windows installations. Thus, the software allows us to customize said installation by adding or removing components from the Redmond operating system installation disk.
In this way, integrating update packages such as service packs or the latest drivers automates the installation process. In turn, it allows us to incorporate the official product key, as well as the administrator password and regional adjustments, among other things. We must also bear in mind that nLite allows us to automatically install third-party programs in order to ignore us.
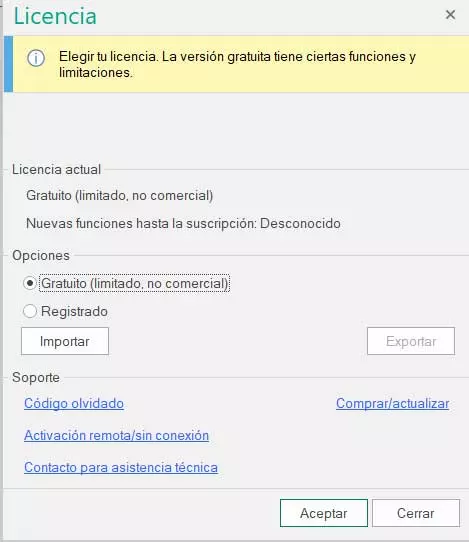
This is a software solution that is compatible with both the old versions of Windows and XP, up to the current Windows 10. Therefore, for all of this, at first what we have to do is download and install the program on our computer. At this point, it is worth mentioning that we live off licenses they put a free, non-commercial one to be able to test and use it.
Next, as we will see in these same lines, we only have to add the elements that we need once we have loaded the original image in the program.
NLite startup
In this way during the process of program installation The first thing we have to specify is the type of license we have. Once this is done, we will have access to the main nLite interface to start working with the application.
At this point, all we have to do is load the new image of the system with which we are going to work. This is something that we achieve through the add button where we select the file that we want to treat to add or remove custom components.
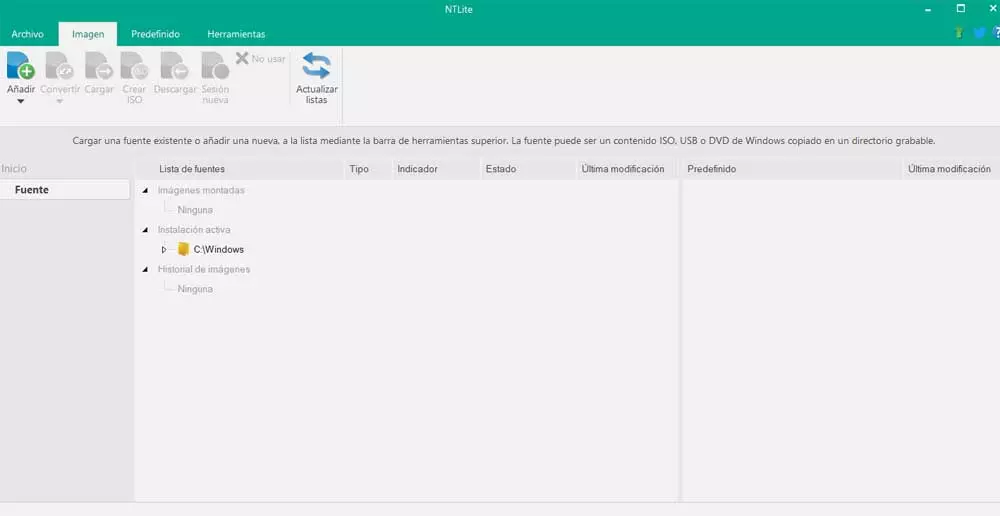
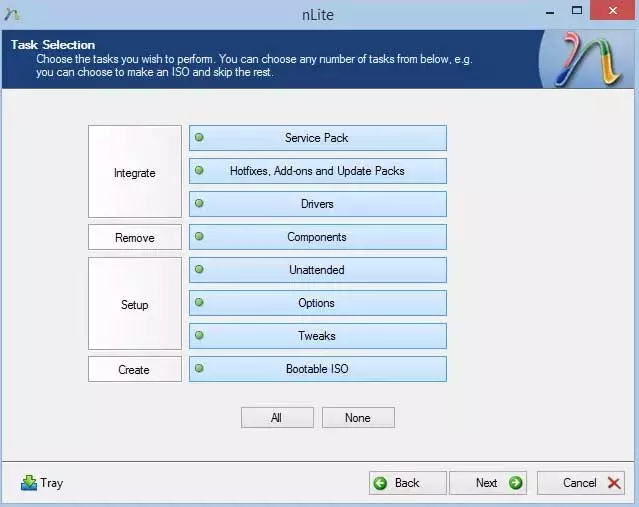
On the other hand, in the upper part of the main interface of the application we find a series of menus that will be of great help. These offer us everything we need to be able to customize the installation files of Windows with whom we will work here.
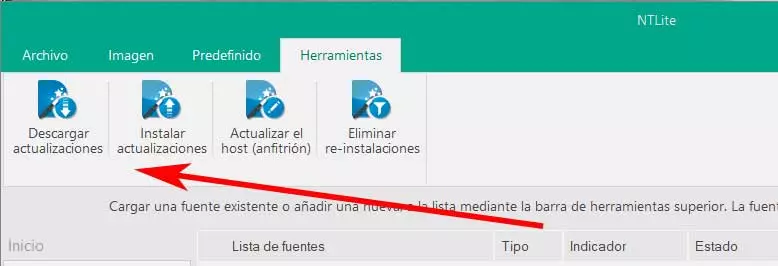
We have the possibility to go to the Tools menu in order to update the Redmond operating system more quickly. This is not allowing us to add the most recent versions of the system to the image we are creating.
Configure and customize how the nLite works
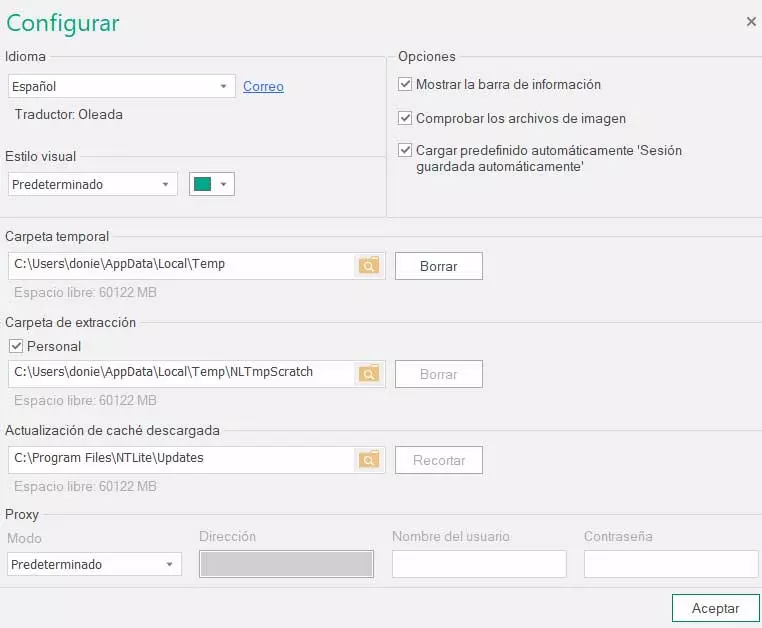
At the same time, it is an application that has some interesting parameters that will allow us to customize its operation. For this we only have to go to the File menu of the main interface of the Program and click on the button Setting. This will lead us to the window that interests us in this case. From here we will have the possibility to customize the appearance of the program’s interface a bit.
However, here we are interested in specifying to nLite, the disk locations that we want to use for the images that we create. At the same time we have the possibility of configuring a proxy to download the images that we download from the internet. In this same section we have an option that if we activate it, it carries out an automatic check of the personalized images that we create.
How to download nLite and use it on Windows
Once we know all this that we have told you, it may be the case that you want to try it first hand. To do this, as we mentioned earlier, you will only have to download the program from its page official Web. We have already told you that this is a software solution compatible with most versions of Windows, from XP to the current Windows 10.
In order to download and install this application and create your own custom installable versions of Windows, we will do so from this link. Well, we remember that if we are not going to make commercial use of the software, we can use it for free on our computer.
What is vLite and how is it related to nLite
It may be the case that on some occasion and belonging to this same software sector, you have heard of a program called vLite. This can generate some confusion, so we are going to clarify the differences between the aforementioned nLite and vLite. To begin with, we will tell you that both software solutions have the same objective, that is, to allow us to create custom installations of the Windows system.
In the same way, both programs carry with us a good amount of weather, so they were used in the past with older versions of Microsoft software. Well, the main difference between the two Applications is that vLite was developed to work with Windows Vista. But given the little success that this version of the operating system had, the truth is that this particular program did not go any further.
That is why vLite became nLite, largely due to its similarity in operation, and that nLite did continue to evolve, being compatible with more current versions of the operating system.
Add SATA drivers to Windows XP ISO with nLite
One of the most successful features of nLite is the possibility of creating an installation CD for the operating system Windows Xp with the drivers SATA. In this way, we obtain an installable and customized ISO with these integrated SATA input and auto-bootable drivers. With this, what is achieved is to avoid compatibility problems with certain SATA disk drives.
That is why below we are going to show you how to achieve this that we are commenting on. As it is easy to imagine, the first thing you should do is download the program as we showed you previously. In the same way, we must bear in mind that the SATA drivers that we want to add to the new image that we are creating, we must have them at hand. If you know them from the outset, you will have to save them in a folder to later add them to the installation CD. These drivers can also be downloaded from the manufacturer’s official website.
The process is simple, since we only have to integrate the driver packages that we are commenting on to the installation image that we are creating. Therefore we only have to import them and follow the wizard until nLite creates its Windows installation disc, with the drivers already loaded.
Add updates to the ISO of any version of Windows
As you already know Microsoft does not stop improving and updating Windows 10. This is a process or work that in the past was also carried out with older versions of the operating system. This is why when creating a custom self-bootable installation image with nLite, the best we can do is add the latest updates to the image itself.
Select original system image
This is something we can do with the Program of which we have spoken in these lines, for any version of Windows. As you can imagine, in this way we will have a much more updated image and we save ourselves from having to do the entire update process once the system is installed. Precisely all of this is what we want to talk about in these same lines.
Thus, the first thing we do to achieve this that we are commenting on, is to select the image with which we want to work here. This is something that we can carry out through the Add button, as we told you before. Among the available options that appear in the drop-down list, we opted for Add image.
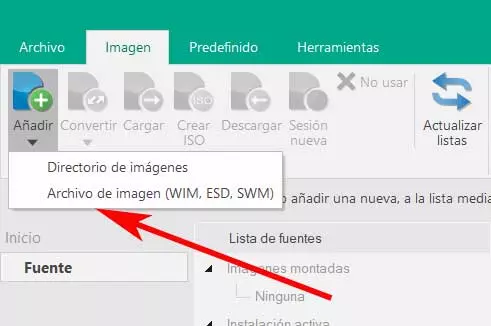
Then we just have to select the file with the image that we are going to deal with in this section. As regular users of this program will already know, once loaded into the application, we can add or remove as many components as we want. Here we refer to elements such as drivers, service packs of old versions of Windows, third-party applications, user accounts, etc.
Download and install updates
But that is not what interests us in this case, but we are going to add the latest updates released by Microsoft itself to our new ISO. once we have loaded it into the program as such, we have to go to the Tools menu of the main interface.
In this section we find several options that will be very useful for this that we are looking for. In fact, to add the corresponding updates to the new image, the process can be done by nLite itself in an automated way. It should be noted that here we find two buttons that interest us to complete the update process. The first one, located at the extreme left of the Tools section, helps us to download locally the latest updates for the selected Windows.
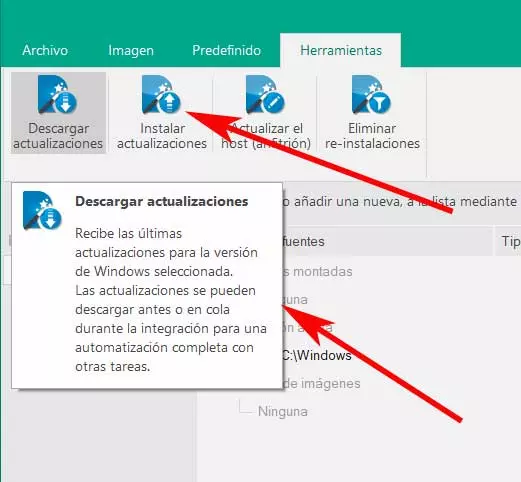
Once the download has been completed as such, we will be able to use the second of the buttons that we comment on. This is found just to the right of the first one and it is in charge of installing the updates downloaded earlier in the new image that we are creating. Therefore, to finish the process that we are looking for here, we just have to click on Install updates.
In this way we will already have the most updated version of all in the new customizable and installable image that we are generating from Windows.