Photoshop actions allow us to save time when we have to perform repeated tasks and condense complete editing paths in a single click. This makes them very interesting to use. Today we are going to learn a little more about them and how they work.
Photoshop actions, what are they?
When using the popular Adobe editing program, it is likely that we will have to apply the same modifications on the photos on many occasions. This is something common and at the same time it takes us too long to repeat the same action over and over again. That is why Photoshop actions arise so that with a single click we can make complex edits automatically. We should not confuse them with extensions or add-ons, as they work differently.
And it is that in this way we will be able to automate the execution of a set of steps that we usually perform on a regular basis, and thus save us valuable time. We can use them for almost anything, getting us to become an expert avoiding the tedious repetition of those steps that we use most frequently. For example, you can create an action that resizes an image, applies an effect, and then saves the file in the desired format.
Through them, steps can be included that allow us to carry out different tasks that cannot be recorded, such as, for example, using the tool to paint. They also allow us to include controls by which to enter values in a dialog box while an action is running. Additionally, actions can be recorded, customized, edited, and batch processed.
How to download and install
It is possible to download shares from different places, being able to find them both free and other paid. In fact, the same Adobe website has different types that we can download for free that will allow us to learn how to use and understand everything they can do for us. We can access them from this link to the Creative Cloud page.
Once chosen we must download it and we will obtain a compressed folder in ZIP format. We must decompress it using a decompressor such as WinRAR, WinZip, or similar. This will make us discover a file with extension .atn which is the one we will need to install next.
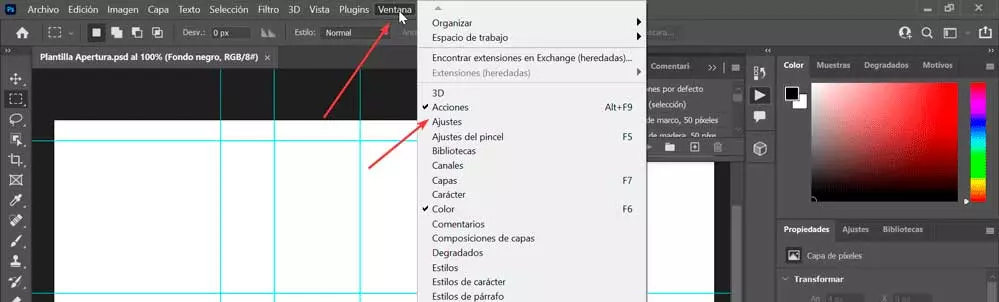
At the time of installation we have two ways available. The easiest is to double-click the file and Photoshop should automatically open it and load the action. Later we choose a photo to apply it. We can also carry out the operation from the editor itself, identifying where they are. To do this, click on the “Window” tab. This will display a list where we will select «Actions» or we can directly press its keyboard shortcut «Alt + F9».
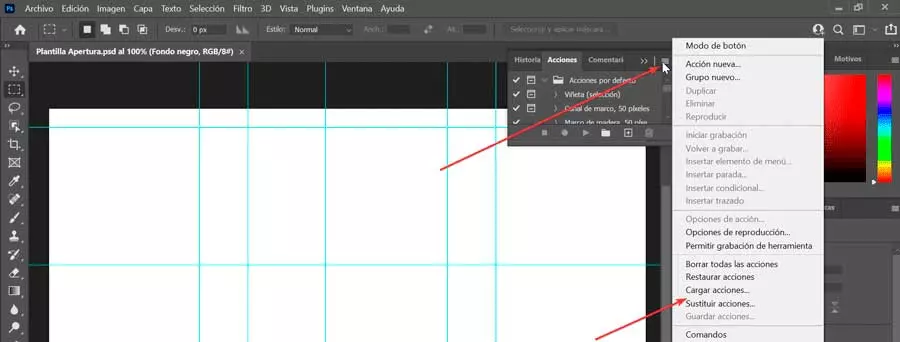
Subsequently, we click on the menu button (four small horizontal lines), which will open other lists of options, among which we click on “Load actions”. Now all you have to do is select the downloaded file and click on «Upload». This will add it to our list, and we may have more installed, so we must locate it on the list.
Run them and check their effects
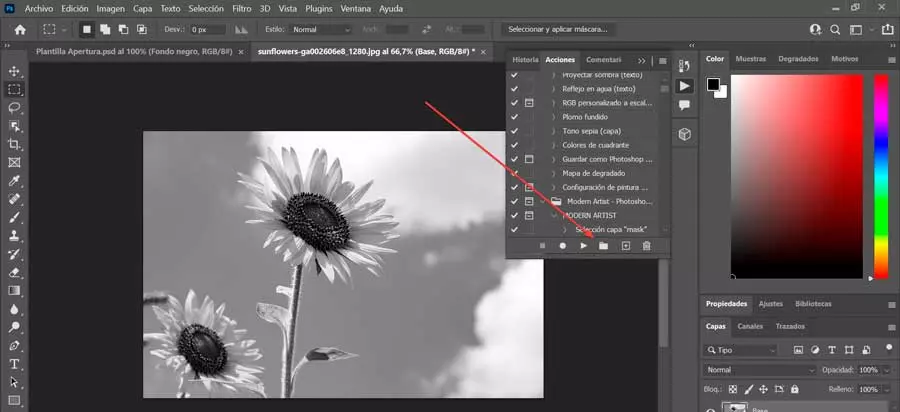
Once we have it installed we can start using it. To do this, we must open the photo to which we want to apply the effects. Later we select the layer to which we want to apply the action, which will generally be the initial background layer, although we can also make a copy of the background layer and apply the action on it to obtain a non-destructive edition. To create the new layer, click on the “Layer” tab, then on “New” and “Layer”.
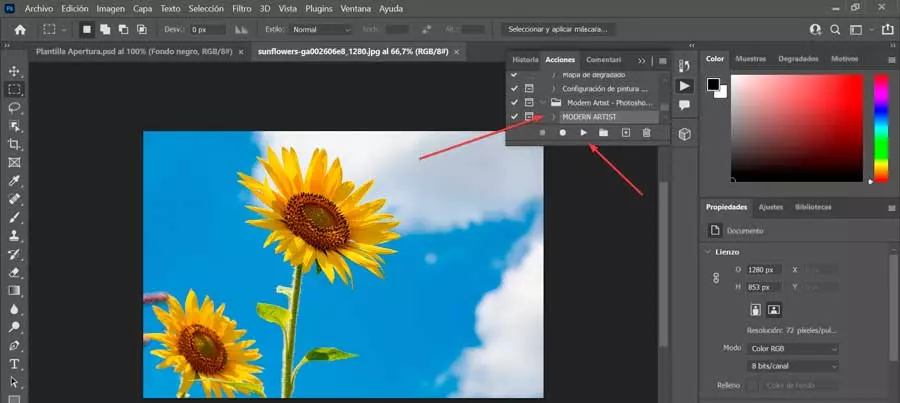
Now we select the action to be carried out from the «Actions» panel. To be able to activate it, just click on a small “Play” -shaped play button in the bottom row of the panel, and it will execute the action. Once executed, we can see the different layers that compose it and get an idea of the techniques used by the person who created it.
Customize the effect
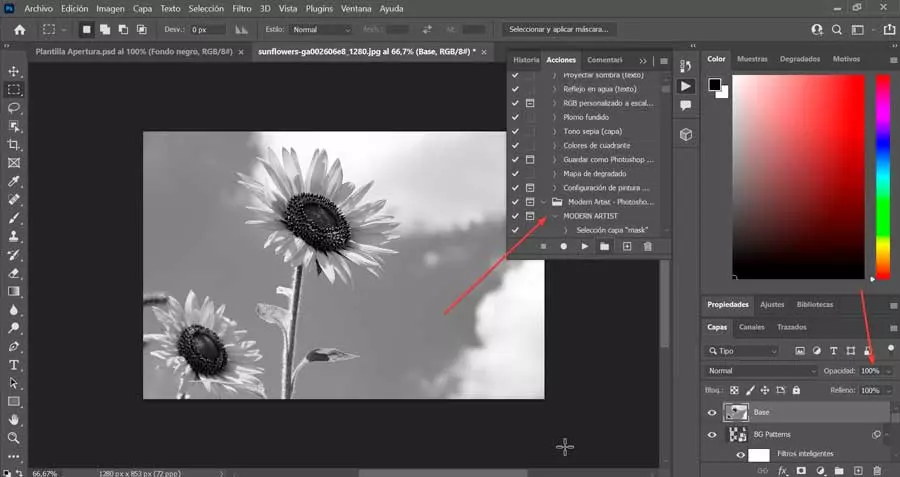
Sometimes we may need the power modify settings that includes by default an action so that we can achieve the desired effect in our photograph. Once we have applied the effect we have two ways to modify it. To do this, the most common is to adjust the opacity of the entire group of layers.
To be able to select a group of layers, just click on the folder-shaped icon that we find next to an action already executed within the layers palette.
Later, once the layer group is selected, we can adjust its opacity by adjusting the intensity of the effect up or down.
The other method of adjusting the effects of an action is to individually adjust the layers within a single layer group. For this we will need to have a deeper understanding of the different components that make up the group, but the method remains the same. We simply have to select the individual layer within the group and adjust its opacity as we deem necessary.
Create our own action
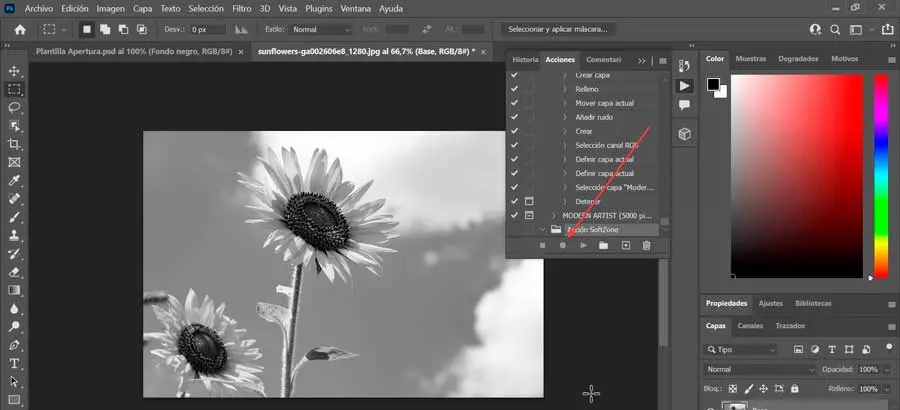
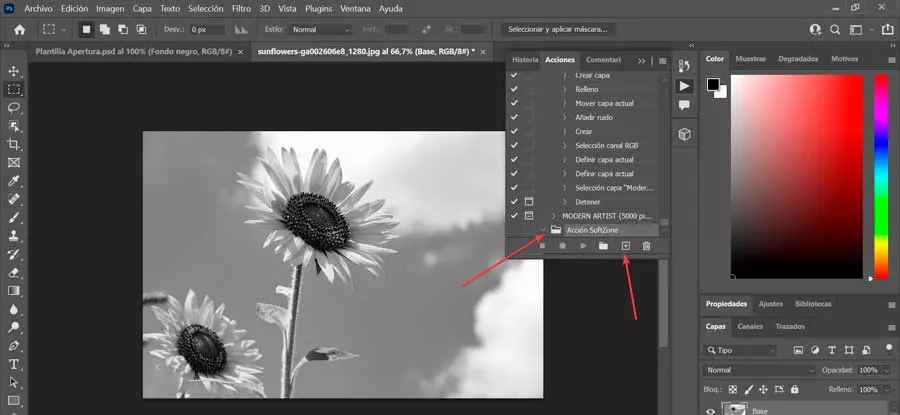
If we wish, we also have the possibility to create our own actions. To do this, we must open the image on which we are going to make the adjustments that we want to save to later apply to another photograph. Later, we must choose if we are going to group it in a folder or leave it loose. Next, we click on the folder symbol and we will give it a name, which in our case is SoftZone, which will appear on the list.
Once this is done, we create the action inside the created folder. We select it and press the button «New action». This will make it ask us for a name for it. Our case will be “SoftZone Action” and we will click on “Record”. From now on, all the steps and actions that we carry out will be recorded in the action.
When we finish making all the settings that we want to be part of the action, we must stop the recording by pressing the “Stop” button (square). With this we will have completed the action that we can later execute the image we need.