Turn the checkbox on or off in Windows 10
If we use Windows 10 as the operating system, we will be able to enable or disable the File Explorer check box, both from its toolbar and from the Folder Options section
From the toolbar
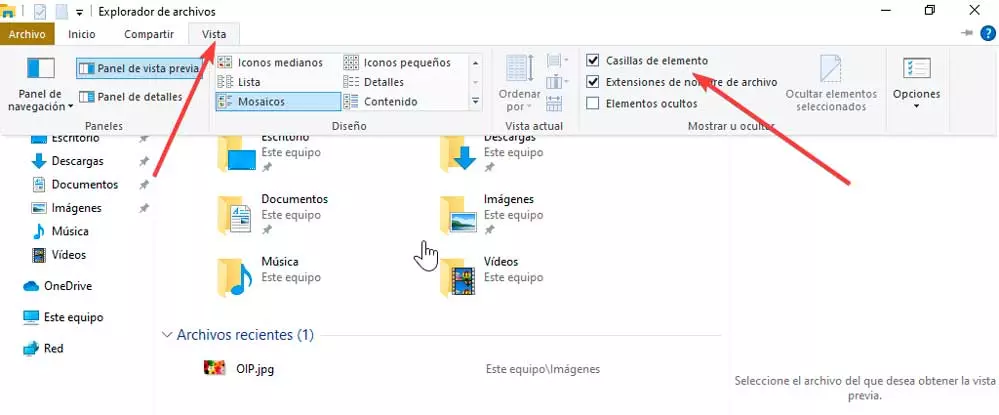
The first thing we are going to do is open File Explorer, something that we can do in different ways. For example, by pressing the “Windows + E” key combination, either by clicking on its shortcut located on the taskbar or simply by opening any folder.
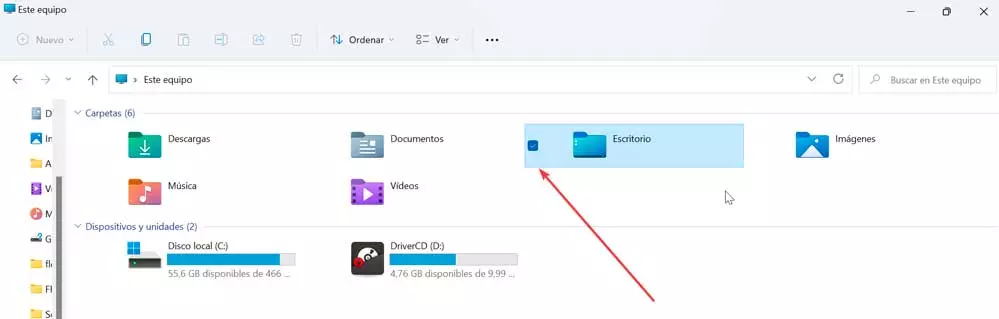
Once open, we go to the top of the Explorer and click on the View tab. Next, on the right side, within the Show or hide section, we will find the Element checkboxes option. If we mark it, we will be enabling the checkbox and a square will appear next to each element that we find in the Explorer. If we uncheck the Item checkboxes option, the checkbox next to each file will disappear.
In the event that we want to activate or deactivate this function again, we simply have to repeat the previous steps at any time and check or uncheck the option of Element checkboxes.
Use Explorer’s folder options
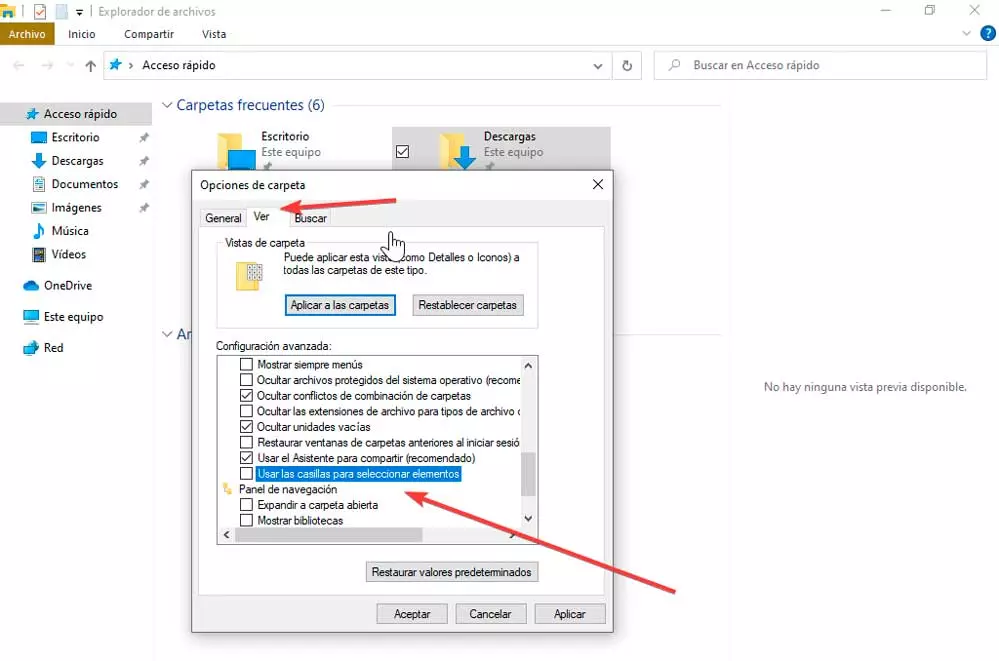
We can also enable or disable the item checkbox using the folder options in File Explorer. To do this, we must access the File Explorer and click on the View tab within its toolbar located at the top. Next, we click on the Options button, which will make it appear in a new window called Folder options.

Here we click on the View tab and scroll to the bottom within its Advanced Settings section. Here we will find the option to Use the boxes to select elements. If we mark it, the check box will appear next to each file, while, if we deactivate it, it will stop being shown. As with the previous method, we can make the necessary modifications whenever we need it.
And in Windows 11?
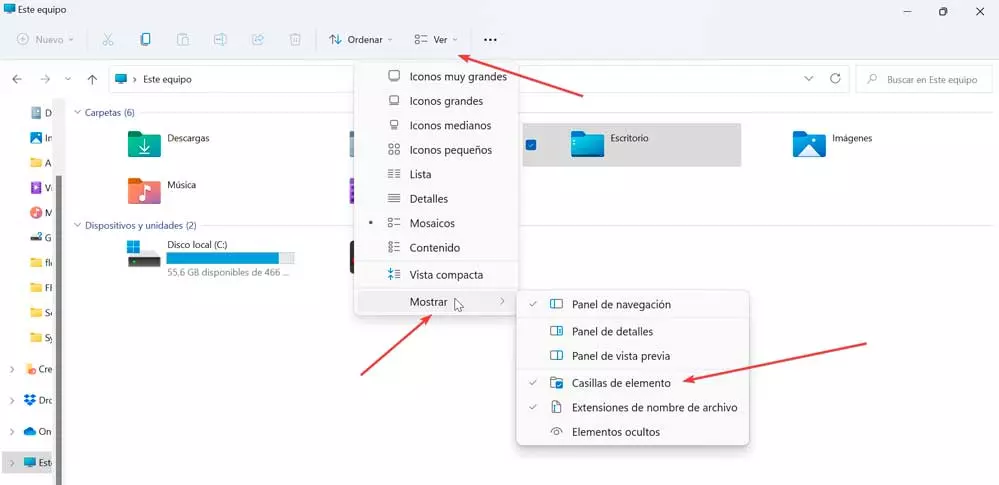
In Windows 11 we can choose to activate or disable the check boxes, but this option is a bit hidden and it is possible that at first glance we do not know how to access it. To do this, the first thing will be to open the File Explorer, which we can do by pressing the “Windows + E” key combination, either by clicking on its shortcut on the taskbar or simply opening any folder.
Once we have accessed we must click on the tab of Watch found at the top of the toolbar. This will make a drop-down menu appear where we must place ourselves in the option of To show located at the bottom of it. This will cause another side menu to be displayed, this time on the right of the screen with various options to choose from. Here we can check or uncheck the option item boxdepending on whether we want to enable or disable it.
And this is all we need to do. If we have activated it, from now on, every time we select a file, we will see a checkbox next to her. In case of disabling this option, the checkbox is not displayed. Whatever our choice, we can change it at any time by following the steps we have mentioned.
Use the Registry editor as a workaround
Although we can activate or deactivate the check box directly from the File Explorer, the truth is that the Microsoft operating system offers us another alternative to do it. This is especially recommended for advanced users, as it will mean making changes to the Registry Editor. The steps are identical in both the version of Windows 10 and Windows 11.
In order to access the Editor, the first thing to do is launch the Run command, using the “Windows + R” key combination. Here we write regedit and press Enter or the OK button.
Once we have accessed it and given that we are going to make changes to it, the most advisable thing to do is to previously carry out a backup. This way, in case something goes wrong, we can easily restore it. To do this, click on “File” and “Export”. Then we specify All in the export range, give it a name, select the .reg format and click “Save”.
Next, we will navigate to the following path:
HKEY_CURRENT_USER / Software / Microsoft / Windows / CurrentVersion / Explorer / Advanced
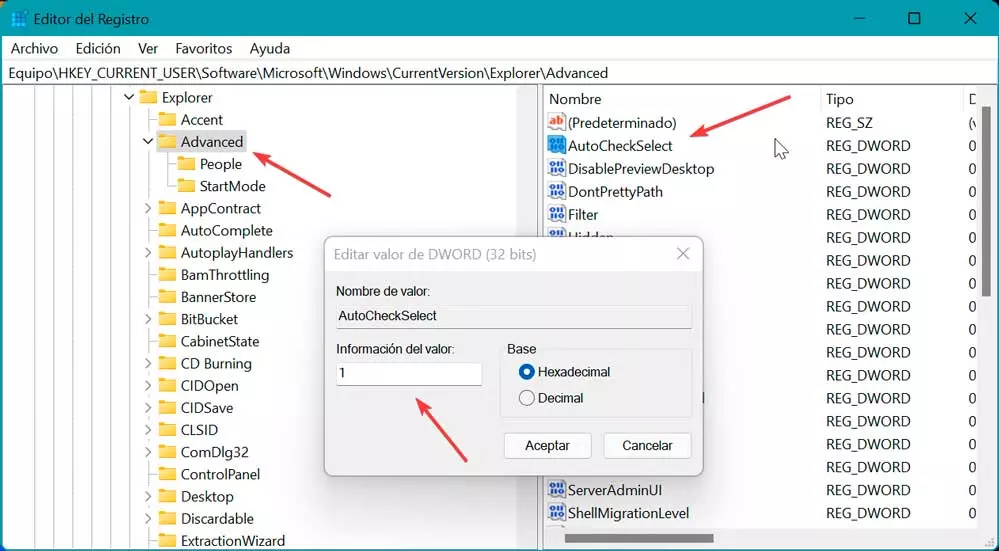
Here, we locate in the right panel the value AutoCheckSelectt. We double click on it to bring up a new window. In it, in the section of Information of value we must put “0”to disable the checkbox, or “one” to enable it.
Once this is done, click OK and the changes will be made automatically. Every time we want to modify this option, we can do it by following the previous steps and change the Value Information section to 0 or 1 as we see fit.