The privacy and security They have been two fundamental issues for all the members of the Californian company. Proof of this is found in the news that Apple includes in all its versions of operating systems regarding the need for nobody to know where we are browsing or our location. In this post we are going to know what is Private Relay and that allows us to do this function that is available from iOS 15 and macOS Monterrey.
What is Private Relay?
When we browse the internet, a trace of DNS and our IP address. Obviously, not only our internet browser can access this data, but third-party companies can also access said data. Therefore, Apple, at the 2021 developer conference, has generated a security system to avoid this information tracking, because it considers that user privacy is an intrinsic element of the user and no one should have access to it.
To have this function, all users who have iCloud+ and they can update their iPhone to iOS 15 or macOS Monterrey From now on, all users have access to a feature called Pivate Relay, which allows you to create a layer of privacy in your iPhone’s internet services, regardless of whether you are using mobile data or a Wi-fi connection. If we activate this option, it prevents no one can access any information about you And not even Apple itself can access your Internet browsing data or access to online elements or web pages.
Activate Private Relay on iOS and macOS
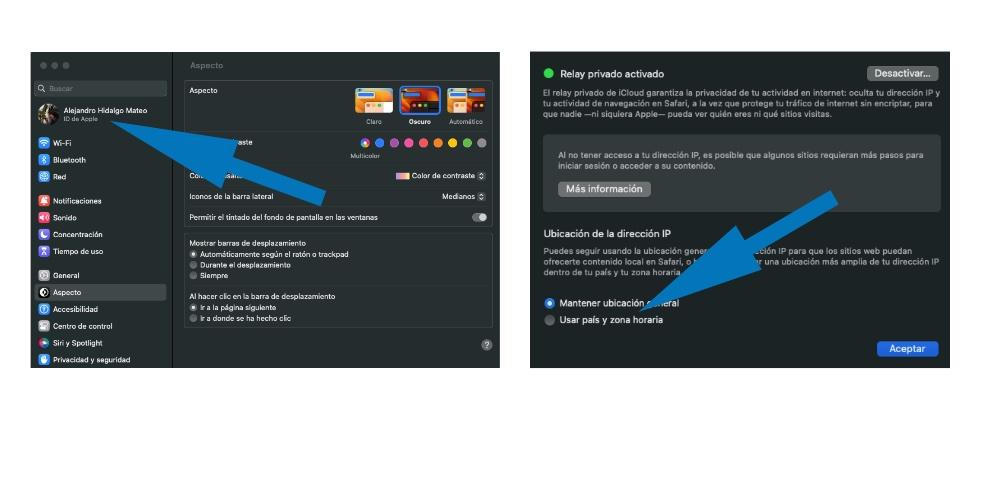
We are going to see the process to activate Private Relay in macOS, which is a different process if your team upgrades to macOS Ventura or not. The process consists of five steps if we do it through macOS Monterey:
- Go to Apple menu > System Preferences.
- Click Apple ID and select iCloud.
- To turn Private Relay on or off, click the check mark next to Private Relay.
- If you want to choose a setting for your IP address, click Options:
- To have sites show you localized content in Safari while your IP address is hidden, click Keep general location.
- If you want to use a wider location for the IP address, click Use country and time zone. You can repeat this option in Ventura.
In macOS Ventura The process consists of five steps as well:
- Go to Apple menu > System Settings.
- Click your name and select iCloud.
- Click Private Relay, then Options.
- To turn Private Relay on or off, click the On or Off button.
- Choose a setting for your IP address.
- To have sites show you localized content in Safari while your IP address is hidden, click Keep general location.
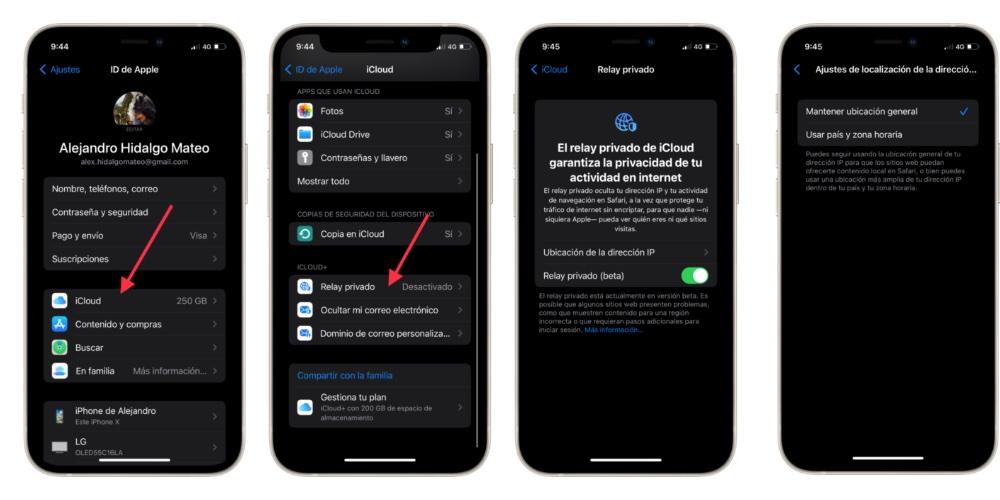
In iphone, You can also activate the private relay option, which is a different process than what is done in macOS. The process consists of 4 steps, which is very similar to how it is done in macOS Ventura but different from how it is done in macOS Monterrey.
- Go to Settings > [tu nombre].
- Tap iCloud, and then tap Private Relay.
- To turn Private Relay on or off, tap Private Relay.
- Choose a setting for the IP address by touching IP Address Location.
- To have sites show you localized content in Safari while your IP address is hidden, tap Keep general location.
If you want to use a wider location for the IP address. tap Use country and time zone.