If we want to add an image of an object or person or add text and that the result is realistic and does not give the sensation of being an edited image, we just have to follow the steps that we show you below. The first and foremost thing before delving into the steps to follow to use perspective in Photoshop is to know how it works, as long as we don’t have previous experience with this application.
Photoshop works with layers. Each layer is an element of the image that is part of the set of layers that make up the final image. When we want to apply an effect to an image with Photoshop, the first thing we have to do is create a layer to work on. We can place that layer above or below the final image. We can also delete it if we don’t like the result and we can use as many layers as we want, taking into account that the greater the number of layers, the larger the file will occupy.
Use perspective in Photoshop
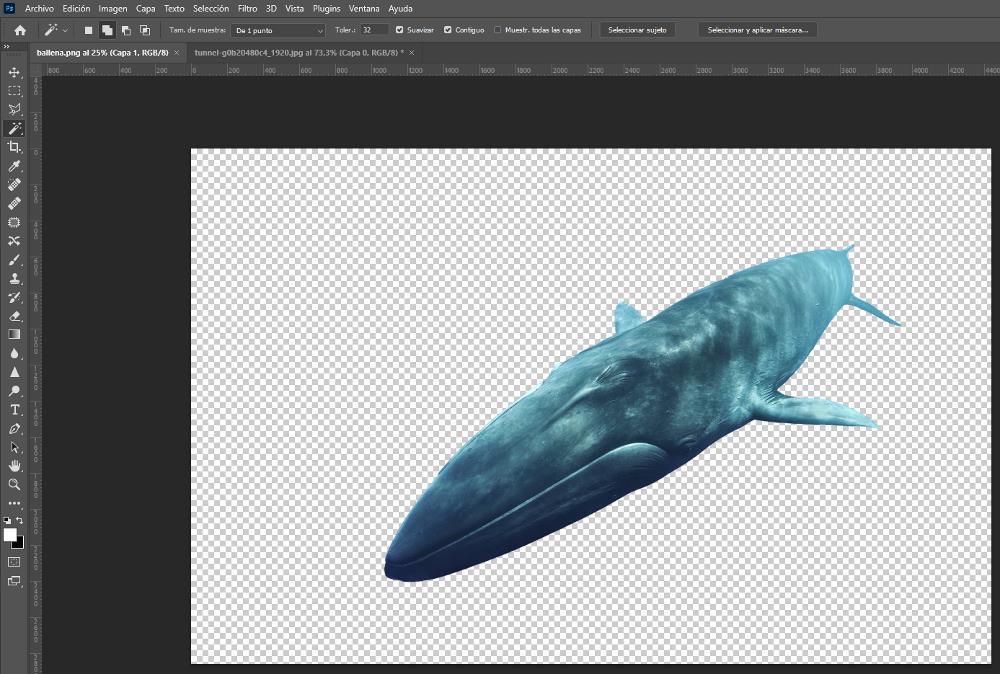
If we want to add an image over another, this second one must have a transparent background where only the object, person or text is shown if it is a logo. If it is a text that we are going to add, it is not necessary remove background since we are going to create the text from the application.
The easiest method to remove the background from an image is to use the function that Photoshop includes for this function. This function is found in the menu Selectionin section Subject.
Next, in the same menu, we select the Invert option and press the Delete button to delete the background, but not before removing the padlock that is shown in the layer (we just have to click on it to remove it) since otherwise, we won’t the transparent background will be displayed. Finally, we save the generated file in .PNG format (compatible with transparencies).
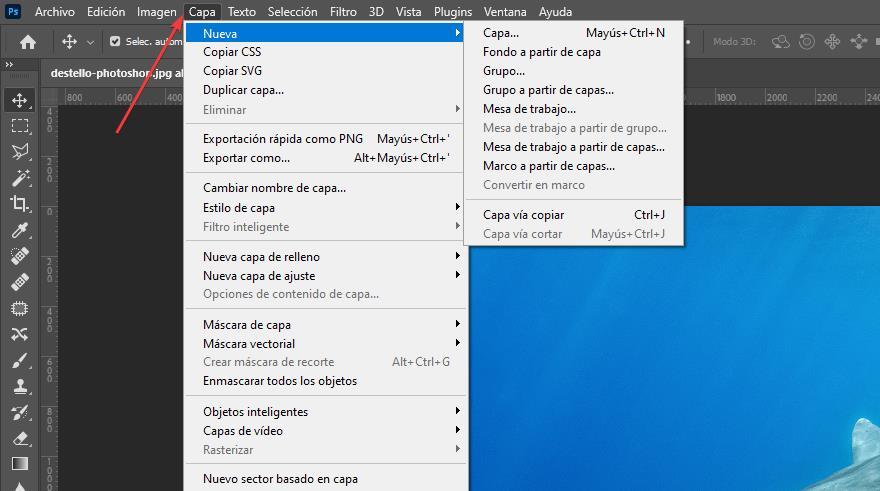
Now, we are going to select the object using the Control + A key combination and copy it to the clipboard using the Edit Copy menu or with the Control + C keyboard shortcut. Next, we open the image where we want to place the object, person or text and create a new transparent layer, using the menu Layer – Layer – New or using the key combination Control + Shift + N.
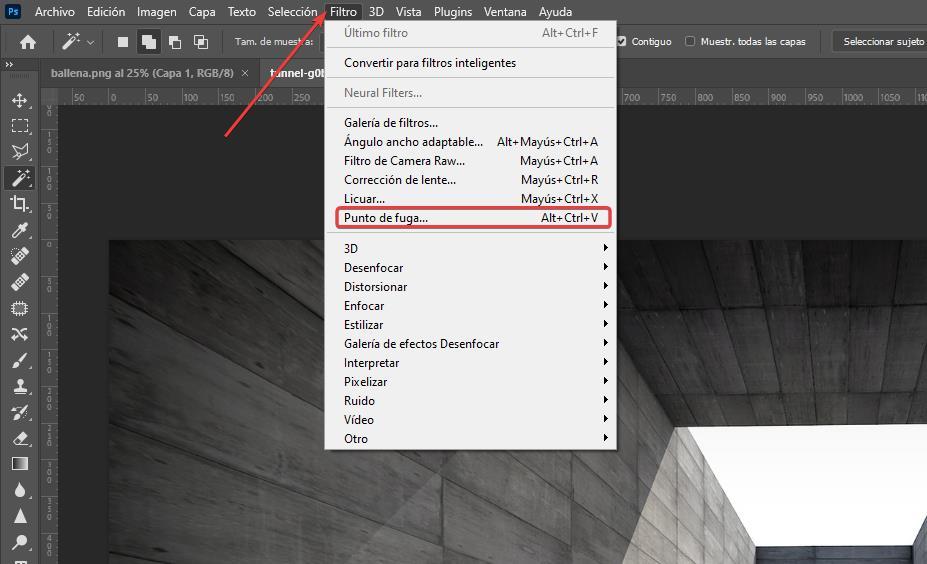
In the next point, we are going to create a pattern of the perspective of the image, a pattern that Photoshop uses to modify the size and vanishing points of the image that we are going to add. This option is available in the menu Filter – Leak points. We must access this function with the new transparent layer that we have created, not in the final image, since we are creating the perspective in the object that we are going to put based on the image where it will be included, an image that is only used as a reference.
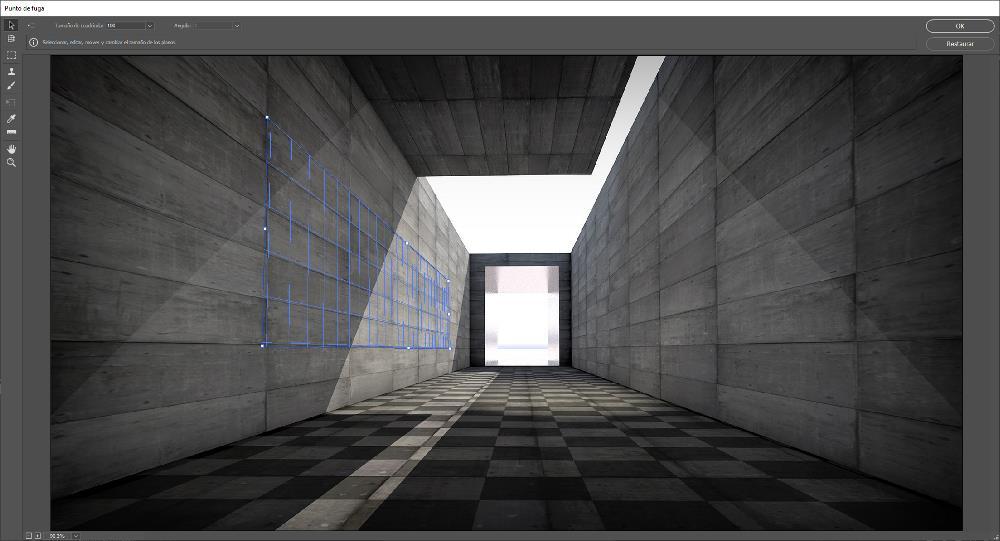
A new window will open where, in the left column, we must select the first option, Create plan tool and create the area where we want the object to be added to be displayed.
Once we have created the plane, we paste the image in this same window, using the Control + V key combination and we adjust the size of the image with the Transformation Tool so that it is located without cutting it in the area that we have delimited.
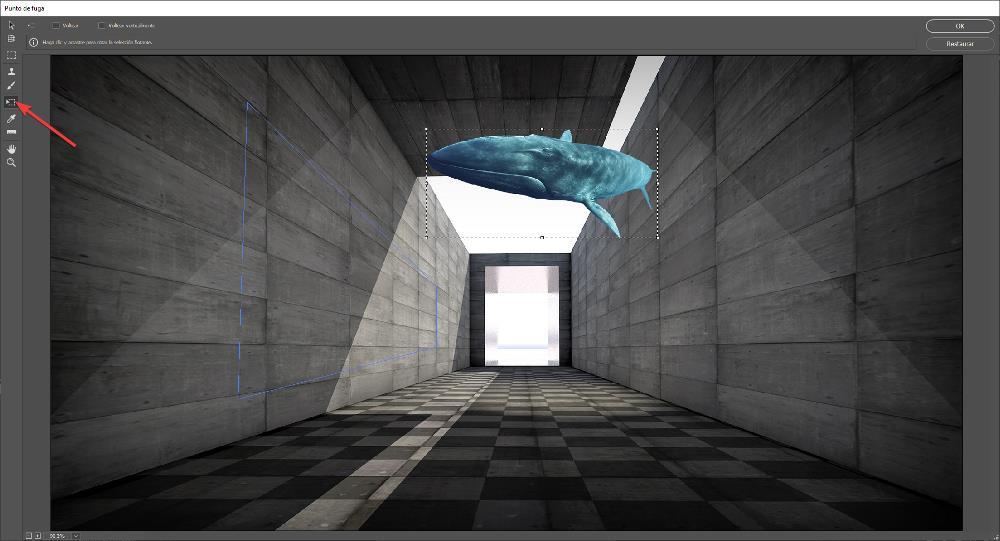
Once we have modified the size of the image that we want to include and we have introduced it in the marked area, the result will be the following, an image where the perspective of the object that we have added has been modified to adapt to the area where we have placed it.

The final result of the image clearly shows that it is an image that we have pasted inside another. To merge the texture of the image where it has been included with the object and give the impression that it is really a photograph and not a composition, we must modify the values of the underlying layer or the blend modes.
Depending on whether it is a text or an image, we will have to modify some values or others. If it is an image, the value that we must modify is the blending modes, while, if we are talking about text, we will have to modify the values of the underlying layer.
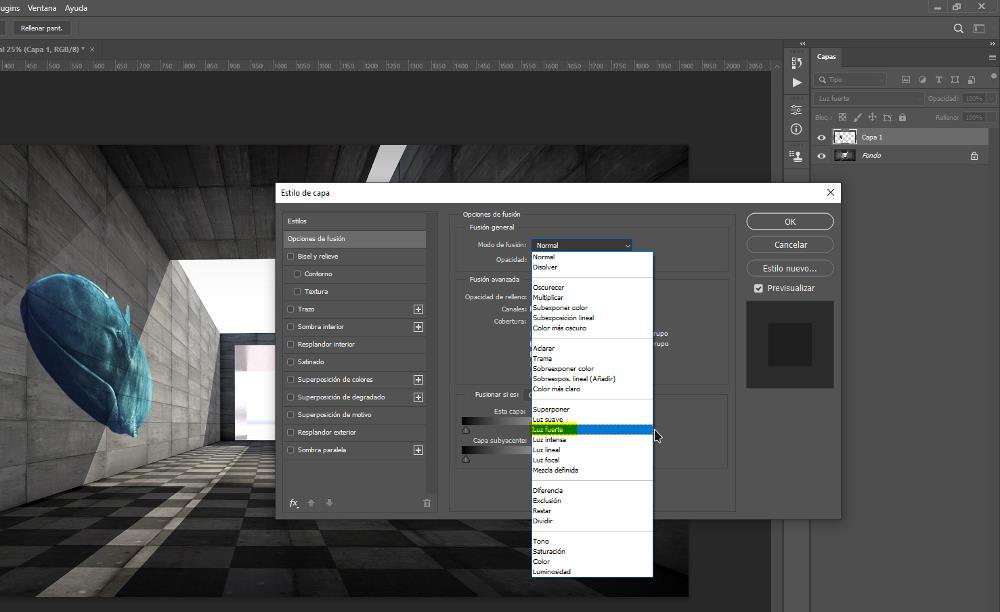
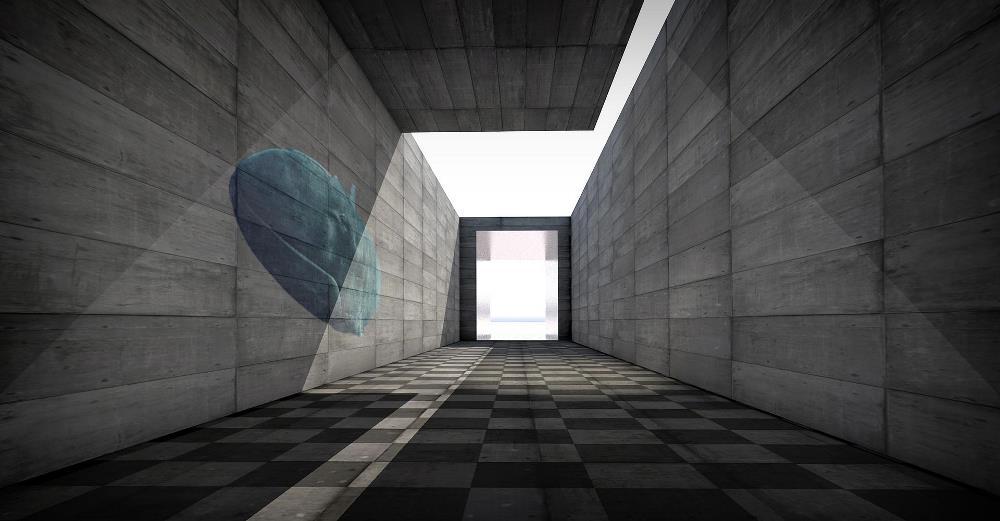
As, in this case, it is an image, we modify the blending values by clicking twice on the layer where the object is located and selecting the option Soft light or strong light, depending on the intensity that we want to obtain. In the following image, we have selected Soft light.

In this other image, we have selected the option Strong light.
The final result of the image after adding the whale would be the following.
When it is a textthe result that we are going to obtain with the merge options is not the same as if we modified the values of underlying layer. To modify these parameters, double click on the layer where the object we have added is located and, within the Blending Options section, we go to the bottom and slide the underlying layer of the black section and the white section using the Alt key until we find the merge point we are looking for.
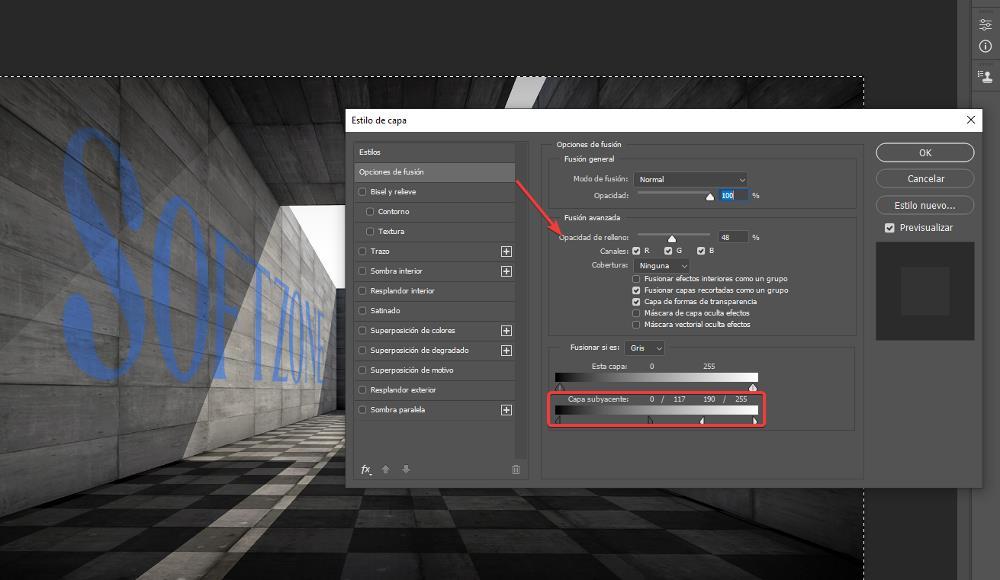
If we do not get the result we are looking for, we can rely on the option fill opacity to increase the level of transparency of the object that we have added.
Once we have made the merger between the two images, we must save the file in .PSD format through the File – Save menu. The .PSD format is the format that Photoshop uses to save all the layers that are part of an image / file allowing us to edit the image again at any time to add or remove layers. If we want to share the image, we must previously convert it to .JPG format. This format takes up much less space than the .PSD format as it bundles all the visible layers into one. To export the file in .JPEG format, we access the File menu – Export and Save for web (inherited).