The first thing that we must take into account before starting to use Photoshop to carry out this process is that, if we have not previously tinkered with the application, we must take into account a series of basic concepts of how Photoshop works. The most important concept that we should know about Photoshop is how it works. Photoshop works through layerslayers that are superimposed on top of each other so that the elements that are displayed on them, if placed above or below the main image or the associated ones.
Can we change the order of layers at all times, always keeping in mind that, depending on their position in the image, they offer us one or the other results, so we just have to play with their position in the image until we find the result we are looking for. We can add as many layers as we want. We can also delete them if they are no longer useful and we can even hide them so that the reason they represent is not shown in the image.
Once we are clear about how Photoshop works, which is necessary to be able to work with this application, we are going to show you the steps to follow to add sparkles and rays of light in Photoshop.
Add sparkles to an image with Photoshop
As I have mentioned above, Photoshop works in layers, so the first thing we are going to do, in addition to opening the image where we want to add the sparkles, is create a new layer over that image. In this way, we are going to work only with the layer and with the final image. If we don’t like the result we get, we can delete the layer and start over without affecting the photograph.
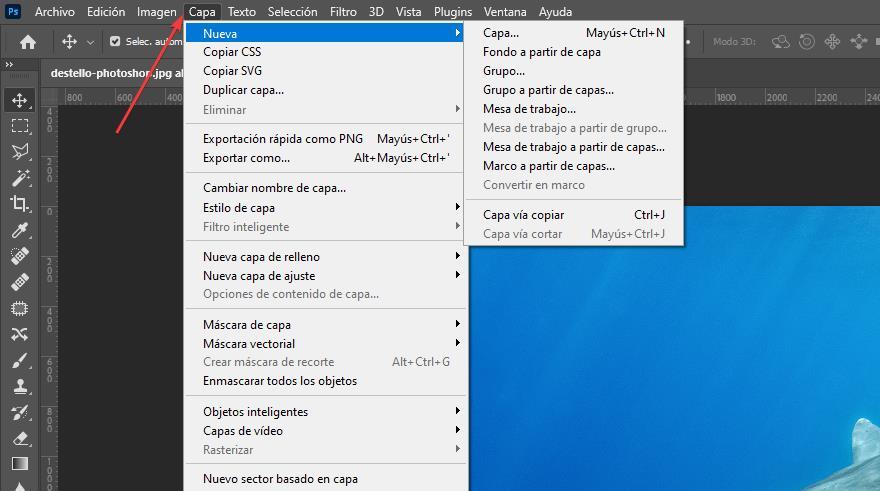
To create a new layer, we go to the top menu Layer – New – Layer.

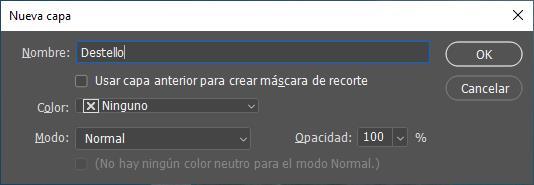
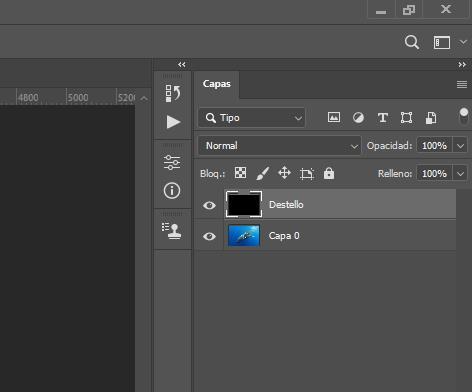
In the next window, we introduce the name that the layer will have (it will allow us to identify it quickly). In color, we select None and in Mode, we select normal. Finally click on Ok and Photoshop will add a transparent layer to the document. It is on this layer that we are going to work to add the effect we are looking for.
Photoshop includes a filter that allows us to add flare to the image, however, we cannot apply the filter on transparent layers, like the one we just created. So, the first thing we are going to do is color the layer. To add color to the layer that we have created, the first thing we will do is click on the icon represented by two squares with different colors and select the color of the layer, which, for this example, we are going to use black.
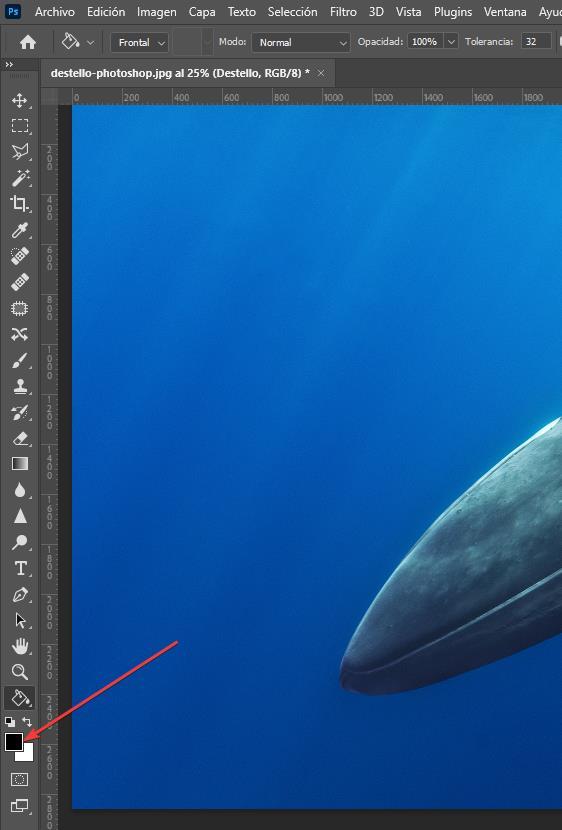
Next, click on the icon in the shape of a paint bucket and drag the cursor over the image to fill it with black. We must make sure that we have previously selected the new layer that we have created, since it is where we are going to apply the flare that will be superimposed on the image to which we want to add the effect. In the end, the two layers that are part of this file should be as follows.
Once we have colored the layer black, it is time to use the created Photoshop effect to add sparkles to an image. Once again, since we are going to work on the layer that we have created, we must select it previously. Next, we go to the menu filters and we select Interpret. Within the Interpret menu, a new submenu will be displayed where we must select Flash.
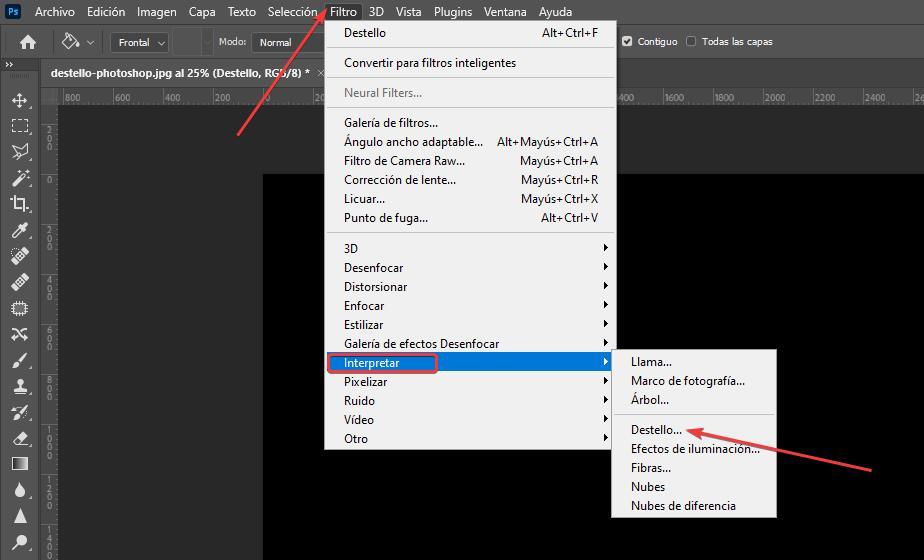
Next, a new window will be displayed where we can choose 4 types of effect. Depending on the type of objective that we use in photography, the result of a flash of natural or artificial light will be reflected differently. The effects available to apply to an image in Photoshop are as follows:
- 50-200mm zoom lens
- 35mm lens
- 105mm objective
- Fixed focal length of film
As we can see in the following image, depending on the type of lens we use, the result will vary considerably. By using a black color layer, the preview of each filter is much more accentuated than if we directly applied the filter on the image without applying any layer.

Once we have selected the type of lens effect that we want to use, we must select the amount of glitter that we want the sparkle to show so that it attracts more or less attention. Let’s also select the position of the light source. To modify it, we just have to click with the mouse on the preview and drag the light to the point where we want to locate it.
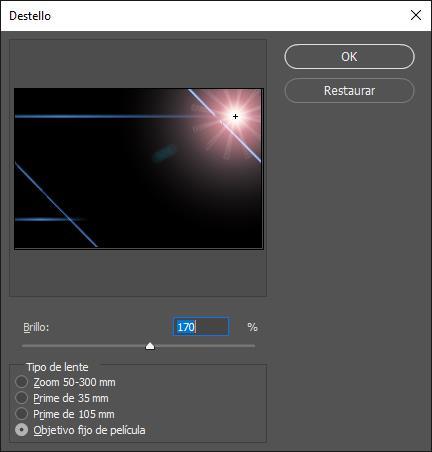
Once we have modified all the customization options that the Sparkle filter offers us through Photoshop, click on Ok to apply it to the layer. As it is a black and non-transparent layer, the image that is just below it is not visible, the layer where the image is located where we want to apply the effect.
To mix both images and that the flash effect that we have applied in the new layer is shown in the image, click on the layer again and click on Normalto select from among all the available options the option Plot.

In the following image we can see both the initial and the final image, after applying the flash filter.

If we don’t like the result we have obtained, we can delete the layer and start over. We can apply this filter as many times as we wanttherefore, if we want to add multiple points of light to highlight a backlight, we can do it using the same filter several times, yes, using different layers each time in order to eliminate the layer that we do not like without having to start over zero.
The last thing we have to do is save the file, both in .PSD format to be able to modify it in the future, and export the result in .JPEG format to be able to share it or open it with any application on our PC or mobile without using Photoshop. To save the file that we have created made up of two layers, we access the menu File, Archive and select the option Keep.
To export the result in JPG format, once we have saved the document in .PSD format, we access the menu again File, Archive and select the option To export – save for web (inherited). Files in .PSD format they take up much more space than files in JPG format since it includes much more information, information made up of the different layers that make it up.