Now that we have accessed the firmware of the router, we are going to proceed to make all the configurations for the start-up of this equipment.
Internet settings
This router is compatible with any Internet operator, the QuRouter firmware allows you to configure VLANs in the Internet WAN to be compatible with FTTH operators, however, by default we will not have any VLANs configured in the Internet WAN.
Configuration without VLANs on the WAN
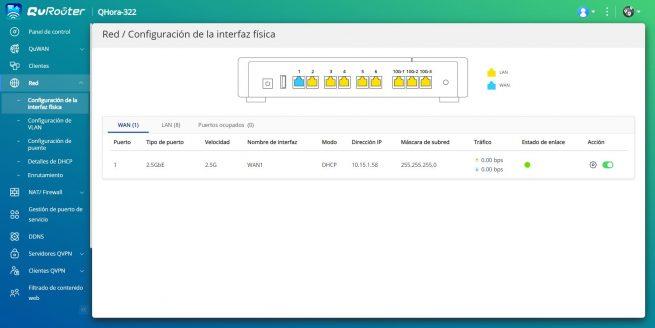
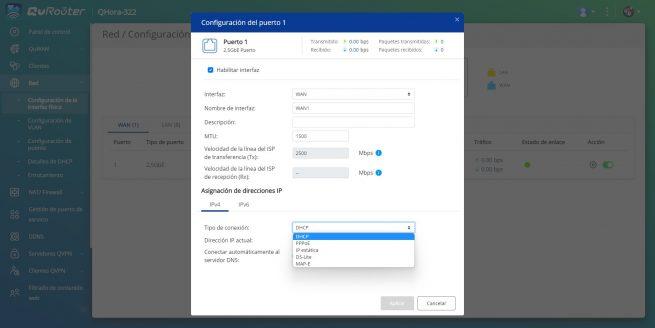
If you have an operator that does not use VLANs in the Internet WAN, you simply have to go to the «Network / Physical Interface Configuration» and click on the «Configure» button right in the «Action» section. In this menu you can configure the MTU and the type of Internet connection you have, the most common today is DHCP and PPPoE.
Remember that if you configure it like this, we are not using VLANs on the WAN, so if you have an ONT that provides you with the Internet through a tagged VLAN it will not work for you.
Configuration with VLANs on the WAN
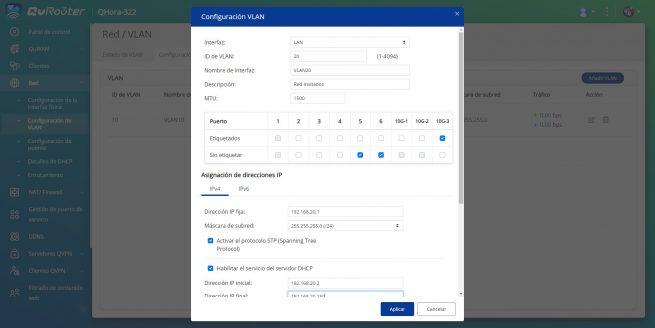
If you need to configure VLANs in the WAN, as it happens if you use operators such as Movistar/O2, Grupo Masmóvil and many others, you will have to go to the «Network / VLAN Configuration«, in this section you will have to go to «VLAN configuration» and click on «Add VLAN». Next, you do the following configuration:
- Interface: WAN
- vlan id: the VLAN identifier for your operator, for example, in Movistar and O2 the VLAN ID is 6.
- Description: you can put a description of the operator.
- MTU: DHCP is normally 1500 bytes and PPPoE is 1492.
- Port: we have to choose the port that we want to use as the Internet WAN, by default it is port 1. Here we must click on «tagged” either “tagged” To make it work.
- IP address assignment: in this menu we have the configuration of the IP address, usually it is DHCP or PPPoE. In the example that you will see below, we have done it with Movistar, and the type of connection is PPPoE.
Once we have configured it, we can see in the “Network / Physical Interface Configuration» that the WAN has disappeared, because it is in the «Busy ports» section, having configured a VLAN.
Configuring VLANs on the LAN
This QNAP QHora-322 router allows you to configure VLANs on the LAN, in this way, we can properly segment the local network to allow traffic between VLANs or to isolate them. In this simple way, we can make a main network, a guest network and even a video surveillance network. In this example, we have created a total of three different networks that are totally isolated from each other:
- Main Network: VLAN ID 10, subnet 192.168.10.0/24.
- Video Surveillance Network: VLAN ID 20, subnet 192.168.20.0/24.
- Guest Network: VLAN ID 30, subnet 192.168.30.0/24.
To be able to do this, we simply have to go to the «Network / VLAN Configuration«, in this section you will have to go to «VLAN configuration» and click on «Add VLAN«. Then you put the following:
- Interface: WAN
- vlan id: The VLAN identifier for the subnet, in the case of the main network it is VLAN ID 10.
- Description: you can put a description of the configured subnet
- MTU: 1500 bytes because we are in a local network.
- Port: we have to choose the port that we want to use for the end clients (PCs, printers and others) and for the manageable switches that can carry the connection to other points of the organization. In this example, we have defined the 10G-3 port as “trunk” or “trunk” to connect a switch. The 10G-1 and 10G-2 ports are where we will connect a PC and a NAS.
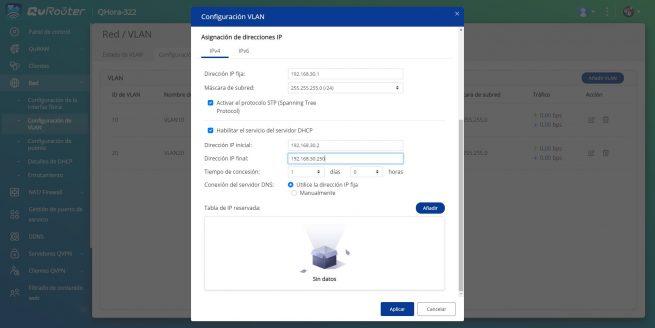
- IP address assignment: In this menu we have the configuration of the IP address of the subnet, we have to put 192.168.10.1 and the DHCP range that we want, as well as add the MAC that we want to the Static DHCP.


To create the second network, we will only have to change the VLAN ID, the description, the ports where we want to configure them and also the IP address assignment. In this case of the video surveillance network, we have labeled the 10G-3 port, because it will be where we connect a manageable switch and these VLANs will also be configured. In addition, ports 5 and 6 will also be in “access” mode for end equipment.

Finally, to create the guest network we change the VLAN ID, description, and we only put the 10G-3 port as tagged to make the trunk, and that the switch takes this connection to the rest of the devices. Of course, we have to configure a specific subnet with its IP and DHCP server.

If we go to the general configuration menu, where it says “VLAN configuration«, we can see a summary of all the configurations we have made. Also, in the section “vlan status» We can perfectly see all the VLANs as tagged or untagged on the different physical ports.
Now that we have successfully configured and segmented the professional local network, we now need to configure the firewall to isolate the different networks.
firewall settings
If we want to isolate the different networks and that they do not have communication, we are going to have to configure the firewall with different rules. We have to configure at the IP address level, so that there is no type of TCP, UDP or ICMP communication between other protocols. To do this, we simply have to go to the “NAT/Firewall” menu and create rules to deny communication between the networks:
- Rule 1: deny from source VLAN 10 to destination network 192.168.20.1/24
- rule 2: deny from source VLAN 10 to destination network 192.168.30.1/24
- rule 3: deny from source VLAN 20 to destination network 192.168.10.1/24
- Rule 4: deny from source VLAN 20 to destination network 192.168.30.1/24
- Rule 5: deny from source VLAN 30 to destination network 192.168.10.1/24
- Rule 6: deny from source VLAN 30 to destination network 192.168.20.1/24
Although the subnet is really 192.168.10.0/24, QNAP forces you to put the first IP, which is 192.168.X.1/24.
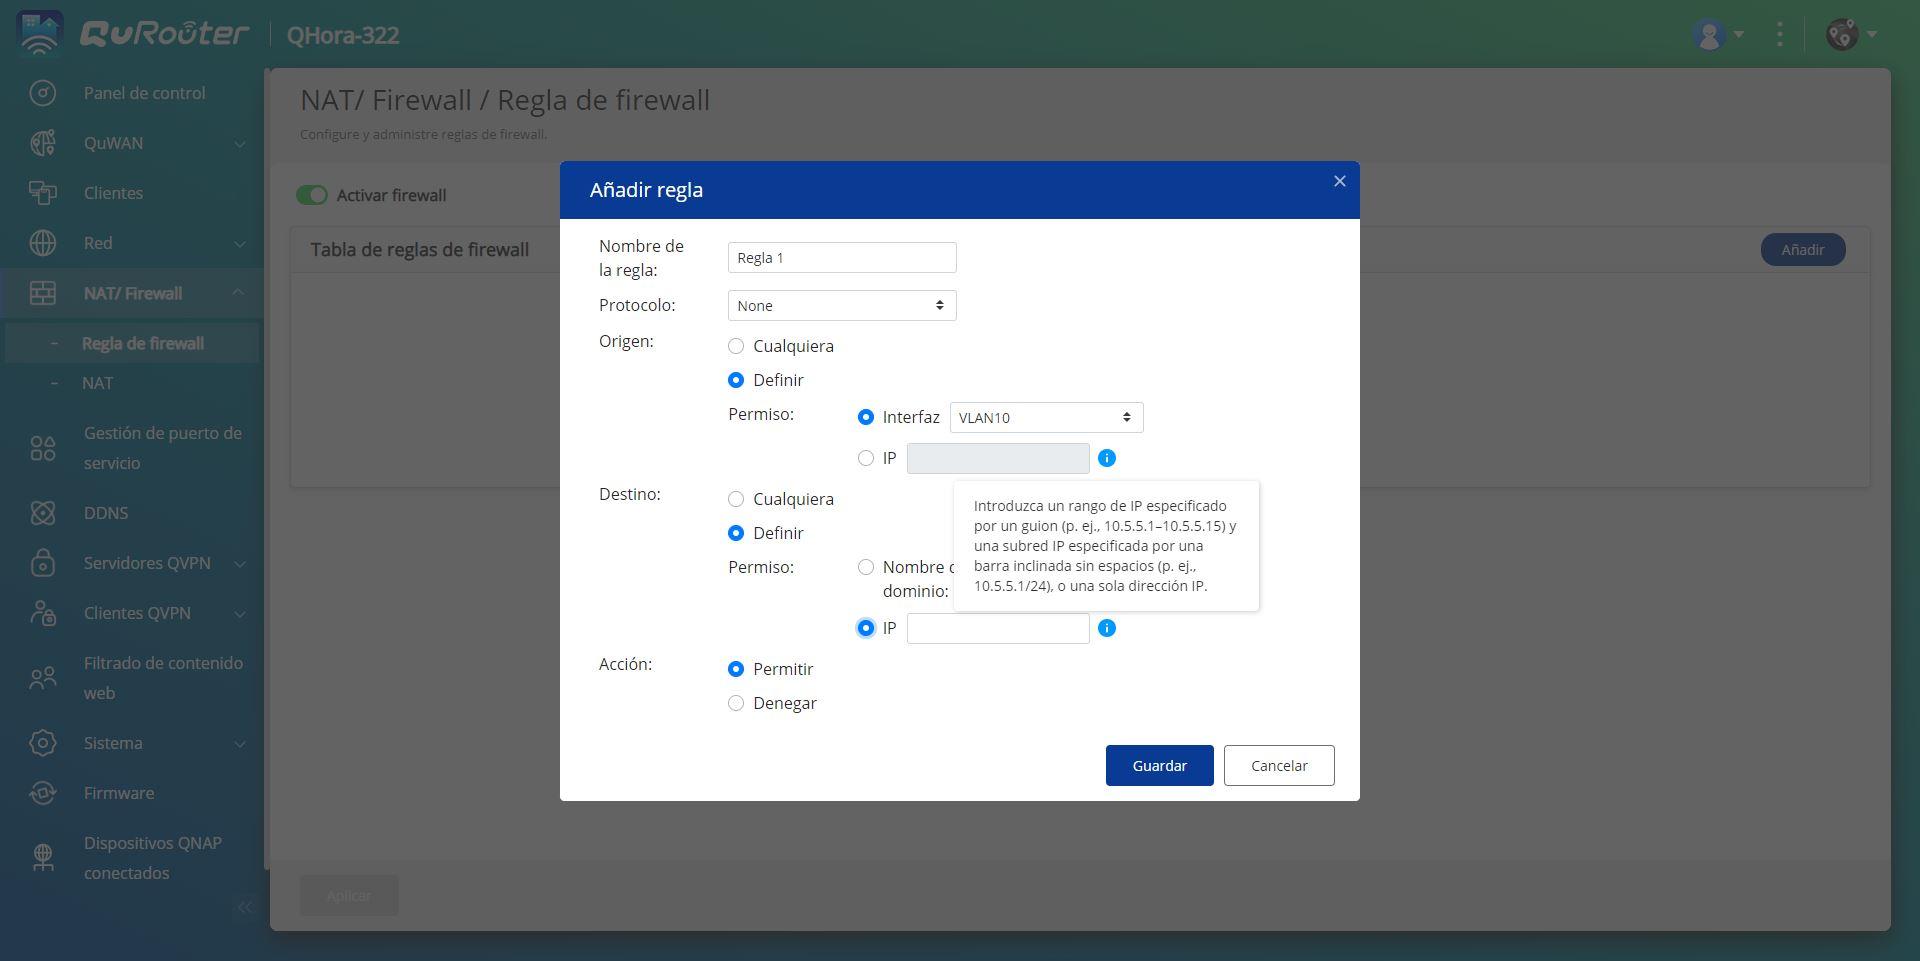
By creating these rules, we will have all the subnets isolated from each other so that they do not have any type of communication. It is very important to define the protocol as “None” so that the blocking is at the IP level.

Once we have already seen how to configure the VLANs and isolate them from each other, we are going to see how to configure the VPN server with WireGuard.
WireGuard VPN Server Configuration
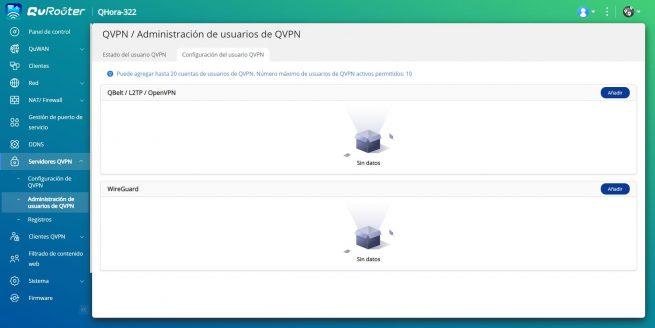
The configuration of the WireGuard VPN server is very simple, we just have to go to «QVPN servers» and in the section «QVPN User Management» click on «Add» in the WireGuard section. We will automatically get a drop-down menu where we can put the name of the profile and also the private and public key, in addition, we can generate this pair of keys at any time.

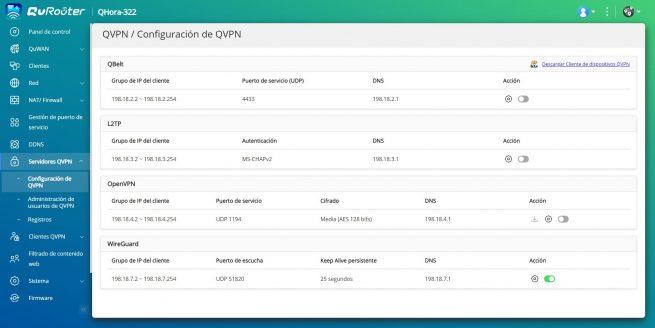
After generating them, we go to «vpn settings» and we will see a drop-down saying that we have to create the users, if we click on «Cancel»we can easily access the menu, and click on the «Setting» from WireGuard VPN. Here we have to enable the protocol, define the subnet where the clients will connect, as well as the UDP port to use and also the key pair. Once we have done it, the protocol will already be activated.

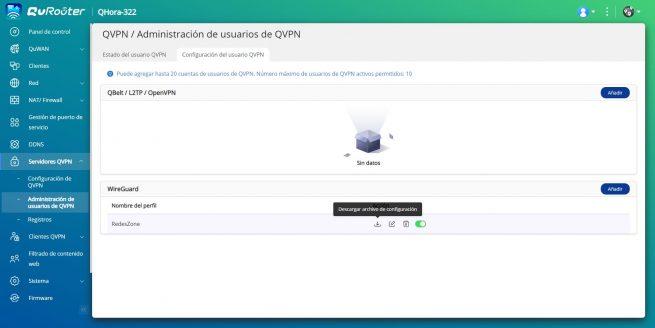
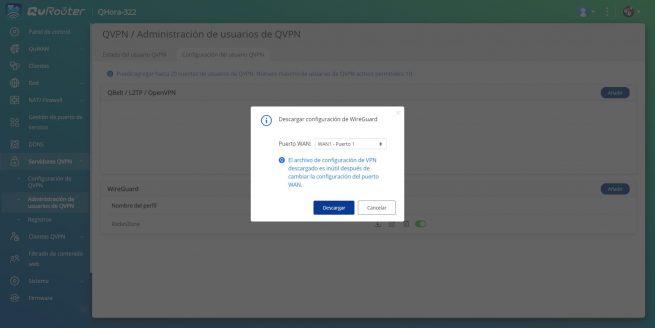
Now we go back to the section «QVPN User Management»and in the previously created profile, click on «Discharge» the configuration file. We select the WAN port to obtain the public IP address, and click on the “Download” button.
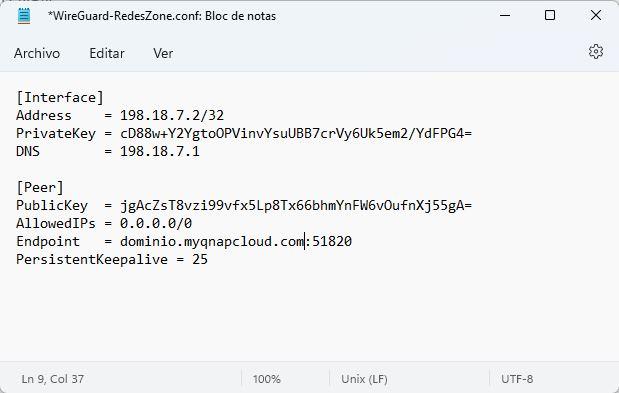
The downloaded configuration file will look similar to this, the only thing we have to modify is the “Endpoint” part where we have to put our public IP or our DDNS domain. It does not matter if we use the myQNAPcloud domain or our own DynDNS domain, No-IP or similar.
So far we have come with this tutorial where we have learned to configure the Internet connection of the QHora-322 router, in addition, we have also learned to segment the local network with VLANs correctly, and we have even activated the WireGuard VPN server to connect remotely to our professional local network.