Disk partitions are the name given to the parts into which the storage units of a PC can be divided. To understand each other, this action consists of “chop” an SSD or hard drive into various “logical disk” partitions in order to better organize them.
Although the creation of these partitions are optional and the bulk of users do not use them, it must be said that they are a way ideal for managing the internal storage of a PC and among its advantages we can point out the improvement in the maintenance of the units, their organization, data security and even performance, in addition to allowing advanced functions such as the installation of multiple operating systems.
Types of disk partitions and systems
Each operating system handles these partitions differently and according to their type, because there are several. The main partitions are those dedicated to system installation and the one for user data, but you will also be able to see additional ones that are usually reserved for tasks such as data caching, temporary virtual memory, system recovery, or hosting. and manage UEFI firmware information.
When we buy a new computer with a pre-installed operating system, it is common for all disk space is occupied. Some manufacturers add small partitions for system recovery and they also create their own additional ones, but only one is generally available for user management.
If we buy internal storage units from a retailer such as modern SSDs, the situation varies, since they are usually delivered “empty” for the user to create the ones they need, choosing the number of disk partitions they will use. Once created and prepared with what we know as formattingthe partitions are recognized and managed by the operating system independently and each with its own file system.
You can previously prepare the partitions of the SSDs or hard drives on any PC or directly when you install an operating system, because all the usual ones (Windows, Linux or macOS) allow you to manage the partitions in the same installation process of the systems. It will always depend on the capacity and the number of units that your team has, but, in general, from here we recommend create at least two partitionsone to host the operating system and another for your own data.
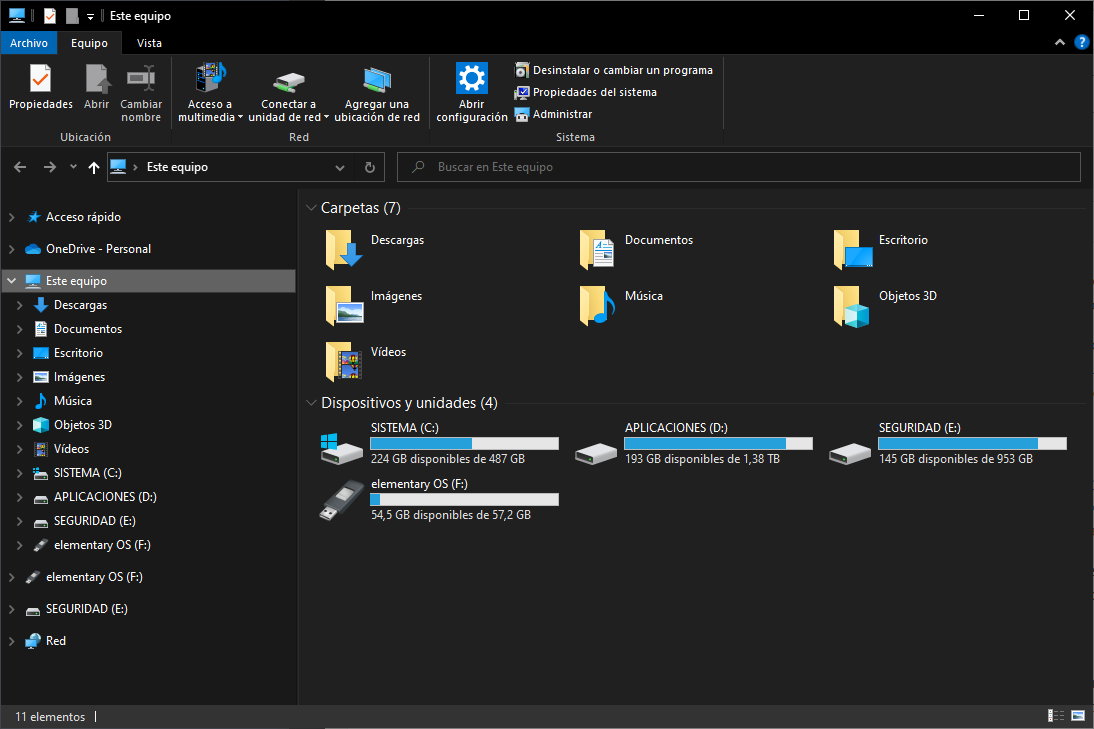
Focusing on Windows, if what you want is to manage the partitions of a disk that is already working, you can review them in “My Computer”, in the file explorer or directly through the disk manager, which is precisely where they can be created, change or delete the partitions that the system manages and that we will review below as a tutorial. There you will also see -if applicable- additional drive letters for optical discs, network locations or external and/or removable storage media whose drives are created as we insert them into the computer.
Why are disk partitions so useful?
These partitions are quite unknown to the general public and are only used by administrators or medium/advanced users. But there are good reasons to use them, such as the ones we are going to point out:
Install multiple operating systems
Most operating systems have to be installed on their own primary partitions. In this scenario, having multiple separate partitions is mandatory. Also, you can create third partitions to share files between them if they use different file systems. You have an example of using partitions for systems in this guide where we saw the installation of Windows 11 and Ubuntu 21 on the same computer.
Safeguard your data in case of system failures
If the operating system fails for any reason (drivers, applications or viruses) and it is very likely in Windows, you may be left without access to the drive or perform a restore of it. Having at least two partitions, one for the system and one for the data, ensures that a system failure will not affect your personal files. In the same way, if we have to reinstall the operating system from scratch, we will only have to format its partition, keeping the additional partitions that we have created for our backup copies and personal files safe.
improved performance
Large hard drives (10, 12, 15 or even 20 Tbytes) offer enormous storage capacity, but force the reading heads to travel further. With this, dividing the disk into several partitions ensures less delay in repositioning data and better performance. It’s not high and doesn’t affect SSDs that otherwise function without moving parts in the same way, but when it comes to performance it all adds up.
better maintenance
Having multiple partitions makes it easy to maintain storage drives, check for errors, optimize them, and defrag drives (hard drives only). Having several smaller chunks also speeds up the search for files
Greater ease in organization
Having several disk partitions makes personal organization easier. An example of use in a typical storage unit in Windows, would consist of a partition C: for the system; D: for installation of applications and games, and E: for backup copies, documents, photos, music or video. The possibilities, depending on the capacity of each disk, are almost unlimited and improve organization compared to a single partition.
How disk partitions are managed
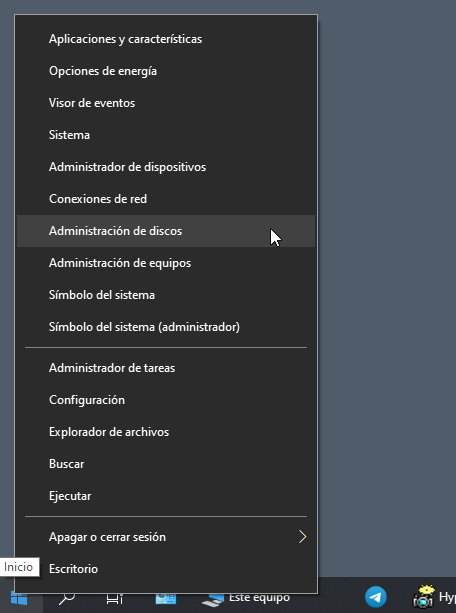
All operating systems offer their own native tools to manage partitions, and third-party developers offer more advanced commercial applications. In Windows, its management is done through the “Control Panel-Administrative Tools-Computer Management-Disk Management”. You can also access it through the run tool (Windows Keys + R) using the command «diskmgmt.msc” and in another more direct way, by right-clicking on the start button and clicking on disk management:
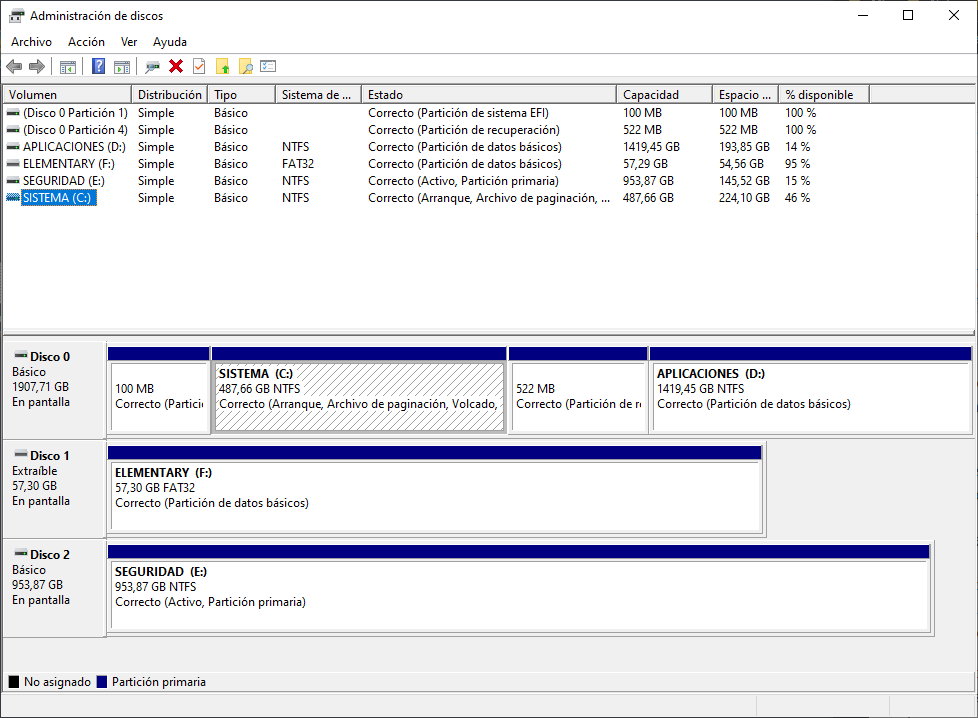
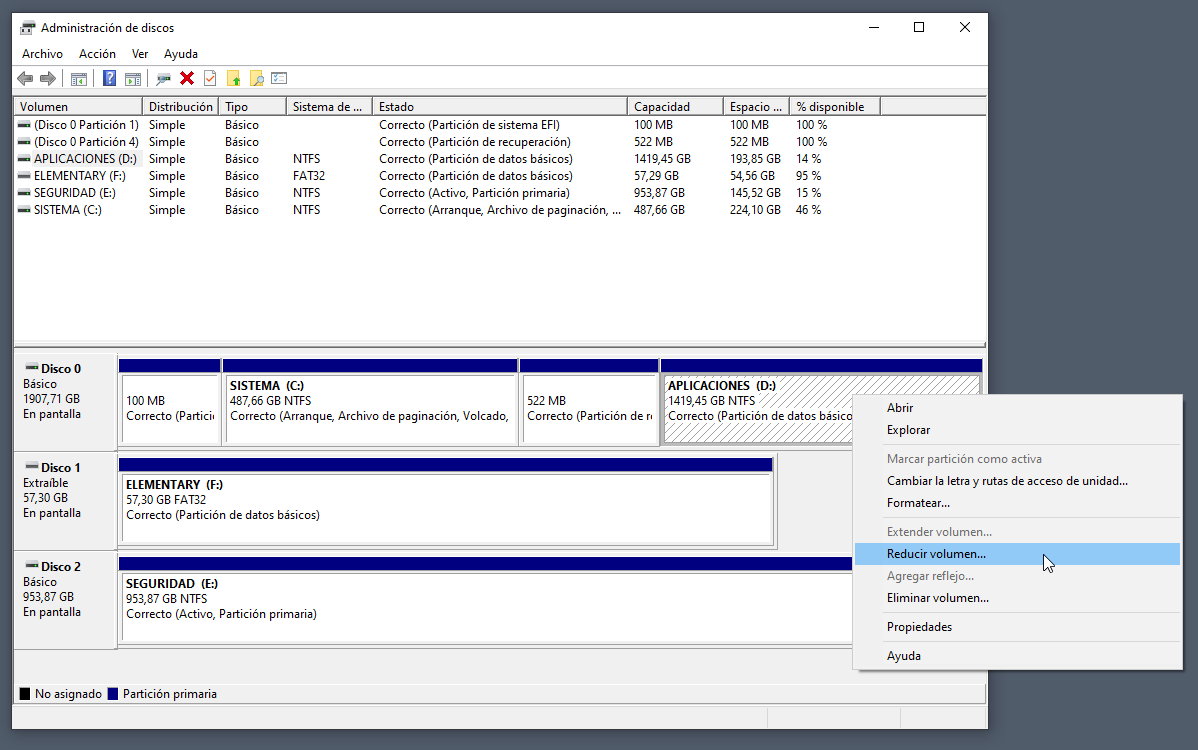
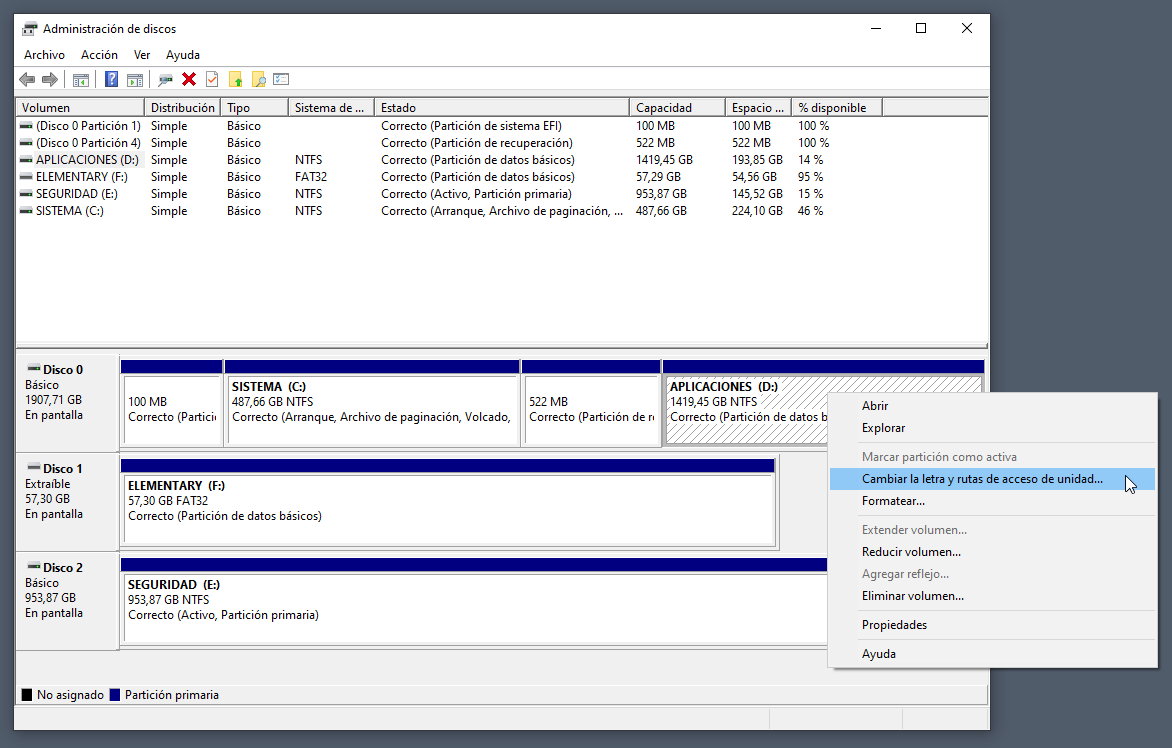
There you will access an interface like the one in the image. Its possibilities range from the creation of additional partitions (as long as we have enough space); reduce the size of each of them to make it possible; format them; change the access letter and path to the drive or format it for a complete cleaning.
Some examples of use are:
create partitions
If you have free space on your storage drives, you can use it to create one or more new partitions. Unpartitioned space is highlighted and labeled as “Unallocated” or “Free Space”. The quickest and easiest way to create a partition using all or just part of the available free space is to right-click or long-press that Unallocated space and click “New Simple Volume.”
delete partitions
In the same way you can delete partitions that you don’t use and free up disk space to create new ones or to add that space to an existing one. Be sure to save the files you need beforehand because they will all be deleted. As in previous cases, right-click on a partition and select “Delete Volume”. There are partitions that you will not be able to delete from this utility, such as the one reserved for the EFI system or the “C:” partition, which is the one that keeps the operating system in use.
Resize partitions
You can also shrink or expand disk partitions, as long as there is free (unpartitioned) space available immediately before or after the partition you are trying to modify. To reduce (or expand) the size of a partition, right-click on it and select “Expand Volume” or “Shrink Volume”. The utility will allow you to shrink the partition down to the maximum amount of space that you are not using at the moment. After the process is complete, you will have that much free disk space that you can use to create additional disk partitions.
format partitions
If you have just created a partition on one of your drives, the wizard offers you the possibility to format it. However, you can also format a partition that is already created and present on a drive. Formatting a partition means that all the data on it will be deleted, so be sure to back up any files you want to save before proceeding. To format an existing partition, right-click on it and select “format” from the context menu. You will be able to choose the file system or the “volume label”, the name of this partition that you will see, for example, when you access it from the file browser.
Change drive letters or labels
The tool can also change the drive letters of the partitions, which, for example, you can see in the file explorer. You can do it both for convenience, and when there is a conflict between those occupied by the different partitions, with the exception of the one installed by the “C:” system, which cannot be changed by this tool. In the same way, you can change the “volume label” or what is the same, the name of the partition. Useful to facilitate their visibility and management when you have many of them. Just like the previous functions, to modify these parameters right-click on a partition and follow the wizard.
As you will have seen, the use of disk partitions is relatively simple once you know how they work. They are very useful for maintenance of storage units, data security and especially for the organization of files on our personal computer. The internal tools included in the operating systems are sufficient for most uses and if you need more you can resort to third-party software, which is more complete and specialized.
