This operating system prioritizes local management of each and every deviceHowever, we can also add integrations through the Cloud of different manufacturers, because many home automation devices do not have local access, but only the Cloud, but this is not an impediment to creating all the automations you need. Another very important aspect of this operating system is privacy, everything is managed locally without sending data to anyone, not even anonymously. If we buy devices like those from the Shelly brand that have local management, no one except us will know that we are using it with home automation at home.
What can it be used for?
Home Assistant not only allows us to centrally unify all sensors, actuators and home automation devices that we have in our home, with local management and a really intuitive graphical user interface. The most powerful thing about this operating system is that we can perform all the automations we want based on data that we can obtain from the different sensors.
When we create a new automation, we have the possibility of automate hundreds of devices and actions, without the need for our intervention, to provide the house with sufficient intelligence so that everything works for us. When we add a new automation, the scheme is the following:
- Trigger: here we can configure that a certain action is triggered based on a calendar, a previously configured device, the state of a sensor or device, a numerical state, a label, a manual event, geolocation, when Home Assistant starts or power off, the time, data via MQTT, a persistent notification, a weather pattern, template, to the state of the sun, to a webhook and also to a certain zone. Not only can we configure a certain action if there is a trigger, but we can also set several simultaneously to have the automations better organized.
- Conditions: is closely related to triggers, and will only allow the action to be triggered if this condition is also met. In this case, we have several configurations such as activating them by some device, state, numerical state, time and we can even add several logical operators such as negation, OR, AND, a template, sun and a zone. In this way, we can configure the trigger in very detail so that it only occurs if the condition is met.
- Actions: is the objective of automation, we can configure an action for a condition, define a specific variable, stop a process, execute something on a device, execute several actions in parallel, choose several actions, configure scenes, wait for a certain time (delaying one action after another), as well as waiting for a template and trigger, as well as a manual event, calling a service, repeating an action, playing media, and performing an action with the If-Then scheme.
Home Assistant At first it may seem very complicated to use, since we have thousands of possible configuration options, in fact, we can perform the same action in different ways, depending on how we configure the triggers, conditions and actions. The most important thing is to have all these options at our disposal, and read the official documentation of each integration and also of the operating system itself, to know in detail how we can configure it. Once you’ve been with the system for a couple of months, spending some time on the integrations and automations, we’re sure you’ll be as delighted as we are.
The possibilities of this operating system range from simply letting us know if a house door is open or closed, if we previously install this type of sensors and add the corresponding integration, to setting up a fairly advanced alarm system in our home. Of course, if you live in a chalet with your own garage, you could install a €15 device like the Shelly 1 on the motor and be able to open and close the door from the home automation system at home. If you put opening and closing sensors on this garage door, you could also automate the closing of the door after a few minutes, and if you have installed some type of presence detector, it should close only when it stops detecting people, and all of this completely automatically.
Installation types
The first step to use Home Assistant is to install it, right now we have the possibility of carrying out different types of installations, some have their strengths and weaknesses. It is very important to decide how to install it and also where, since we can regret it very soon and then it will cost us extra work and spend a lot of time migrating everything so that the operation continues to be perfect, it is something that we must take into account.
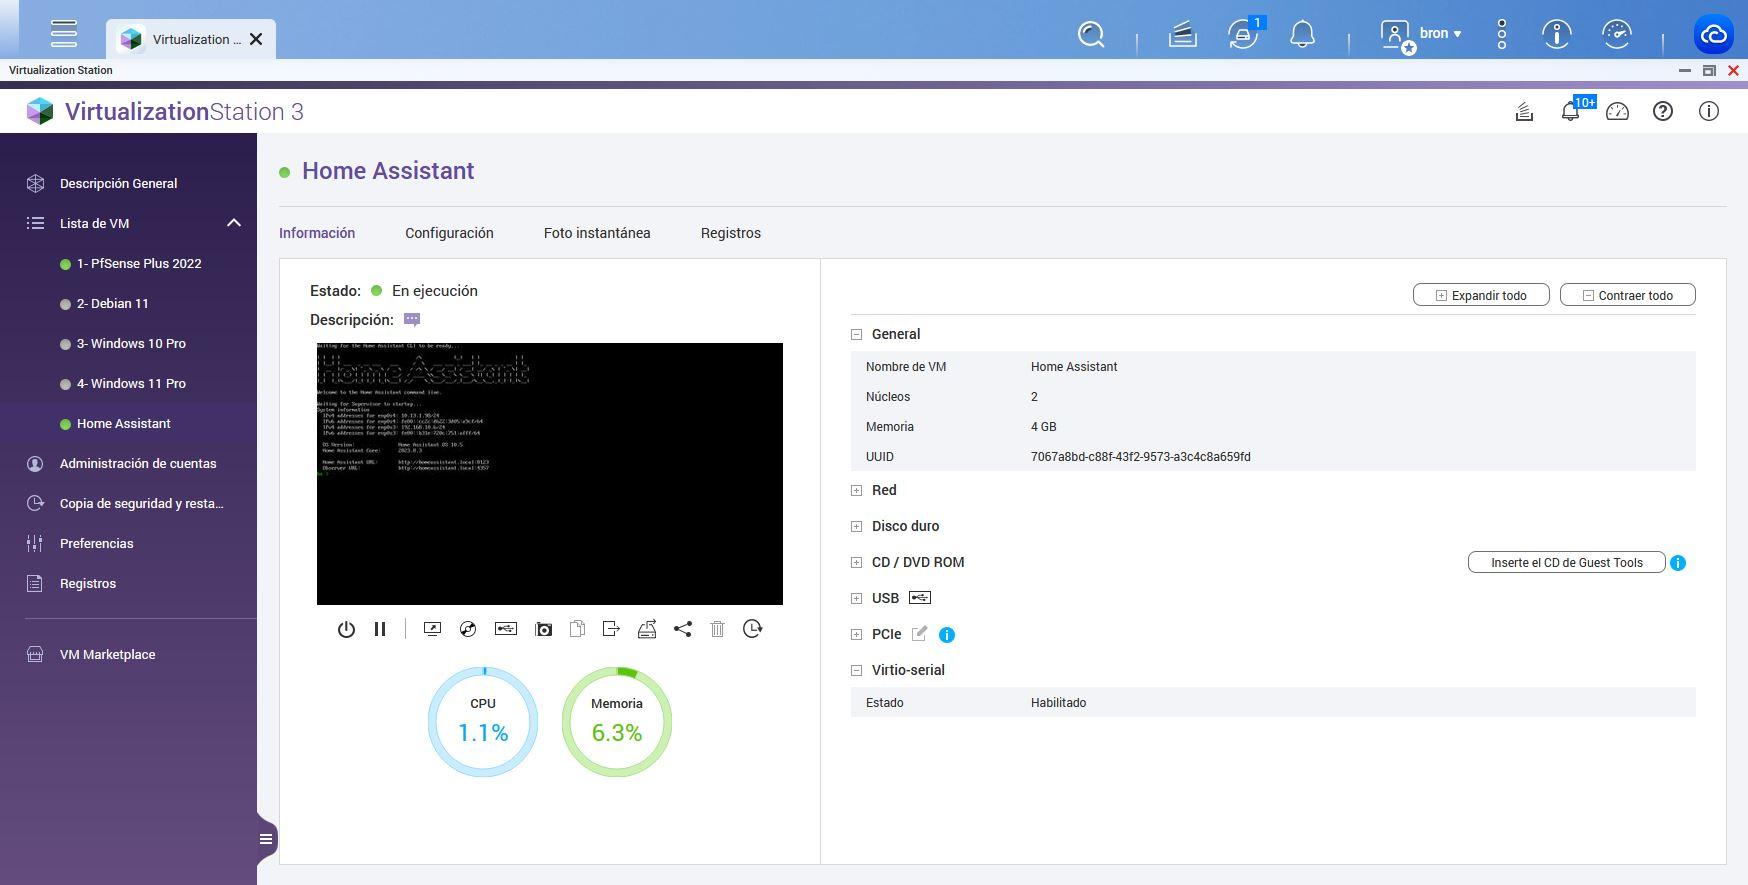
First of all, our recommendation is that install Home Assistant on a computer dedicated exclusively to home automation, which is permanently on. For example, today you have really good mini PCs for about €200 and even less, these devices will serve us perfectly to install this operating system and control all the home automation in our home. If you have a somewhat powerful NAS server, of more than €500 approximately and with a good processor and more than 8GB of RAM, then you could also install Home Assistant here to make it the home automation center of your home, but you should know that during the time the updates to the device itself last. Home Assistant and the NAS, the system will not be operational, that is, for just a few minutes. Personally, we have the operating system installed on a very powerful QNAP NAS virtualized with Virtualization Station, and for more than 2 years we have not had any problems.

We are going to explain in detail all the types of installation, their strengths and weaknesses, as well as the one we recommend you use.
Home Assistant OS
Home Assistant OS or also known as Home Assistant Operating System, is an integrated and minimalist operating system designed specifically to run the Home Assistant ecosystem, both on mini computers natively, as well as in a virtualized way using VMware, Virtual Box, Proxmox or any virtualization system. When we install OS. A very important aspect when we use this type of installation is that we can install the latest updates to the supervisor (the base operating system) directly from the Home Assistant main menu, eliminating the need to do it manually. Of course, we also have the possibility of installing this OS directly on our NAS with the QNAP, Synology or ASUSTOR virtualization system, perfect for integrating everything on the same computer.
This form of installation is the most complete and the best you can do, we have at our disposal the possibility of adding automations, integrations, all the menus that we want, the possibility of installing Addons officially, and also through HACS that It is the “store” for unofficial integrations. We can also make backup copies of the virtual machine directly, and even snapshots (Snapshots) to go back whenever we want. Without a doubt, this is the best option to get the most out of the operating system, since we have absolutely all the options and possibilities at our disposal. Furthermore, if we install it in a virtualized way, we have the possibility of cloning the VM and making backup copies in a fairly advanced way.

There is no weak point in this type of installation, the only thing you have to keep in mind is to provide hardware with at least 2 virtual CPUs, 2GB of RAM and about 50GB of storage, ideally SSD for perfect operation. This is the ideal way for beginner users to install it, but also for experts.
Home Assistant Container
This form of installation is what we can do through containers, for example, with Docker on our mini PC or NAS server. This way is very efficient in terms of the use of resources, however, there are certain negative aspects that we must take into account:
- We cannot install addons, after all, one of the best things about this operating system is the large number of addons that we have available.
- We do not have a supervisor, we depend on the Docker we have to correctly manage the system.
- The backup copies that we can make, both in Container and Core, are tools to migrate to Home Assistant OS or a completely manual restoration.
If you have the possibility of using OS, much better than Container since you will have fewer possibilities in the future.
Home Assistant CORE
This installation of Home Assistant is done manually through a virtual Python environment. We must keep in mind that Python is the basis of this home automation system. This way of installation does not use Home Assistant Supervisor, nor does it use Docker containers as we have indicated before. The weak points are exactly the same as the Container version.
This form of installation is only recommended for expert users, who want to carry out this type of installation with clear limitations, such as add-ons. We do not recommend installing this version.
Home Assistant Supervised
This type of installation can only be performed on Linux-based operating systems (Debian only, for now), it has the same options and possibilities as the OS, but we have to specifically manage the base operating system. This type of installation takes advantage of Docker, which is managed directly by the supervisor. If you are an advanced user, have a Linux-based operating system and want to integrate Home Assistant into it without needing to virtualize the OS or use Docker containers, then this is your option.
The worst thing about this type of installation is that it is for advanced users, we have to follow a very long and detailed guide to be able to have it, in addition, it only supports Debian right now (it does not support Ubuntu, or Armbian, Raspberry Pi OS or any other).
In the following graph you can see the main differences between the versions of Home Assistant:

Our recommendation is that you use the Home Assistant OS installation type, the developers will provide us with the corresponding images for Hyper-V, VirtualBox, VMware and also KVM, so we have all virtualization technologies covered, both for base operating systems and Windows, Linux, MacOS and more. In the event that you are going to install this operating system on a NAS, you will have to use the virtualization system that it has, if you have a mini PC with Windows, you have the possibility of using Hyper-V, VMware or VirtualBox, but also removing Windows and install Proxmox directly to have the best possible performance and not always depend on Windows.
Conclusions
Home Assistant is a really complete home automation system, at first it can be very difficult to configure, but once you get the hang of the graphical user interface, you will not have to write any code, although you always have the possibility of doing so if You are an advanced user and you know how to program. The best thing about this home automation system is that you do not need great knowledge, although you do need to know how to get along well with virtual machines to be able to start it. Once started, there is a huge amount of documentation on its official website and a lot of help through its forums.
At RedesZone we are going to soon offer you many tutorials related to Home Assistant, after more than two years of daily use to control all the home automation in our home.