In fact, among the many tools that we have in the popular photo editing application, the text is one of the most used by users. This is due to the enormous versatility that it presents us, together with the fact that we can obtain surprising results. Many of you will already know that in this program we can find somewhat complicated functions, while others are available to most. Well in this case we are going to focus on the text tool that is included within the affordable ones.
We could say that the majority of professionals who dedicate a good amount of hours to this software solution are more than used to this function. But it can also be the case that we are newbies here and want or need to get the most out of the texts in Photoshop. It is precisely in all this that we want to help you in the next lines.
Select the text tool in Photoshop
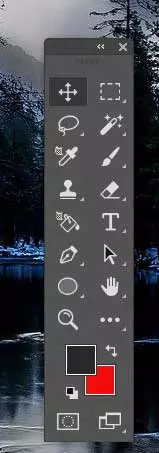
Well, in order to use this tool in the best possible way, the first thing we do is load the image in the photoshop desktop. It must be said that in the left part of the Photoshop window is the toolbar. Here we find a horizontal list of functions and tools that we can use to edit and work with the loaded image. Therefore, we only have to select the one we need at that moment.
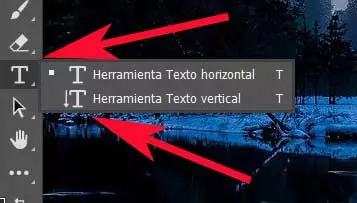
We have already commented that in these lines we will focus on the text tool. Thus, initially to add text to the photo, we click on the button represented by a letter T. Similarly, we can press the T key on the computer keyboard. This will select the standard script writing tool. horizontal text default.
At that moment we will be able to click on the arrow in the lower right corner of the T button. With this we can change the behavior of the text editing tool. This opens a side menu with other options, including using vertical text. Now we no longer have to select the orientation of the text that we want to include in the image.
Next, we select the area of the image canvas where we want to place the custom text and click the area to place a box.
Add custom text to image
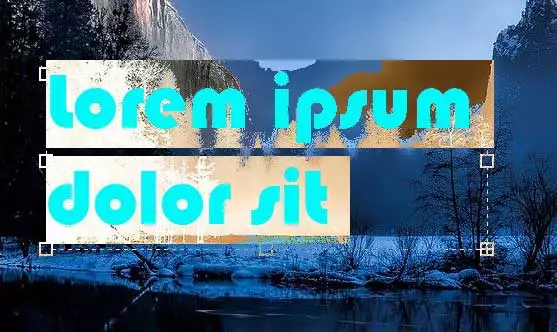
At that time the own Photoshop by default inserts the words Lorem Ipsum as placeholder text in the text box.
This allows us to see the current color and font, which are the ones used in the beginning. It is evident that to change these characters we only have to delete them and to write what we want to insert.
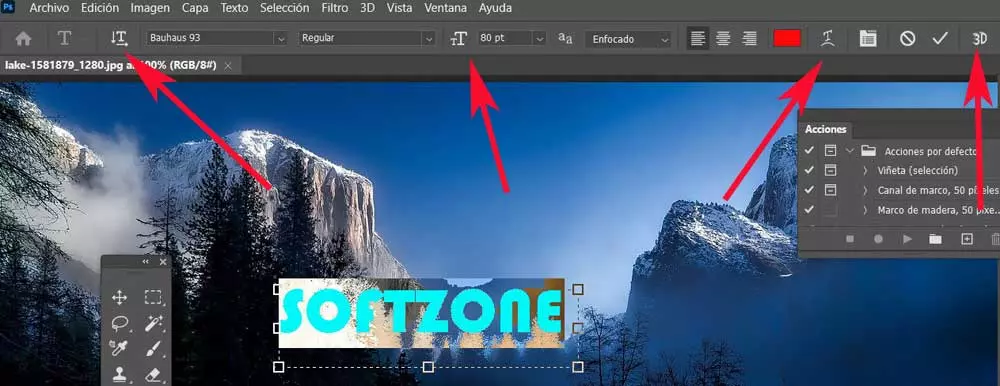
At the same time and how could it be otherwise, once the desired text has been typed, we can customize its appearance from now on. Therefore, if we want to change its format, we just have to click on the inserted text box again and mark the letters. At that time we will see a options bar at the top of the Photoshop interface. On the right we see a button to change the orientation between horizontal and vertical.
In the same way and from this same bar, we have the possibility to select a new font, or change its size. We achieve all this from the corresponding drop-down menus that we find here. But that’s not all, since at the same time the program puts at our disposal other changes that are somewhat more advanced. We refer to the possibility of applying effects to the selected text, warping it, or even giving it a three-dimensional appearance.
As you can see first-hand, this is a program that greatly facilitates us that at first it might seem a bit complex. With just adding the characters corresponding to the text with which we are going to work, in seconds we will be able to capture the desired phrase in the image and give it a custom format.
Delete texts from an image in Photoshop
In addition, Photoshop himself makes a good number of functions available to us directly to apply to the texts just by marking it. But it can also be the case that, as we have created it, later we want to delete these added elements.
It is worth mentioning that at first if we want to delete a text in the Adobe program, it is a fairly simple task. Simply select the text box created before and then press the Backspace key to delete all the marked content. In the same way, the situation can occur in which we need to eliminate the text box completely.
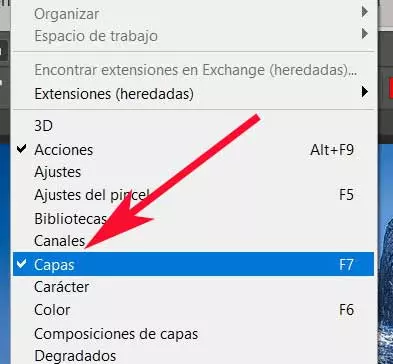
Well, for this we have to access the Layers panel. Generally, it is found located to the right of the main Photoshop desktop. However, if we do not see them, we click on the Window menu option and mark Layers, or press the F7 key.
It will be at that moment when we see the layers section on the right side of the program interface. It is a small window that we can place wherever we want within the work desk. How could it be otherwise here we find each of the layers created in the active image, but the one that interests us is the one corresponding to the text that we are going to delete. Thus one of the layers existing ones will have a T-shaped icon. Also, to avoid confusion, it usually has the same name as the text it contains.
From this specific section we will have the possibility of hiding a text layer while editing other parts of the image.
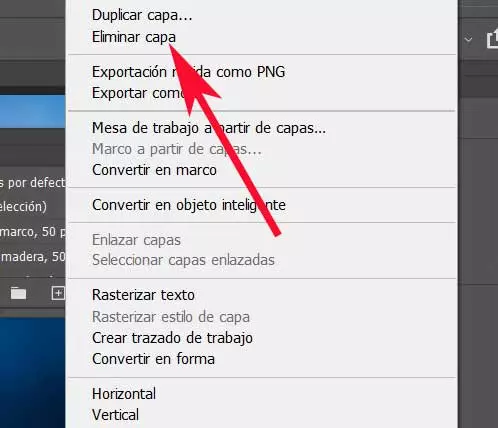
We do this by clicking on the eye icon next to the corresponding layer. But in order to completely eliminate this layer that we have created, we click with the right mouse button on the element and select Remove layer.
