We are going to start by explaining what this service offers us, how we can create a free account and some examples of use.
What FlipDrive offers us to work in the cloud
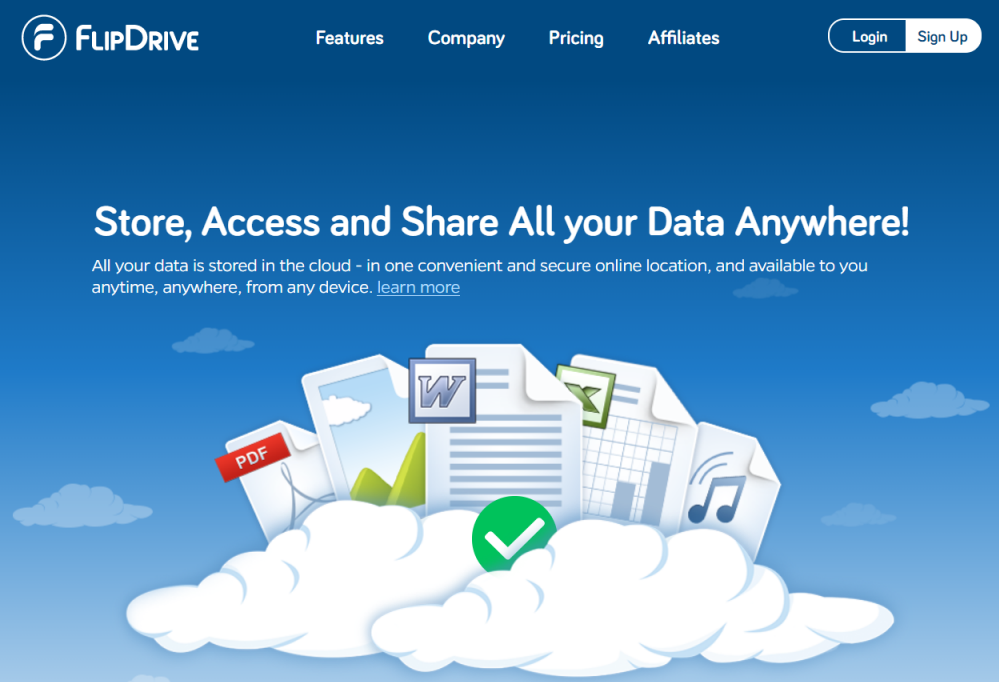
FlipDrive It will allow us to access and share all our data, regardless of where we are. Its way of working consists of storing our data in the cloud, in a suitable and secure online place. Thus, we have them available when we need them, anywhere and also from any device. FlipDrive is based in New York City and offers 24/7 support.
This service offers us a safe storage in the cloud to store data online. Here we can save our photos, documents, music, software and other files.
Another interesting function of FlipDrive is the «Photo albums»Specialized to save our photos online safely. In addition, it allows you to keep the original photo files with full resolution so as not to lose quality, share the photos with whoever you want and have a page of personal public photos. Photos are stored in a state-of-the-art, disaster-proof data center, so we can rest assured that they are protected against computer failures and viruses. On the other hand, we have full control of our photos. In this regard, we decide who has access to our personal photos, being able to choose between:
- Keep our photos private.
- Create a password protected photo album.
FlipDrive for sharing, collaboration, backup and more
This cloud-based service is designed to share and collaborate. In that aspect, we can share any file of any size with anyone. All we have to do is configure the data access permissions for different people and groups. On the other hand, for the rest of our data we should not worry since they remain private and safe.
They also have a contact management system in which we can store, organize and manage our contacts. We can quickly locate a contact information and create our groups. By storing contacts we can share our data with individuals and entire groups without having to, for example, retype the email address.

Another way to use it is like cloud backup. A fundamental thing today is to have a backup plan to be able to recover our most important data in case our computer crashes. If this happened, we would find ourselves in a difficult and frustrating situation. For this reason, from RedesZone we recommend having a copy of our essential data on another computer, on an external hard drive or stored in the cloud. Thus, FlipDrive safely stores and protects our data from any mishap. Keep in mind that normal backup solutions are vulnerable to attacks and hardware failure. In that sense, we obtain a truly secure private cloud where to store a backup.
It also has a bookmark system to save, organize and retrieve everything online. Thanks to this, we can create a custom category and add the related links that we need.
How to create a free or paid account
The first thing we have to do is go to the FlipDrive website by clicking on the following link.

Next, click on Sing UP to be able to register and create our account. At that moment, a list will appear with the available plans that are at that moment.
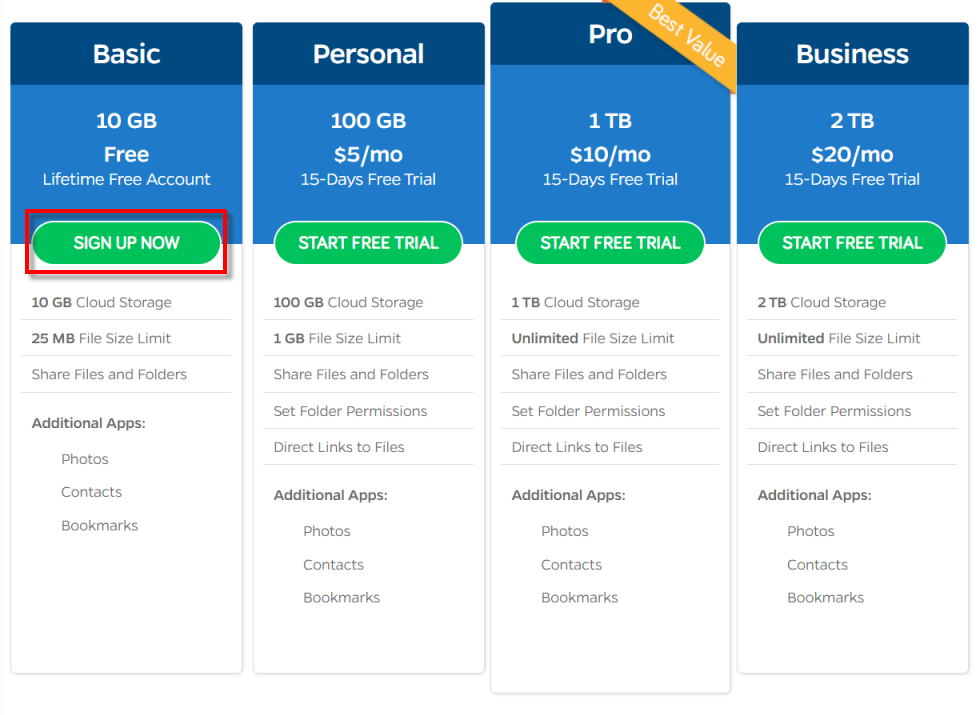
In this case we are going to opt for the basic plan which is the free one. Account creation is similar to that of the rest of the plans. Practically, the free version differs from the other Trial versions, in that they let you try it for 15 days for free, but you have to put in a credit card to create the account.
Therefore, in our case we are going to click on SING UP NOW that you have marked in the red box.

Here, we have to put a username, our name, surnames, an email, the country and a password that you must put twice. When we finish filling in all this, we will click on CONTINUE.
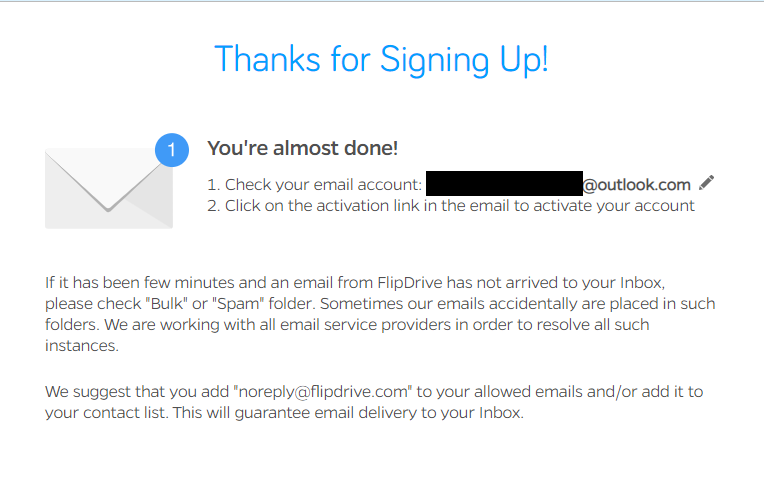
Now he tells us that he has sent an e-mail to the account that we put in the registry, and that we need to click on a link to activate it. Therefore, we will go to our mail inbox and see a message like this.
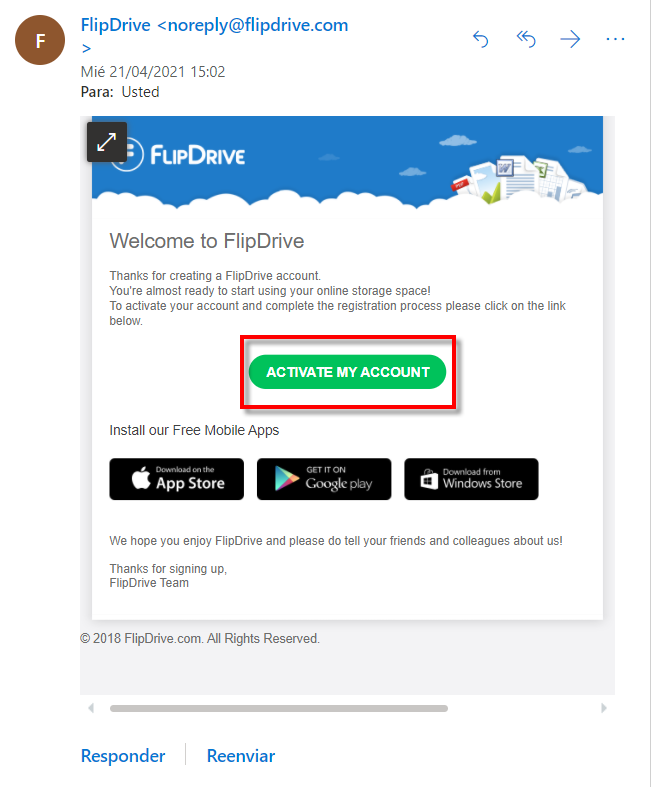
Then we click on ACTIVATE MY ACCOUNT and we will get a screen like this to complete the registration.
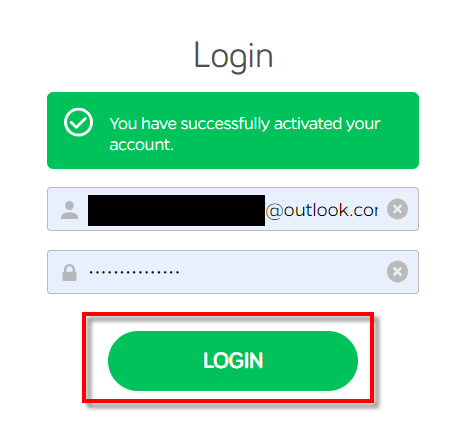
Now we put the-mail and the password if they do not come out, click on LOGIN, and we will be able to access our space in the cloud.
Get started with this cloud service
The first time we enter, a screen like this will appear:
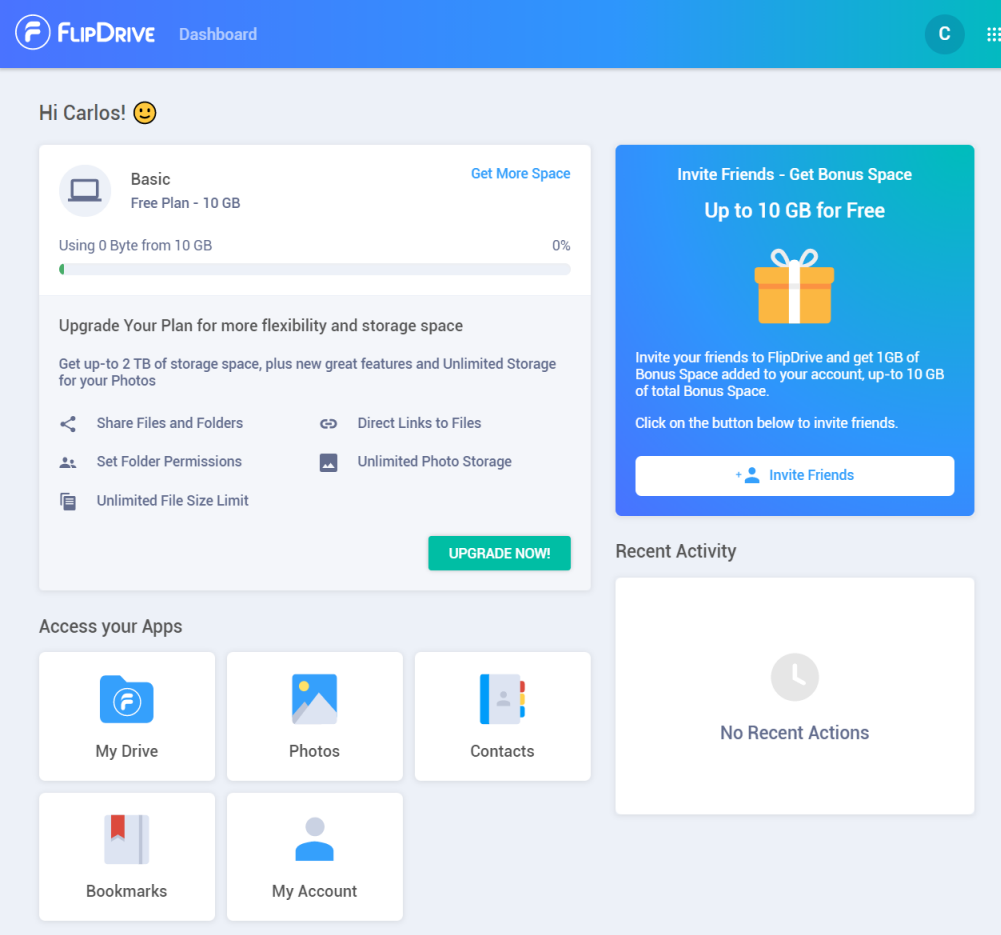
Here, at the top, we see that our storage is the basic one, and that we have a space of 10 GB. Another thing to comment is that the size of the file that we want to upload should not be greater than 25 MB. Below we have access to our applications:
- My drive: it would be to manage our hard drive in the cloud. There we have our folders, we can create new ones, see what they are sharing with me and what I am sharing with others.
- Photos: to create an album and save our photos.
- Contacts: with this option we can create contacts and more.
- Bookmarks: here we can, for example, have stored the links of the URLs that we need most often to work. It allows to classify them in folders.
- My Account: used to change the options of our account. For example, we can change the password or manage the space to change to a higher plan.
This would be an example of the section Photos:
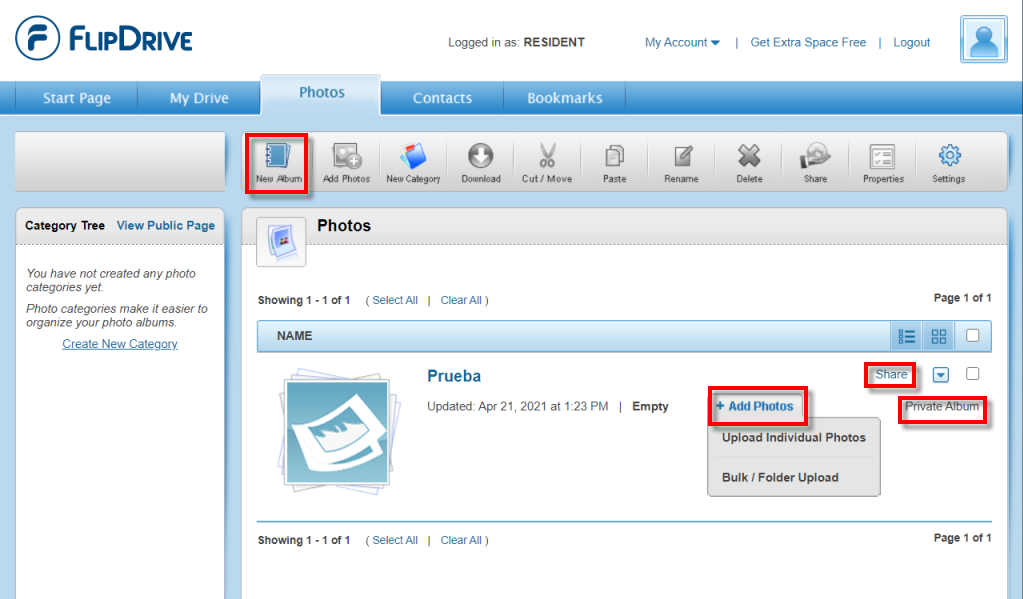
If we click on New Album we can create a folder to save our photos. In addition, it will let us choose if we want it to be public or private. Private Album tells us that it is private. Clicking on Add Photos, we will add our photographs and with Compartir we can share them.
The «Contacts» and «My Drive» sections
Managing and creating contacts in FileDrive and then passing them on is easy. It will also allow us to create groups so that later it is easier for us to share files. If we click on Contacts, Add Contact we can easily create a contact.

However, if we want to create a group so that later it is easier to share files, we will click on the second button that says New Group. Now we go with the section My Drive which would be our disk in the cloud.

With the button ADD NEW we can create our folders and upload the files. Other ways to upload the files would be:
- Dragging from Windows file explorer to the window that says Drag & drop.
- Clicking on the button ADD File.
In the lower left corner we have available storage. It should also be noted that we have an app to use with mobiles. This would be the Android one:


This other one from IOS:


As you can see, FileDrive will allow us to use it both on desktop computers and on mobile devices such as tablets and smartphones easily and quickly.