Steps to follow to configure it
Now yes, once you know what are the requirements that you need to meet to be able to use the HomePod, it is time to go step by step telling you what you have to do to be able to carry out that initial configuration without any problem.
Initial setup
One of the hallmarks of Apple is that usually all configuration processes are very simple to carry out, and obviously, with the HomePod or HomePod mini it was not going to be an exception. The reality is that the way to set up this device for the first time is not very different from what you have to do to set up AirPods. Here are the steps to follow.
- Connect HomePod to power and wait for the light on the top to start flashing white.
- Place a device with iOS or iPadOS a few centimeters from the HomePodyes, keep in mind that this device has to be unlocked.
- When the setup screen appears, click on “Configure”.
- Follow the instructions that appear on the screen and choose HomePod settings. However, you can always go to the Home app later to further customize all the settings of this device.
- The moment you are asked, center HomePod in your iPhone’s viewfinder, iPad, or iPod Touch to complete the pairing. In case you can’t use the camera, tap Enter code manually and Siri will respond with a four-digit passcode that you’ll need to enter on your device.
- Waiting for HomePod to finish setup.
- Finally, Siri will greet you and give you some tips to use this device.
It is not very common that it happens, but the situation can occur in which the setup screen not appearing automatically, and therefore, you have to perform a series of steps to be able to initially configure the HomePod or HomePod mini. We will detail it below so that you do not have any problems.
- open the home app on the iPhone, iPad, or iPod Touch.
- Click on the icon «+«.
- Click on «add accessory» and then in «I don’t have a code or I can’t scan it«.
- Tap the HomePod in the list of «nearby accessories«.
- Press «Set up» and follow the instructions that appear on the screen of your device.
Use voice recognition
The HomePod stands out thanks to the great sound quality it is capable of offering. On the other hand, it is also very useful, since has Siri integrated, which means that you can carry out actions simply by saying the voice command indicated for each of them. However, this can become a problem, especially if the HomePod is used by different people within the same space, which is why the voice recognition function is something that you have to take into account.
Siri is able to recognize different voices inside the house, in this way, as long as you have invited other people to share your house, in the Home app, said members can make personal requests and request your own music to the HomePod, so that it is able to recognize who is the person who is speaking to you at any given moment. Also, to set up voice recognition on the HomePod, the steps you have to follow are very simple.
- go to Settings > [nombre de usuario] > «Password and security»
- Make sure the two factor authentication it’s activated.
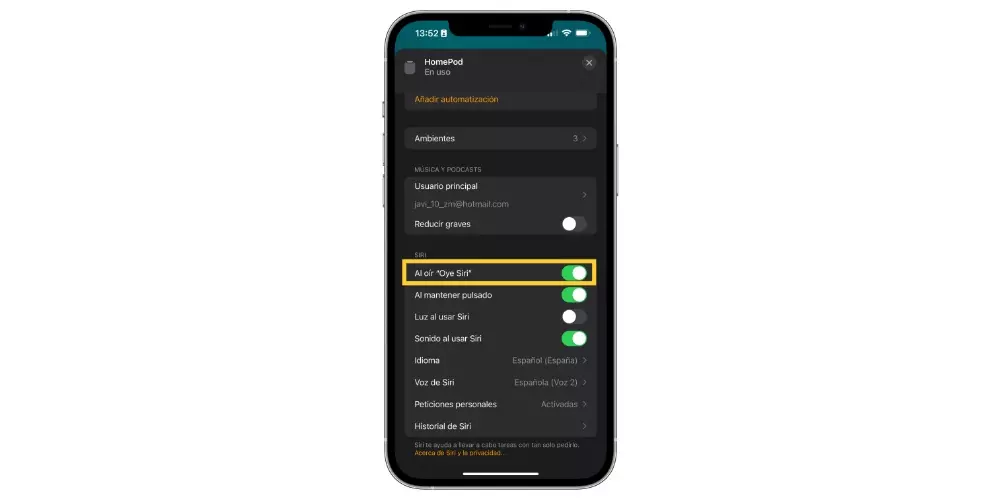
- In the Home App, press and hold a HomePod.
- Scroll down, tap the gear icon, and make sure “Hearing ‘Hey Siri‘” It is activated.
- Click on the «x«.
- Follow the instructions that appear on the screen.
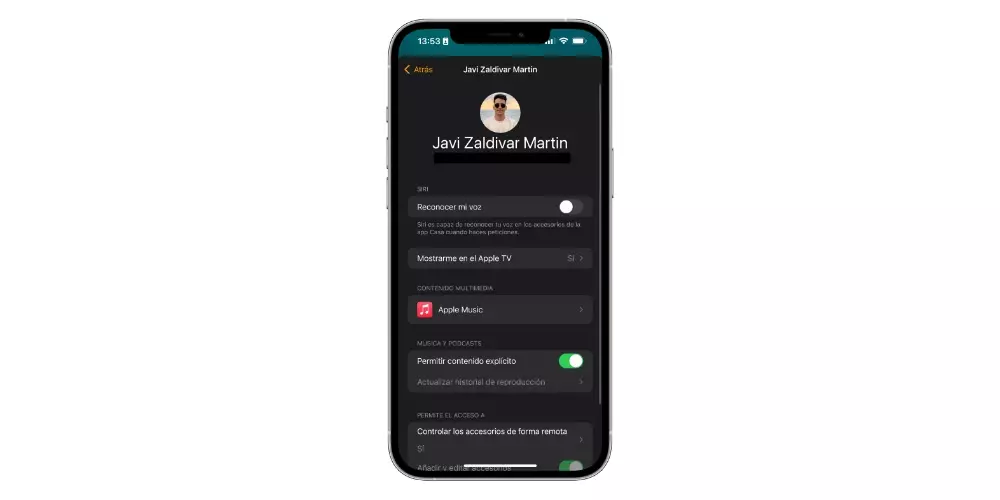
If setup instructions don’t appear, tap the house icon, tap Home Settings, then tap a user profile under People, then tap Recognize My Voice. Also, keep in mind that during setup each member will be prompted to activate Siri, and also change their device’s language to the same language as the HomePod, if this isn’t the case.
Configure your personal requests
Once you have voice recognition activated, it is also very interesting that you activate or configure personal requests. These are Siri commands that use information from apps on your different iOS and iPadOS devices like PostsReminders, Calendar, Contacts, Notes, and other apps you’ve installed that work with Siri. In order to activate personal requests you need to have previously configured voice recognition as we have explained a few lines above. Here are the steps to activate them.
- Connect your iOS or iPadOS device and HomePod to the same Wi-Fi network.
- go to Settings > “Siri and Search”, and activate the following options:
- Hearing “Hey Siri.”
- “Press Side Button to Open Siri” on an iPhone with Face ID, “Press Top Button to Open Siri” on an iPad with Face ID, or “Home Button to Open Siri” on an iPhone, iPad, or iPod Touch with start button.
- Siri with locked screen.
- Go to Settings > [tu nombre] > Find and make sure the option «My location» is set to «This device«.
- In the Home App, tap the home icon and then tap «house settings«.
- Tap your name, then “Personal Requests,” and finally turn on “Personal Requests” for HomePod.
Tips for getting the most out of your HomePod
The HomePod, as you know, is not simply a speaker to which you can send music from any other device via AirPlay, but rather it has and offers the user a series of very interesting functions that you have to know about in order to get the most out of this product. from Apple.
Use Apple Music
The first advice that we want to give you is the same that we have told you as soon as we started this post. An Apple Music subscription is not required to enjoy the HomePod, but it is better because you can enjoy functions that with another service you do not. First of all, you can ask Siri directly to play any song you want.

But beware, not only can you ask for songs, also playlists, a radio or simply play music that you like, since thanks to the platform’s algorithm you can enjoy music related to your tastes. On the contrary, when using other services such as Spotify or YouTube Music, this type of action cannot be carried out.
Use Siri commands
The reality is that Siri is far behind the rest of the voice assistants that currently exist. However, this does not imply that you can continue to take advantage of it, even more so when you have it inside a smart speaker such as the HomePod. The first thing you have to know, as we have mentioned, is that you can ask it to play any type of song, list or style of music.

Plus, with voice recognition and personal requests turned on, you can use HomePod to add any event in the calendaradd a reminder, start a timer, ask him something, or simply, call a contact as long as HomePod and iPhone are on the same Wi-Fi network.
Set automations
We can say that the HomePod is one of the most important devices for creating a smart home with HomeKit. Well, whether you have more accessories or if only the HomePod is the device you have configured in a room in your home, you can set automations to create environments at every moment of the day.

An automation is the achievement of actions that are carried out as a result of a trigger, that is, you can configure a series of actions such as putting on a specific music, activating the lights in your room with a specific color and intensity and lowering the window shades, for example, the moment you tell Siri to activate “X” ambient. Or if, for example, you only have one HomePod, you can set different scenes with playlists.