How to create Apple iD on your iPhone?
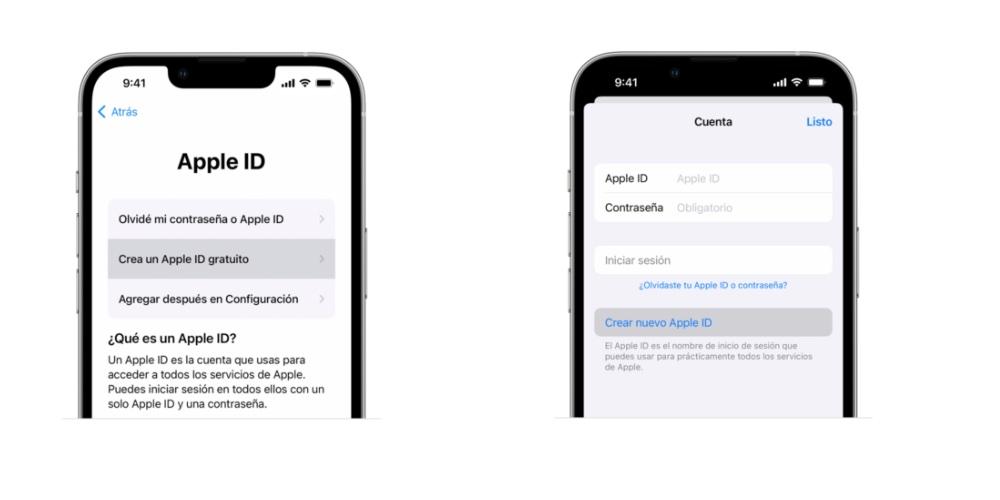
Once we have configured the iPhone in its initial parameters, we have to go to the App Store or Settings and click on the profile icon. Within them, click on the option Create an Apple ID. Two options appear on the screen. On the one hand, the possibility of logging in with your Apple ID and password in the event that you already have accounts. If not, you have to click on the option “Create the new Apple ID”. The steps you have to take are the following:
- you have to fill in the steps that appear on the screen, such as email, create a password ma’am and set the region where your device is located. It is important to note that the email address entered will be the new Apple ID.
- Confirm your phone number. This section is not to obtain information from you, but rather to verify your identity and recover your account in case you need it. Then click on next.
- Confirmation of the telephone number. This step will be useful to verify your identity and recover your account in case you need it. Then click on next.

Once you have verified the above mentioned steps, you’ll be able to sign in with your Apple ID to sign in to the App Store, iTunes Store or other services like iCloud. It is also interesting the possibility of being able add your credit and billing cards. This section is very simple so that, in the event that you want to buy applications or Apple products in the future from your iPhone. However, you can also not do it and fill in the data at the time you go to make a purchase.
Create an Apple ID on another device

If you want to create a Apple ID on another device outside of the Apple ecosystem Either on an Android device or Smart TV, you have to go to appleid.apple.com and perform the following steps and they are very similar to those described above.
- Go to the page of appleid.apple.com and click create your Apple ID.
- Make the form where the incorporation of email address, creation of a secure password and setting the region of your device are requested.
- Write a phone number that you can always access
- Below is a box to subscribe to Apple updates if you wish. That way, you’ll always receive news and updates about the latest software releases, Apple products, and services.
- Finally, click on continue and Follow the steps to verify your email address and phone number.
Let us know in the comments if you’ve ever had trouble creating an Apple ID or if you’ve created an Apple from an external Apple device