Once you click on the “Windows” menu, you will be able to download the operating system image appropriate for you. In our case, we are going to download both the VirtualBox and VMware images, since we are going to show you how to configure it in both programs to virtualize operating systems.
Once we have downloaded the image, what you should do is unzip it and put it in a folder. This folder will be where the entire virtual machine runs, both for VirtualBox and also for VMware. Before doing anything, we recommend that you correctly locate this folder, it is recommended that it always be on an SSD drive, to obtain the best possible reading and writing performance.
Installation and configuration with VMware Workstation
Once we have downloaded the image HAOS (Home Assistant Operating System), we must create a new virtual machine manually, and use that file as the disk of the created virtual machine. The first thing we must do is open VMware Workstation and click on the «Create a New Virtual Machine«.
In the configuration wizard we must choose «Custom (Advanced)» in the first menu that appears, then we click on Next, on the second screen we choose that the hardware compatibility is VMware Workstation 17.X and click on Next again. Now we choose the option of «I will install the operating system later«, and we click on Next again. In the next menu we choose the type of operating system that we are going to use in the virtual machine, we choose «Linux» and version «Other Linux 5.X kernel 64-bit«.
Now we give it a friendly name for the virtual machine, and the location will be the same folder where we have the file that we have downloaded from the official Home Assistant website, click on Next again. Now we must start choosing the VM hardware configurationwe choose a processor and 4 cores, the RAM that we have assigned is 4GBthe local network settings should be «Use bridged networking» so that it can be located by all the home automation devices that we have on the local network.
Other configurations that we must make in the following menus are the following:
- SCSI Controller: LSI Logic (this is the default option).
- Virtual Disk type: SCSI (this is the default option).
- Disk: Use an existing virtual disk.
Once we have set this up, we will have to select the existing disk file, which is what we have downloaded from the official website. It will ask us that, if we want to convert the virtual disk into the new VMware format, click on «Convert» and we wait a few seconds. Finally, we will get a summary with all the configurations we have made.
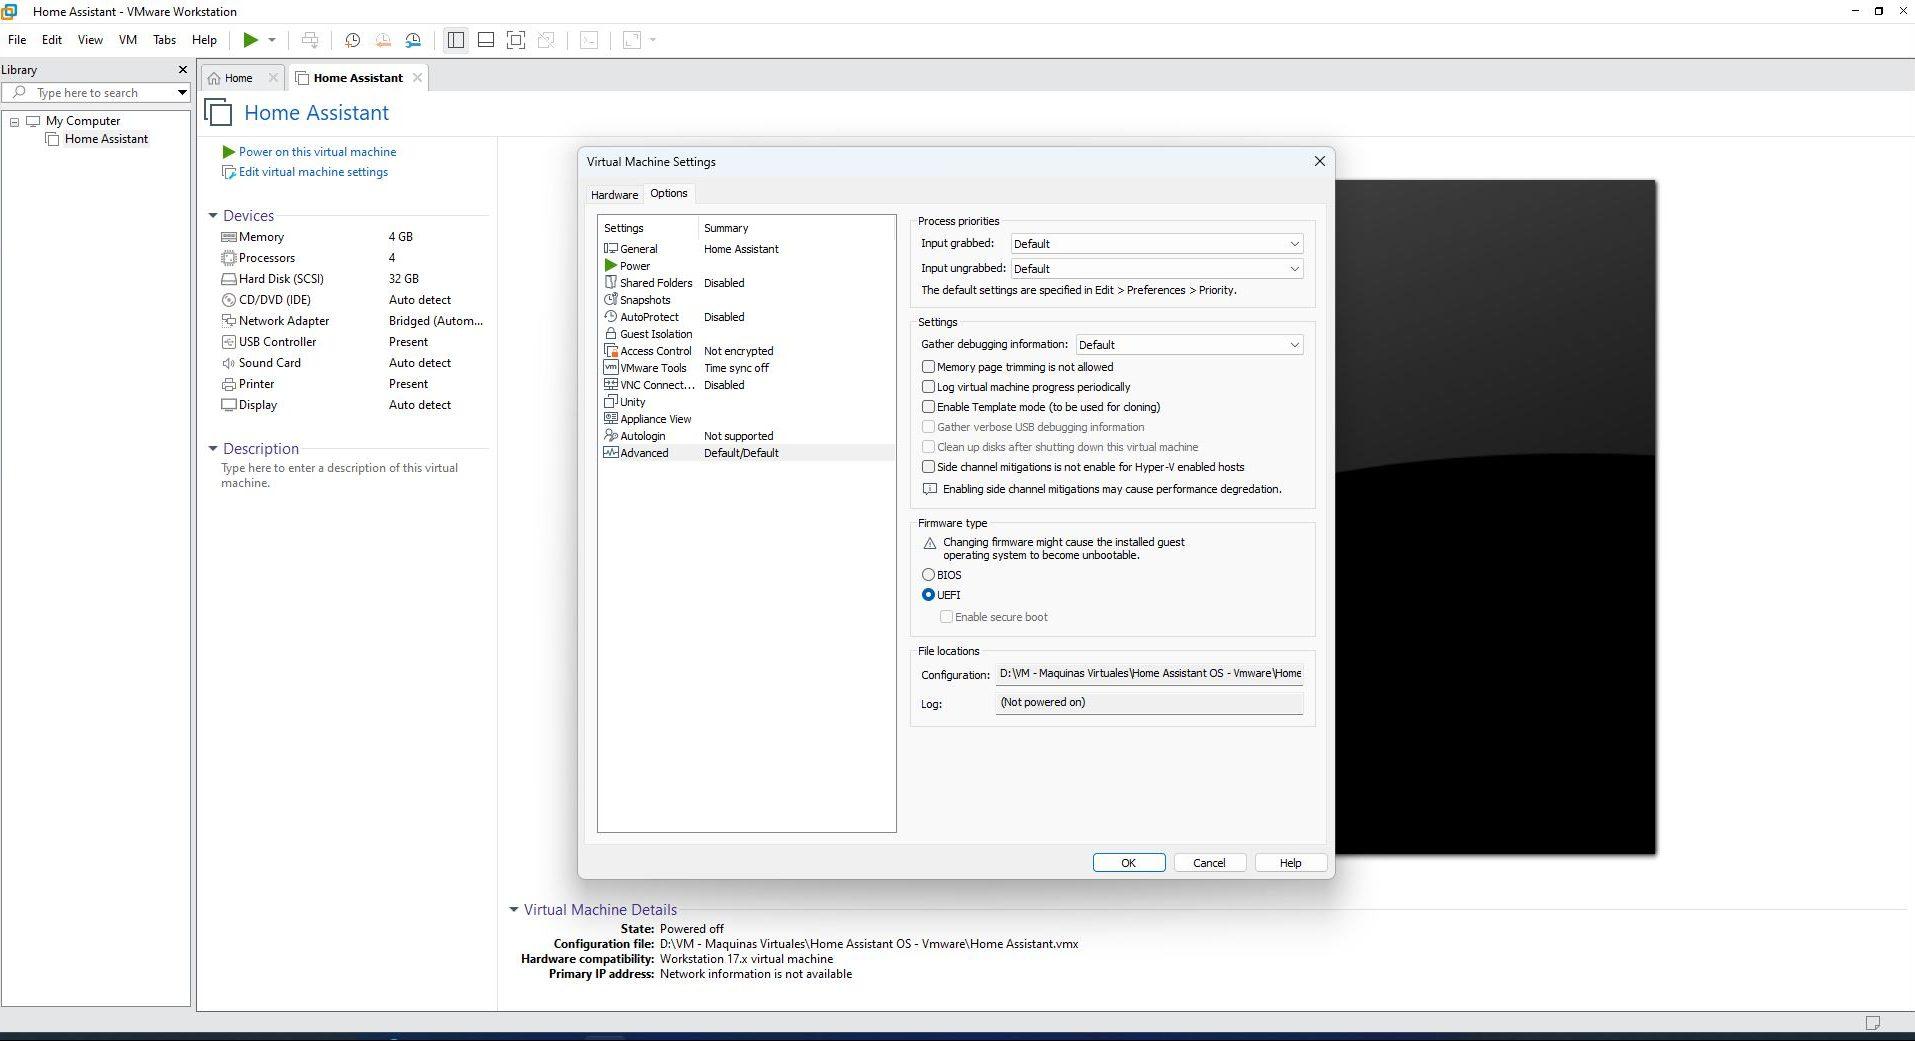
We will now have the virtual machine almost ready to start it, but we must make a prior adjustment so that it starts correctly, otherwise it will give an error.
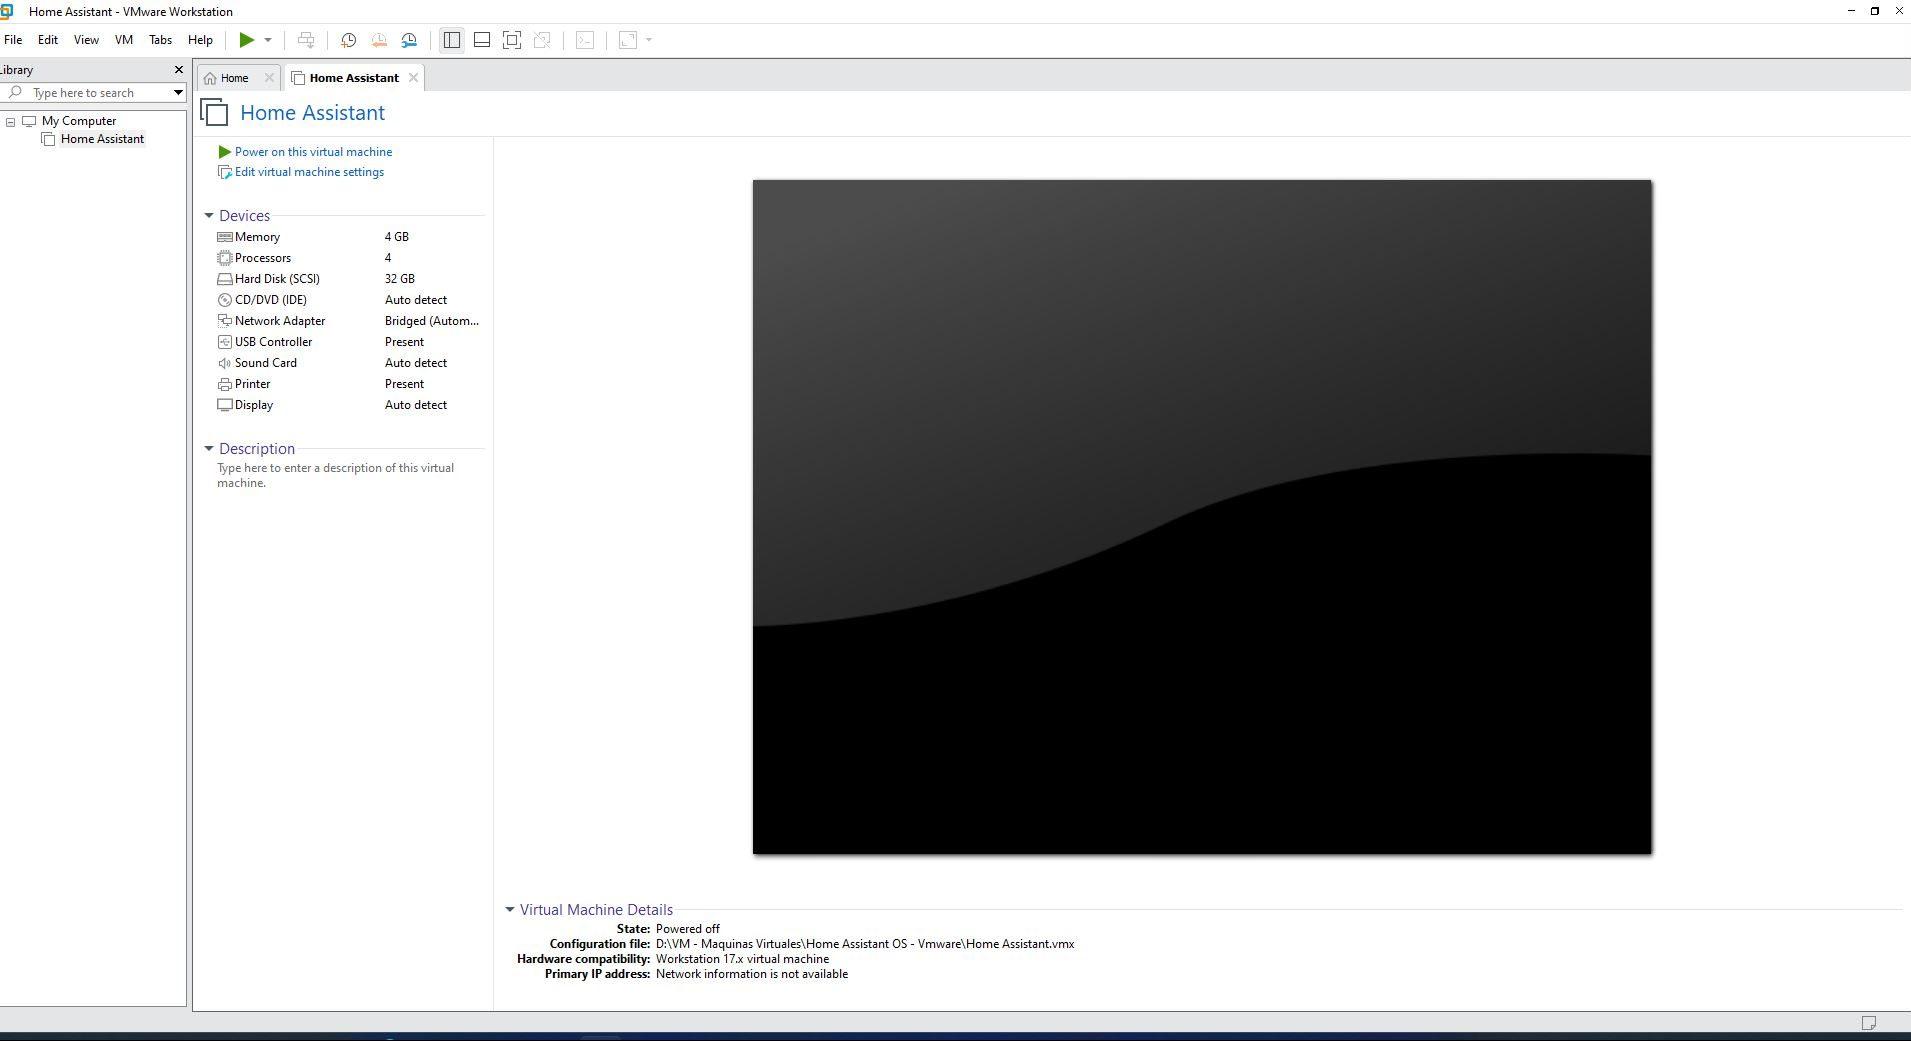
We go to the section «Edit virtual machine settings«, and in the « tabOptions” and in “Settings» we proceed to define as «Firmware type: UEFI«, by default it is set to BIOS. It is absolutely necessary to choose UEFI if we want the Home Assistant operating system to boot.
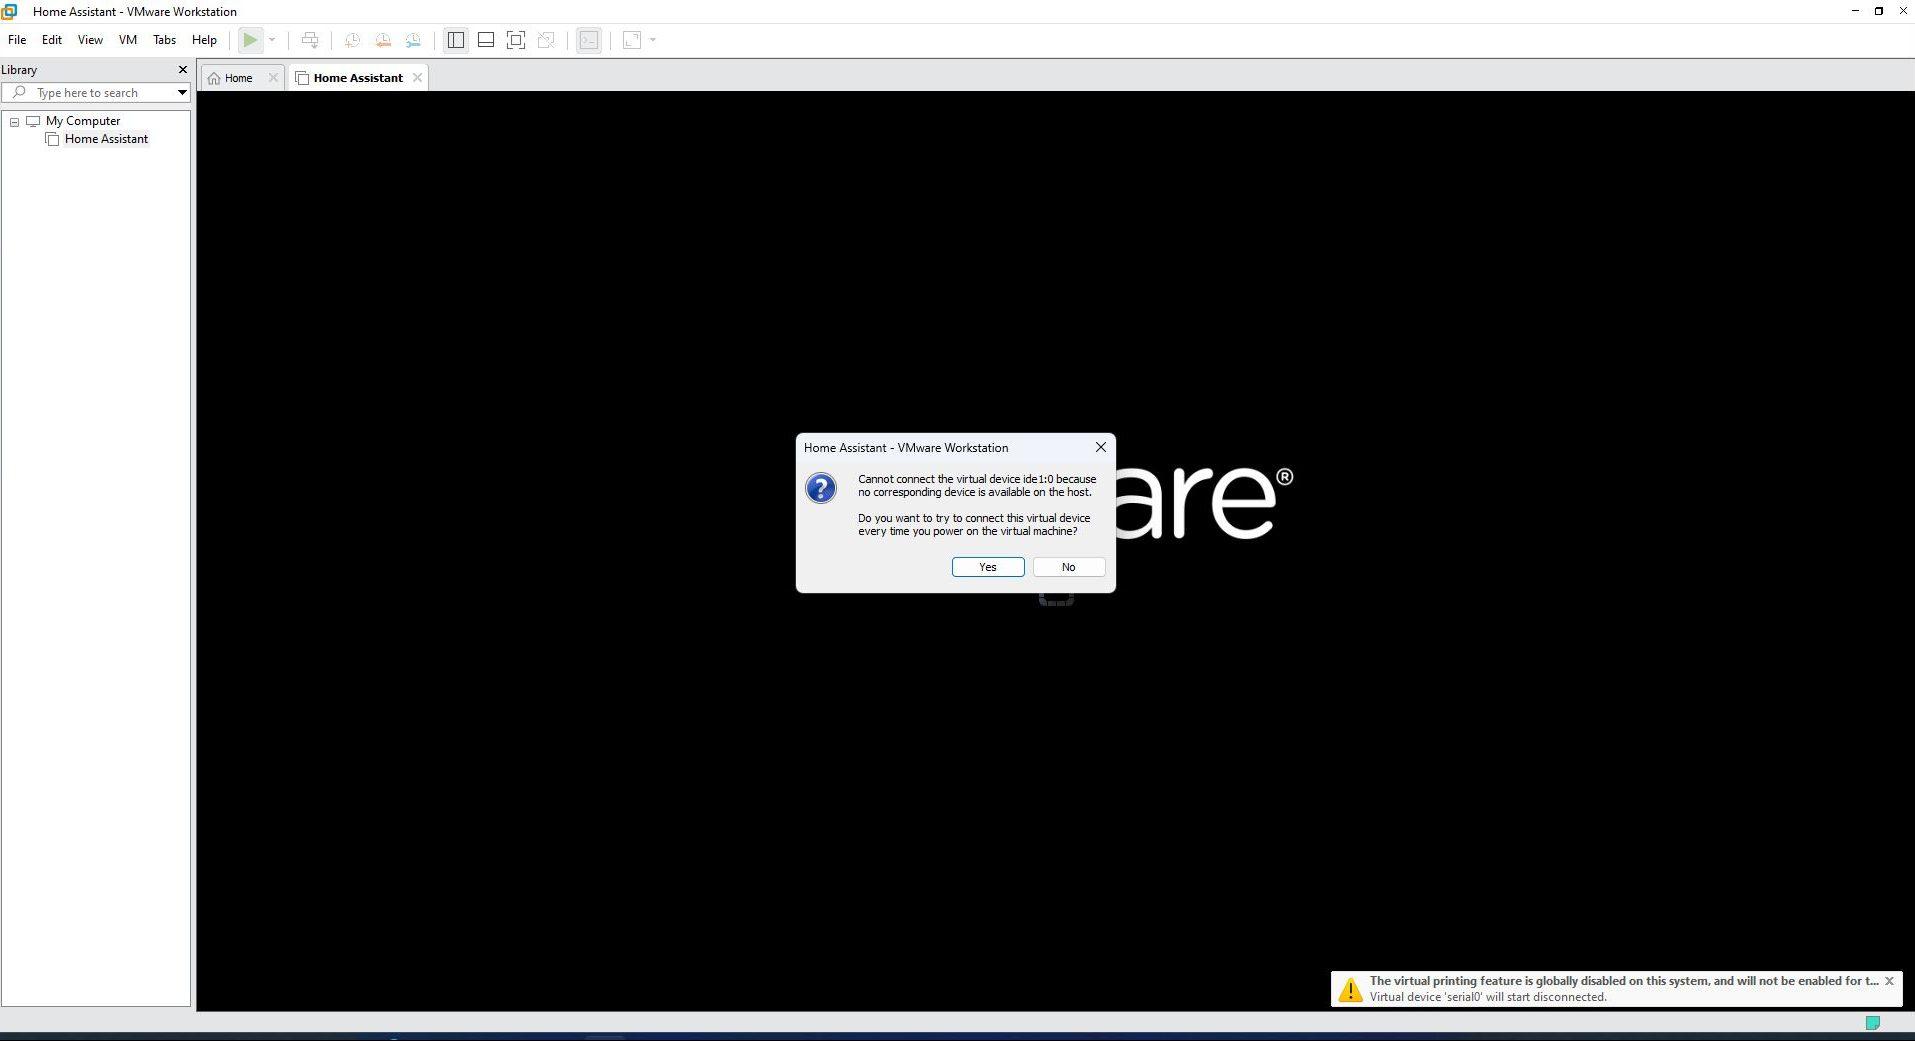
Once we have done this, we start the virtual machine and if we get a message, we click on “Yes”.
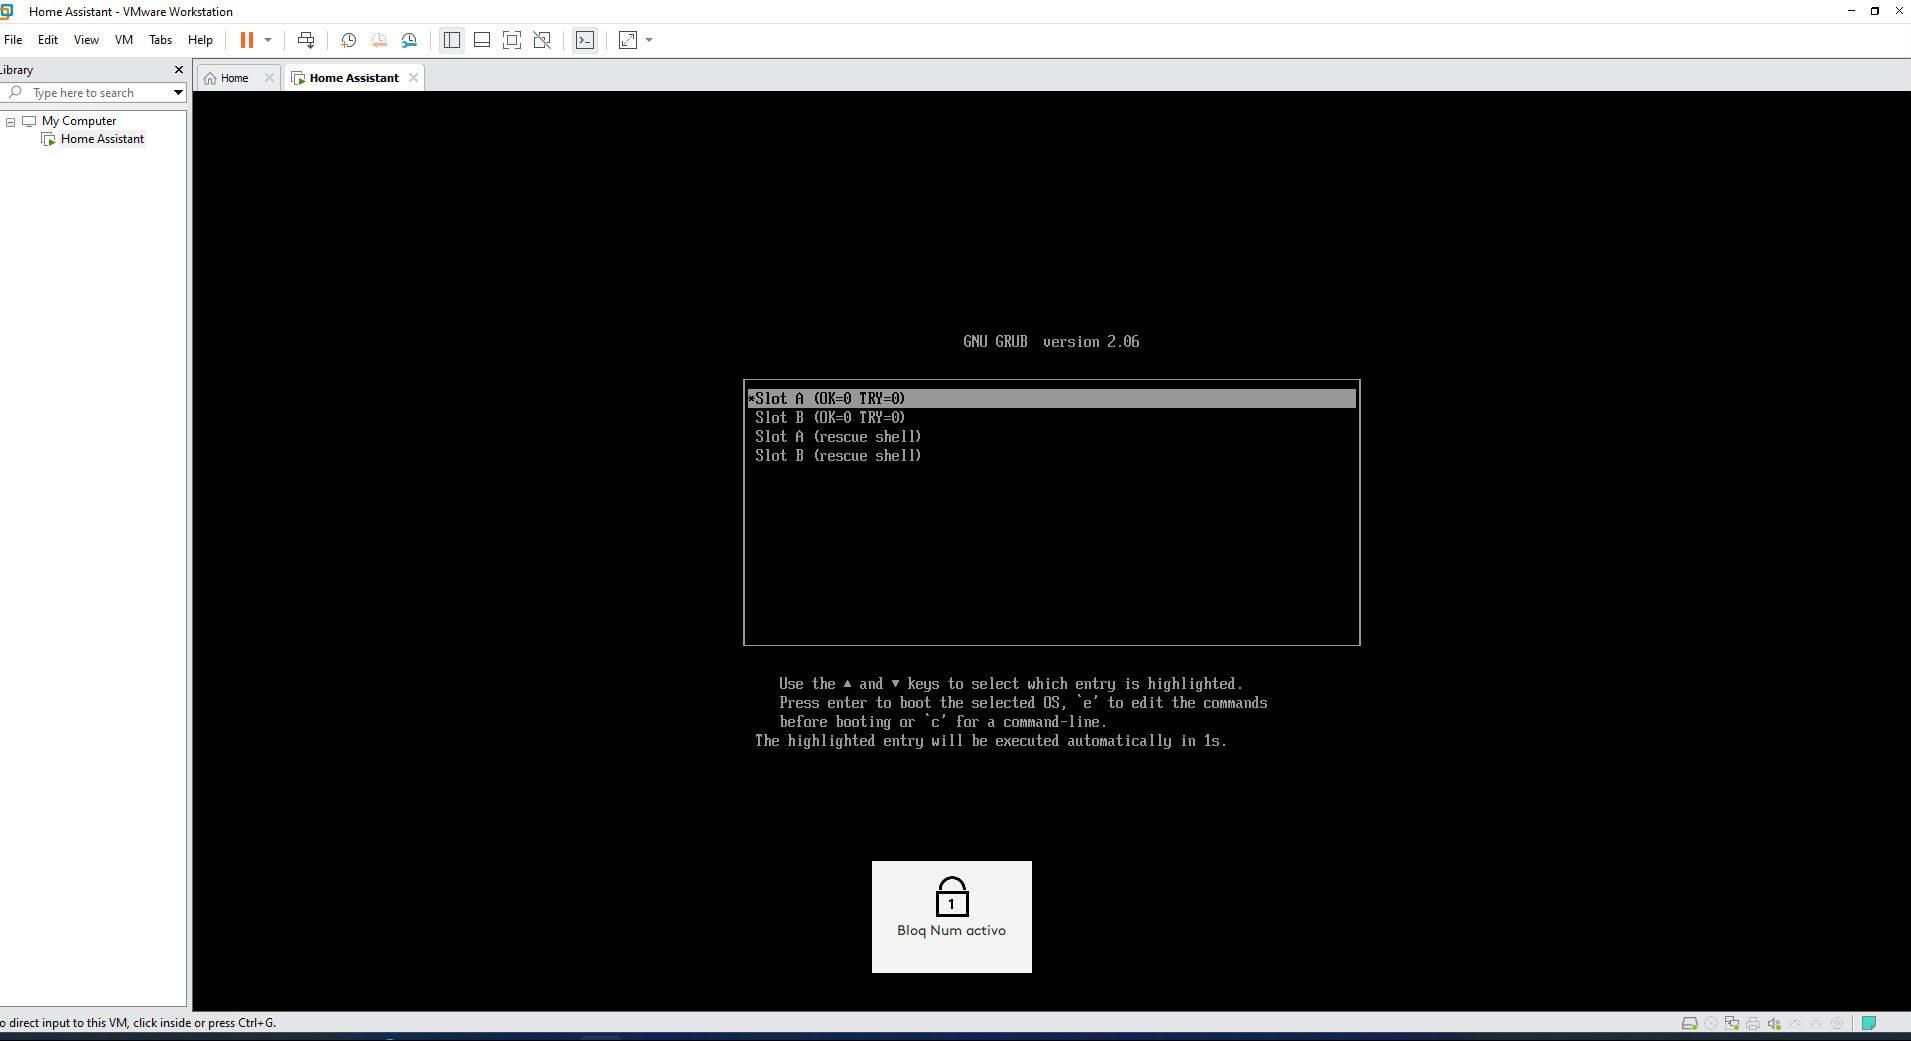
We enter the virtual machine and choose «Slot A» to proceed with the startup, or we wait a certain time since it will start automatically.
After a couple of minutes where the operating system will boot, we can see that it is now fully operational. There you can see the IPv4 address and also the IPv6 address that this virtual machine has right now to access it.
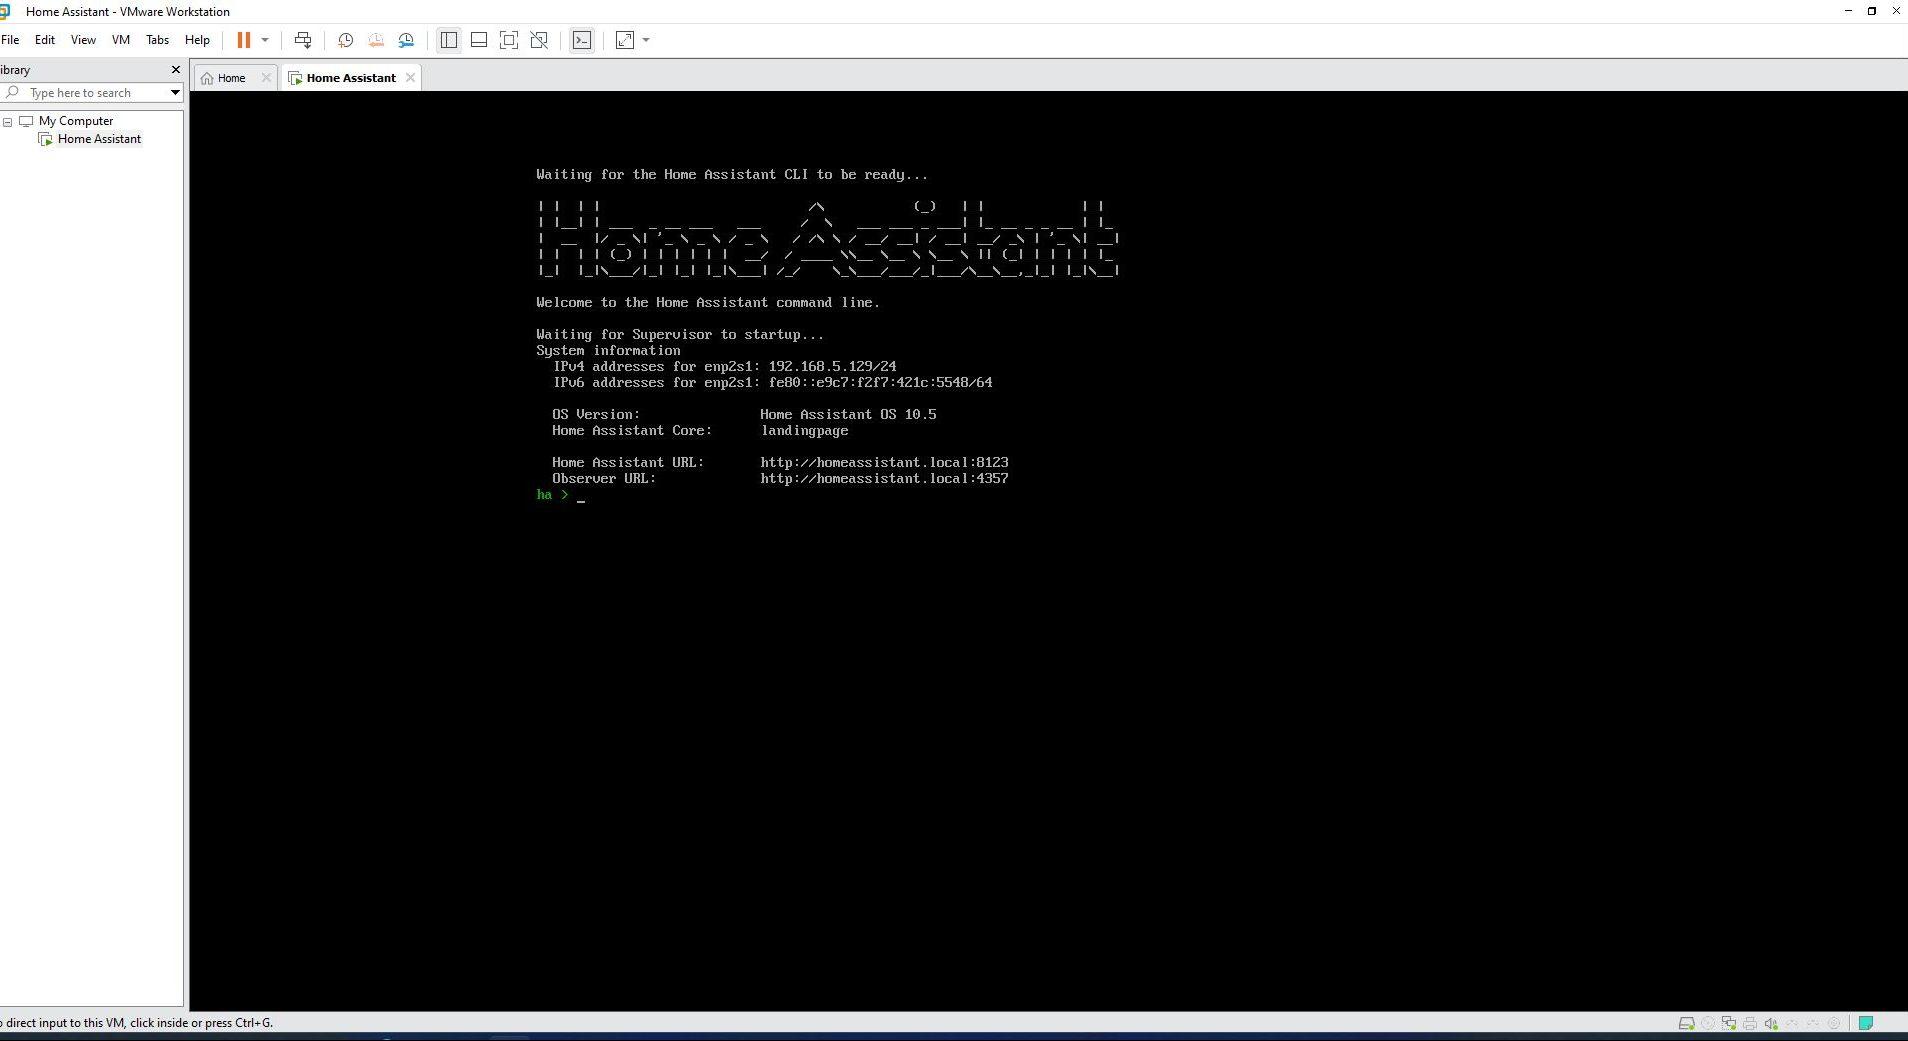
If we want to access the Home Assistant web interface, we simply have to put 192.168.5.129:8123 in the address bar and it will load. At the first start it will take a few minutes until all the files and operating system configurations start to load, we must wait until the welcome appears. Depending on the hardware of your mini PC, it will take more or less time, but it will always end so be patient.
Installation and configuration with VirtualBox
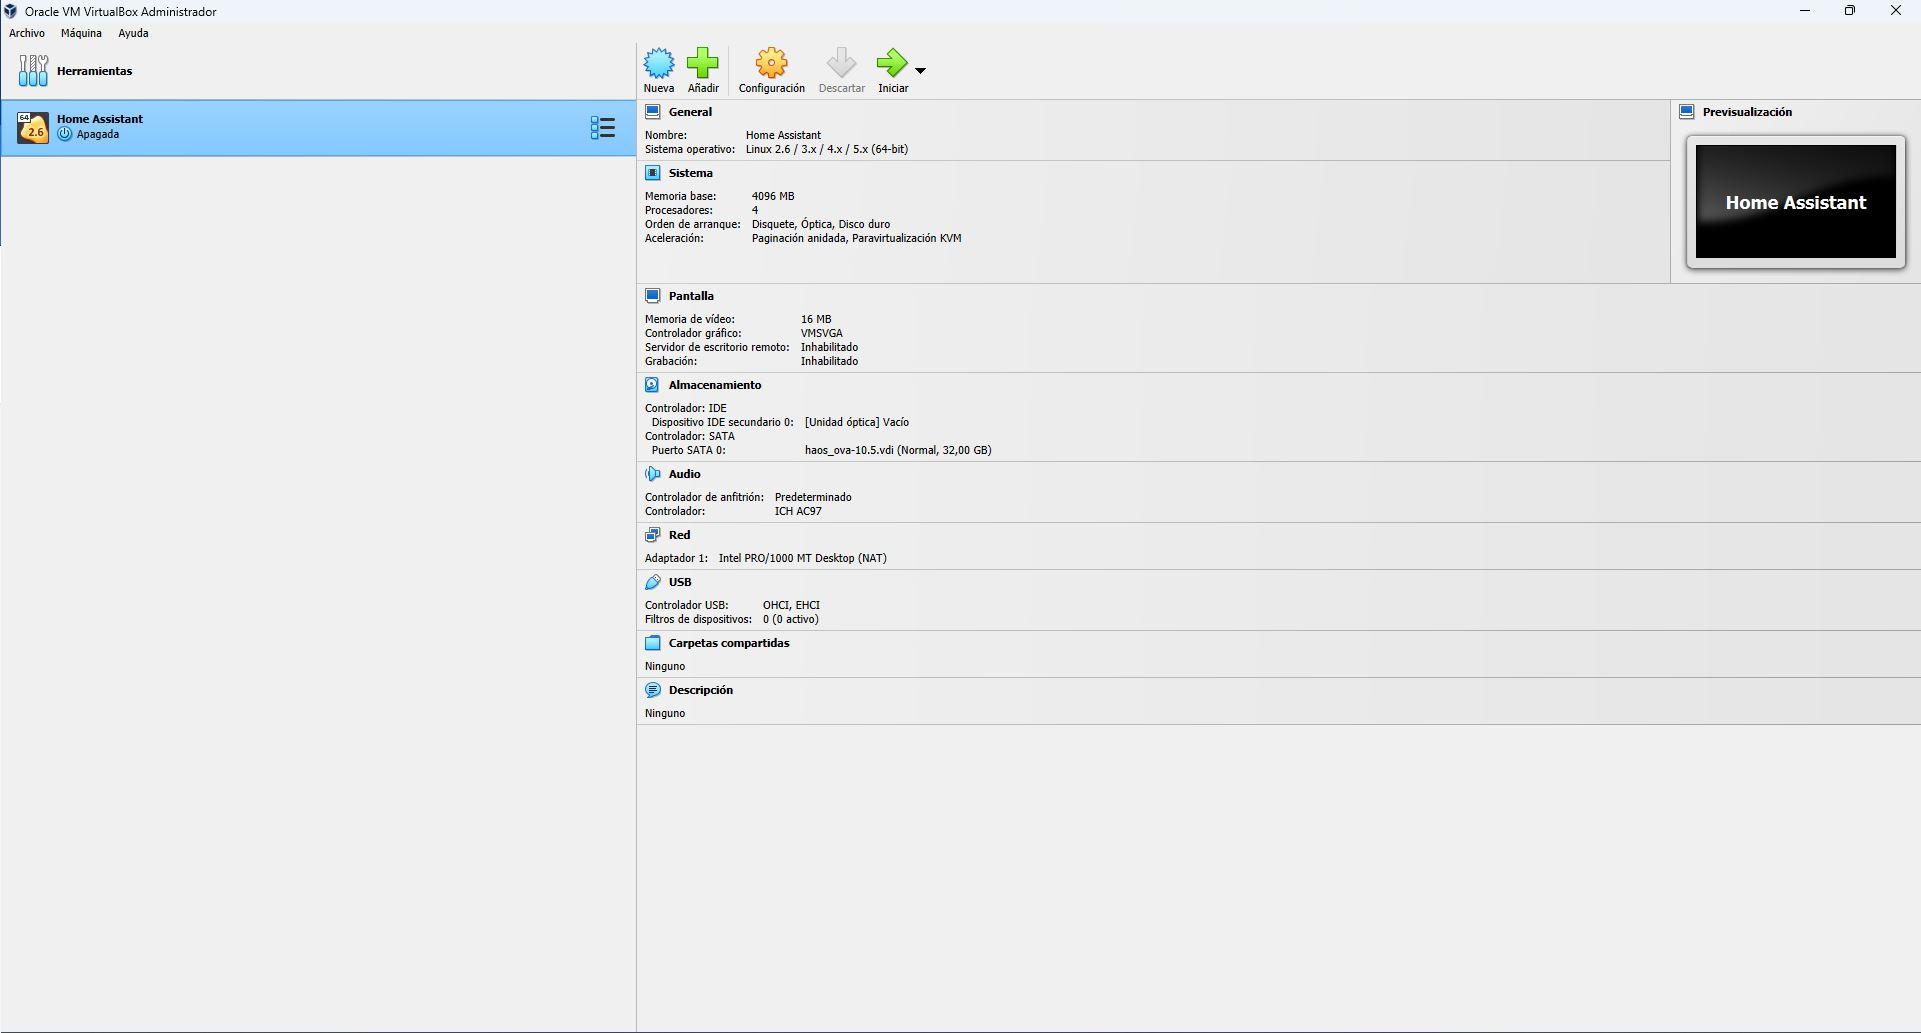
The configuration with VirtualBox is also very simple, once the program is installed we must create a new virtual machine by clicking on the «New«.
When we go to create the virtual machine, the creation wizard will appear, in these menus you will have to configure the following:
- Names and operating system
- Name: We give it a descriptive name, for example, “Home Assistant”.
- Folder: we choose the same folder where we have placed the file downloaded from the official website.
- ISO image: empty.
- Type: Linux
- Version: Linux 2.6 / 3.X / 4.X / 5.X (64-bit)
- Unattended installation: all empty.
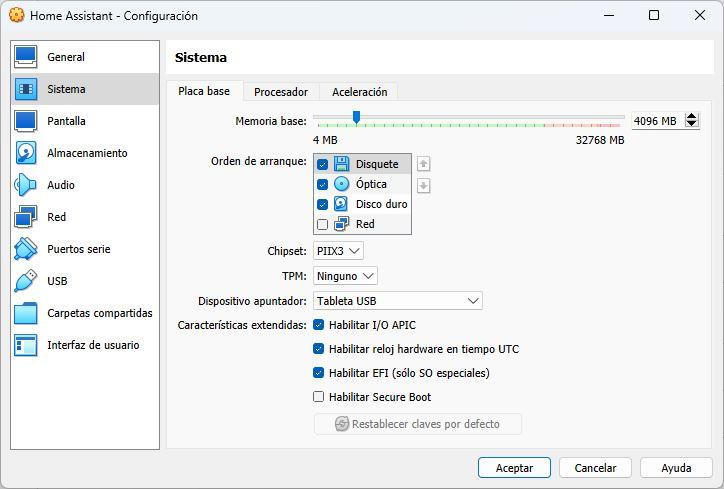
- Hardware: We put 4GB of RAM and 4 cores so that it works perfectly. It could also work with less hardware, but at least it should be 2GB of RAM and 2 cores. It is very important that you select the option “Enable EFI«If you don’t do it now, you can do it later, but it’s better to do it directly here.
- HDD: We choose the option “Use an existing virtual hard disk file.”
To add an existing virtual hard drive, it will take us to a new window, where we have to click on the “Add” button, search for the file downloaded from the official Home Assistant website, and select it. Once done, it will appear directly in VirtualBox in the previous menu, as you can see here:
Once we have done everything, we will have to make some additional configurations, both on the network and on the EFI (if you have not done so previously). We must click on the «Setting» to proceed with making these changes.
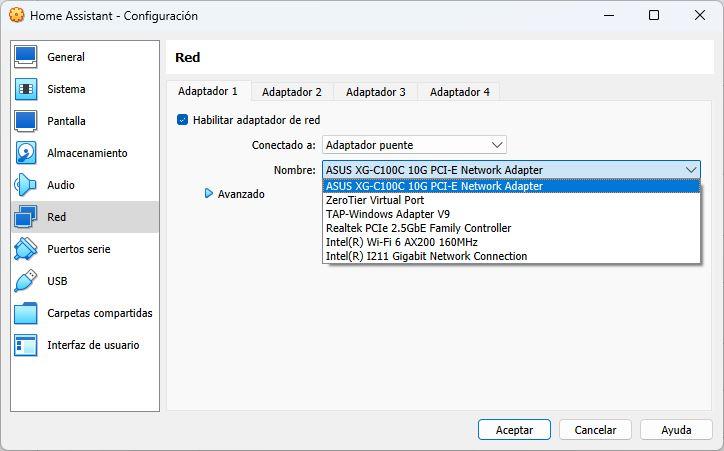
In the section of “Setting» we have to go to the « sectionGrid«, here in the « tabAdapter 1» we make sure to choose «bridge adapter» and we choose the physical Ethernet network card that we are going to use to connect the mini PC to the local network.
If you have not previously enabled the “Enable EFI«, then you can do it in the «System«, as you can see.
Now we will be ready to start the virtual machine, we click on “Start” and wait a couple of minutes until it is available.
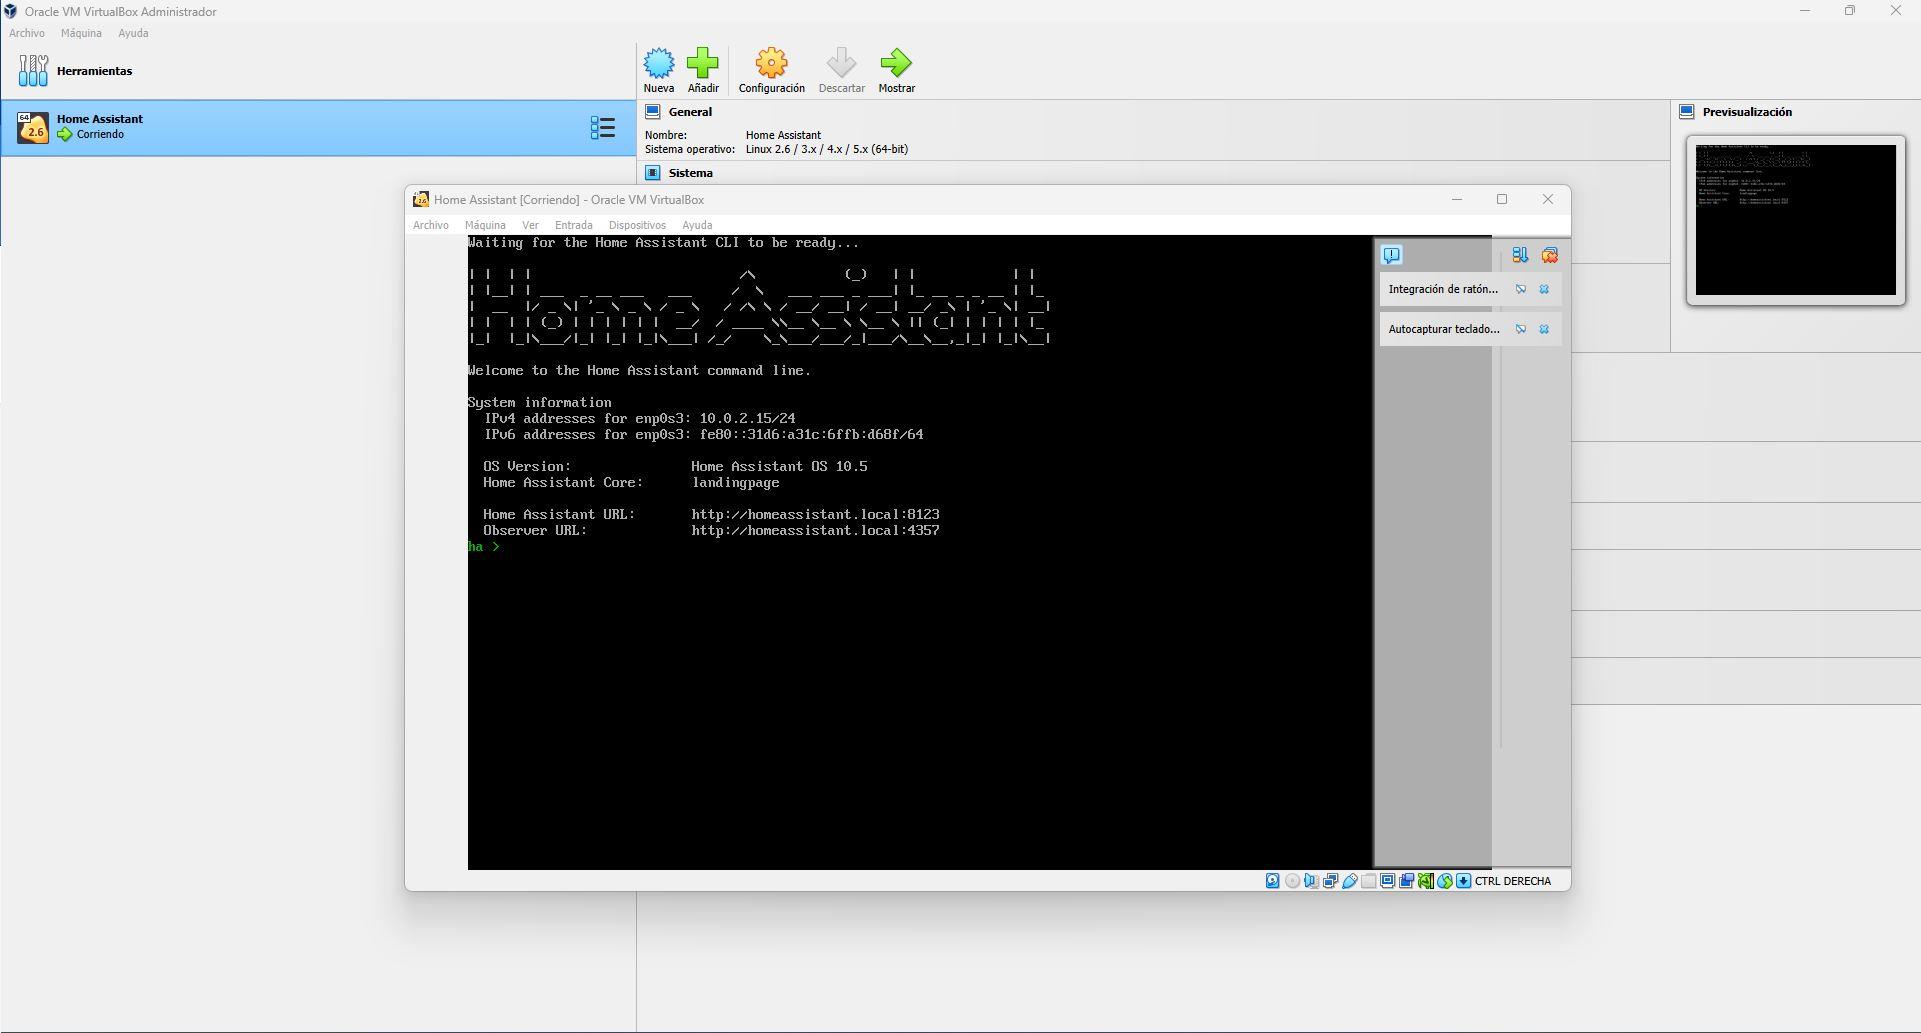
If we want to access the Home Assistant web interface, we simply have to put 10.0.2.15:8123 in the address bar and it will load. We must keep in mind to put the card in bridge mode, so that it obtains a specific private IP address from the local network. If we put it in NAT or any other configuration that prevents access from the local network, the discovery will not work. of devices or most local functions.
The first startup takes a few minutes longer than normal, this is because it has to load all the files and settings, once it has finished, the operating system startup wizard will appear.
Starting the system
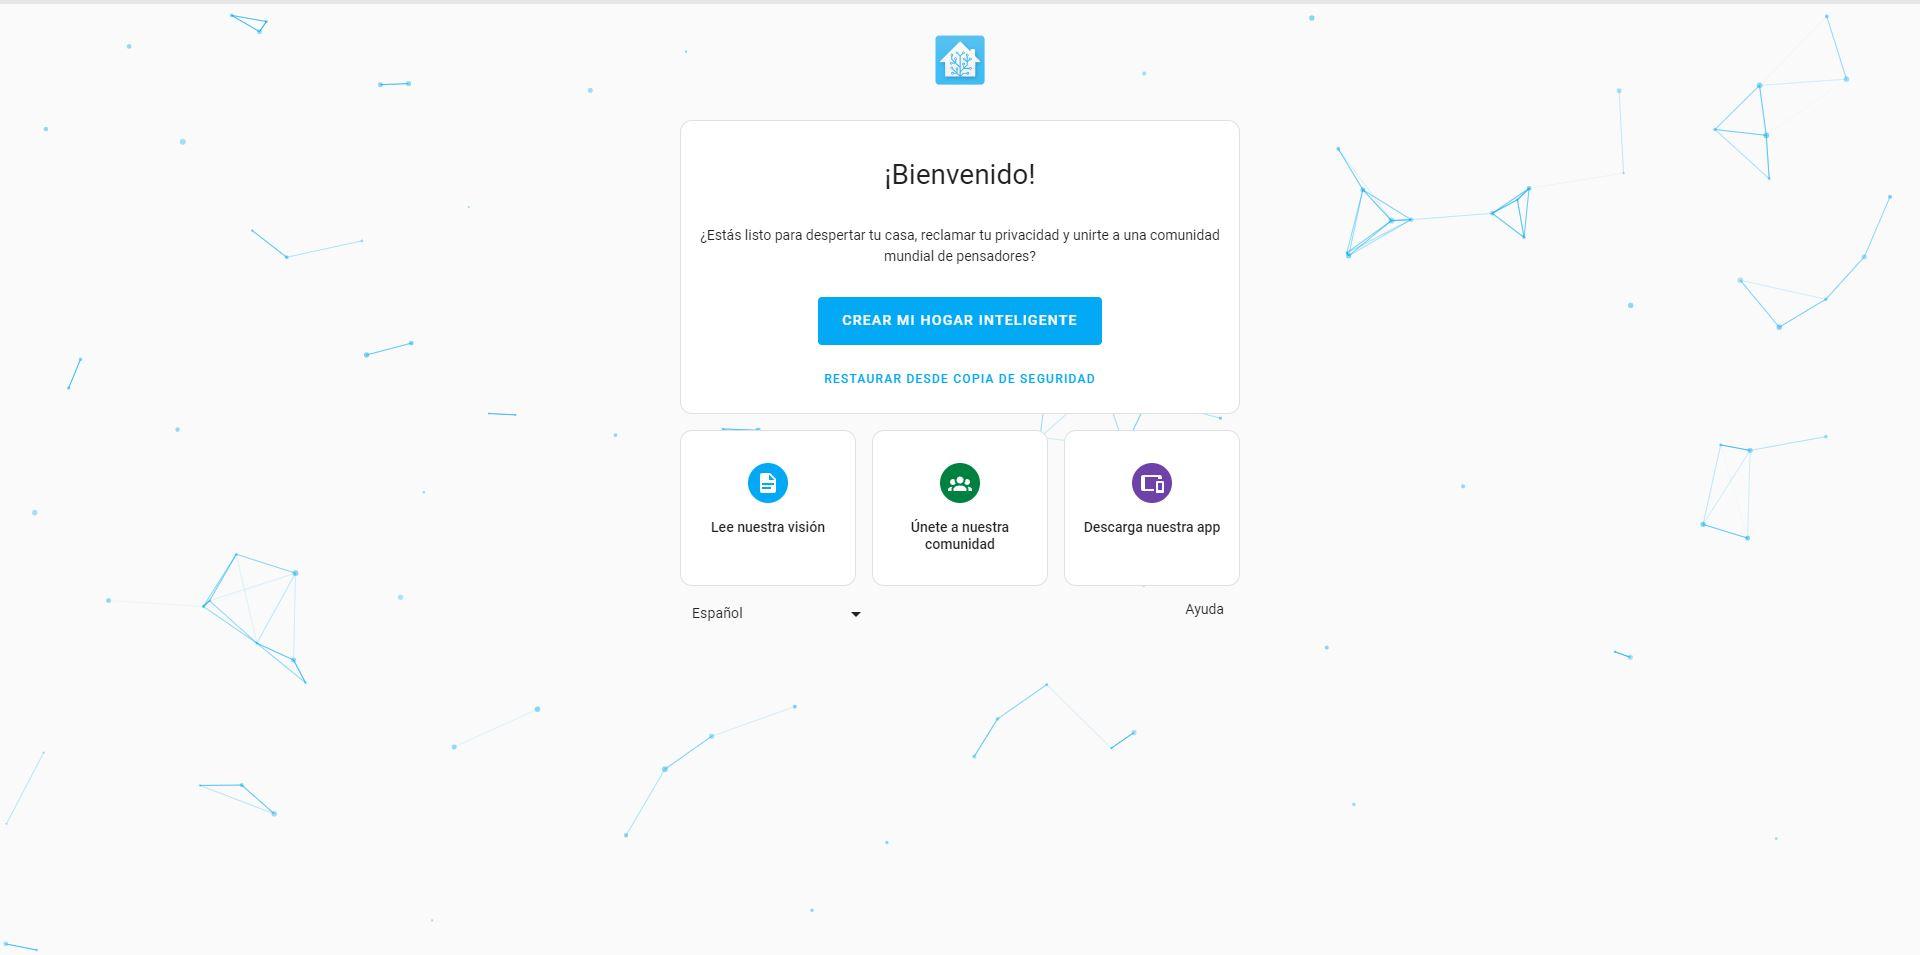
Once we have waited a few minutes until Home Assistant is available, we will see a screen that will welcome us. In this menu we must click on the «Create my smart home» to open the startup wizard. However, if you previously had a Home Assistant installation, you could restore the backup very easily with the second option.
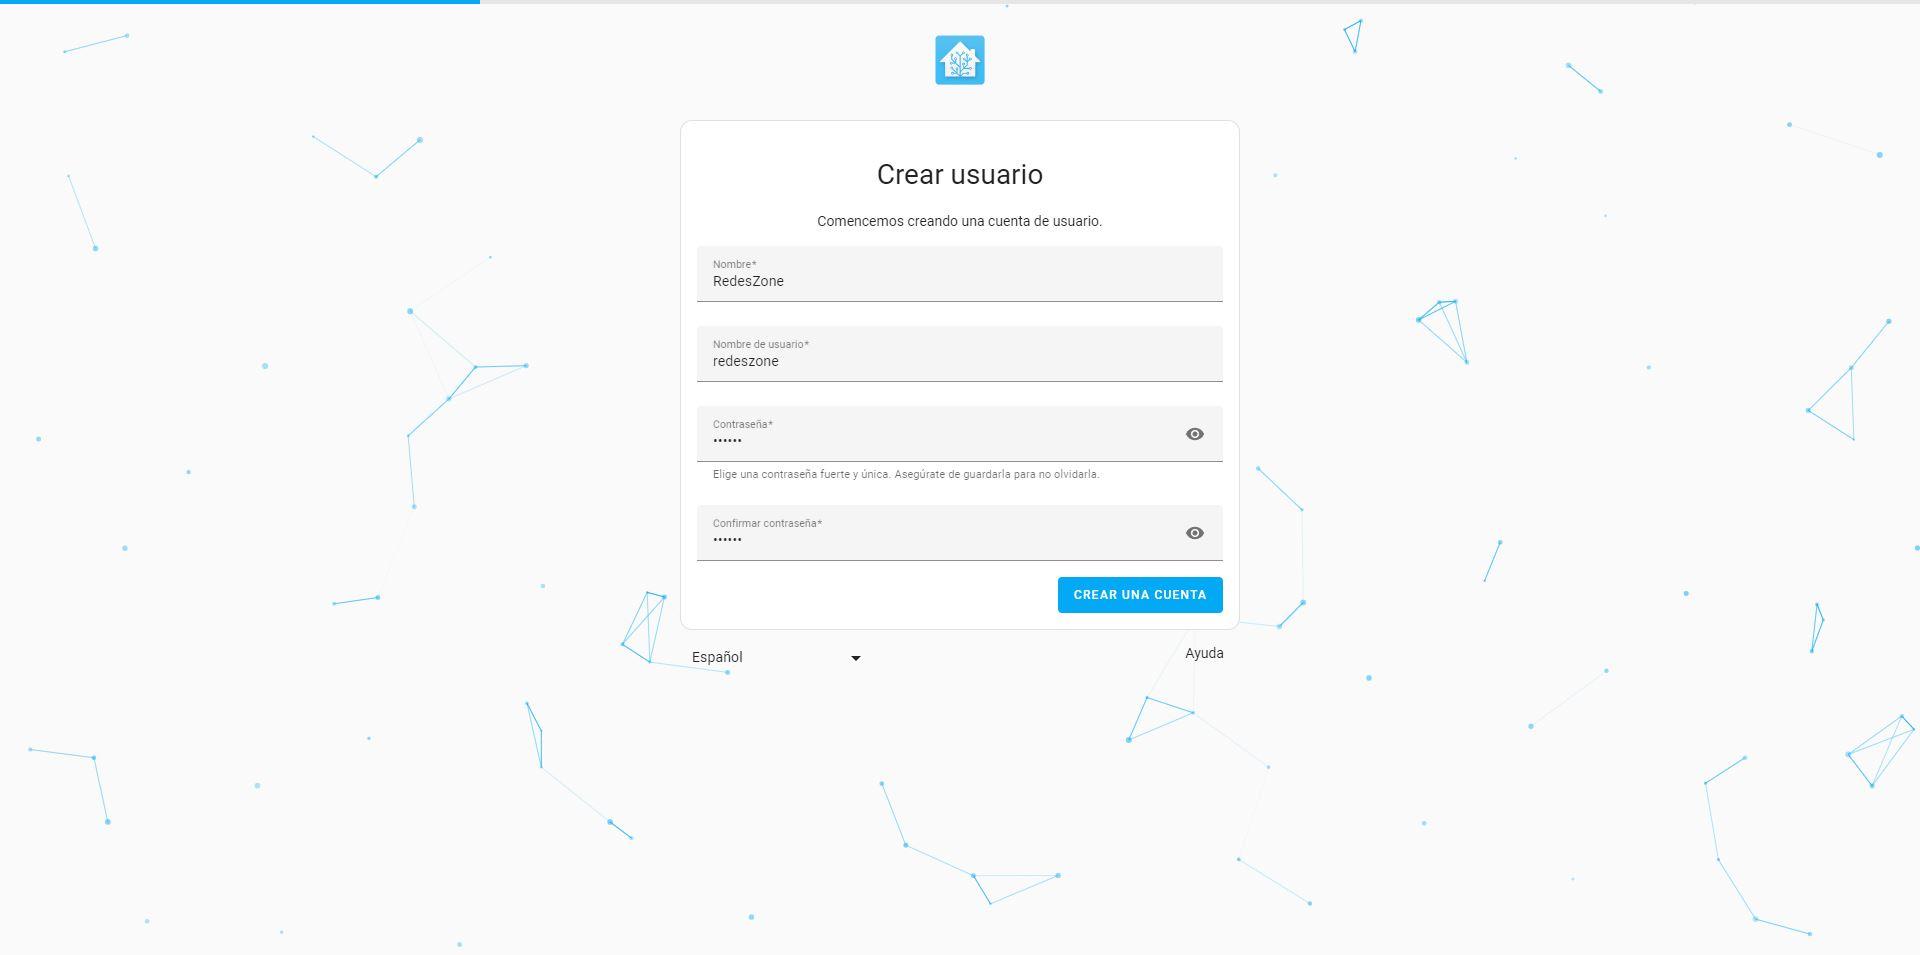
In the first menu it will ask us to create the administrator user, then we can create more administrator users without problems. We enter the name, username, password and confirm the password. Finally, we click on «Create an account«.
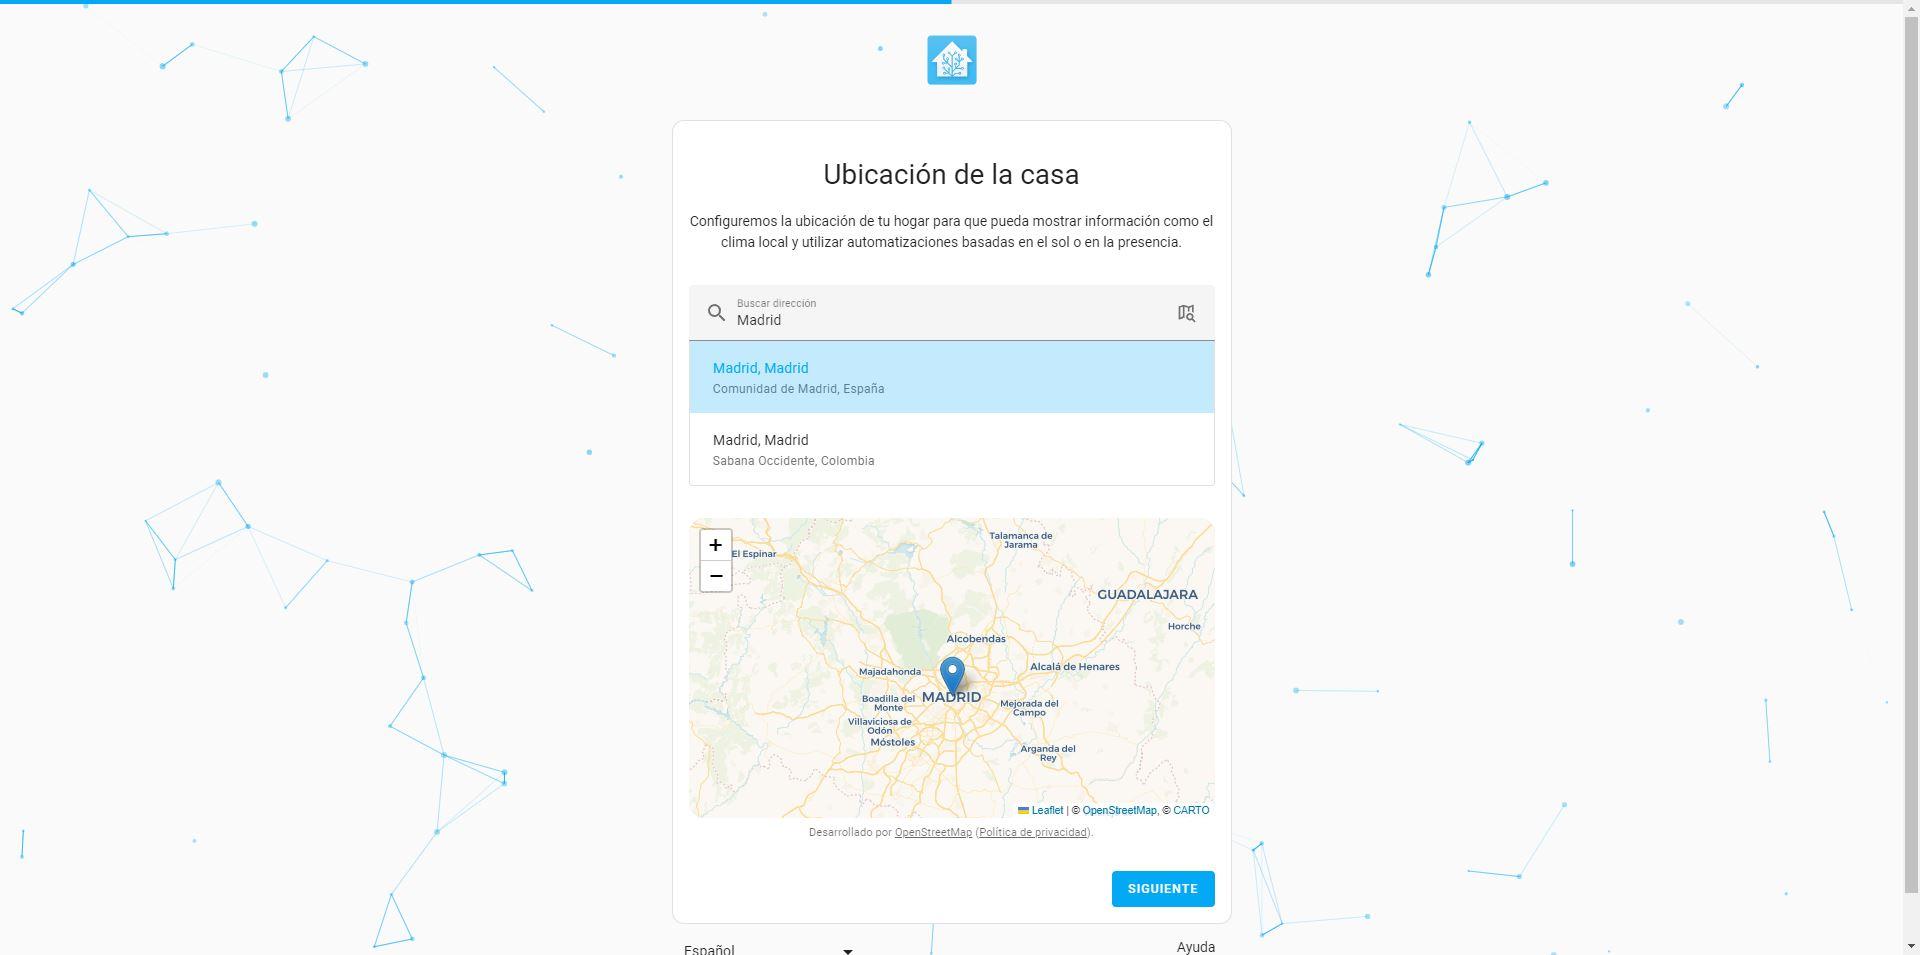
Now it asks us to locate our house, since we can carry out automations related to geolocation, it will also tell us the weather in our location based on the AEMET and much more. We enter the address and we can even move the blue pointer that we have on the map.
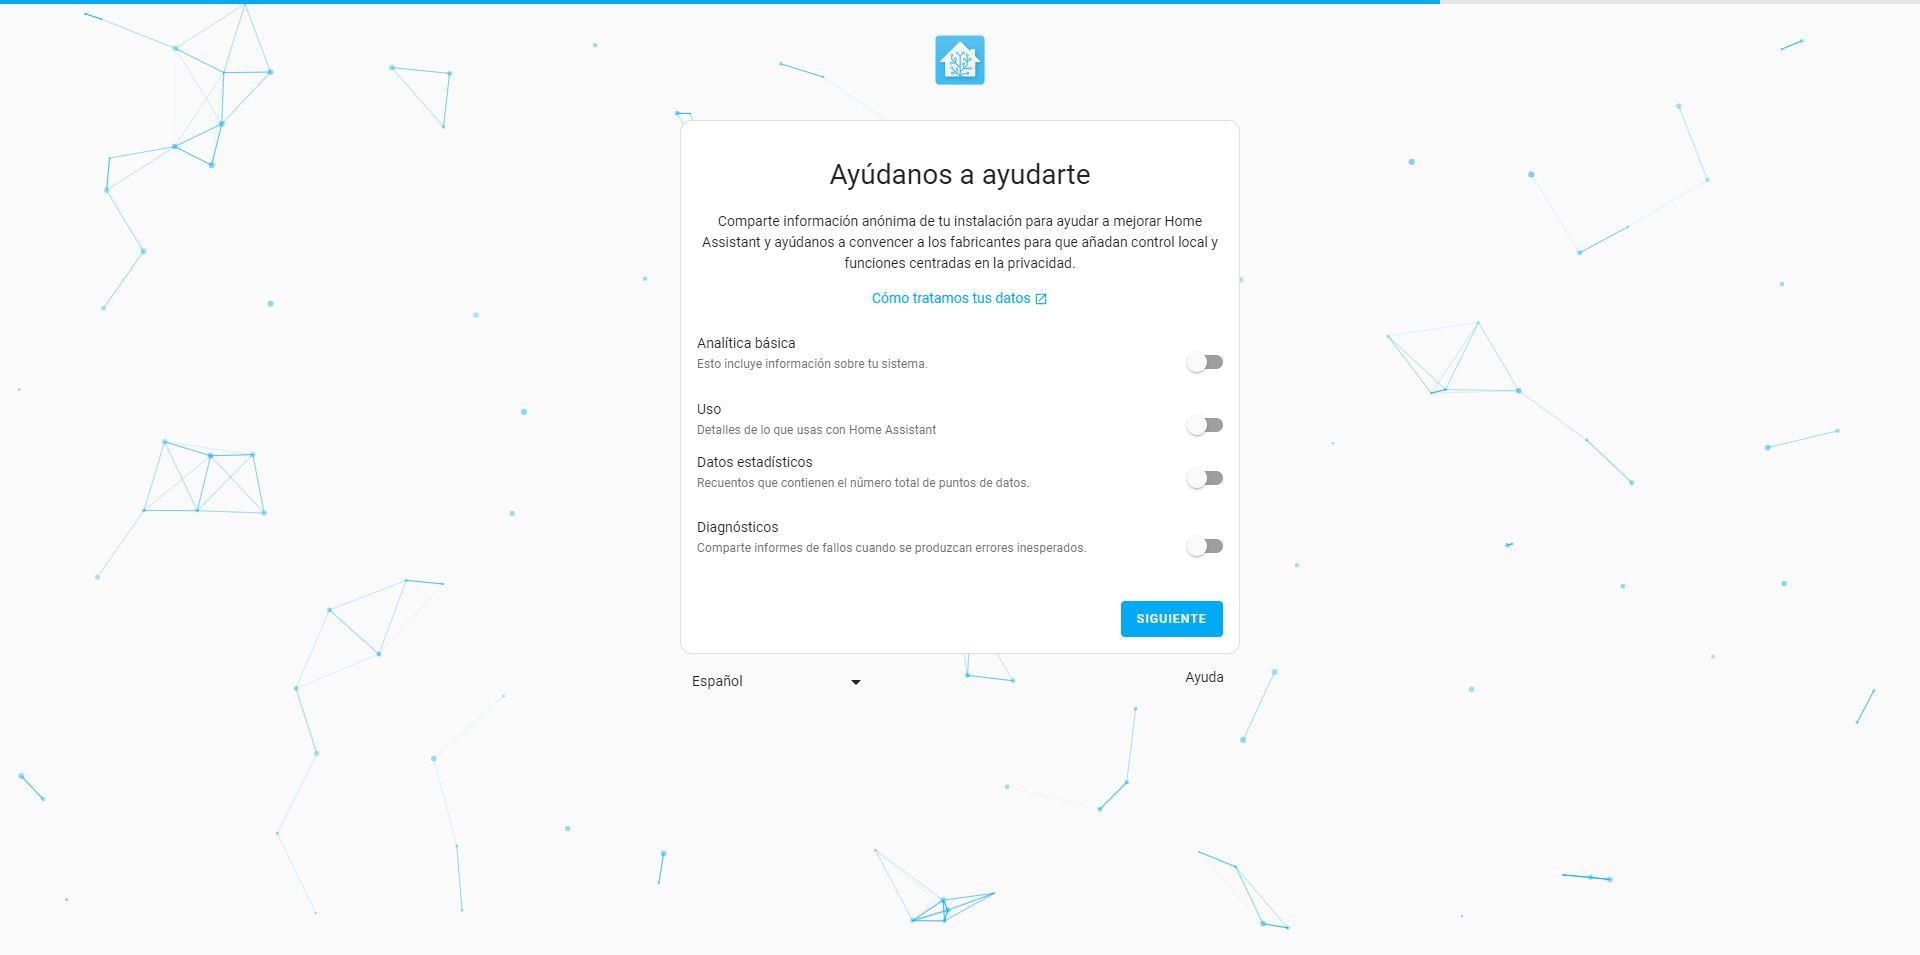
Now it will ask us if we want to share different system usage analytics, with the aim of correcting bugs and errors. By default everything is disabled, if we want to enable something we can do so to contribute to the development, but since Home Assistant is a private home automation system, by default everything is disabled. Now we click on “Next”.
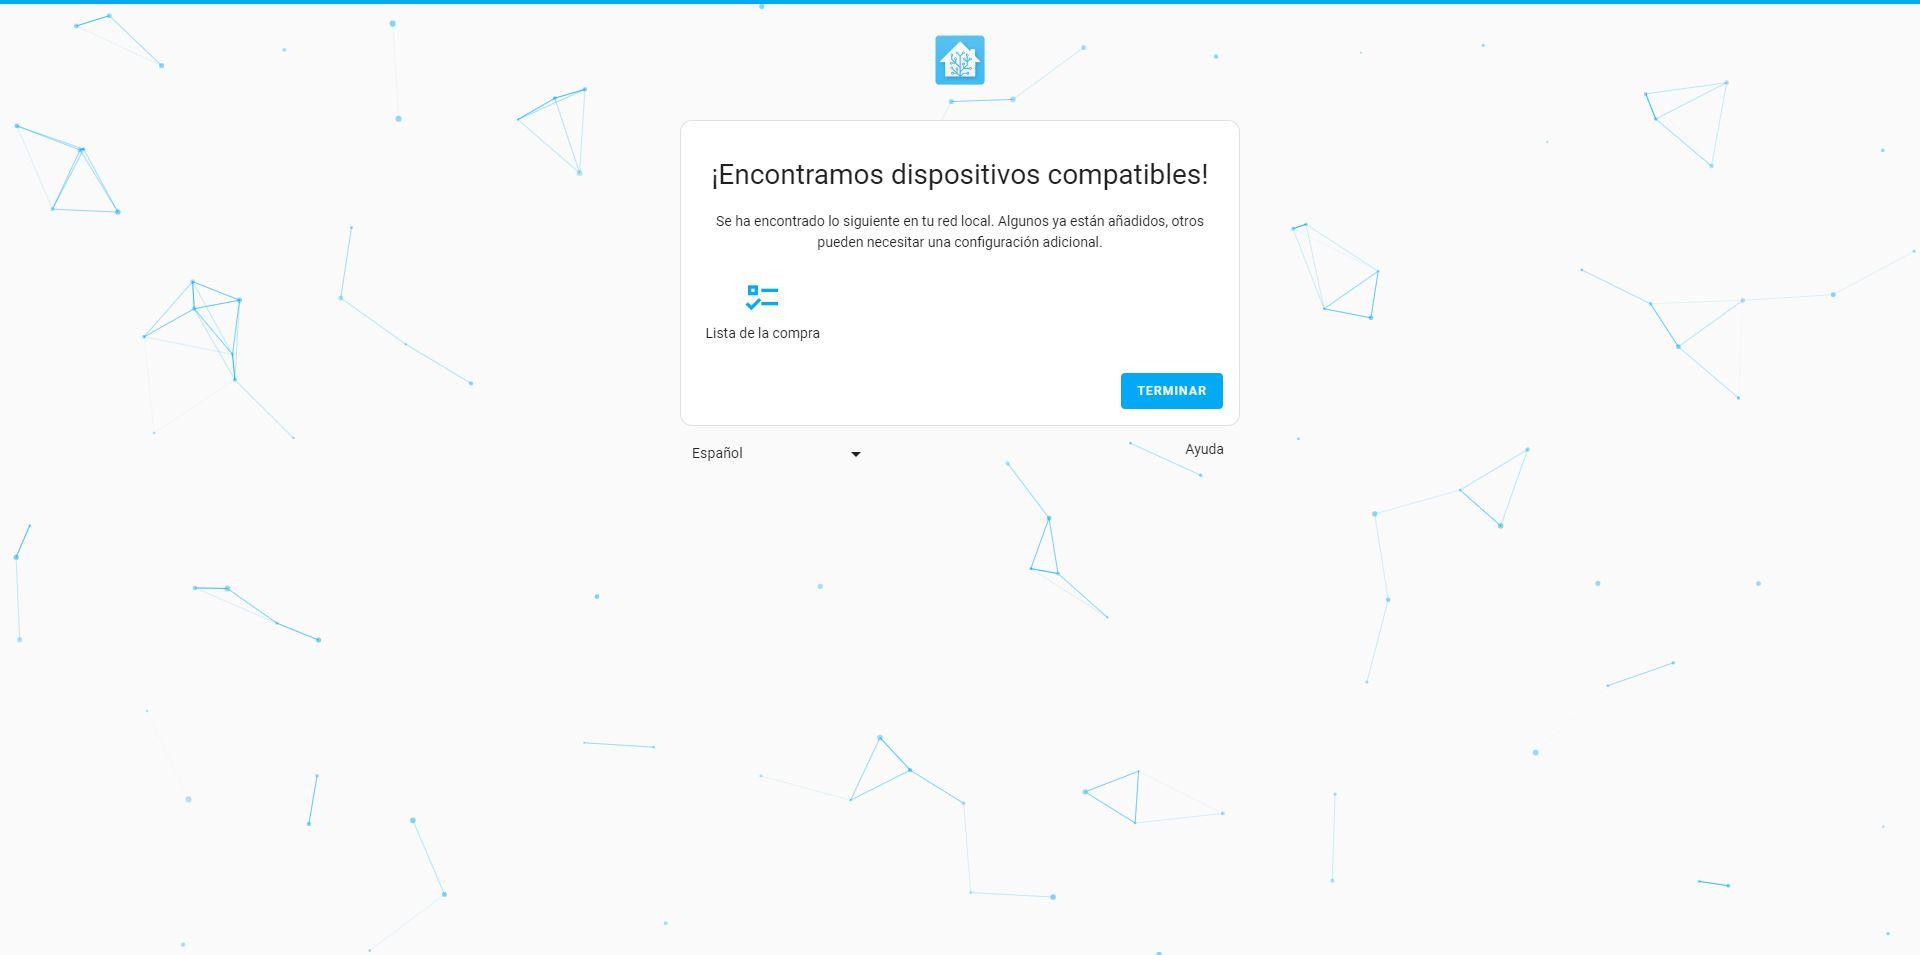
In the last menu, Home Assistant is capable of scanning the local home network in search of devices that we can integrate, if right now we do not have any, or we have put Home Assistant on a network where there are no devices, then nothing will come out. We click on «Finish«.
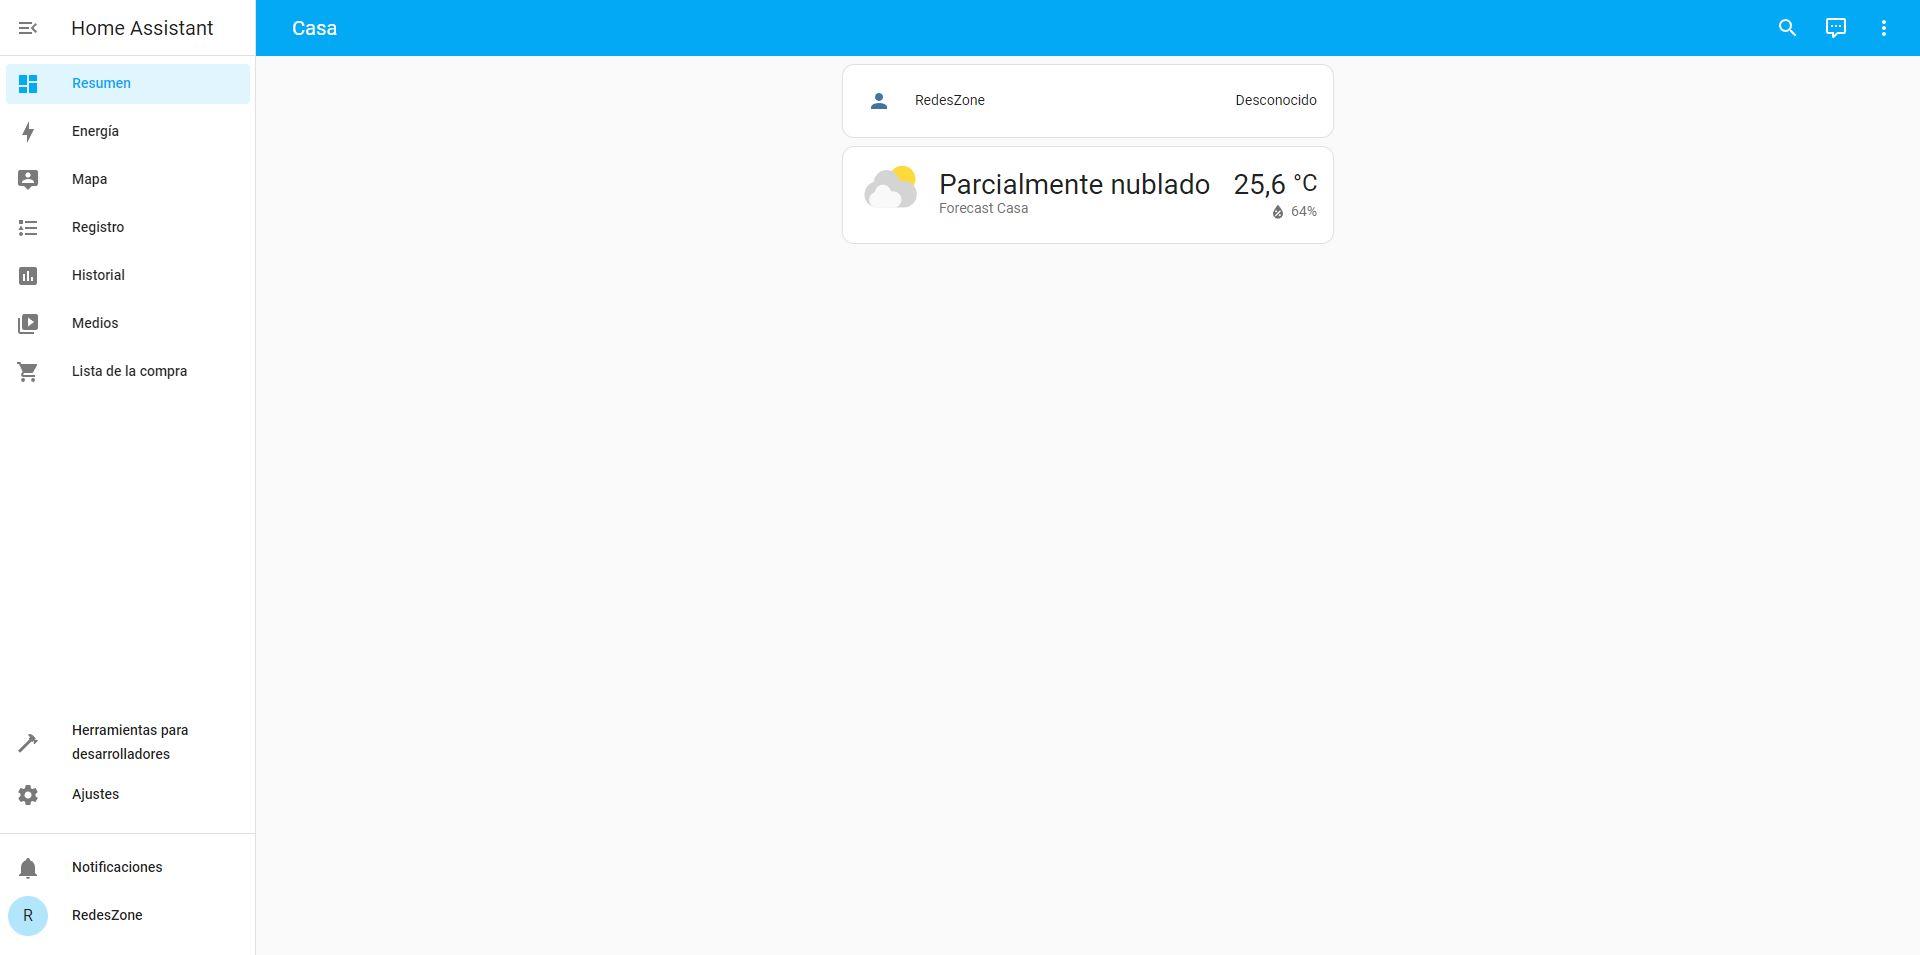
In the main menu we can see the username created, and also what the weather will be like in the location we have indicated. This is the main menu that we can customize as we want.
If we want to edit this main panel, we can do it very easily by clicking on the three vertical points, we choose «Edit dashboard«. Now we activate the option «Start with an empty control panel» to customize it as we want, and click on «Take the control«. If we click on «Add card» We can add different cards, buttons, information and more. Since we do not have any registered devices now, it is completely normal that we cannot register almost anything.
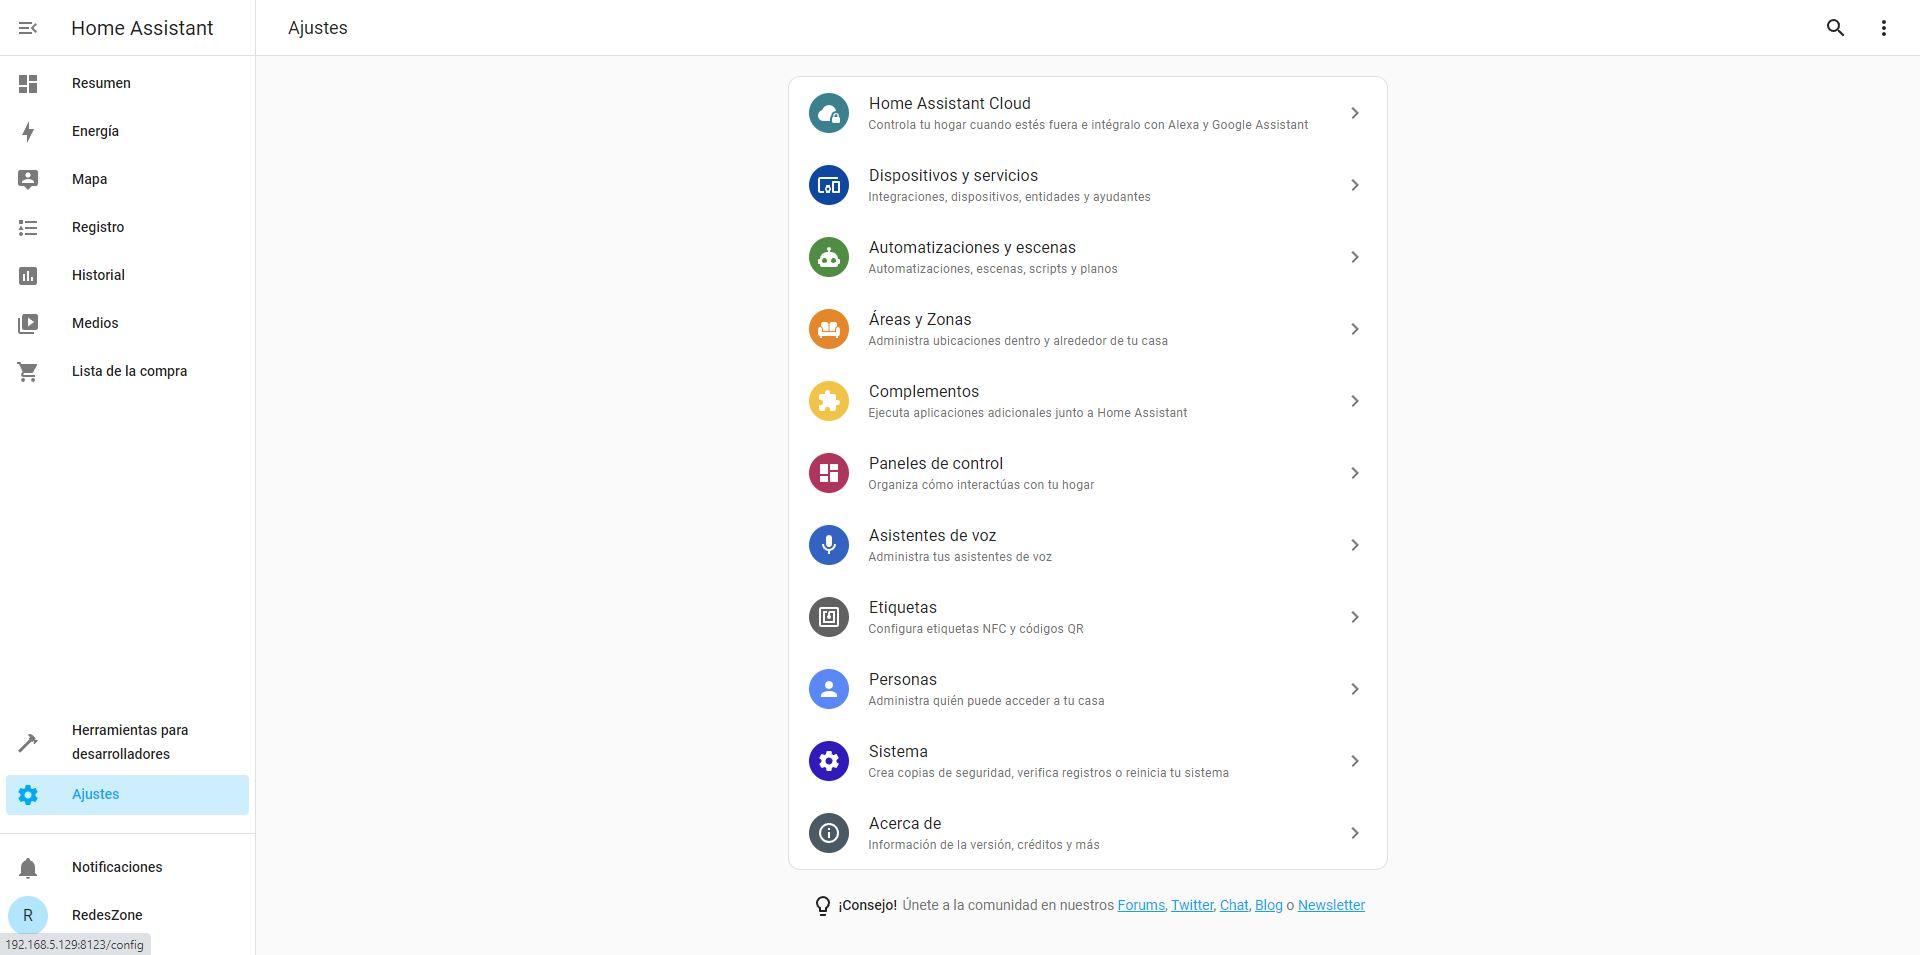
In the section of “Settings» is where we can access all the parts of Home Assistant, the most important ones are “Devices and services”, “Automation and scenes”. “Add-ons” and also “Control Panels” and “System”.
If we go to the “Integrations” section we can see all the default integrations that we have available and already configured by default.
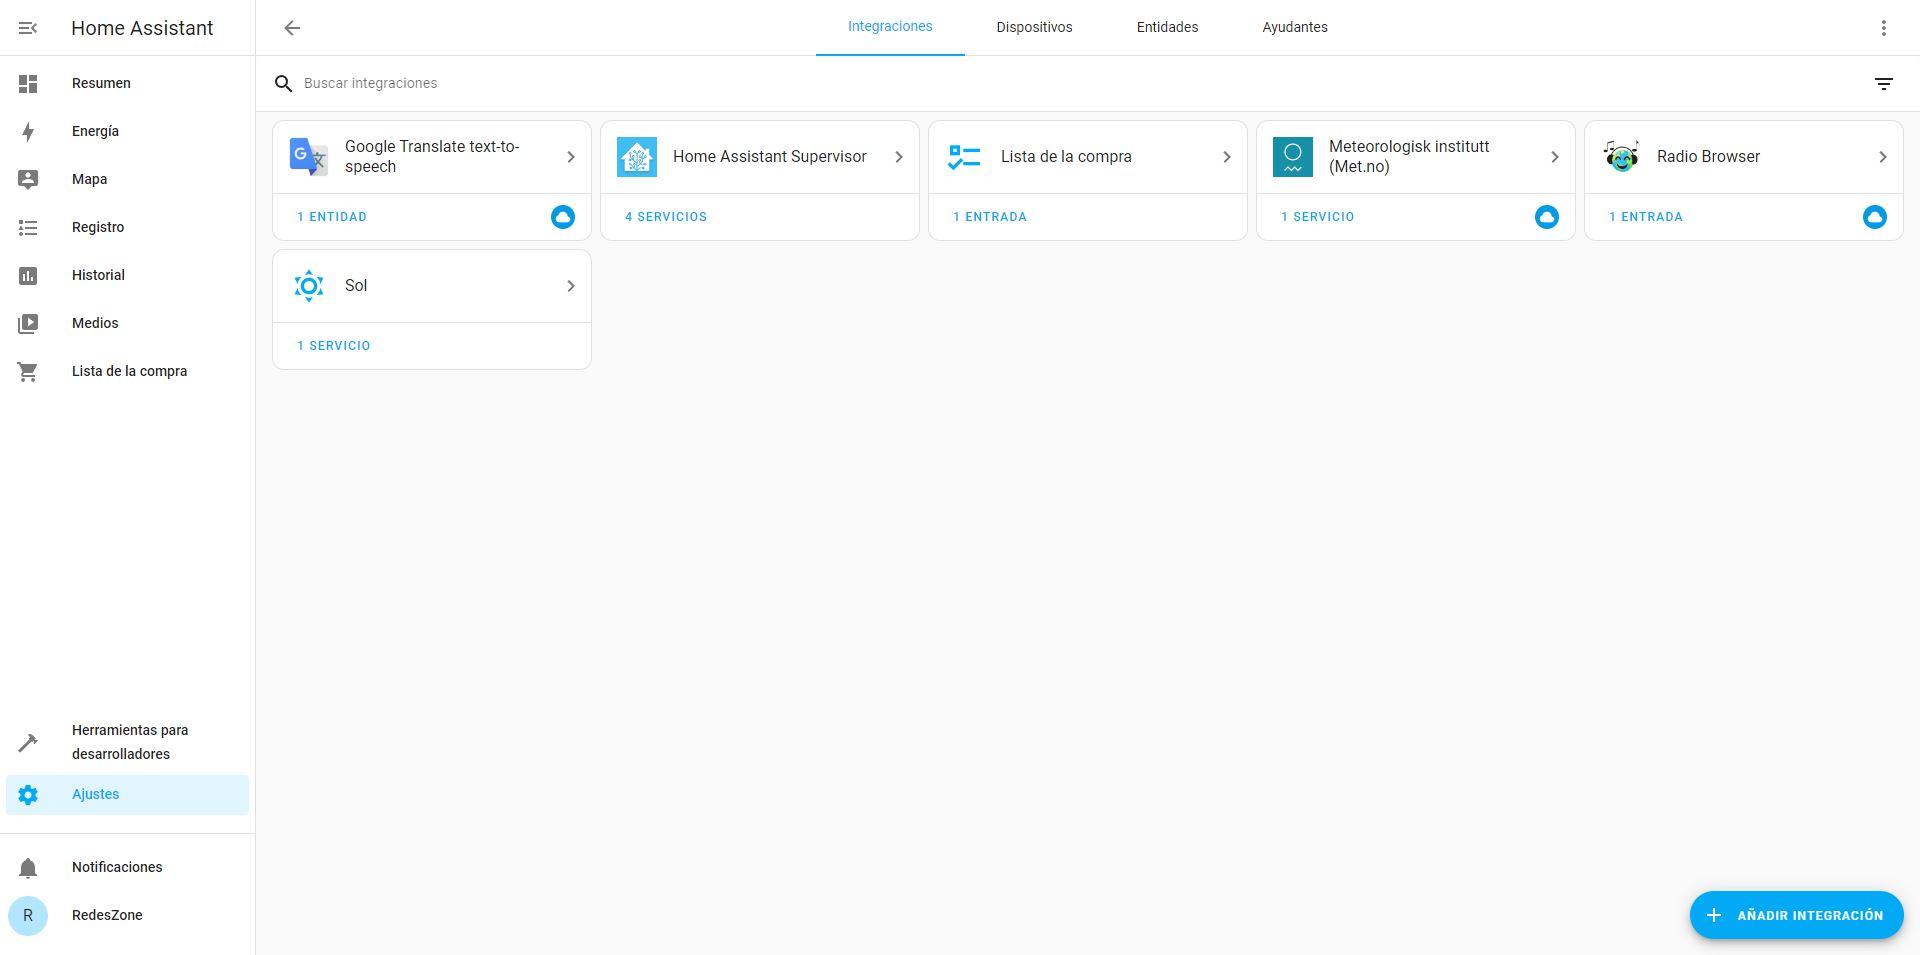
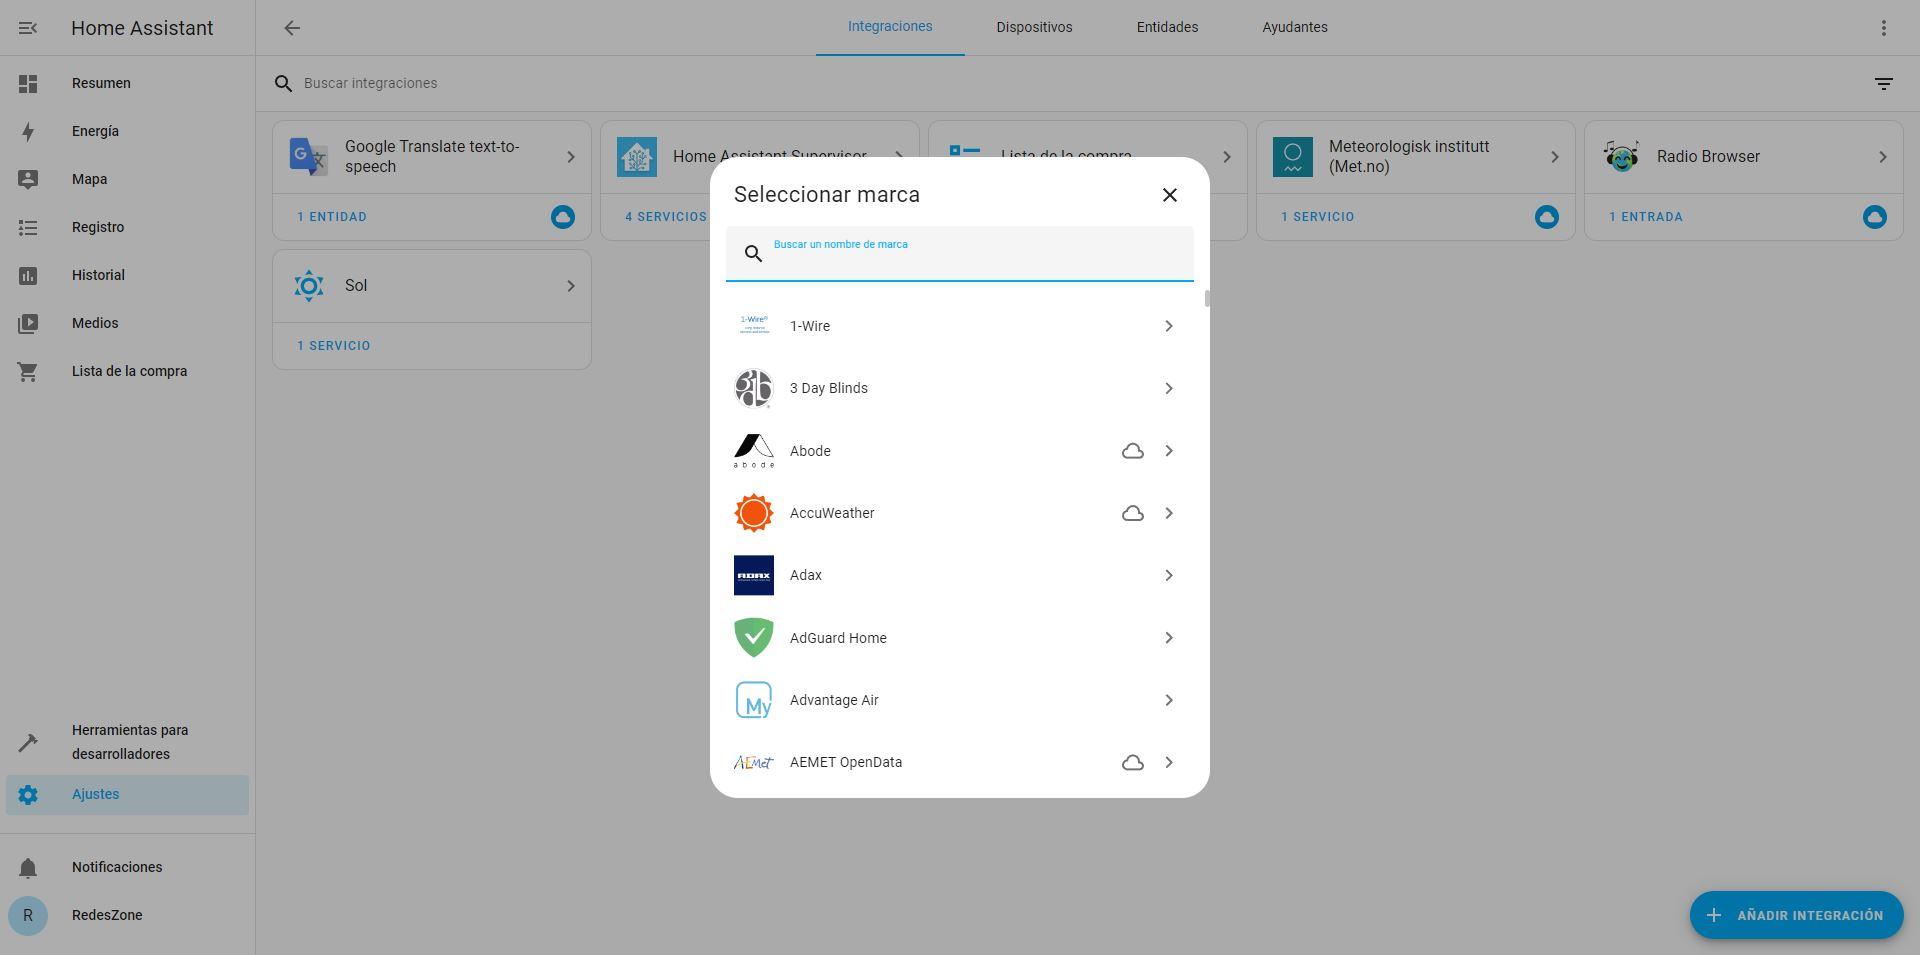
If we click on «Add integration«We will be able to see all the brands compatible with Home Assistant, in fact, there are many more, but they are unofficial, so we will have to install an unofficial integration store to be able to add it.
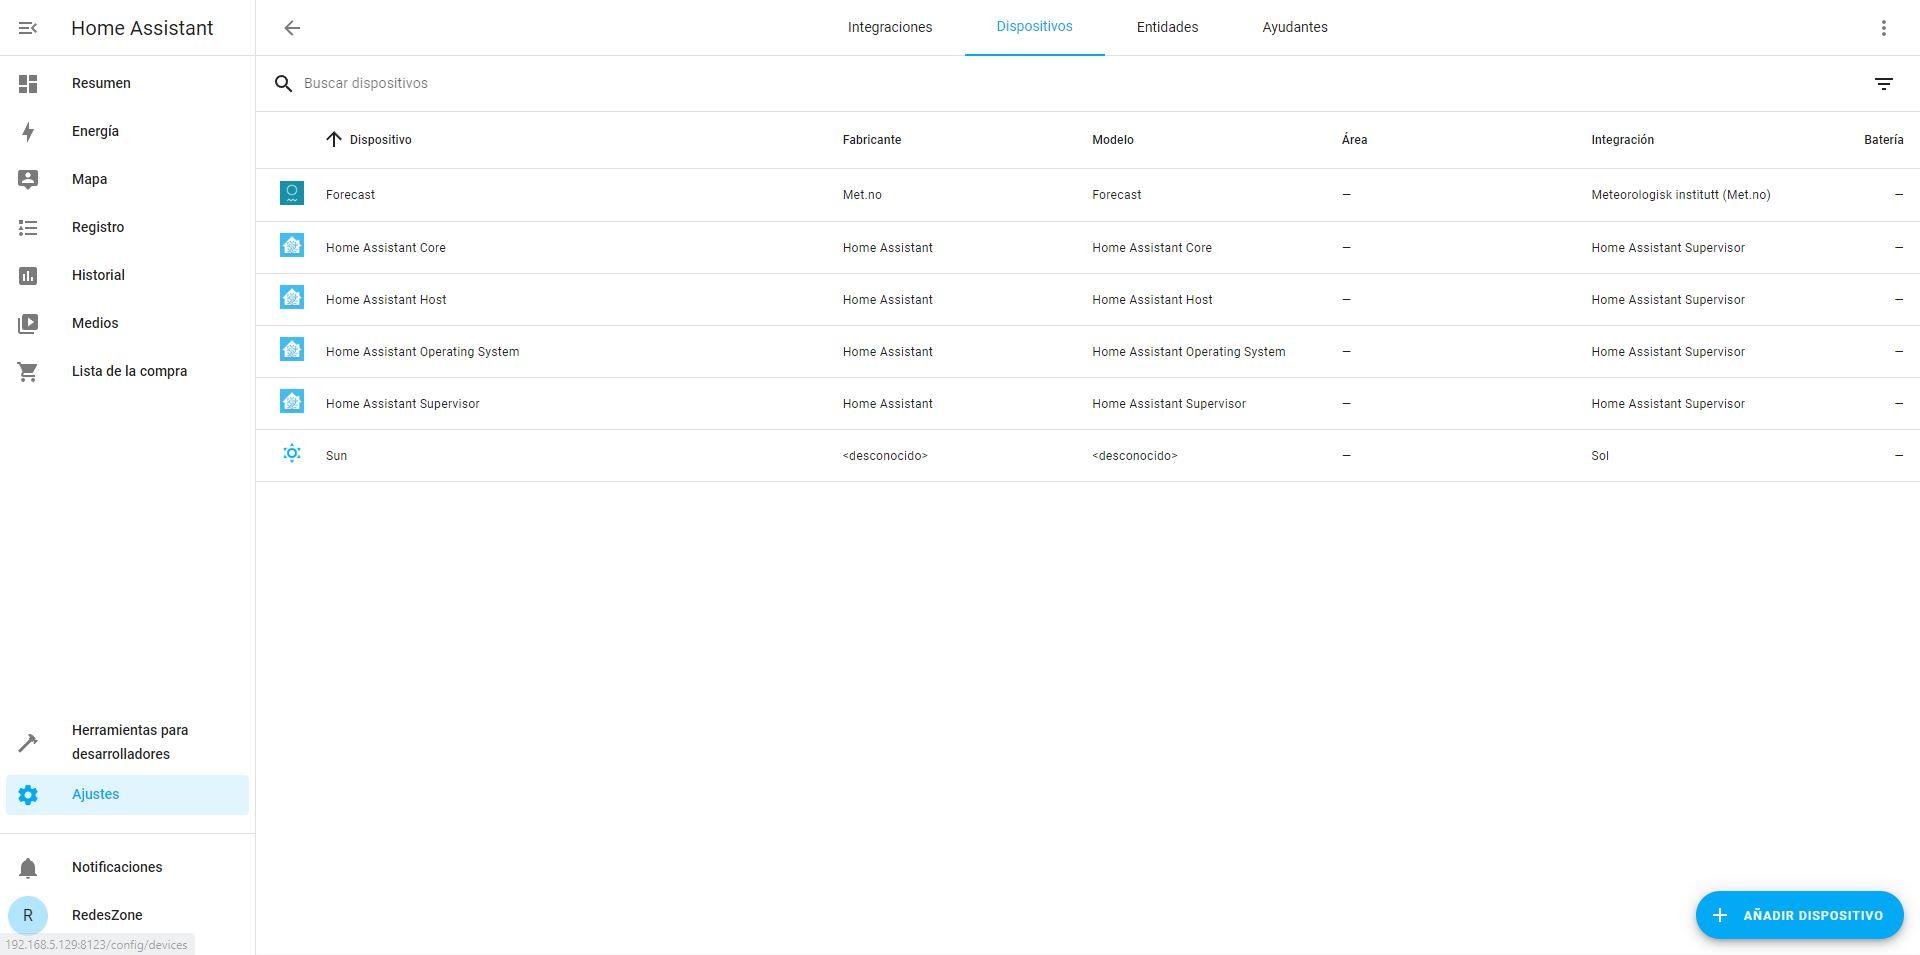
If we go to the «Devices» We can see all the ones we have right now, here we will see the list of all the home automation devices that we have integrated.
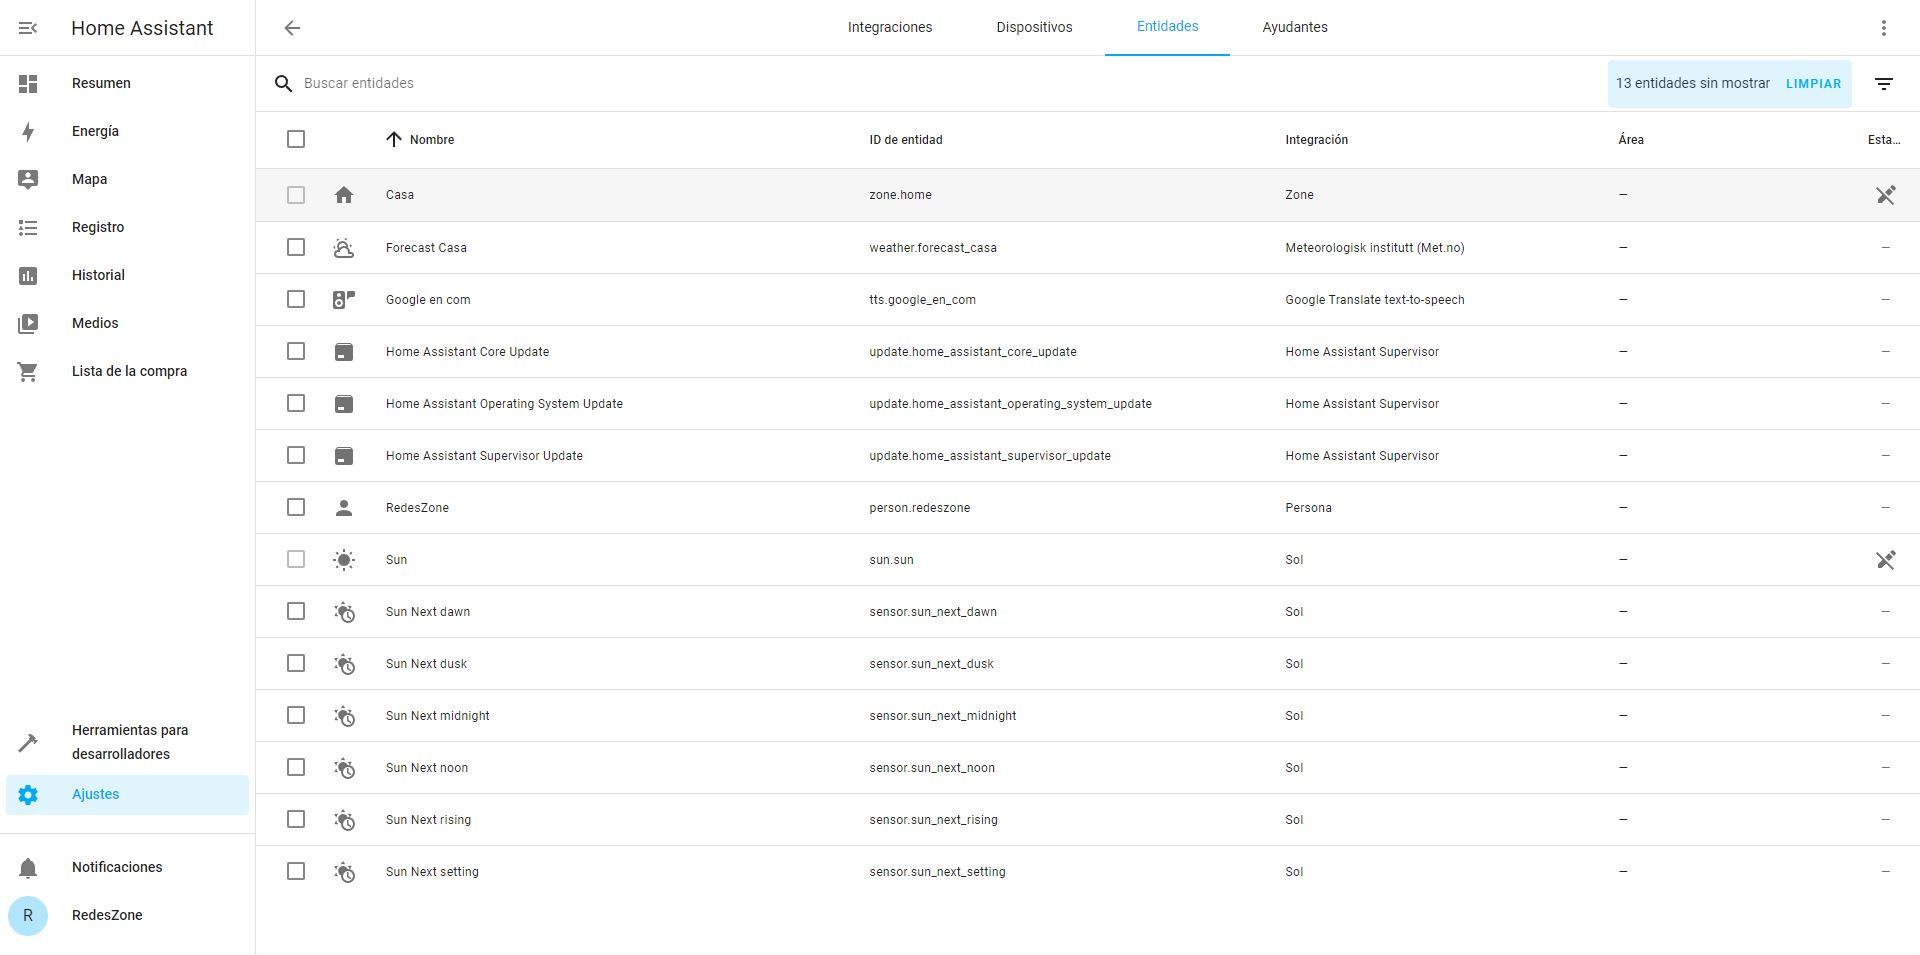
In the section of “Entities» is where we have the entities of the devices, a device can have five entities or fifty, it depends on what device it is and its possibilities.
As you can see, we have many configuration options and possibilities, later in RedesZone we will see much more about how to configure this complete home automation system in detail.
Conclusions
Home Assistant is a truly complete home automation system, its installation through VMware Workstation or VirtualBox on a Windows 11 operating system is really simple, it is not necessary to make complicated configurations to get it up and running. Although installing HAOS in a virtual machine is not the most efficient, the truth is that we have installed HAOS on a mini PC with an Intel N100 processor and it works really well, the only thing we will notice is a little slowness in the startup of the operating system and when it comes to restarting the system, but otherwise the operation is simply perfect.
As a recommendation, thanks to the use of HAOS in a virtual machine with VMware Workstation or VirtualBox, we have the possibility of making backup copies of the virtual machine in a very simple way. Not only will we make a backup of the configuration that we have inside, which we can also do to later restore it, but we can directly make a backup of the entire VM. Another very interesting possibility is to configure snapshots, this way, if during an update the operating system breaks and does not start for some reason, we can “go back” very easily thanks to these snapshots.