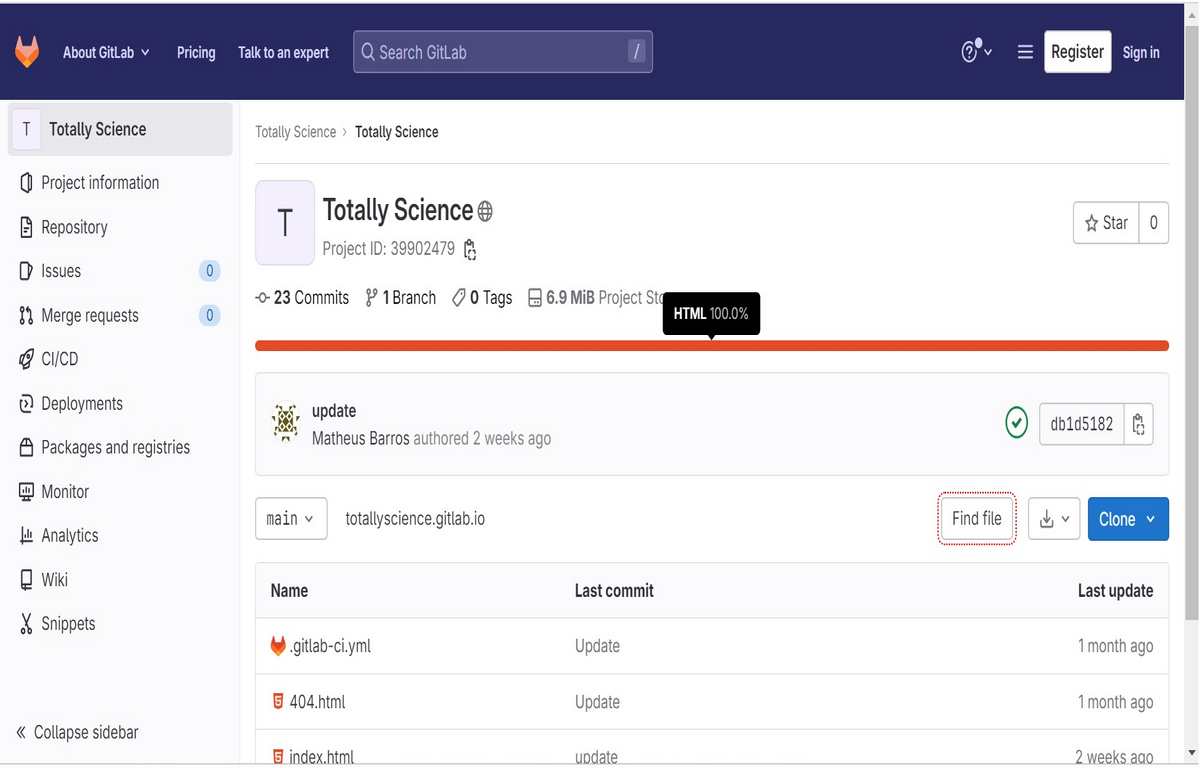
Totallyscience GitLab is a powerful tool that can help teams to improve their software development process. It is a free and open-source platform that provides version control, code review, and collaboration features for software development teams. It is based on Git, a distributed version control system, and offers a wide range of features that make it a popular choice for both small and large teams. It is a free and open-source platform, so it is a cost-effective option for many teams.
Whether you’re a beginner or an experienced developer, understanding the tips and tricks for utilizing GitLab can enhance your productivity and streamline your workflow. In this article, we’ll explore some valuable tips and tricks to help you make the most of Totallyscience GitLab.
What is Totallyscience GitLab?
Totallyscience GitLab is a feature-rich platform that empowers software development teams to collaborate effectively and streamline their workflows. By familiarizing yourself with the interface, leveraging project templates, utilizing issue boards and merge requests, incorporating CI/CD pipelines, and effectively tracking issues, you can maximize your productivity and take full advantage of GitLab’s capabilities.
Familiarize Yourself with the Interface:
GitLab’s interface may seem overwhelming at first glance, but taking the time to explore its features will pay off in the long run. Get familiar with the navigation menu, project pages, issues boards, and merge request workflows. Understanding how to navigate and access different functionalities will enable you to work efficiently and find what you need quickly.
Leverage Project Templates:
GitLab provides project templates that act as pre-configured repositories for specific use cases, such as Ruby on Rails, Python, or Node.js. These templates come with predefined file structures, common dependencies, and even CI/CD configurations. Utilizing project templates saves time and helps maintain consistency across projects. When creating a new project, consider using an appropriate template to kickstart your development process.
Take Advantage of Issue Boards:
Issue boards in GitLab are excellent tools for visualizing and managing project tasks. You can create custom boards to match your workflow, such as a Kanban board or a simple to-do list. Drag and drop issues between different columns to reflect their progress and keep track of your team’s work. Issue boards provide a clear overview of your project’s status and allow for effective collaboration.
Utilize Merge Requests:
Merge requests enable team members to propose changes, review code, and merge new code into a project. They are crucial for maintaining code quality and collaborating on larger features or bug fixes. When creating a merge request, ensure you provide a clear description, assign reviewers, and address any feedback promptly. Leveraging merge requests fosters effective collaboration and ensures code quality.
Continuous Integration and Deployment (CI/CD):
GitLab’s built-in CI/CD pipelines simplify the process of automating software testing, building, and deploying applications. Familiarize yourself with the .gitlab-ci.yml configuration file, which allows you to define your pipeline stages and scripts. Take advantage of the extensive documentation available to explore different stages, jobs, and integrations. Integrating CI/CD pipelines into your workflow enhances the development process and increases efficiency.
Issue Tracking and Management:
GitLab offers robust issue-tracking and management capabilities. When creating an issue, provide clear descriptions, add labels, assignees, and due dates. Utilize issue templates to maintain consistency and capture essential details. Additionally, leverage GitLab’s powerful search and filtering options to find and organize issues effectively. Properly utilizing issue tracking ensures that tasks are well-documented and progress is transparent.
Collaborate with Discussions:
Discussions in GitLab allow for threaded conversations directly within issues, merge requests, and commits. Engaging in discussions helps foster collaboration, gather feedback, and resolve questions or concerns efficiently. Remember to tag relevant team members using @mentions to ensure they are notified and can actively participate. Discussions are a valuable tool for effective communication and ensuring everyone is on the same page.
Creating Your First Project in Totallyscience GitLab
Totallyscience GitLab is a powerful and feature-rich platform for managing software development projects. If you’re new to GitLab, getting started with your first project can seem daunting. However, with a step-by-step approach, you’ll be able to create your project and begin collaborating with your team in no time. In this guide, we’ll walk you through the process of creating your first project in Totallyscience GitLab.
Step 1: Sign in to Totallyscience GitLab:
Visit the Totallyscience GitLab website and sign in to your account using your username and password. If you don’t have an account yet, you can create one by following the registration process.
Step 2: Navigate to the Projects Dashboard:
Once you’re signed in, you’ll be directed to the dashboard. Click on the “Projects” link in the top navigation menu to access the projects page.
Step 3: Create a New Project:
On the projects page, click the green “New Project” button to initiate the project creation process.
Step 4: Choose a Project Template or Import Existing Project:
Totallyscience GitLab provides several project templates for various programming languages and frameworks. You can choose a template that aligns with your project requirements and save time by utilizing pre-configured settings. Alternatively, if you have an existing project, you can choose to import it into GitLab.
Step 5: Configure Project Details:
In the project creation form, you’ll need to fill in some essential details. Start by providing a project name and a brief project description to help your team understand the purpose of the project. You can also specify the project’s visibility level, choosing between public, internal, or private, depending on your needs.
Step 6: Set Project Permissions:
GitLab allows you to define project-level permissions to control who can access and contribute to your project. You can grant access to specific team members, groups, or even the general public, based on your requirements. Take some time to define the appropriate permissions for your project.
Step 7: Initialize the Repository:
In GitLab, each project has its own repository where you can store and manage your source code. Choose whether you want to initialize the repository with a README file, which is often a good practice to provide an overview of your project. You can also choose to create a .gitignore file, which helps exclude certain files or directories from version control.
Step 8: Additional Project Configuration (Optional):
GitLab offers various additional configuration options, such as enabling issue tracking, project wiki, or project snippets. Review these options and select the ones that are relevant to your project. You can always modify these settings later if needed.
Step 9: Create the Project:
After you’ve filled in all the necessary information, click the “Create Project” button to create your project in Totallyscience GitLab. Once the project is created, you’ll be redirected to the project’s main page.
Congratulations! You have successfully created your first project in Totallyscience GitLab. Now you can start adding code, creating issues, setting up CI/CD pipelines, and collaborating with your team to bring your project to life.
Remember to explore GitLab’s extensive documentation and features to make the most of the platform. Whether you’re new to version control or an experienced developer, Totallyscience GitLab provides a comprehensive set of tools to streamline your development process and foster collaboration within your team.
Adding Members and Permissions to Your Project in Totallyscience GitLab
Once you have created a project in Totallyscience GitLab, the next step is to add team members and assign appropriate permissions to collaborate effectively. GitLab provides a flexible and granular permission system that allows you to control access to your project’s repositories, issues, and other features. In this guide, we’ll walk you through the process of adding members and managing permissions in your Totallyscience GitLab project.
Step 1: Navigate to Your Project’s Settings:
Sign in to your Totallyscience GitLab account and go to your project’s main page. Click on the “Settings” option located in the sidebar menu on the left-hand side.
Step 2: Access the Members Section:
Within the project settings, you’ll find a section called “Members” or “Access.” Click on this section to manage the project’s members and their permissions.
Step 3: Invite New Members:
To add new members to your project, you can either invite them via their GitLab usernames or email addresses. In the Members section, look for an “Invite a member” or similar button. Click on it, and a dialog box will appear where you can enter the usernames or email addresses of the individuals you want to invite.
Step 4: Set Member Permissions:
After inviting new members, you’ll need to define their permissions within your project. GitLab provides several levels of access control:
- Guest: Guests have the most limited access. They can view project details and contribute to discussions but cannot make any changes to the code or project settings.
- Reporter: Reporters can view project details, issues, and merge requests. They can also make comments and create new issues but cannot modify the code.
- Developer: Developers have read and write access to the repository, allowing them to push code changes, create branches, and submit merge requests.
- Maintainer: Maintainers have full access to the project. They can manage issues, merge requests, branches, and project settings. Maintainers can also add and remove other members and change their permissions.
- Owner: The project owner has the highest level of access and can perform all actions available within the project, including managing other owners.
Select the appropriate permission level for each member based on their roles and responsibilities within the project. You can assign multiple members the same permission level or grant different levels to different individuals.
Step 5: Manage Existing Members:
To modify the permissions of existing project members, locate their names in the Members section. You can click on a member’s name to access their individual settings. From there, you can adjust their permission level or remove them from the project if necessary.
Step 6: Groups and Subgroups:
If you have larger teams or want to manage permissions more efficiently, consider creating groups or subgroups in GitLab. Groups allow you to add multiple projects and set permissions at the group level, which automatically applies to all projects within the group. This helps streamline access management and reduces the need to individually set permissions for each project.
Step 7: Review and Refine Permissions:
Regularly review and refine the permissions of your project members to ensure they align with your project’s evolving needs. As your project progresses, you may need to add new team members, modify roles, or adjust access levels. Regularly assessing and updating permissions helps maintain a secure and efficient collaboration environment.
By following these steps, you can effectively add members and manage permissions in your Totallyscience GitLab project. GitLab’s flexible permission system allows you to control access to various project features, ensuring a secure and collaborative environment for your team. Remember to communicate any changes in permissions to your team members to ensure everyone is aware of their access levels and responsibilities within the project.
Using GitLab for Version Control
GitLab is a popular web-based Git repository management tool that provides powerful version control features. Whether you are working on a small project or collaborating with a large team, GitLab offers a comprehensive set of tools to manage and track changes to your codebase. In this guide, we’ll explore how to use GitLab for version control effectively.
Create a New Project:
Start by creating a new project in GitLab. This can be done by following the steps outlined in the “Creating Your First Project in Totallyscience GitLab” guide. Once your project is set up, you can begin using GitLab for version control.
Clone the Repository:
To work on your project locally, you’ll need to clone the GitLab repository to your development environment. Open your terminal or Git client and navigate to the desired directory. Then, use the following command to clone the repository:
git cloneReplace with the HTTPS or SSH URL of your GitLab repository. This command will create a local copy of your project on your machine.
Make Changes and Commit:
Now that you have the project on your local machine, you can make changes to the code. Use your preferred code editor or IDE to modify existing files or create new ones. Once you’ve made your changes, it’s time to commit them.
To commit your changes, use the following commands:
The git add . command adds all the modified files to the staging area, preparing them for the commit. Replace “Your commit message” with a descriptive message that explains the changes you’ve made.
Push Changes to GitLab:
After committing your changes locally, you need to push them to GitLab to update the remote repository. Use the following command:
git push originReplace with the name of the branch you’re working on. By default, the main branch is typically named master or main. This command sends your committed changes to the GitLab repository, making them available for collaboration and version control.
Branching and Merging:
GitLab provides powerful branching and merging capabilities. Branches allow you to work on different features or bug fixes independently. To create a new branch, use the following command:
git checkout -bReplace with the name of your new branch. Once you’ve completed your work on the branch, you can merge it back into the main branch or any other target branch using GitLab’s merge request functionality.
Managing Merge Requests:
Merge requests enable code reviews and collaboration among team members. In GitLab, you can create a merge request to propose changes from one branch to another. Team members can review the changes, leave comments, and suggest modifications before merging.
To create a merge request, go to your GitLab project’s page and click on the “Merge Requests” tab. Then, click on the “New merge request” button and follow the prompts to select the source and target branches.
Continuous Integration (CI) and Pipelines:
GitLab offers robust CI/CD capabilities to automate build, test, and deployment processes. By configuring CI pipelines, you can automatically run tests, build artifacts, and deploy your application whenever changes are pushed to the repository. GitLab provides a flexible configuration file (.gitlab-ci.yml) where you can define your pipeline stages, jobs, and scripts.
Take advantage of GitLab’s extensive CI/CD documentation to set up and customize your pipelines according to your project’s requirements.
Collaborating with Team Members:
GitLab provides several features to facilitate collaboration among team members. You can use issues to track and manage tasks, create discussion threads to provide feedback, and use code reviews to ensure code quality. GitLab’s web interface offers an intuitive and user-friendly experience for collaboration within your project.
By following these steps and utilizing GitLab’s version control features effectively, you can streamline your development process, collaborate seamlessly with team members, and maintain a well-documented history of changes to your codebase.
Remember to regularly pull the latest changes from the repository (git pull) to ensure your local copy is up to date with the remote repository. Additionally, explore GitLab’s advanced features, such as protected branches, project wikis, and code snippets, to further enhance your version control workflow.
Managing Issues in Totallyscience GitLab
Totallyscience GitLab provides a robust issue tracking system that allows you to efficiently manage and track tasks, bugs, and feature requests within your projects. Effectively utilizing GitLab’s issue management features can help you stay organized, collaborate with your team, and track the progress of your project. In this guide, we’ll explore how to manage issues in Totallyscience GitLab effectively.
Creating an Issue:
To create a new issue in GitLab, navigate to your project’s page and click on the “Issues” tab in the top navigation menu. Then, click on the “New issue” button to open the issue creation form. Provide a descriptive title and a detailed description of the issue, including any relevant information or steps to reproduce.
Assignees and Labels:
Assigning the appropriate team member to an issue helps clarify responsibility and ownership. In the issue creation form or the issue’s sidebar, you can assign one or more team members to the issue. Additionally, you can use labels to categorize and prioritize issues. GitLab provides default labels, but you can create custom labels specific to your project’s needs.
Milestones:
Milestones in GitLab allow you to group related issues together and track their progress as part of a larger goal or release. You can create milestones based on specific timelines or project milestones. Assigning issues to milestones helps provide context and visibility into their overall progress.
Commenting and Collaboration:
GitLab’s issue management features support collaboration through comments. Team members can leave comments on issues, provide feedback, ask questions, or provide updates. Utilize comments to engage in discussions, provide additional information, or track the status of an issue.
Issue Boards:
GitLab’s issue boards offer a visual way to manage and track the progress of your issues. You can create custom issue boards based on your preferred workflow, such as Kanban-style boards or simple to-do lists. Drag and drop issues between columns to reflect their progress and easily visualize the status of your project’s tasks.
Filtering and Searching:
GitLab provides powerful filtering and search capabilities to help you find specific issues or create custom views based on criteria such as assignee, labels, milestones, or due dates. Use the search bar or explore the advanced search options to quickly locate the issues you need.
Closing and Referencing Issues:
Once an issue is resolved or completed, you can close it in GitLab. Closed issues remain accessible for reference, but they are no longer considered active tasks. When closing an issue, you can optionally reference other issues, merge requests, or commits that are related to the issue. This cross-referencing helps maintain a clear history of the project’s development.
Notifications and Subscriptions:
GitLab allows you to customize your notification settings to stay informed about changes and updates to your issues. You can subscribe to specific issues or entire projects to receive notifications via email or in GitLab’s notification center. Ensure that you and your team members are subscribed to relevant issues to stay updated on their progress.
By effectively managing issues in Totallyscience GitLab, you can streamline your project’s development process, collaborate efficiently with your team, and keep track of important tasks and milestones. Take advantage of GitLab’s comprehensive issue-tracking features, including assignees, labels, milestones, and issue boards, to stay organized and ensure that tasks are completed successfully. Regularly review and update the status of issues, engage in discussions, and leverage the search and filtering capabilities to effectively manage your project’s issues.
Integrating Totallyscience GitLab with Your CI/CD Pipeline
Totallyscience GitLab offers powerful built-in Continuous Integration and Continuous Deployment (CI/CD) capabilities, enabling you to automate the process of building, testing, and deploying your applications. By integrating your GitLab repository with a CI/CD pipeline, you can streamline your development workflow, ensure code quality, and deliver your software more efficiently. In this guide, we’ll walk you through the steps to integrate Totallyscience GitLab with your CI/CD pipeline.
Step 1: Understanding CI/CD in GitLab:
Before diving into the integration process, it’s essential to understand the concept of CI/CD in GitLab. CI/CD involves automating the build, test, and deployment processes for your applications. GitLab uses a configuration file called .gitlab-ci.yml to define your CI/CD pipeline. This file specifies the stages, jobs, and scripts to be executed when changes are pushed to your repository.
Step 2: Configuring the .gitlab-ci.yml File:
In your GitLab project, create or modify the .gitlab-ci.yml file in the root directory of your repository. This file defines the pipeline stages and jobs you want to execute. Each job represents a specific task, such as building, testing, or deploying your application.
The .gitlab-ci.yml file uses YAML syntax and consists of a series of stages, jobs, and associated scripts or commands. Here’s a basic example:
stages:
- build
- test
- deploy
build_job:
stage: build
script:
- echo "Building your application here"

test_job:
stage: test
script:
- echo "Running tests here"

deploy_job:
stage: deploy
script:
- echo "Deploying your application here"
This example defines three stages: build, test, and deploy. Each stage has a corresponding job with its own script or commands. Modify the file according to your project’s requirements, incorporating the necessary build, test, and deployment steps.
Step 3: Commit and Push the .gitlab-ci.yml File:
After configuring your .gitlab-ci.yml file, commit it to your GitLab repository and push the changes. This will trigger the CI/CD pipeline, and GitLab will start executing the defined stages and jobs based on the configuration.
Step 4: Monitoring and Managing Your CI/CD Pipeline:
Once your CI/CD pipeline is running, you can monitor its progress and manage the results through the GitLab interface. GitLab provides a dedicated CI/CD section where you can view pipeline status, access logs, and investigate any issues that may arise.
Within the CI/CD section, you can explore various features, such as viewing test results, examining job artifacts, and configuring variables or environment-specific settings. Additionally, GitLab allows you to define custom rules, triggers, and notifications to fine-tune your CI/CD pipeline.
Step 5: Extending Your CI/CD Pipeline:
GitLab offers a wide range of features and integrations to extend and enhance your CI/CD pipeline. You can incorporate additional tools, such as testing frameworks, code quality analyzers, or deployment services, to further automate and improve your development process.
GitLab also supports different deployment strategies, including manual approvals, canary deployments, and rolling deployments, enabling you to tailor your deployment workflow to match your specific requirements.
Integrating Totallyscience GitLab with your CI/CD pipeline can significantly improve your development workflow by automating the build, test, and deployment processes. By configuring the .gitlab-ci.yml file and leveraging GitLab’s built-in CI/CD features, you can streamline your development pipeline, increase productivity, and ensure code quality. Regularly monitor and manage your CI/CD pipeline to address any issues promptly and continually enhance your development process.
Customizing Your Totallyscience GitLab Experience
Totallyscience GitLab provides a highly customizable environment that allows you to tailor your experience based on your preferences and project requirements. By exploring the various customization options available, you can optimize your workflow, enhance collaboration, and make the most of GitLab’s features. In this guide, we’ll walk you through some key customization options to help you personalize your Totallyscience GitLab experience.
- User Interface Customization: GitLab allows you to customize the user interface (UI) to match your preferences. Here are a few customization options you can explore:
- Theme and Appearance: GitLab provides different themes, such as light and dark, to customize the overall appearance of the UI. You can choose a theme that suits your visual preferences or improves readability.
- Navigation and Layout: GitLab offers flexibility in organizing the navigation menu and layout. You can customize the sidebar, rearrange menu items, or collapse sections to declutter the interface and prioritize the features you use most.
- Dashboard Widgets: GitLab’s dashboard can be customized by adding and rearranging widgets. You can choose to display project activity, issue boards, merge requests, or other relevant information on your dashboard.
- Project Settings Customization: Within your GitLab projects, you have several customization options to optimize your workflow and collaboration:
- Repository Settings: GitLab allows you to configure repository-specific settings such as protected branches, merge request approvals, and repository visibility. Adjust these settings based on your project’s requirements and security considerations.
- Labels and Milestones: Custom labels and milestones help categorize and prioritize issues, making it easier to track progress. Consider defining labels and milestones specific to your project’s needs and workflows.
- Issue Templates: GitLab enables you to create custom issue templates to standardize issue creation. Templates can include predefined sections, instructions, or guidelines, ensuring consistent and informative issue reporting.
- Project Integrations: GitLab supports numerous integrations with external services, such as project management tools, chat applications, or deployment services. Explore and configure integrations that align with your project’s ecosystem to streamline collaboration and automation.
- Notifications and Alert Settings: GitLab provides granular control over notifications and alerts to keep you informed about project activity. Customize your notification settings to receive email notifications for specific events, mentions, or discussions. You can also configure notifications through the GitLab interface or via webhooks to connect with other notification services.
- Keyboard Shortcuts: Efficient navigation and interaction are crucial for productivity. GitLab offers keyboard shortcuts that allow you to perform common actions quickly. Take some time to familiarize yourself with the available shortcuts and incorporate them into your workflow to expedite your GitLab experience.
- CI/CD Pipeline Configuration: GitLab’s CI/CD pipelines are highly customizable. You can define different stages, jobs, and scripts in the .gitlab-ci.yml configuration file to suit your project’s build, test, and deployment requirements. Customize the pipeline configuration to incorporate specific testing frameworks, code quality checks, or deployment steps that align with your development process.
- Snippets and Templates: GitLab provides the ability to create and manage code snippets and templates. Snippets allow you to save and share reusable code fragments, while templates enable you to create predefined files or code structures. Leverage snippets and templates to save time, promote consistency, and facilitate collaboration across your projects.
- Project Wiki: GitLab’s project wiki feature allows you to create and maintain project-specific documentation. Customize your project’s wiki by adding pages, organizing content, and linking relevant information. Keep the wiki up to date with project guidelines, tutorials, or FAQs to ensure easy access to essential documentation.
By customizing your Totallyscience GitLab experience, you can optimize your workflow, improve collaboration, and tailor the platform to meet your project’s specific requirements. Explore the available customization options, experiment with different settings, and adapt GitLab to your preferences and workflows. Regularly review and refine your customizations to ensure they align with the evolving needs of your projects. With a personalized GitLab experience, you can enhance productivity and maximize the benefits of this powerful collaboration platform.
Totallyscience GitLab FAQs: Common Questions Answered
Q1: What is Totallyscience GitLab?
Ans: Totallyscience GitLab is a web-based Git repository management tool that provides version control, issue tracking, collaboration, and CI/CD capabilities. It allows teams to efficiently manage software development projects, track changes, and automate various aspects of the development lifecycle.
Q2: What is the difference between Git and Totallyscience GitLab?
Ans: Git is a distributed version control system that tracks changes to files and enables collaboration among developers. Totallyscience GitLab, on the other hand, is a complete platform built on top of Git. It adds features like issue tracking, project management, code reviews, and CI/CD pipelines, making it a comprehensive solution for software development teams.
Q3: Is Totallyscience GitLab free to use?
Ans: Totallyscience GitLab offers both a free and open-source Community Edition (CE) as well as a paid Enterprise Edition (EE) with additional features and support. The CE edition is free to use and suitable for small teams and personal projects, while the EE edition caters to larger organizations with more advanced needs.
Q4: How do I create an account on Totallyscience GitLab?
Ans: To create an account on Totallyscience GitLab, visit the registration page on the GitLab website and follow the prompts to sign up. You’ll need to provide a valid email address and choose a username and password for your account.
Q5: How do I create a project in Totallyscience GitLab?
Ans: After signing in to your Totallyscience GitLab account, click on the “Projects” link in the top navigation menu. On the projects page, click the “New Project” button and follow the prompts to create a new project. You can choose project templates, set permissions, and configure other settings during the project creation process.
Q6: How do I collaborate with others in Totallyscience GitLab?
Ans: Totallyscience GitLab provides various collaboration features. You can invite team members to your project, assign them roles and permissions, and collaborate on code using merge requests. GitLab also offers issue tracking, discussions, and wikis for efficient collaboration and knowledge sharing among team members.
Q7: How do I set up a CI/CD pipeline in Totallyscience GitLab?
Ans: To set up a CI/CD pipeline in Totallyscience GitLab, you need to define your pipeline stages, jobs, and scripts in the .gitlab-ci.yml configuration file. This file resides in the root directory of your project’s repository. Once configured, GitLab will automatically execute the defined pipeline stages whenever changes are pushed to the repository.
Q8: Can I integrate Totallyscience GitLab with other tools and services?
Ans: Yes, Totallyscience GitLab supports integrations with various tools and services. You can integrate with issue trackers, project management tools, chat applications, and deployment services. GitLab also provides an API that allows you to build custom integrations to suit your specific needs.
Q9: How can I customize my Totallyscience GitLab experience?
Ans: Totallyscience GitLab offers customization options to personalize your experience. You can customize the user interface, configure project-specific settings, set up notifications, define keyboard shortcuts, and tailor CI/CD pipelines to match your preferences and project requirements.
Q10: Is my code safe and secure on Totallyscience GitLab?
Ans: Totallyscience GitLab takes security seriously and provides various features to ensure the safety of your code. It supports encryption, two-factor authentication, access controls, and regular security updates. Additionally, GitLab offers self-hosted options, allowing you to have full control over the security of your code.
These are some common questions and answers about Totallyscience GitLab. For more detailed information and specific use cases, it is recommended to consult the official GitLab documentation or reach out to the GitLab community for assistance.
Conclusion
Totallyscience GitLab is a powerful platform that offers a wide range of features and functionalities for software development teams. From version control and issue tracking to collaboration and CI/CD pipelines, Totallyscience GitLab provides a comprehensive solution to streamline your development process and enhance productivity.
In this guide, we covered various aspects of using Totallyscience GitLab, including creating projects, managing members and permissions, utilizing issue tracking, integrating with CI/CD pipelines, and customizing your experience. By following these guidelines, you can leverage the capabilities of Totallyscience GitLab to effectively collaborate with your team, track changes, automate workflows, and deliver high-quality software.
Remember, as you explore Totallyscience GitLab further, referring to the official documentation, community resources, and engaging with the GitLab community will provide you with additional insights and support.
Embrace the power of Totallyscience GitLab, tailor it to your needs, and unlock the full potential of your software development projects. Happy coding!