One of the main problems that users encounter after the launch of Windows 11 is that millions of computers were no longer compatible with this new system. This is because Microsoft changed the requirements to be able to install it, making it much stricter and leaving older PCs out of support, even if they were running Windows 10. Luckily, this is not a real restriction, and there are several ways to bypass it to be able to launch this new system on any PC.
If you’re thinking about upgrading your PC to Windows 11, but you’re having compatibility issues, here’s how to fix them.
Use the Insider Program
During the betas, all users could join the Insider program, whether or not the PC was supported, to install Windows 11. However, when the operating system reached its final version, Microsoft removed this possibility, leaving only those with a Compatible PCs could join the development program. Luckily, there is a way around this limitation.
What we must do is join the Insider program in Windows 10, specifically the Release Preview channel. Once inside, we restart the PC and open the registry editor to go to the HKEY_LOCAL_MACHINE > SOFTWARE > Microsoft > WindowsSelfHost > Applicability section. Inside we will locate an entry called “BranchName”. We open it by double clicking and change its value to “Dev”.
We restart the computer and that’s it. We will already be within the Insider Dev channel. When searching for new Windows updates, the new Windows 11 will appear, and we can update to it for free.
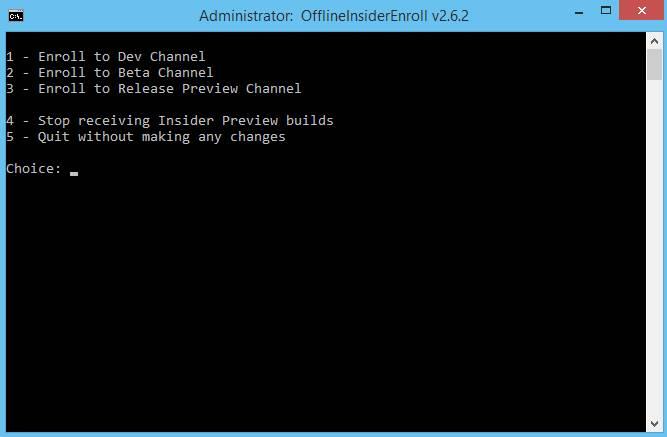
Another way we can do this is with the “OfflineInsiderEnroll” tool, thanks to which we will be able to join the Insider program even without a Microsoft Account, and without having to edit the registry.
Use a patched USB
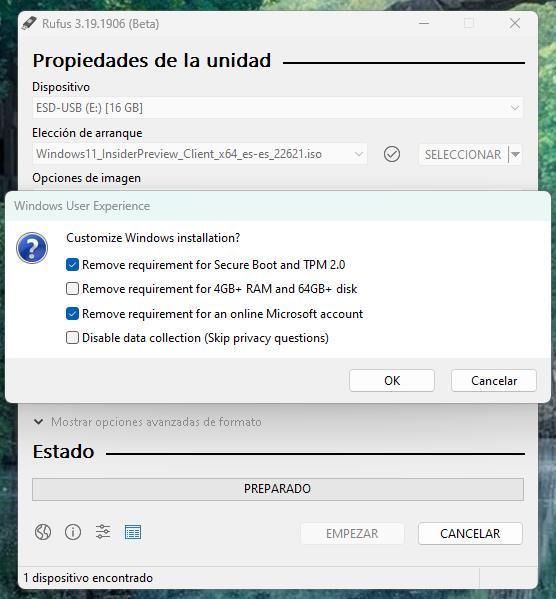
If we don’t mind updating the operating system from scratch, what we can do is patch the installation media so that it allows the OS to be installed on a PC that does not meet the requirements. For this, what we have to do is download windows 11 on the computer, and use the program Rufus to create our installation USB.
When we try to mount the Windows 11 ISO we can see a window like the following. From it we can eliminate the requirements that we want: Secure Boot, RAM and even the use of a Microsoft Account. In this way, the requirements will not be a problem.
After starting the PC with this USB we can install Windows 11 without problem.
Update the components of your PC
Finally, it is still worth upgrading the components of the PC to be able to install the new system without modifications. For this, it is necessary to use a tool, such as PC Health Check, which will analyze our PC and tell us exactly what the problem is.
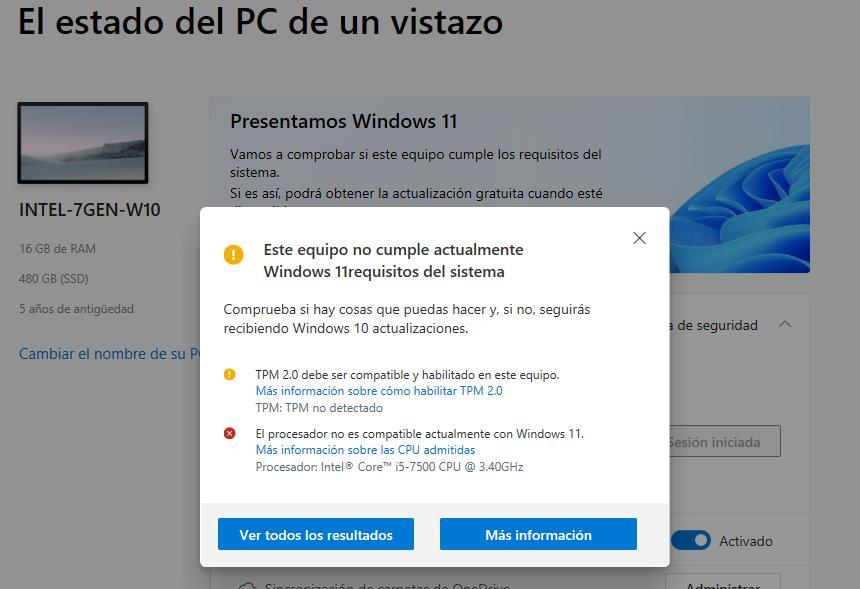
For example, we can see if the problem is that TPM 2.0 is not activated, if we don’t have enough RAM or SSD, or if there is a compatibility problem with a driver. Whatever the reason, we must act accordingly. Some solutions will be simple, such as enable TPM 2.0 in BIOSwhile others will give us more headaches, such as installing more RAM or changing the processor or motherboard.