Of all the adjustments that we can make in Windows to make our Internet connection speed much faster, changing the DNS is one of the most important. Depending on which DNS we use, the loading speed of a web page may be shorter or longer. Most users use Google DNS by default, however, it is not always the best option.
In addition to Google’s DNS, we can also use other DNS such as those offered by OpenDNS or Cloudflare, to name the best known, although they are not the only ones.
Alternatives to Google DNS
As we have commented above, Google’s DNS is the most used. These are 8.8.8.8 for the Primary and 8.8.4.4 for the Secondary. If the loading speed offered by these servers is not the best of all, we can use the ones that we show you below.
- cloudflare: 1.1.1.1 and 1.0.0.1 for the primary and secondary respectively.
- OpenDNS: 208.67.222.222 for the primary and 208.67.220.220 for the secondary.
- Quad9: 9.9.9.9 for the primary and 149.112.112.112 for the secondary.
Modify Windows DNS
Windows puts at our disposal different methods to change the default DNS, those of Google, for one of the different alternatives that we have shown you in the previous section.
- third party application. The fastest and easiest solution of all is to use the DNS Jumper application, an application that allows us to change the Windows DNS quickly and easily. In addition, it includes the best-known DNS, so it is not necessary to manually enter the address of the ones we want to use.
- Windows settings. The option that allows us to change the DNS from the Windows configuration is found in the configuration menu (Win + i ) > network and internet > Wi-Fi / Ethernet (depending on the connection we are using) and clicking on See additional properties. Next, in the Edit button that is shown to the right of DNS and we establish the ones that we want to use. Finally, click on Save.
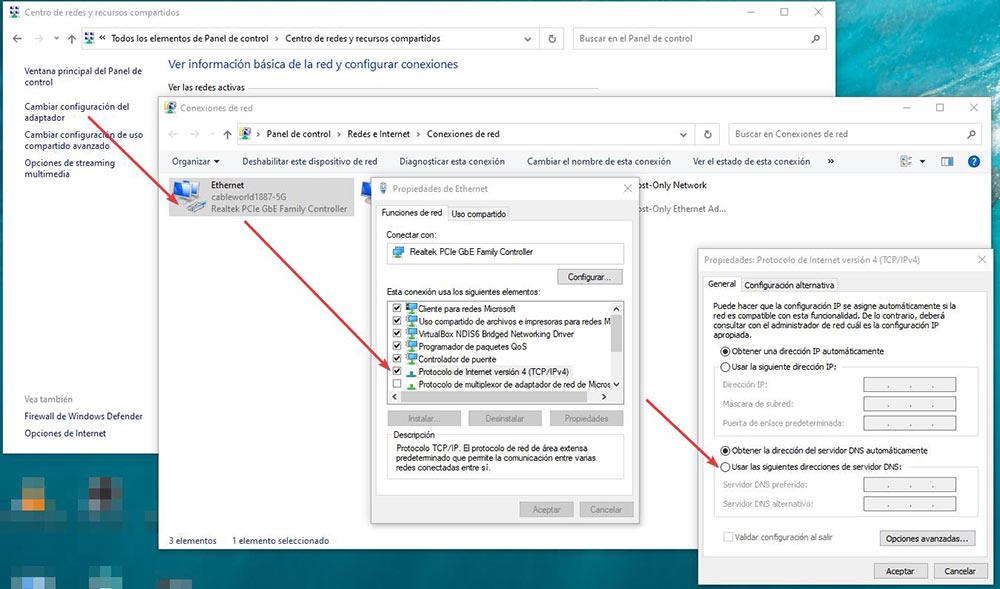
- control Panel. If we want to make this change from the control panel, we can also do it. In this section, which we can access through the Windows search box, we access the section Center network and sharing. Inside this, in the left column, click on Change adapter settings. Next, we access the properties of the type of connection we are using with the right mouse button and click on Internet Protocol version 4 to then check the box Use the following DNS server addresses.
- PowerShell. As these are important changes to the Windows configuration, we must open PowerShell with Administrator permissions. Next we enter the following command to know the name of our connection, which in this case is “Ethernet”.
Get-DnsClientServerAddress
Next, we will use the following command modifying the name of our connection and establishing the DNS that we want to use.
Set-DNSClientServerAddress “connection-name” -ServerAddresses(“Primary-DNS”, “SECONDARY-DNS”)
If our connection is called Ethernet and we want to use Cloudflare’s DNS, the command we must enter is:
Set-DNSClientServerAddress "Ethernet" -ServerAddresses ("1.1.1.1", "1.0.0.1")
- CMD. The process to change the DNS with CMD is similar. First of all, we must know the name of our connection with the command, a name that is shown in the Interface name section.
netsh interface show interface
Next, we need to use the following commands to set the first and second DNS.
netsh interface ipv4 set dnsservers "nombre-conexión" static xx.xx.xx.xx primary netsh interface ipv4 add dnsservers "nombre-conexión" yy.yy.yy.yy index=2