Precisely in these same lines we want to focus on this last element that we comment on, that is, in the management and visualization of images. This is something that we can directly carry out from this program without the need for additional ones. With this, what we want to tell you is that, as with video or audio content, the photo archives We can also manage them from here.
As with the rest of the file types, when we start working with Kodi the first thing we have to do is create our photo library or libraries. From there, the application itself will already know the disk locations where we have these contents stored for later management. This is something that is surely familiar to us if we have already used it with videos or audios. In fact, below, we are going to show you a series of changes that we recommend you do to improve the viewing experience of these own photos.
How to add our personal photo library to Kodi
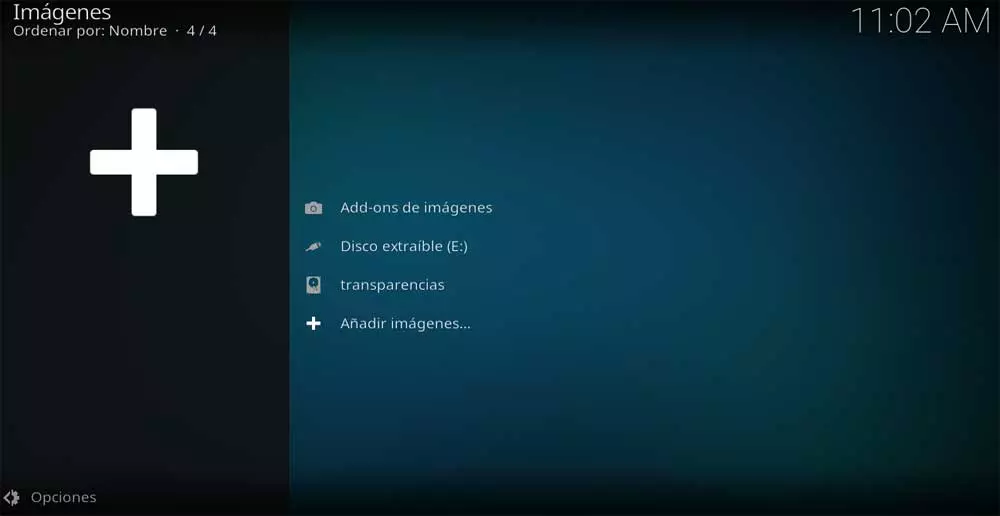
As we mentioned, the first thing we must do is add to the program the disk location where we have our photo library. This is something that we can repeat as many times as we need. Once we have started the application, in the left panel we select the Photos option and click on Add images that appears in the right panel.
After clicking on search, we only have to specify the folder where we have stored our images so that Kodi converts this into one library. Then, and after clicking on the Add button, the program itself is in charge of making a compilation of all the compatible files that it finds in that disk location.
Sort the photos based on our needs
Once the library is created, it will appear on the screen each time we go to the Photos section. Well, when accessing it, all the contents that this library that we have added to the library will appear before our eyes. Program. However, we are going to change some default parameters, such as the ordering of these contents.
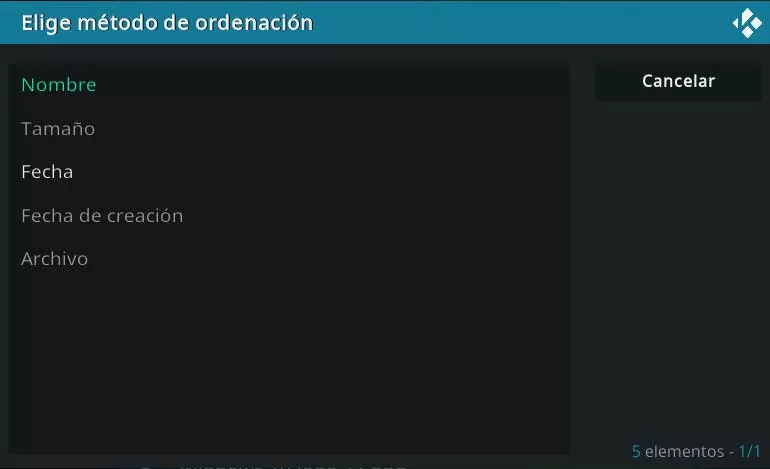
To do this, the first thing we do is click on Options, which is located in the lower left corner of the Kodi main interface. At first here we find an option called Sort by. From here we have the possibility of ordering our contents by date, name, size, etc. The mode arrived and from the option Order, we can place these files in ascending or descending order, which will be very useful if their number is very high.
Modify the type of view of the images
When we have to visualize the photos contained in the library from this program, by default it will offer us a large view of these. However, this is something that we can change easily and thus have a more comfortable viewing. For example, we have the possibility to reduce the size of these thumbnails, as well as to create a list with all the contents stored here.
For this we only have to go to the menu Choices that we find in this same window. Here we just have to click on the Type of view section so that in real time we can see how to change the view mode of the contents.
Create a multimedia presentation on Kodi
It can also be the case that we want to show all our summer photos, for example, to our friends and family. Instead of going one by one, here we can create a multimedia presentation that shows all these contents automatically. This will also be very useful if, for example, we have hundreds or thousands of files of this type that we are going to show.
For this we do not have to do more than go back to Options in the lower left corner where we already have the possibility to select View presentation.