A little over a month ago, Apple presented its new studio display. An impressive display aimed at the professional audience and the perfect monitor for your new Apple Studio. Its features include 5K resolution, 600 nit brightness, DCI P3 calibration, camera, sound, and its ability to further enhance the macOS experience. Unfortunately, it is a fairly expensive product and not suitable for all pockets. However, there are some who have given their imagination a bit and have managed to make their own Studio Display investing much less money.
So you can make your own Studio Display for much less money
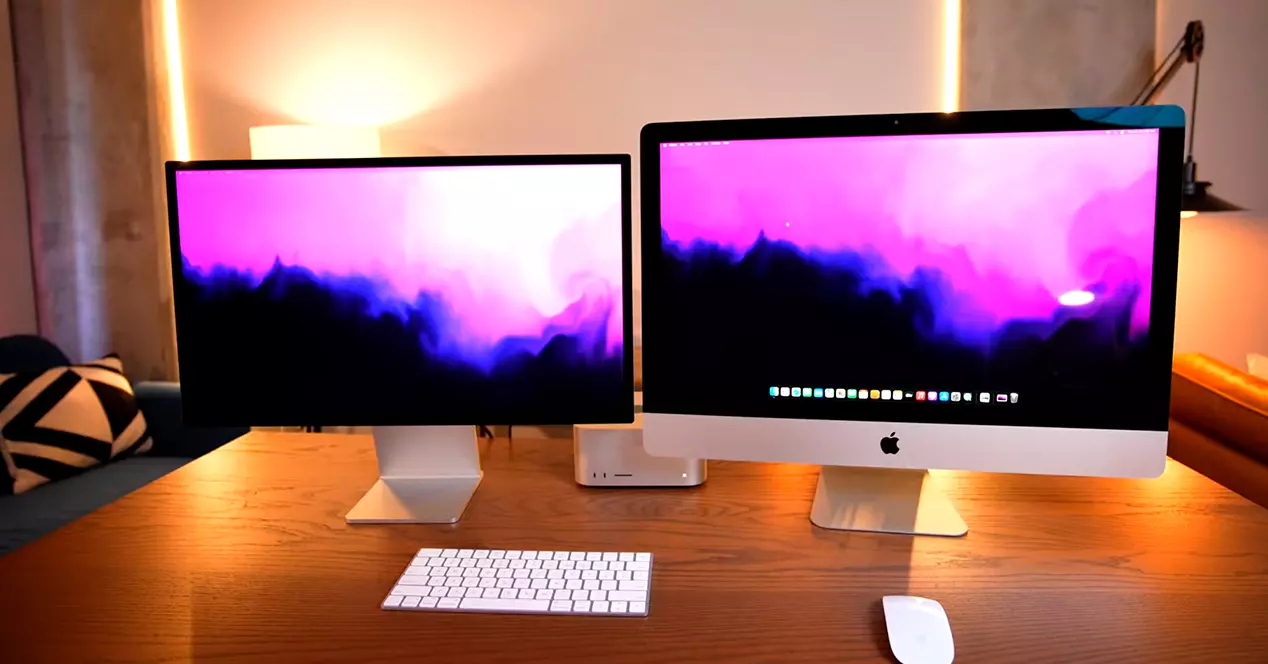
No one is going to deny that the Studio Display is a great product. But their €1,779 they can convince anyone to choose a somewhat more affordable option. The youtuber Luke Myani He’s been testing this Apple display for a few days now and he’s been amazed, but he’s also come to the conclusion that you can make a similar product at home for a lot less money.
The Studio Display features a 27-inch panel with 5K resolution. As you may already know, part of the magic of the screens that Apple includes in its equipment is that they are perfectly measured. Hence, they remind us so much of the Retina Display concept, which is still a trade name for Hi-DPI technology.
Replicating the features of the Studio Display
Therefore, making your own Studio Display is not as easy as buying any screen. Luke thought about it and came to the conclusion that the iMac 5K It met both of these requirements. So he got to work and searched for a screen of this model on eBay. In principle, the spare part was very expensive, so he sifted through second-hand models. His idea was to get a unit that had the motherboard fried, but finally he got a complete computer for about 620 dollars. The 5K iMac he bought was from 2014, a fairly powerful machine, but today it no longer supports the latest versions of macOS.
Next, Luke armed himself with a few iFixit guides and a lot of value. He disassembled the iMac screen and removed all the components inside it. After a cleaning, he was able to see the exact model of his screen, essential information to get a inverter compatible. There are a lot of compatible plates for iMac screens and at very affordable prices. However, Miani got a fairly expensive model, as it is not so easy to find one of these for the iMac 5K. For about $180Luke bought a very complete board that even had several HDMI and DisplayPort ports.
You don’t have to be MacGyver to make your own Studio Display
Once he had the components, making it functional was very simple. just had to plug and play. However, Luke wanted the experience to be as similar as possible to the Studio Display. For the same reason, he also wanted to add a webcam. The iMac’s built-in drive wasn’t going to be functional, so he managed to install an Arduino one under the display and control it via the same controller board.
The result has cost Luke Miani a total of $875. The youtuber ensures that this price can be lowered if we later sell the motherboard, power supply and various components of the iMac 5K, with which he estimates that we would remain in about 400 dollars. At the performance level, the iMac panel has less contrast than that of the Studio Display, but its performance is still impeccable, and it is a great idea that users who have a 5K iMac collecting dust in a storage room can carry out.